
This post may contain affiliate links, which means I’ll receive a commission if you purchase through my links, at no extra cost to you. Please read disclosure for more information.
I’d always shied away from making custom embroidered gloves because hooping was so tricky on my single-needle embroidery machine.
You are viewing: How To Get Embroidery On Gloves
However, once I started embroidering socks and learned about a sock hooping aid, I could suddenly embroider gloves easily!
Now, I’m not talking thick or fleecy gloves where you take apart seams (I recommend this tutorial to monogram garden gloves for that.)
Instead, I’m embroidering stretchy, knit gloves! These are a perfect Dollar Tree embroidery blank to practice with.
Read on to learn how to machine embroider gloves!

Supplies
- Embroidery machine and appropriate hoop (I recommend 4″x4″)
- Sock Easy sock hoop and gloves
- Stabilizer: self-adhesive sticky stabilizer and water-soluble topping
- Needle: 75/11 embroidery needle
- Thread: embroidery thread (You can try 60wt for intricate designs, but I used 40wt polyester here.)
- Pencil, ruler, and embroidery design
Using a Sock Easy for Gloves

The Sock Easy hooping aid is one of the niftiest embroidery gadgets I’ve come upon, and I love how it works for more than just socks.
Hooping or floating knit gloves is almost impossible without help, so I love how the glove can be positioned on the sock hoop to hold it open in a single layer.
There are two sizes (adult and child socks), and I recommend using the smaller for embroidering on gloves.
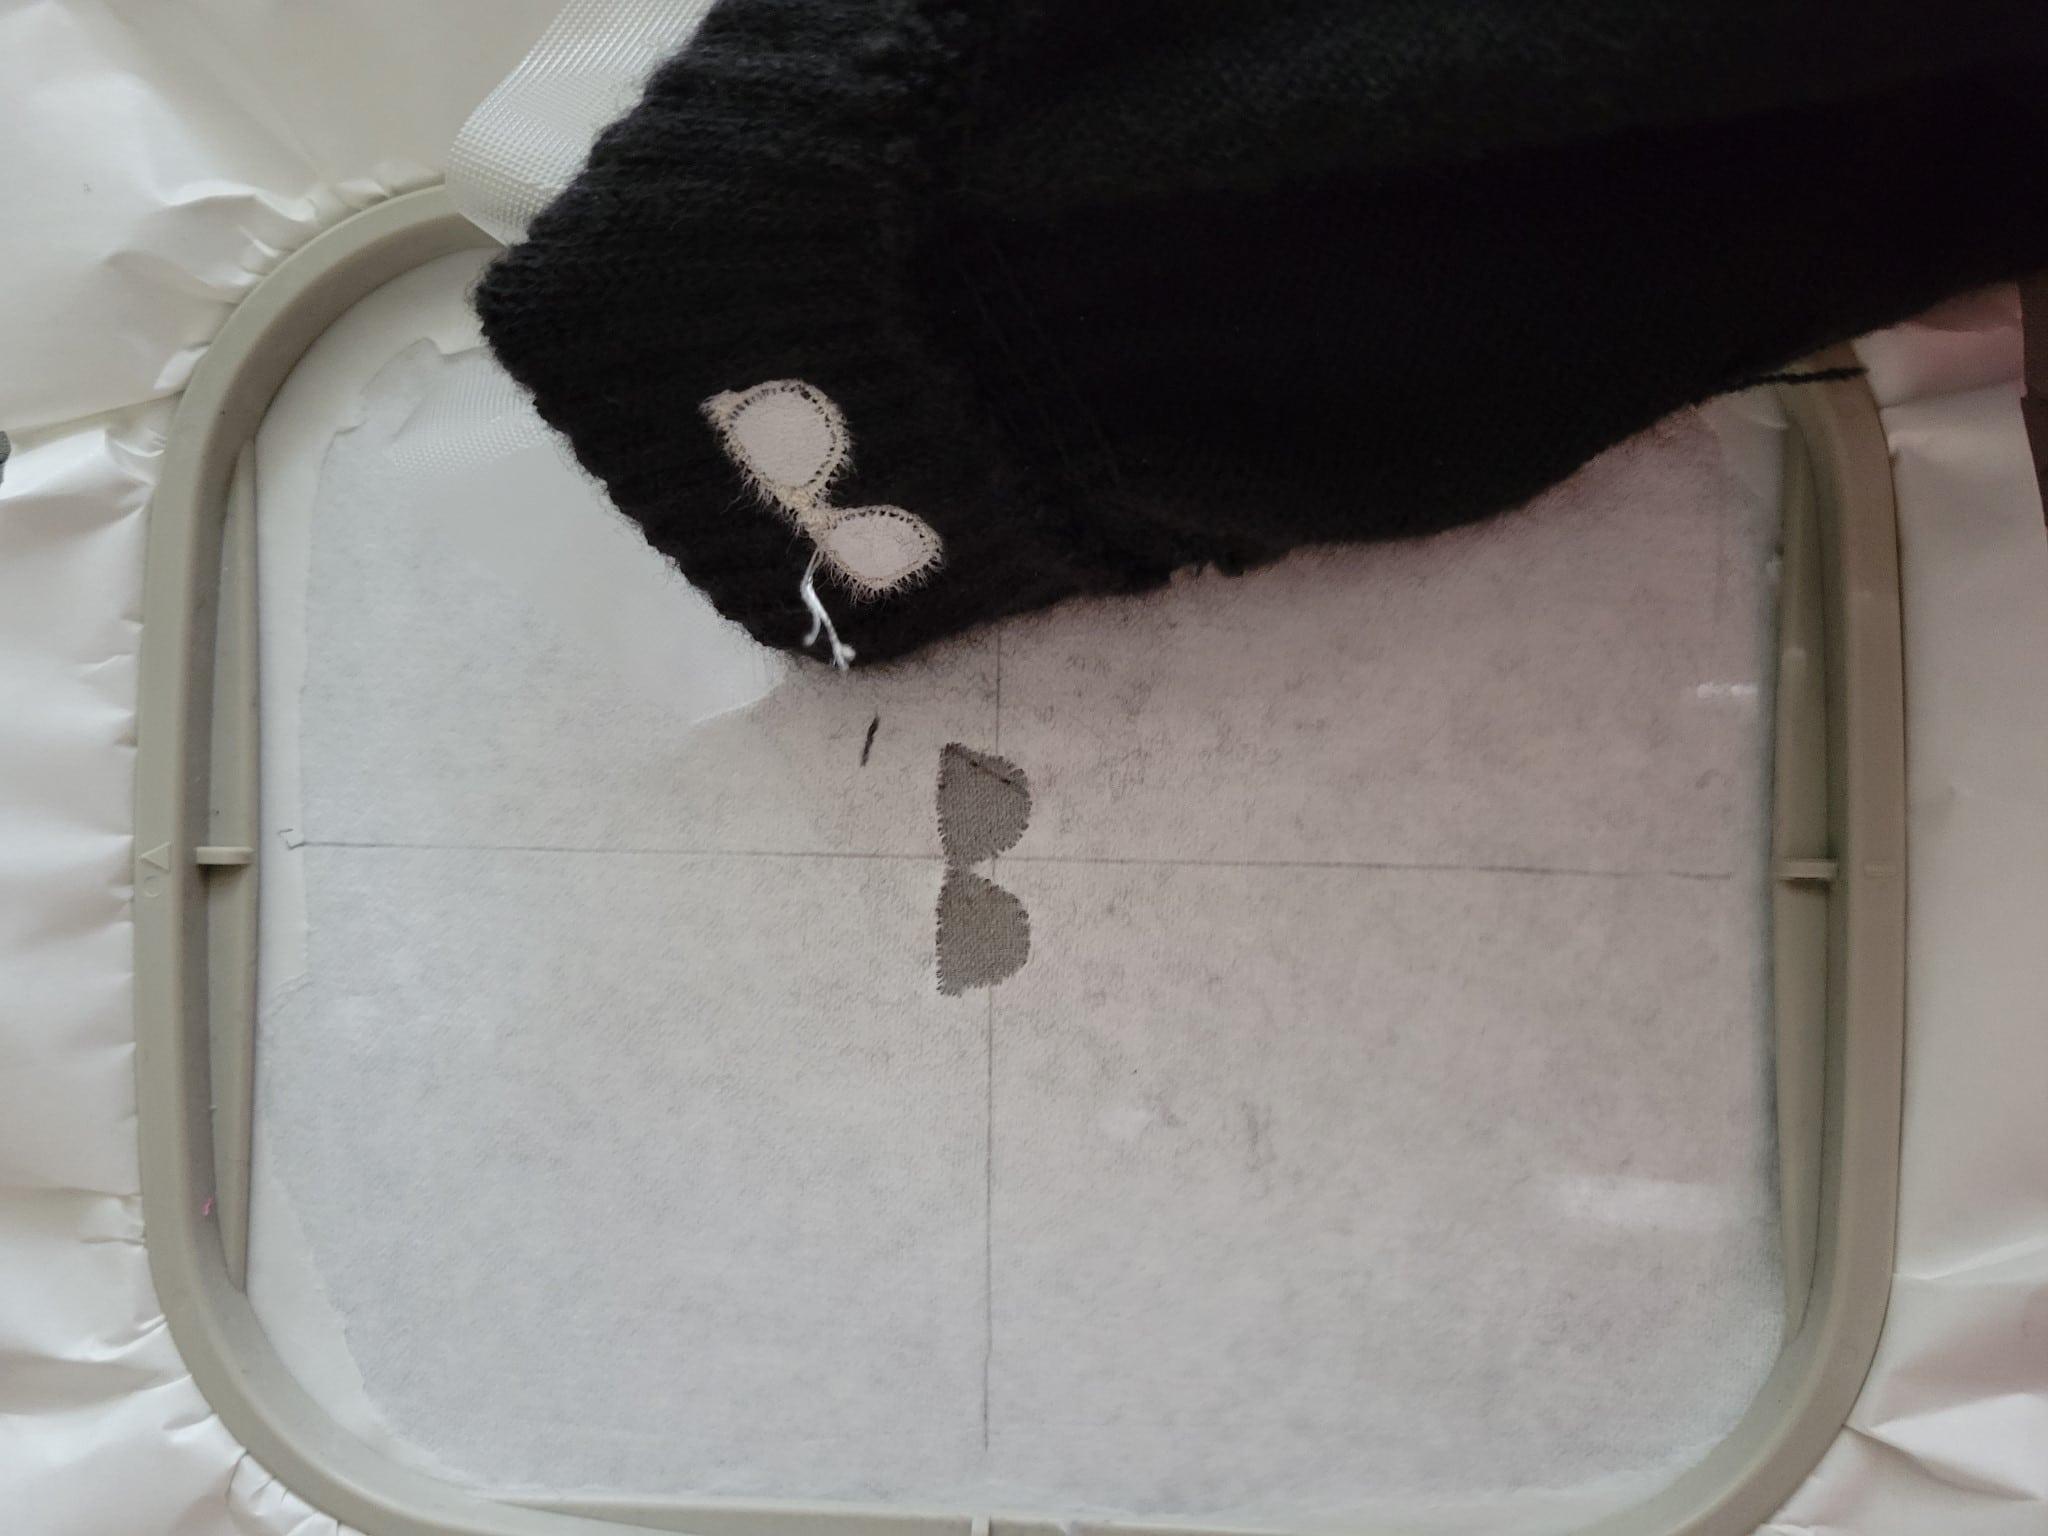
Unfortunately, without a free arm on your embroidery machine, you are limited in the location you can embroider the glove. The wrist portion is the most reasonable option.
And, as a caution, the usable embroidery area within the sock hoop is smaller than it appears because the embroidery foot needs clearance. Measure precisely the space you can use before selecting a design size.
Design Size and Considerations
Designs stitched on gloves need to be small. Thus, either digitize an image at a small scale or reduce the size of an existing design when feasible.
When reducing design size, make sure the stitch density stays constant and the number of stitches decreases. That way, the design won’t be too dense and hard for the gloves.
Since it’s easiest to use sticky, self-adhesive tear-away stabilizer, choose a small design without super dense fill-stitches. Tearing away the stabilizer results in a nicer appearance to the back of the design.
How to Embroider Gloves
1. Mark Design Placement
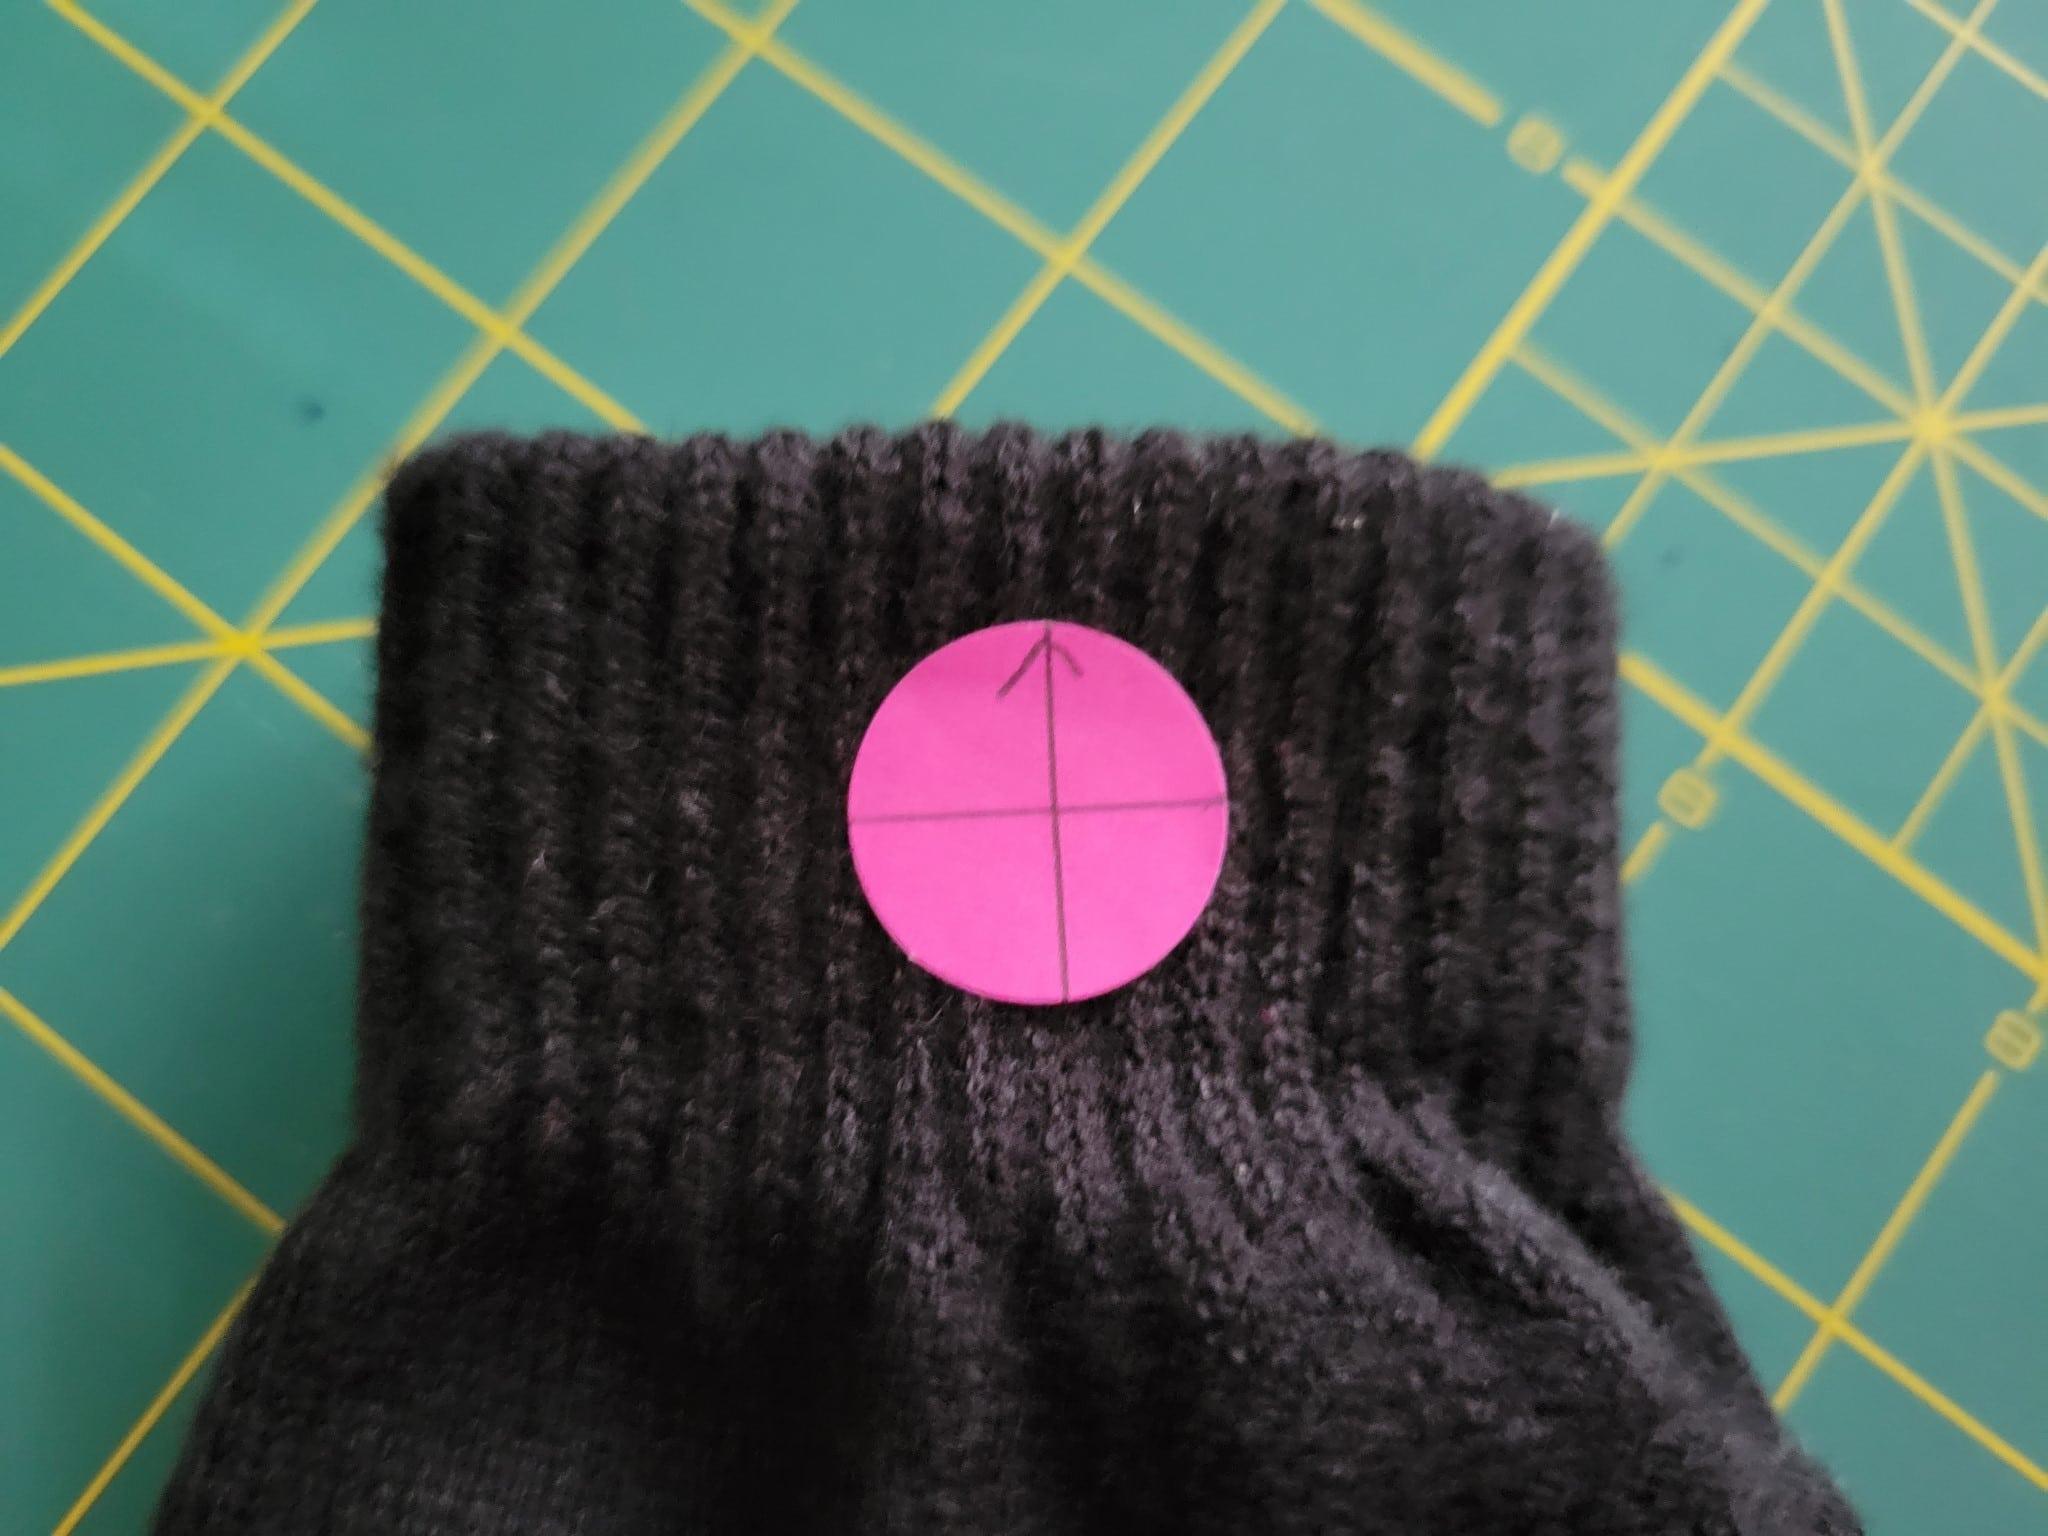
I love using embroidery target stickers to mark blanks that don’t respond well to water-soluble markers.
One big perk for this project is these stickers will remind you which way the design should face. (Once you start using the sock hoop, keeping your direction straight is tricky!)
Thus, using an embroidery sticker, mark where you want the center of your design to go. Remember that you have a left and right glove when it comes to marking.
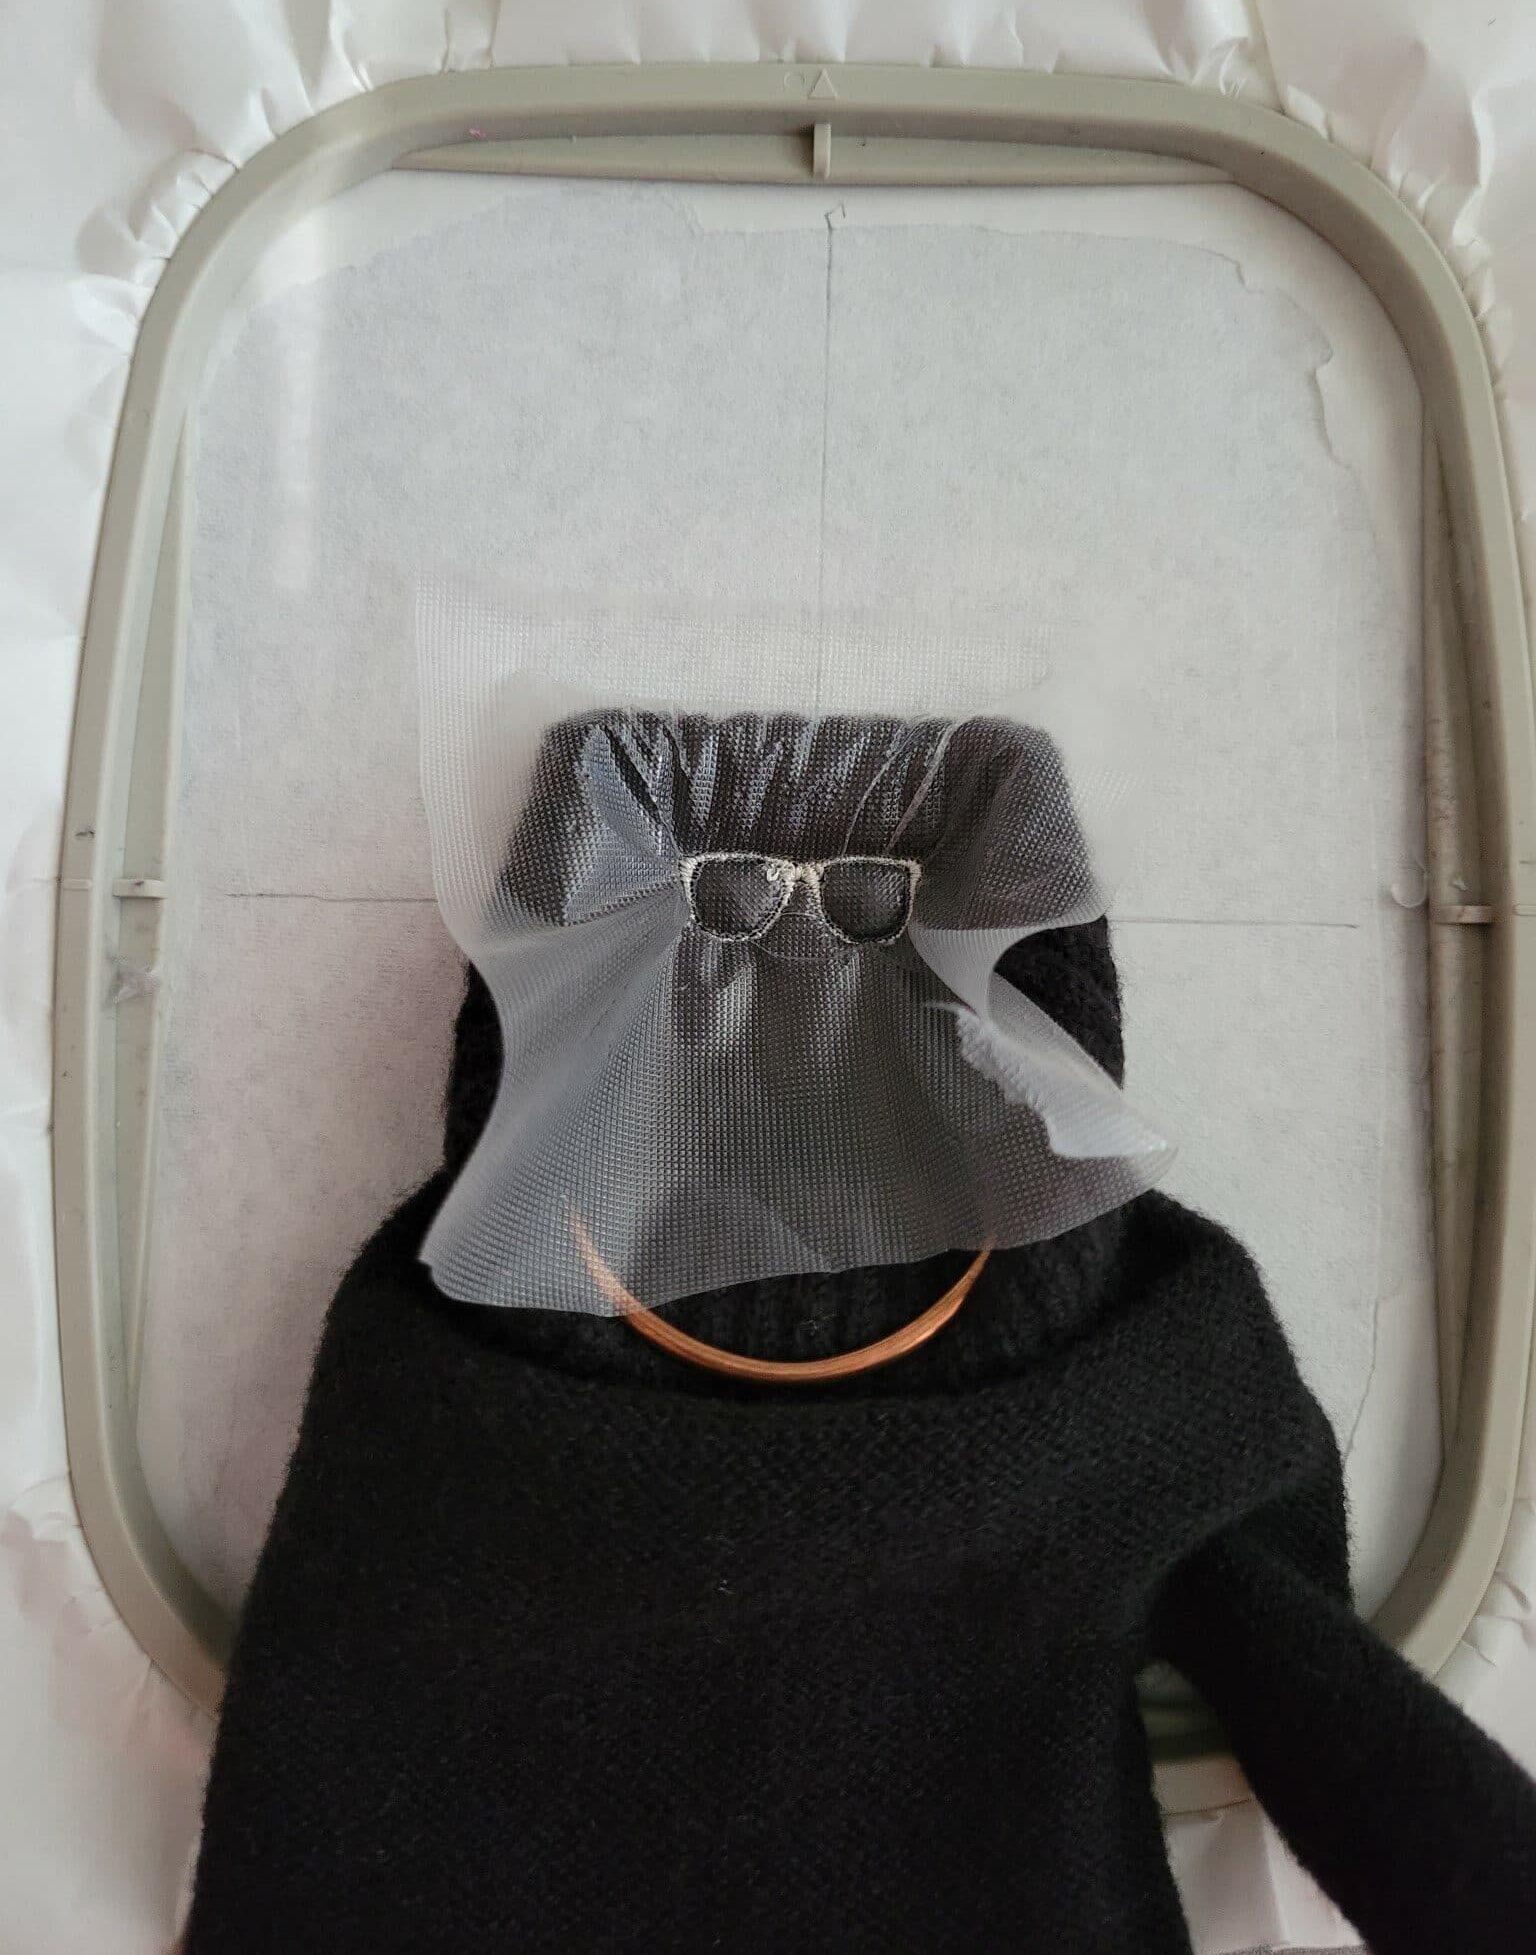
2. Place the Glove in the Sock Easy Hoop
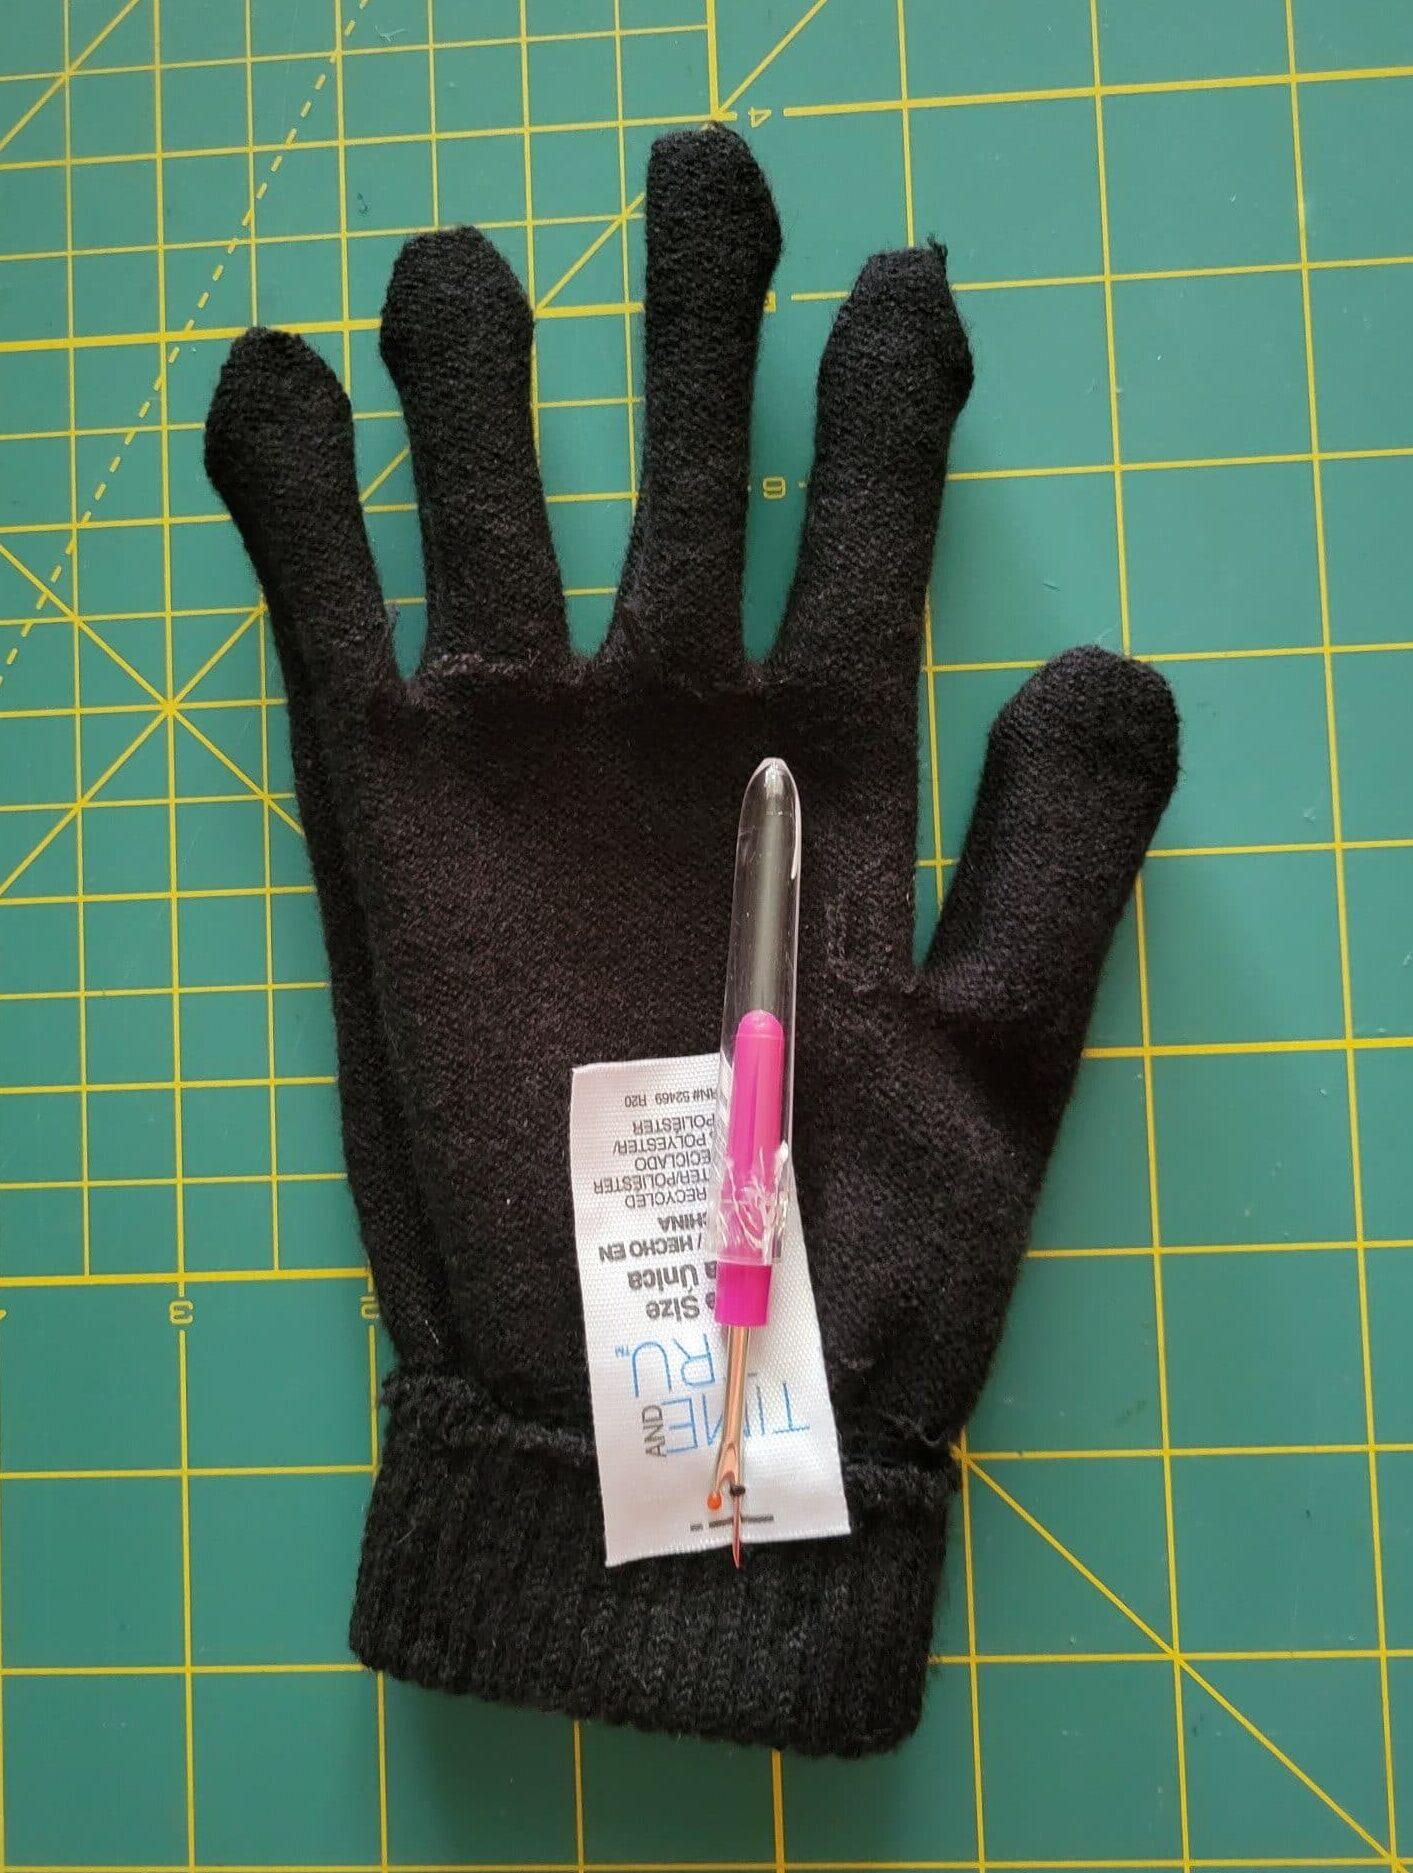
First, turn the glove inside out and remove any tags.
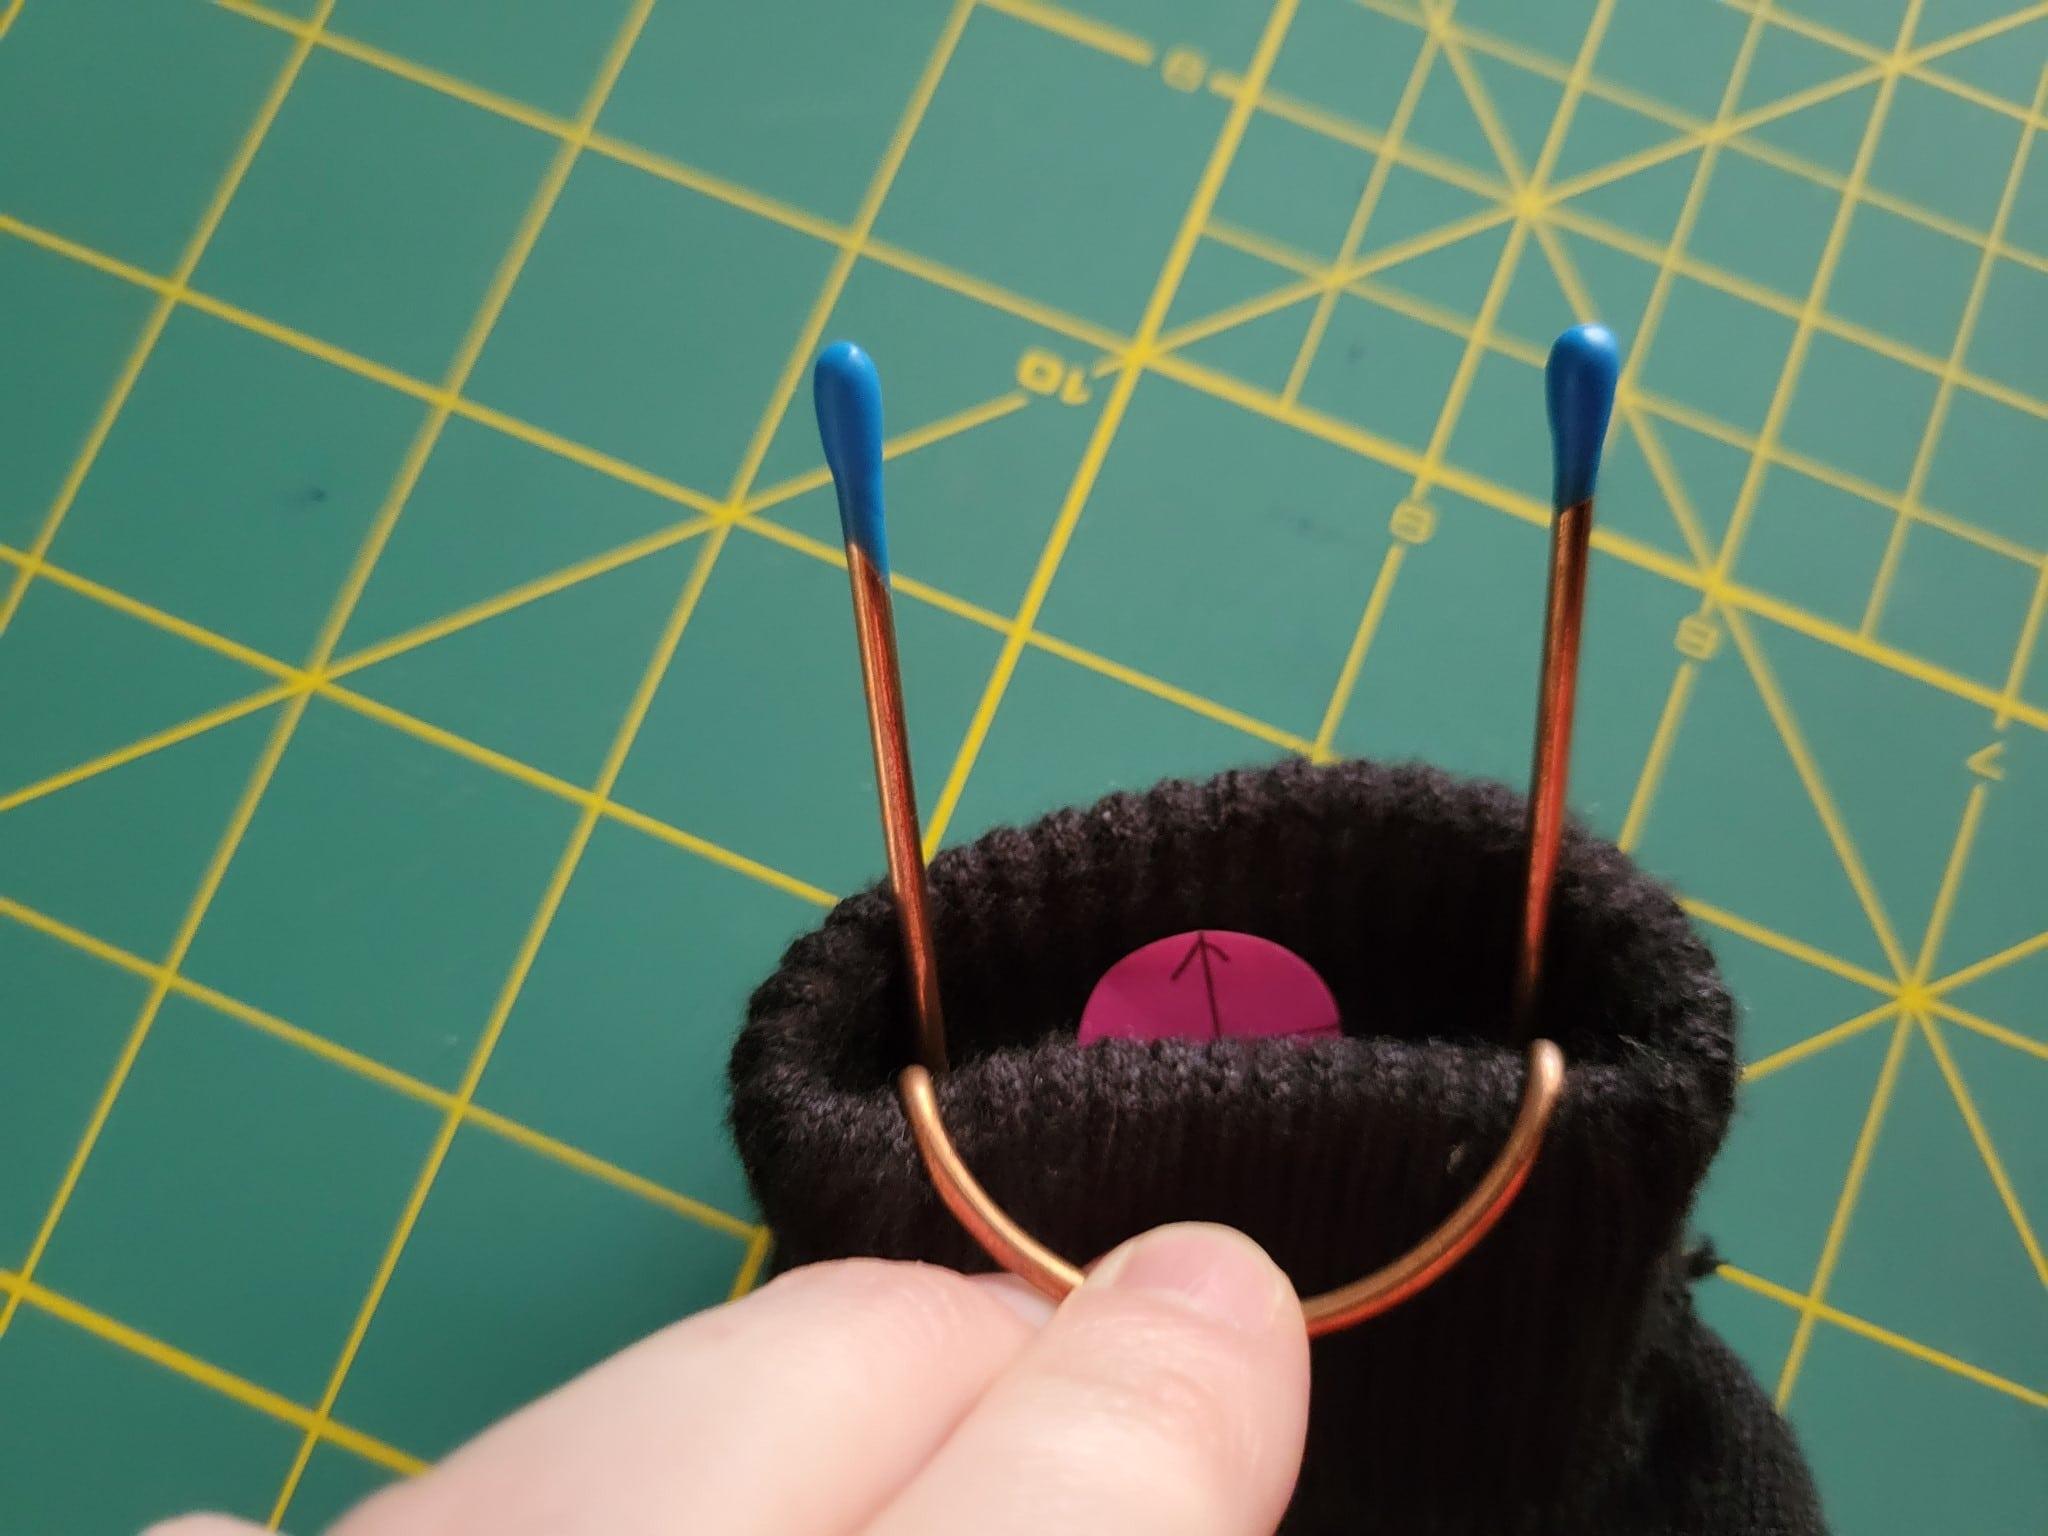

Then, place the glove in the Sock Easy, as shown in the pictures above. The goal is to hold one side of the glove with the sock hoop’s lip while the side to be embroidered attaches at the tines of the base.
3. Set Up the Embroidery Hoop
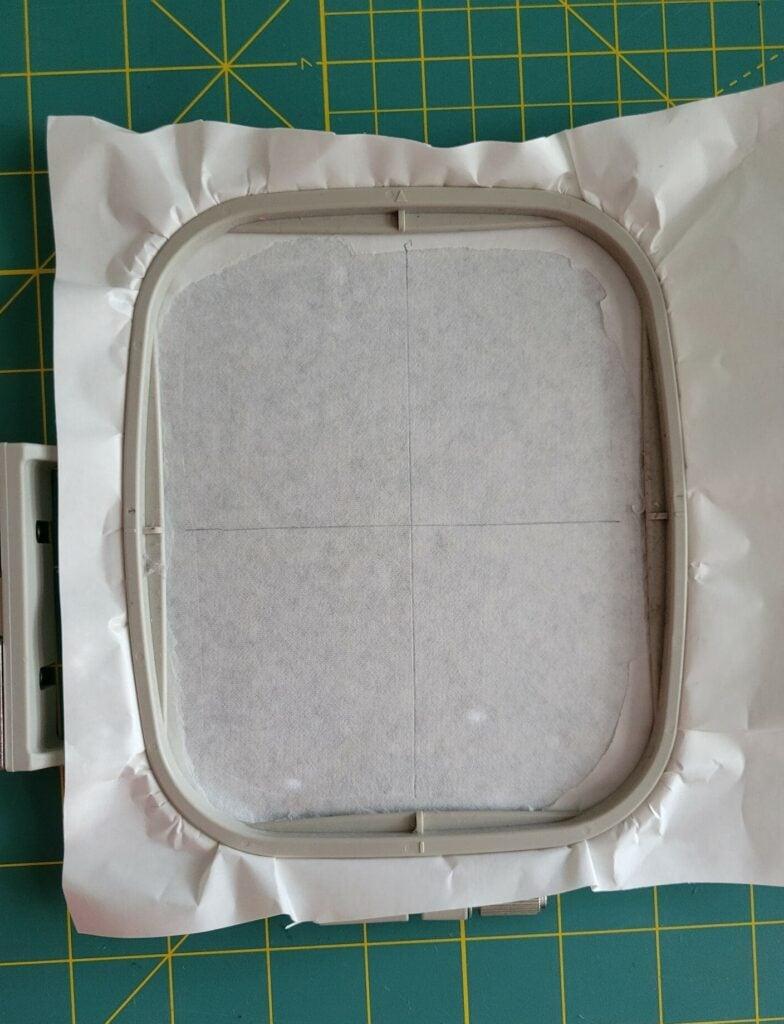
Next, hoop one layer of sticky, self-adhesive stabilizer with the shiny side up.
Then, score the stabilizer around the edge of the hoop with a pin, and peel away the top layer to reveal the sticky surface.
Next, mark vertical and horizontal lines with a pencil to denote the center of the hoop.
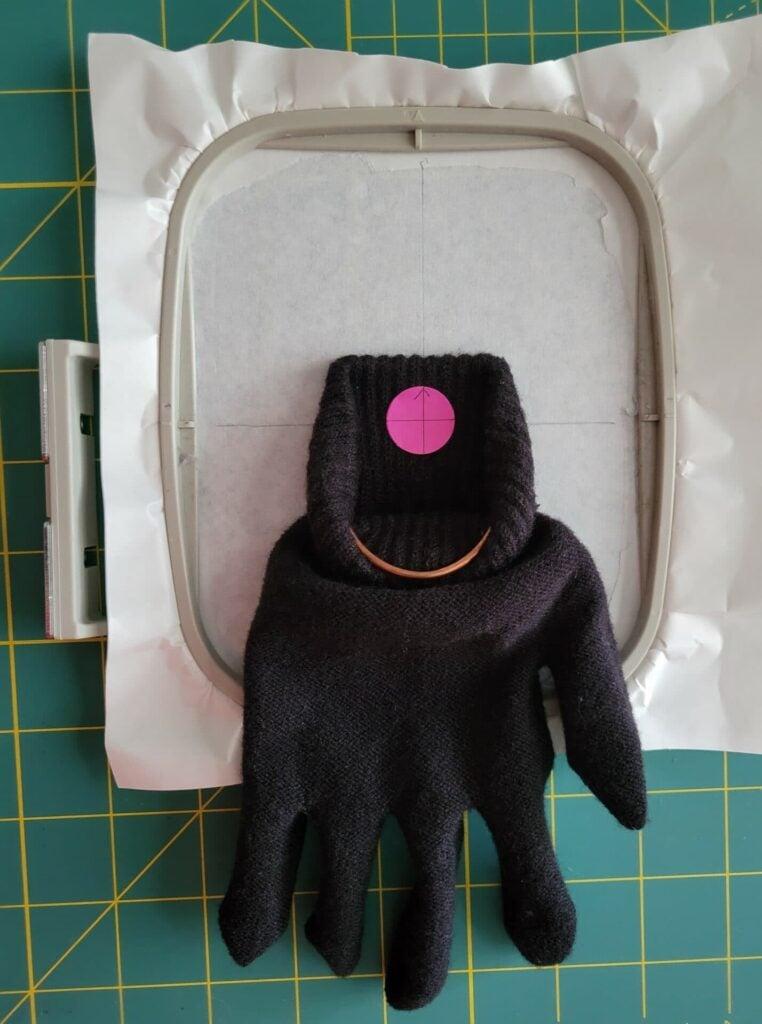
Press the sock hoop with the sock in the center of the hoop. Line up the embroidery target sticker marks with the marks on the stabilizer.
Then, place the hoop in your machine.
4. Get the Embroidery Machine Ready
Read more : How Much Does Donal Glover Sing Of Werewolf Bar Mitzvah
Turn on the machine and load your design.
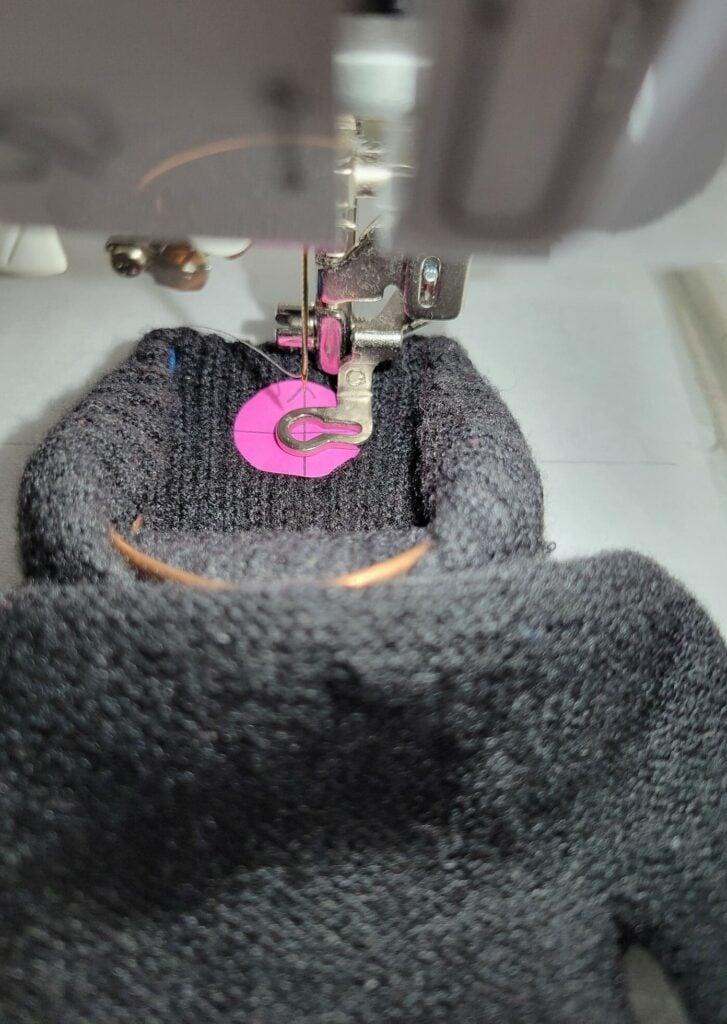
Check that the design orientation is correct, and move your hoop around so the needle is in the center of the placement sticker.
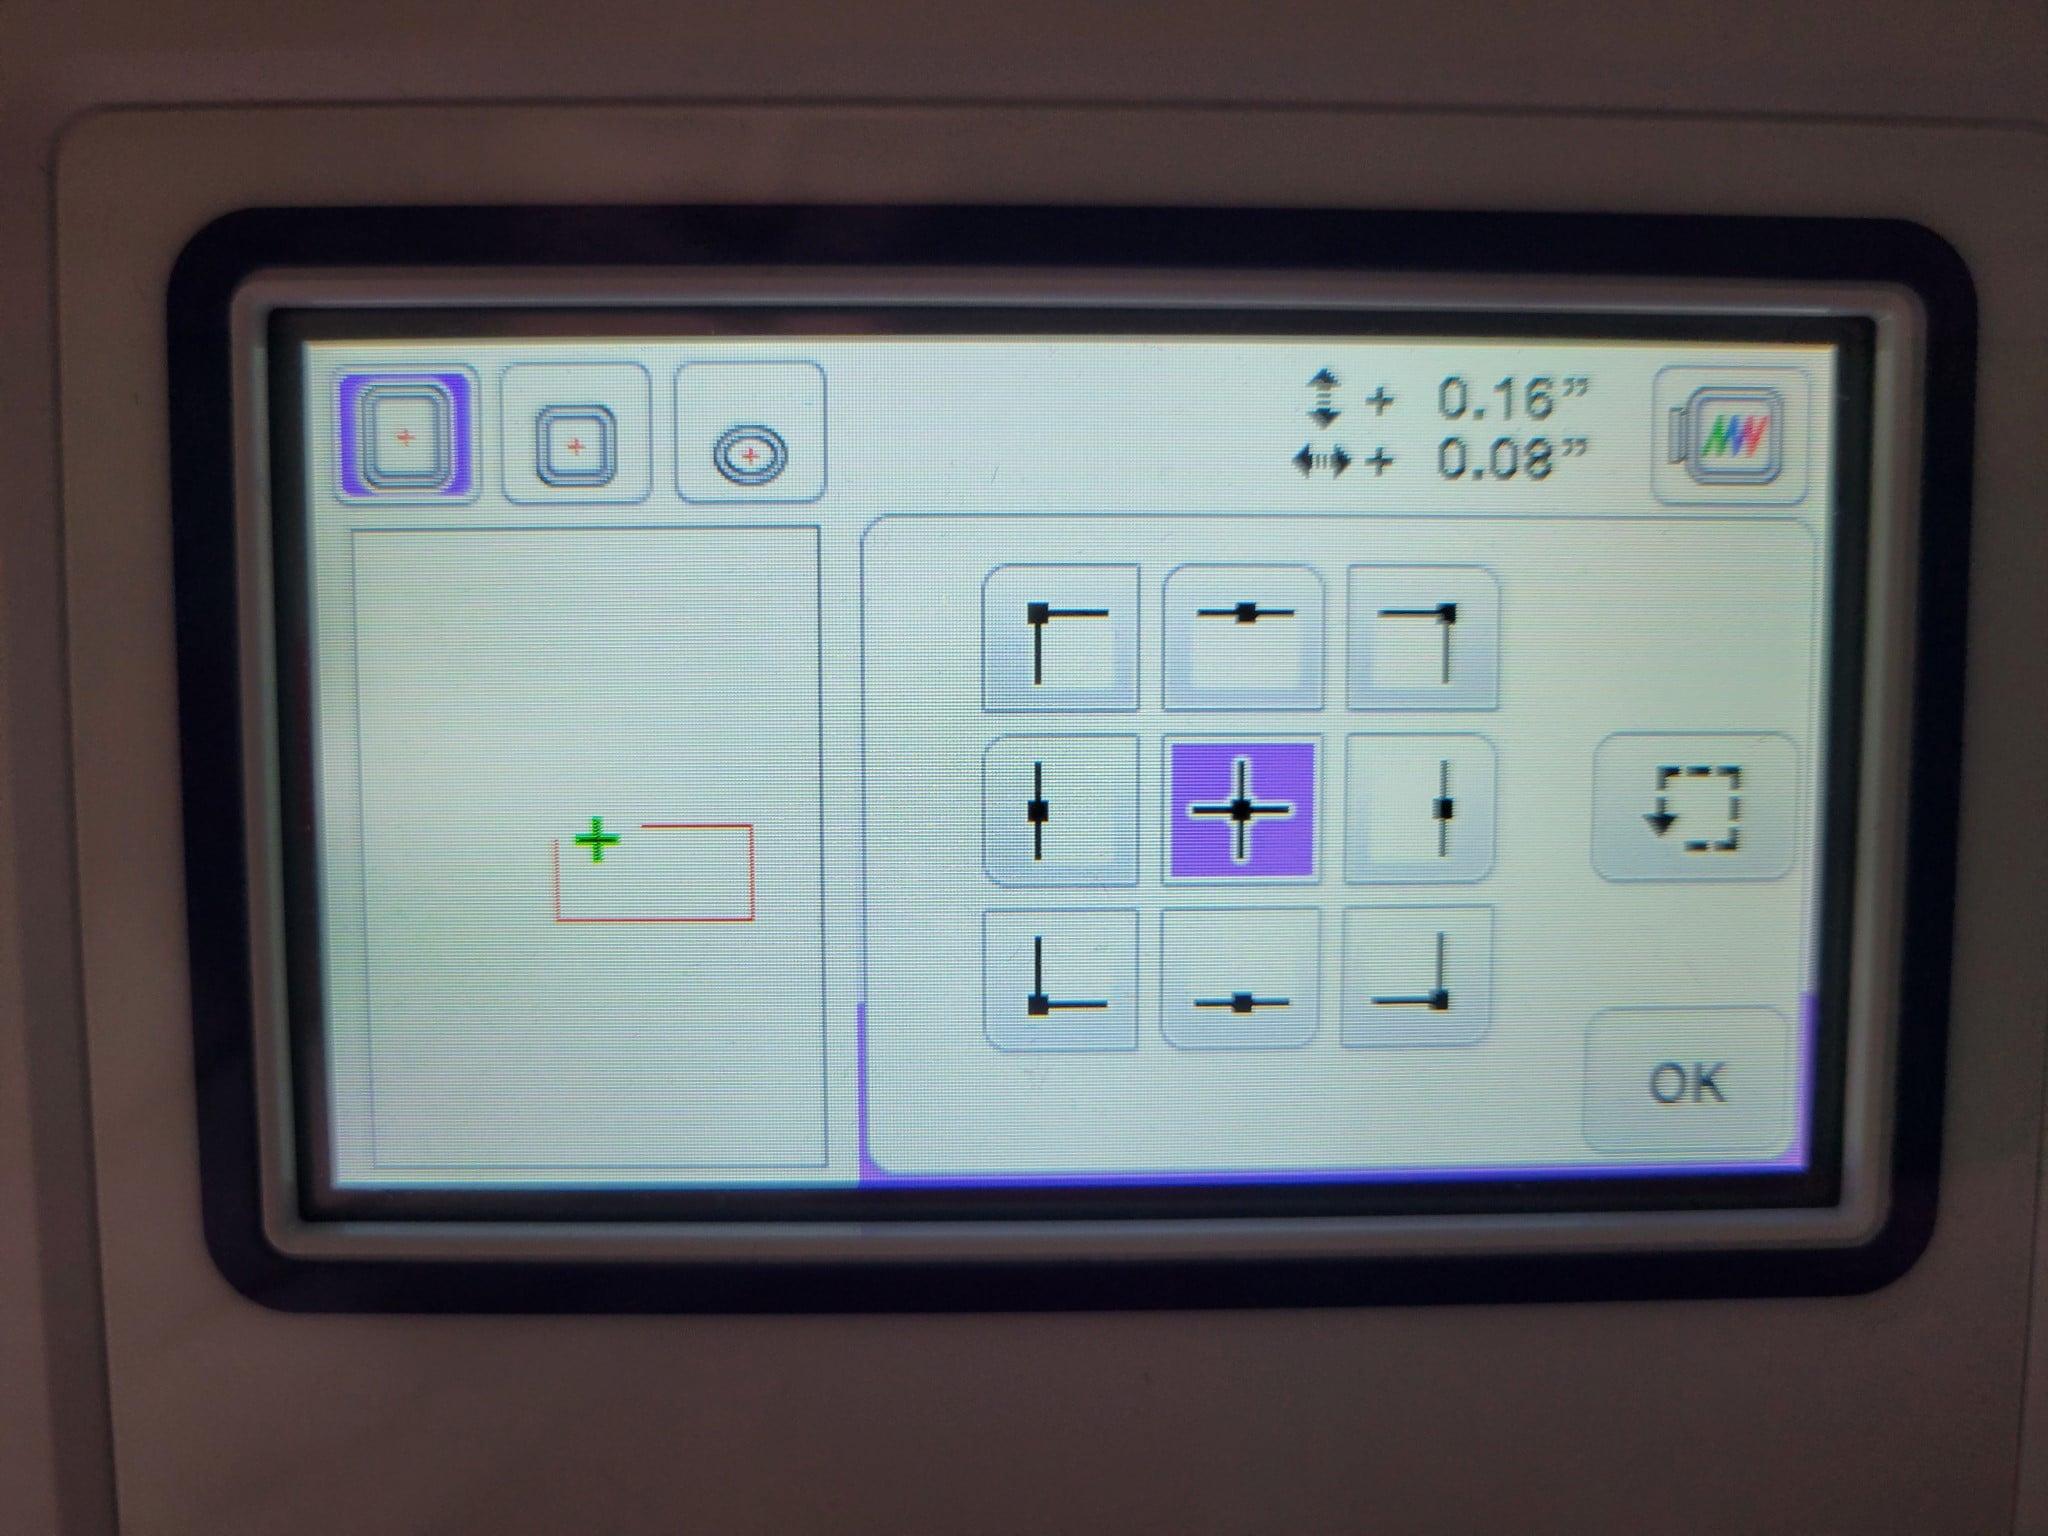
Then, if possible with your machine, preview the edges of the design to make sure you won’t accidentally run into the sock hoop with your embroidery foot.
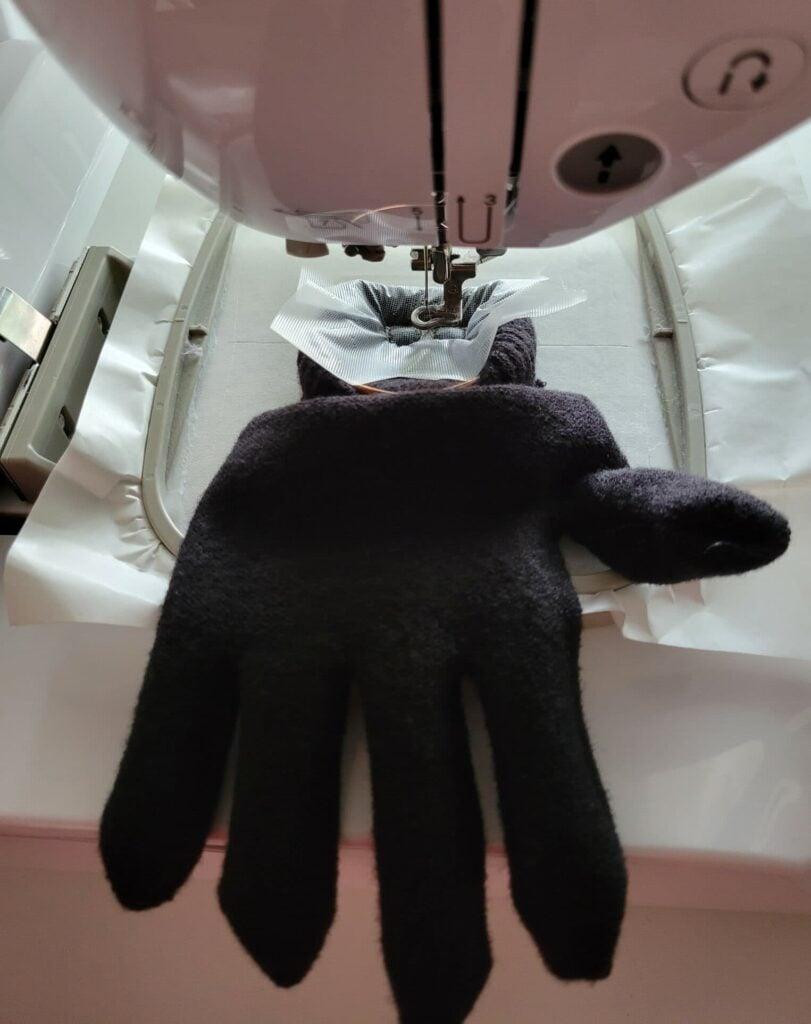
Then, remove the placement sticker, and add a layer of water-soluble topping.
If you make the topping piece large enough, you can stick it to the sides of the stabilizer. Otherwise, just keep an eye on it.
5. Press Go!
Press start, and watch your machine embroider the glove! Keep a close eye to make sure nothing goes awry.
6. Put On The Final Touches
Once your machine has finished customizing the glove, remove the hoop from the machine.
Then, gently pull the sock hoop and glove off the stabilizer.
Trim any jump stitches, and remove the water-soluble topping.
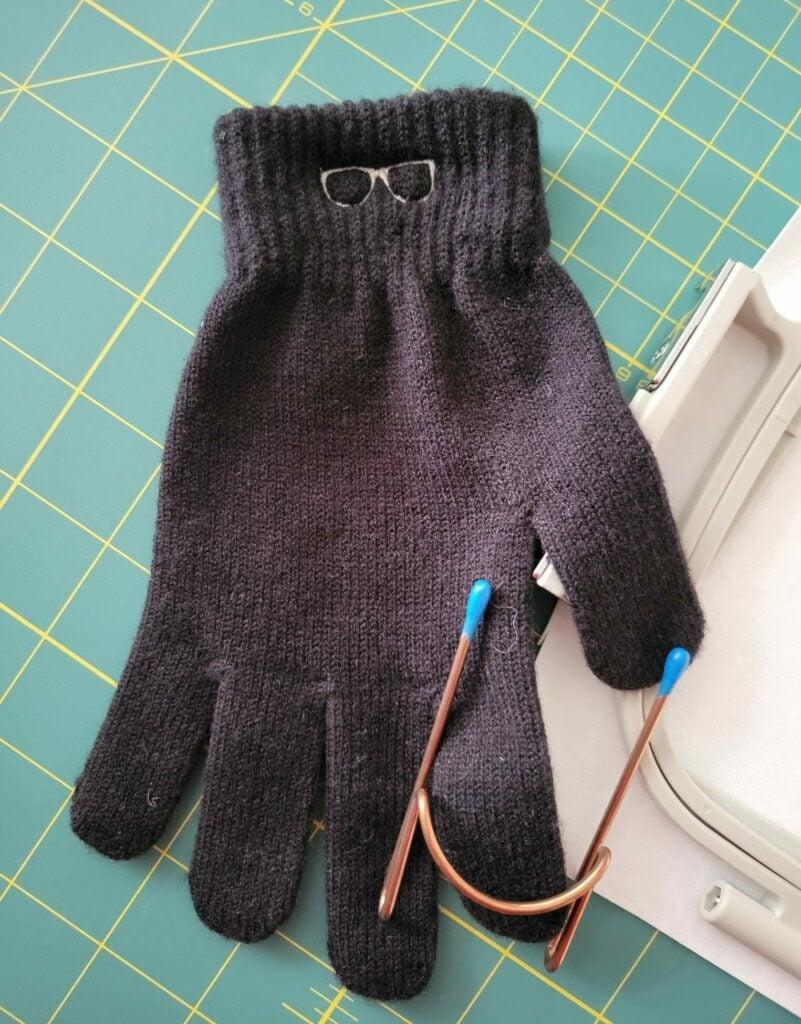
Embroider the other glove, and that’s a wrap for this fun embroidery project idea!
Source: https://t-tees.com
Category: HOW