Application Instructions
1. Insert the recorder (plastic monitor unit) firmly into the adhesive sensor patch as shown:

a. If you are replacing your adhesive patch mid-study, it is ok to discard the previous adhesive patch. Be sure not to discard the recorder/monitor unit, instead install it as shown in your new adhesive patch.
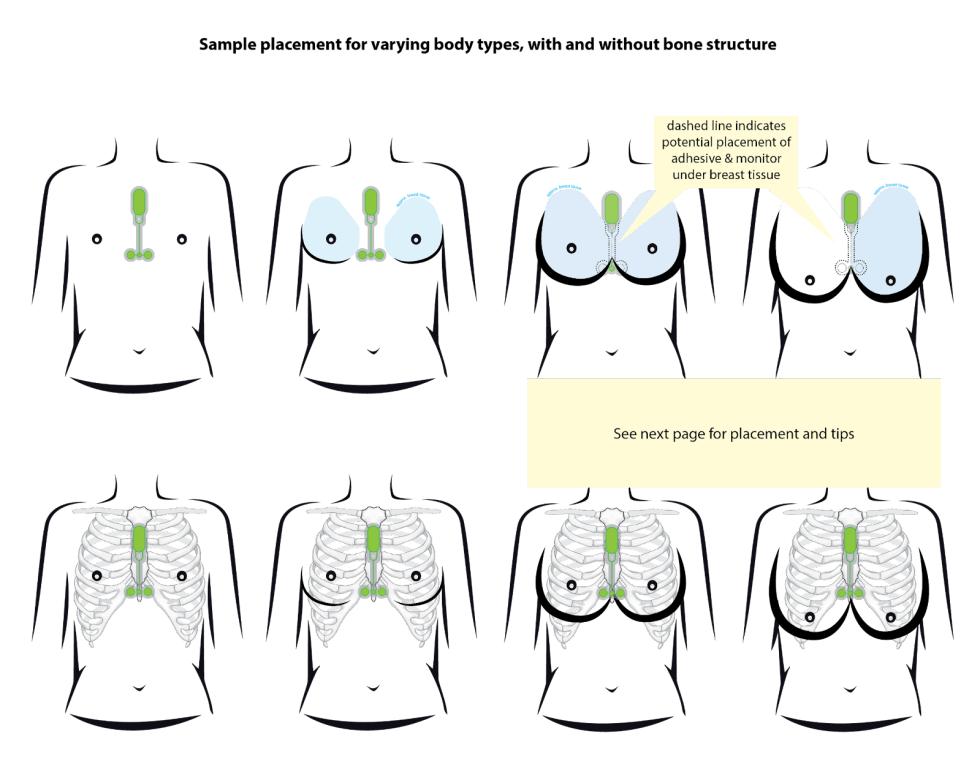
2. The Heart Monitor should be placed over the sternum, so the bottom nodes of the adhesive patch rest over the xiphoid process, but no lower.
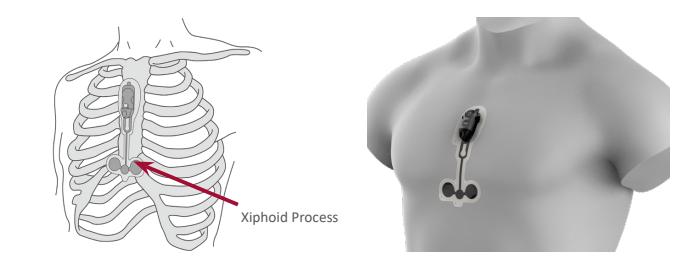
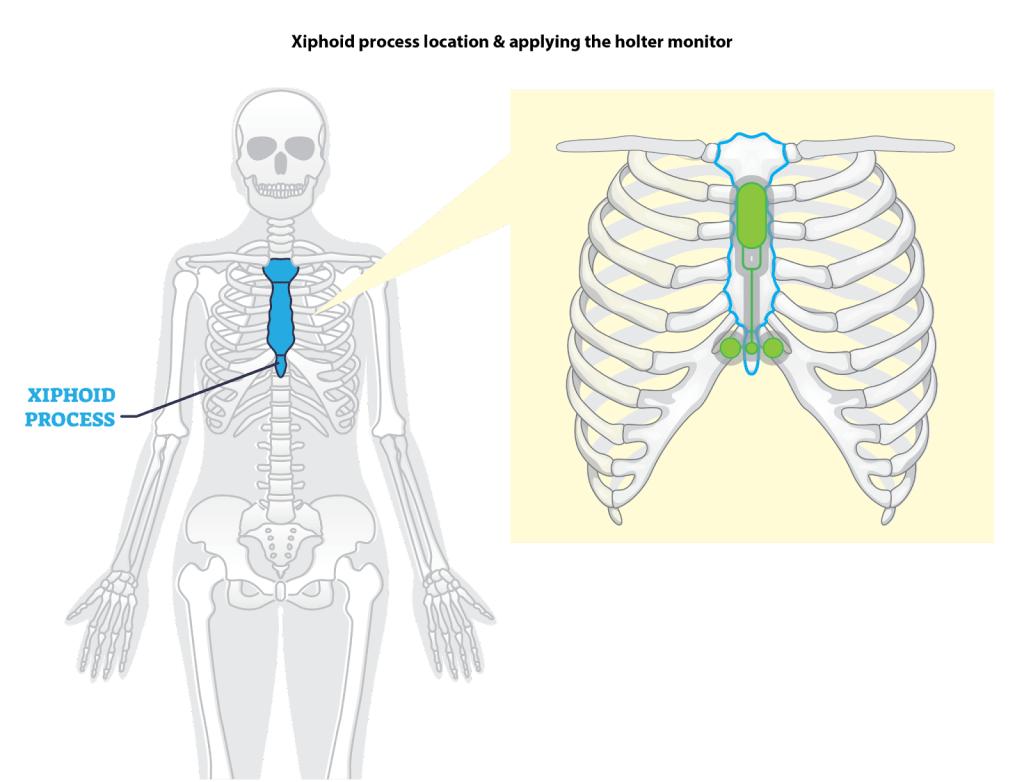
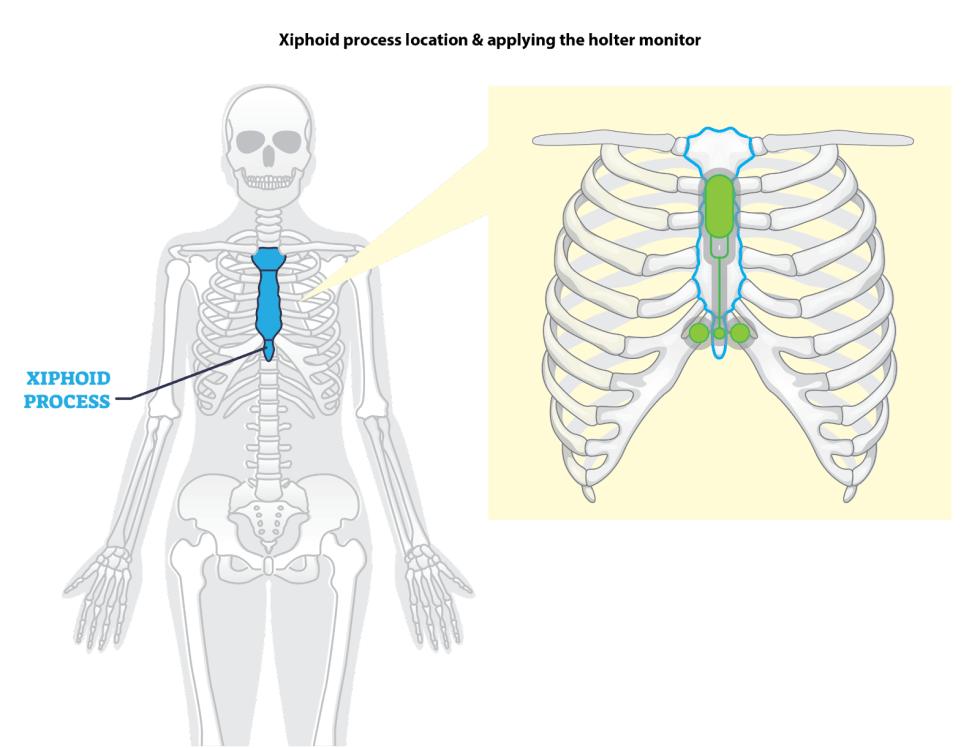
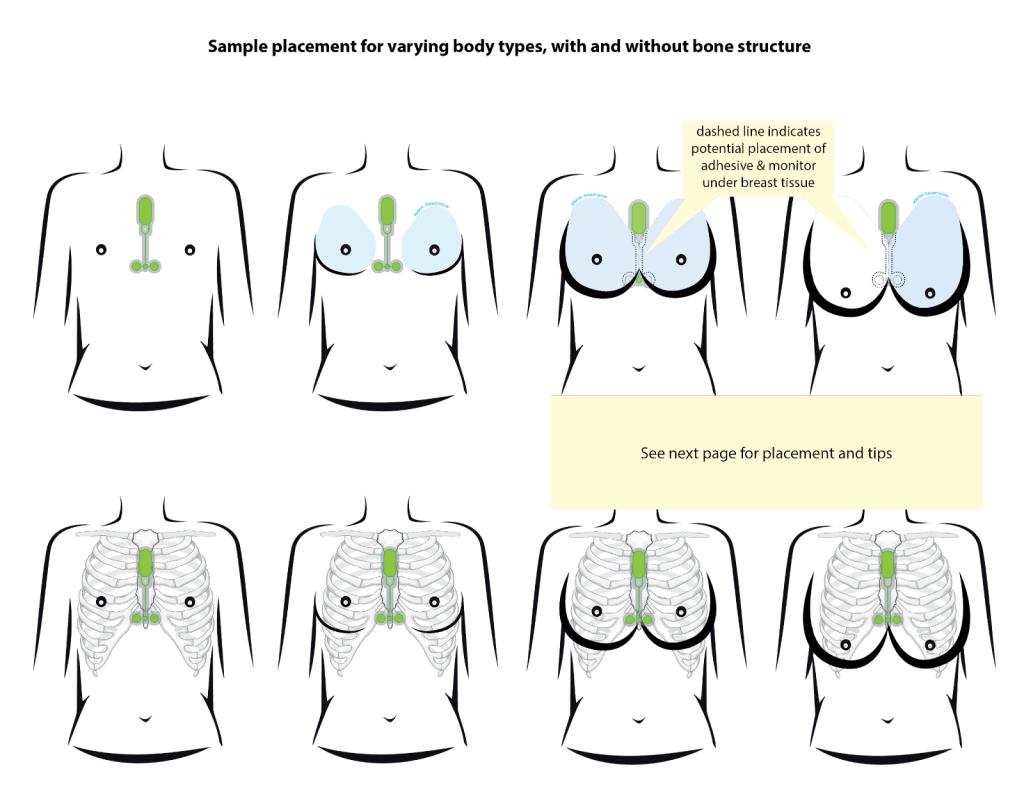
3. Study staff will show you over your clothes where the monitor should be placed. We recommend confirming the placement of the monitor before removing the adhesive backing. Use the mirror to review the placement.
a. On people with breasts, the two bottom nodes of the adhesive patch should rest on the xiphoid process location. Nodes should not be placed on breast tissue directly but should rest below the breast. It may be necessary to move breast tissue out of the way to achieve correct placement.
4. If you have chest hair, please shave or clip the hair prior to application.
5. Wipe the application area with an alcohol wipe. Wait 30 seconds for alcohol to dry.
Applying the Sensor/Adhesive patch
6. Hold the Sensor upside down with the Number 3 sensor tab and carefully peel off the backing on area labeled Number 1. Peel from the top and each side to avoid the adhesive material adhering to itself.
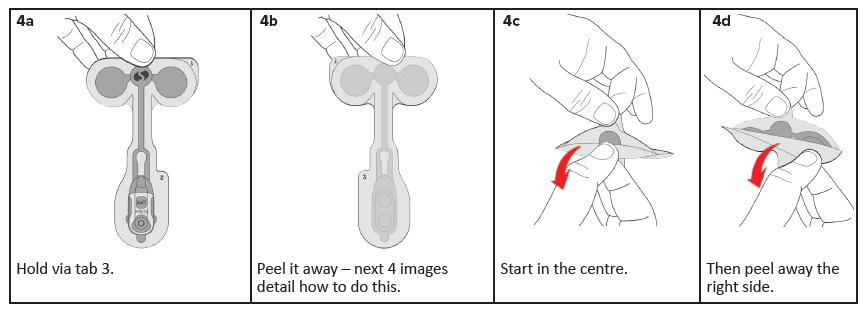
7. Press all adhesive backing firmly to the chest and smooth it out. It is essential that the monitor sticks firmly to the chest, and applying a little extra pressure at application helps with this.
8. Once installed, the monitor event button will light up green for 5 seconds and then it will blink green in time with your heart rate for 30 seconds. Watch in the mirror to ensure you see the green light. If you see a red light, please alert the study team.
9. If the monitor is firmly attached to your chest and you saw the green light when you installed it, you are good to go! You can confirm it’s working by pressing the event button which should light up green when pressed.
10. To ensure the adhesive sticks properly for the full seven days of the study, please avoid showering or engaging in sweaty activities for four hours after you apply the monitor.
Wearing the Monitor
- Carry out your normal daily routine. Do not remove the monitor or open the recorder.
- Throughout the study, press the event button whenever you experience a stressful event, either at work or at home. Examples of stressful events:
- Exercise, Getting a promotion, Getting good feedback on a project, Experiencing a Microaggression, Public Speaking, Being late to work, Seeing family/friends that you haven’t seen in a long time, Unexpected car problems, Traffic problems, Misplacing/losing something, Working with difficult people, Miscommunication (at work, with friends, partners), Doing your hair, Watching the news, Interactions with authority, Interactions with law enforcement, Excessive caffeine intake, Arguments with partners, Family life/environment, Going to the grocery store at peak times
- You can push the button based on your personal experience of stress – do not feel that a stressful event needs to reach a certain level of stressfulness in order to push the button.
- You may wear the monitor in the shower. Try to avoid excessive contact with water – we recommend facing away from the shower spray.
- Following a shower, dry the sensor and adhesive patch gently with a towel and press the adhesive firmly to ensure it has not loosened.
- If you go swimming or take an immersive bath, please remove the monitor prior to going in the water. Please replace the monitor using a fresh adhesive patch as soon as possible afterwards following the directions above.
- Do not unnecessarily pull on the monitor, scratch the monitor, or remove the monitor.
- If you notice the monitor flashing red, please ensure that the adhesive patch is properly attached to your chest. If you are still experiencing issues, please follow the troubleshooting directions below and contact the study team for more guidance.
- If the Sensor gets wet, it will dry out and you may see an occasional red flashing light during this process. If the red flashing light continues for an extended period, please contact the study team for advice.
- You may experience some mild intermittent itching from under or around the Sensor, but this should pass. If itching or irritation persists, please contact the study team.
- Body lotions and sprays can be applied to areas surrounding the Sensor, but please ensure they are not applied or run onto the Sensor adhesive material. This can cause premature detachment of the Sensor
End of Study
- When the study is over, please remove the monitor from your chest.
- Using a baby wipe or an adhesive removal pad, wipe around the edge of the Sensor and gently start to peel back the edges.
- Work your way around the Sensor carefully removing each adhesive area until the recorder and sensor are fully detached from the chest. Holding the Sensor adhesive material and pushing the skin away from the adhesive in small steps can be easier than peeling in one go.
- If you are having difficulty with removal of the Sensor, using warm water or someone to assist you can help.
- Do NOT pull the Sensor off rapidly as this can damage the skin.
- It may be easier to remove when damp, so consider removing it after showering.
- Place the adhesive patch with the monitor still attached onto the piece of paper provided.
- Do not discard the adhesive patch or the monitor.
- Place the paper with the adhesive patch and monitor in the Biomonitor kit box.
- Return the entire biomonitor kit to the study team.
Source: https://t-tees.com
Category: WHY
