
Hey buddies! Long time no talkie! I wasn’t planning on taking a full-on blogging vacay, but it turned out that way when I was stricken with bronchitis and strep just in time for Christmas. Miraculously, Nick and the girls didn’t get sick at all, and they did a great job of taking care of me. The girls love to play Dr, so they were covering me in a million blankets, taking my temperature, and bringing me cough drops.
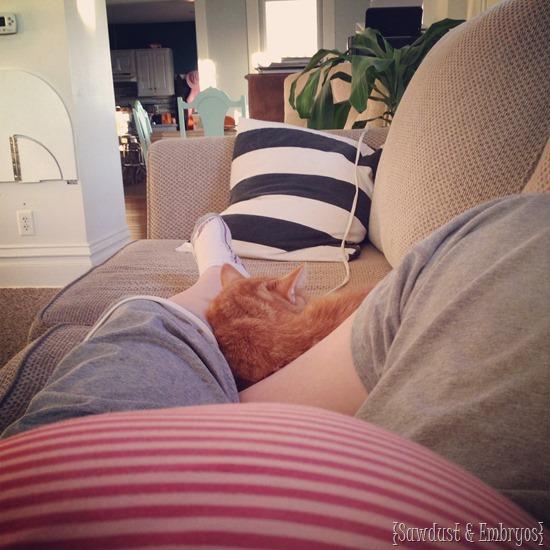
Speaking of cough drops, have you ever tried to cough when you’re pregnant? It’s unpleasant. And there’s always a little pee involved.
You are viewing: How To Make Cubbies For Hats And Gloves

While I was sick, Nick did countless loads of dishes (our dishwasher has been broken for months), and made many delicious home-cooked meals for our family… potato soup, hand-breaded chicken fingers, banana bread, burrito filling, homemade pizza, etc… all while building cabinets for the laundry room. I’m crazy spoiled. And lucky that I happened to be sick when he was off work for a couple weeks anyway.
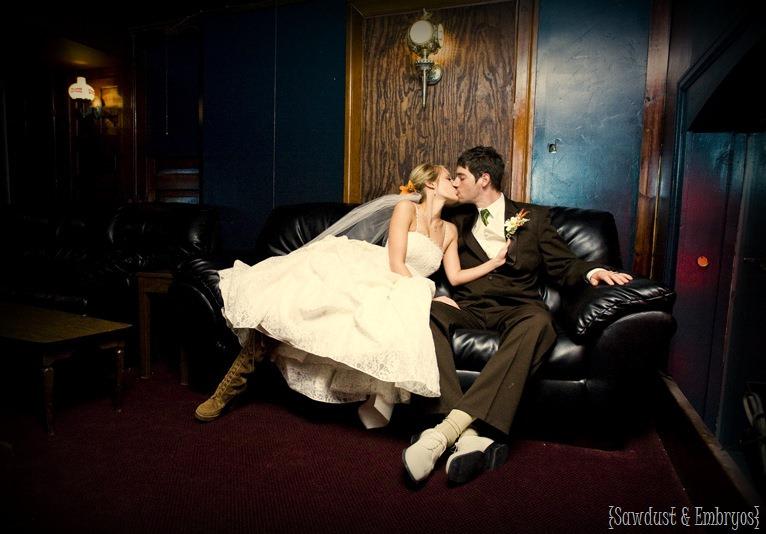
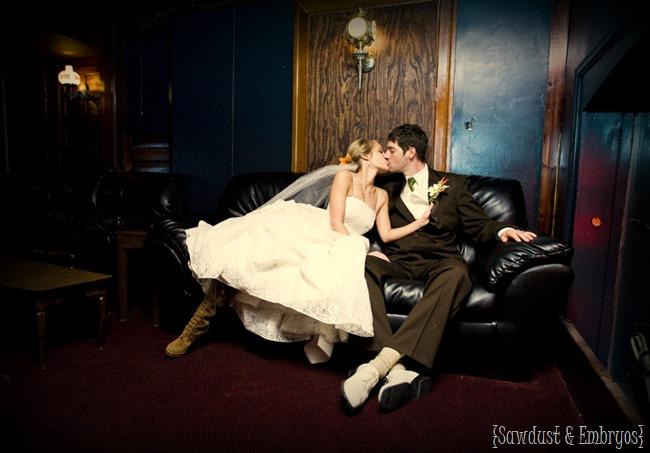
We also celebrated our 6 year Anniversary yesterday… time flies! I wish I could have those collar bones again:
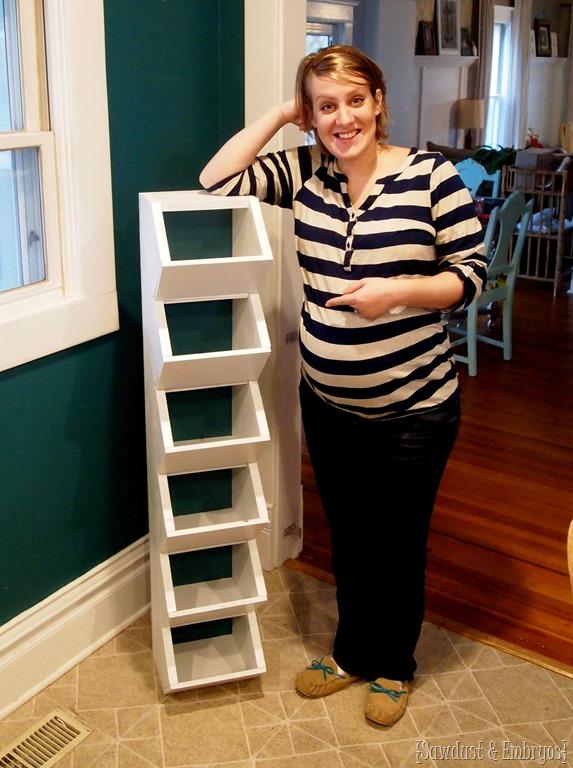
So now that the holidays, festivities, and anniversaries are over, I’m healthy, and we’re back to the daily grind… I’m going to finally share a little something I built for our mudroom. I actually threw this thing together before Christmas, but am just now sharing for all the above reasons.
CUBBIES!
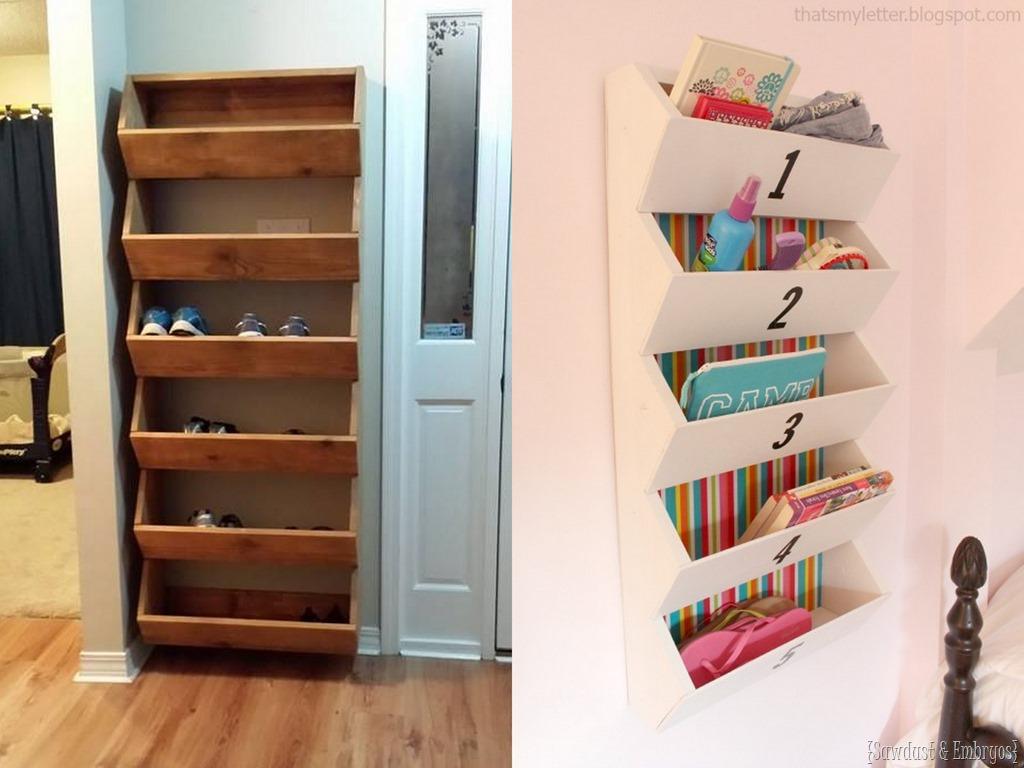
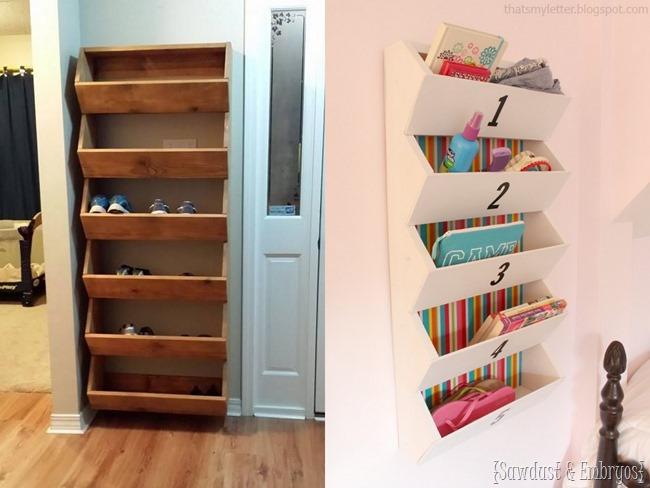
The inspiration for this came from these two pics that I had pinned awhile back. I don’t have the source for the first one, so if you know who’s pic this is, please tell me!
 Pic 1 source unknown / Pic 2 That’s My Letter
We already have a good storage solution for our shoes, but I did love this design and knew I could customize it to be smaller and perfect for hats and mittens in our little mudroom area that I’ve been building.
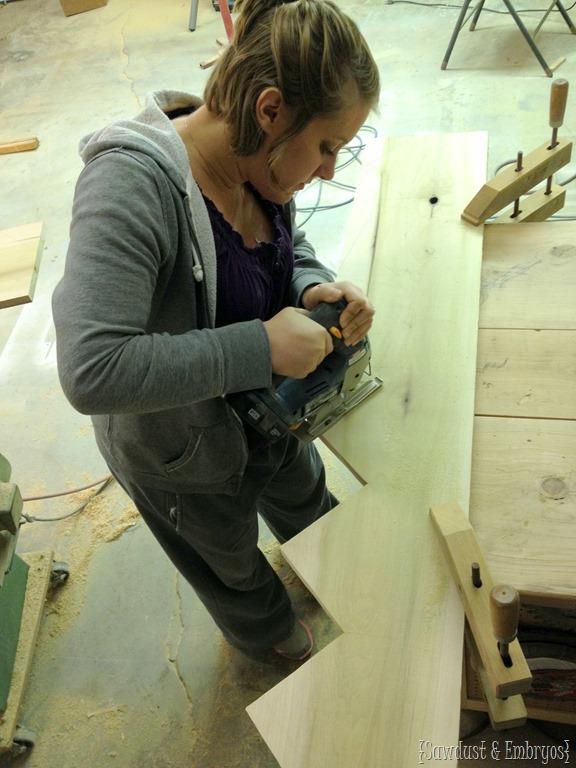
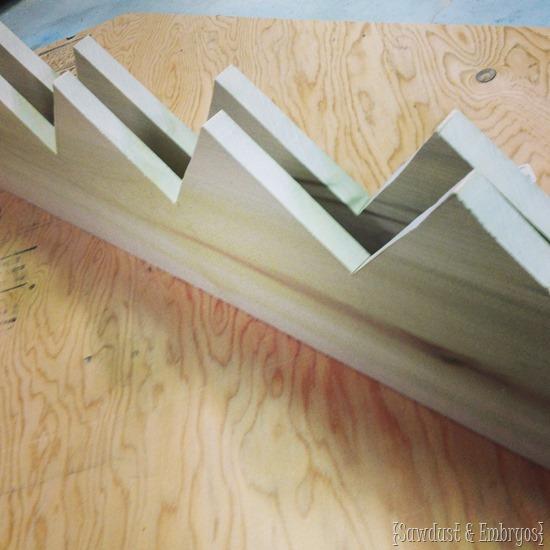
After measuring my space, I cut two 1×12 poplar boards to 52”, then drew out a zig-zag with right angles using a carpenters square.
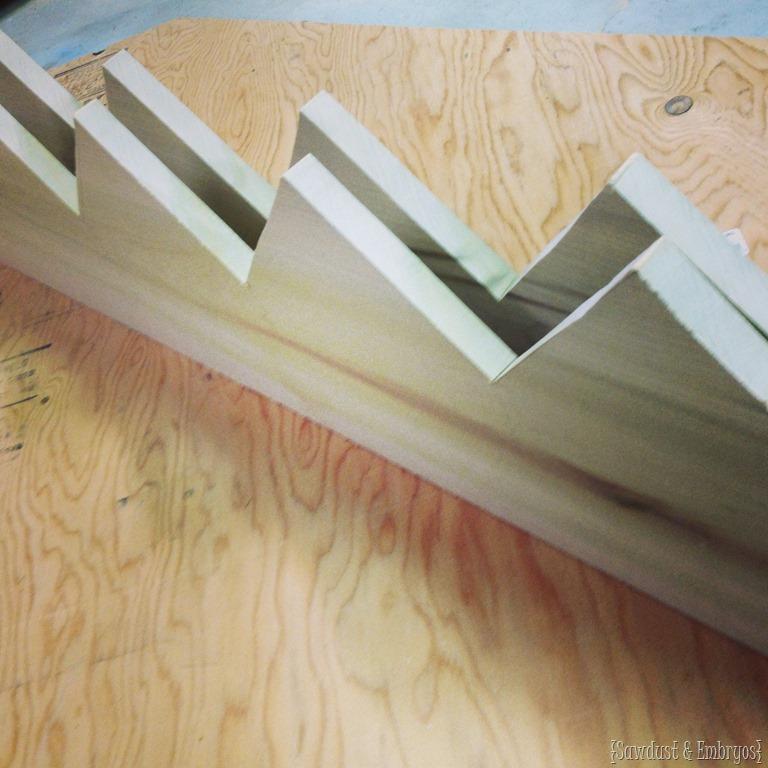
 Then I cut along the lines with my RYOBI jigsaw.

So, once I had the zig-zags cut on one board, I traced it onto the other board and repeated!
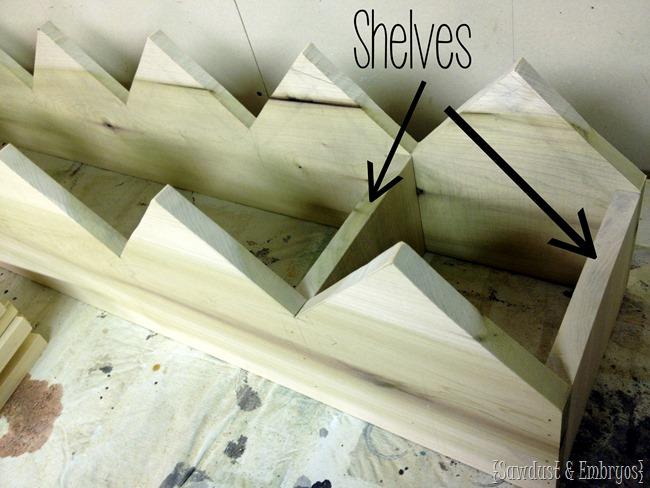
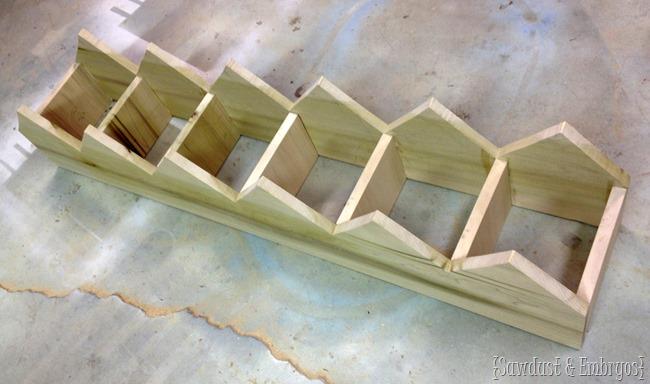
My next step is to cut the shelves… 7 total. I used the miter saw to cut a 1” board into 5.5” x 8.25”. (Note! Yours may not need to be such specific measurements for the space you’re needing your cubbies). I I glued these into place and secured them with a couple nails using my AirStrike gun.

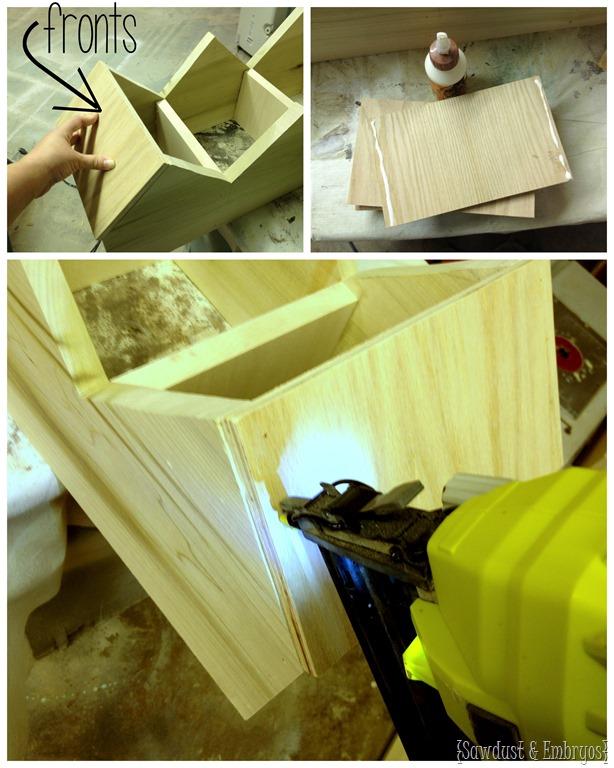
For the fronts of my cubbies, I didn’t want such a chunky feel. So instead of using 1” wood like I had been, I just grabbed some 1/2” plywood we had laying around and cut it to size (6” x 10”)… 6 total.

Then the whole thing got primed and painted white! (this stuff).
This thing is pretty sturdy, but I decided to put a backing on it just for added durability. And I liked the idea of being able to remove it and use it somewhere else in the home if I so desired. I just measured and cut an old piece of plywood to size and glued/nailed it on. You cant tell in the pic below, but I painted the front side of the backing board to match my kitchen walls before affixing it to the unit. I knew how much harder it would be to paint in there after it was all installed!
And finally, it’s ready to install in my little mudroom area! I worked on these cubbies off and on for an entire day, and had it finished before I went to bed. Not bad, eh?

Those labels on the fronts of each cubby are actually chalkboard vinyl. Crazy awesome, right?! I ordered them friend Dana (my vinyl dealer and BFF), and just love the custom touch it adds. (you can get yours here!). Each family member has a cubby for our hats/mittens/etc, and we have two leftover for ‘returns’ and ‘things that belong in the garage’.
You might remember from my sketch that there will be shelving extending across the top of this whole area. NEXT ON THE LIST! Although, I’ll admit I’m starting to feel myself slowing down being in my 8th month of pregnancy. This might need to wait!

We affixed this thing to the wall by screwing straight through the backing with drywall screws… making sure we hit studs. It’s solid! And the girls are excited to put their hats and mittens away after coming in from the cold.
UPDATE! We’ve finished the kitchen mudroom, and it turned out AMAZING!

If you think about it, these cubbies could be used for soooooo many things. I think I could use one in each room of my house! Can you imagine… toy room? pantry? craft storage? closets? HELLO!
Be sure to check out all the other little projects I’ve done to make this space feel more custom and built-in. Not to mention my island-turned breakfast bar! Things are slowly coming together, and I’m having such a blast!
Thanks for pinning!
*this post contains affiliate links
Source: https://t-tees.com
Category: HOW