
In cosplay, dedication to both the art and character means going the extra mile in terms on accuracy but with the hobby mainstreaming anyone can cosplay because of the massive availability of materials from wigs to contact lenses. But, do take note that some character designs aren’t simple as you would think, in fact, they make the cosplay go further than the 100% they are dishing out.
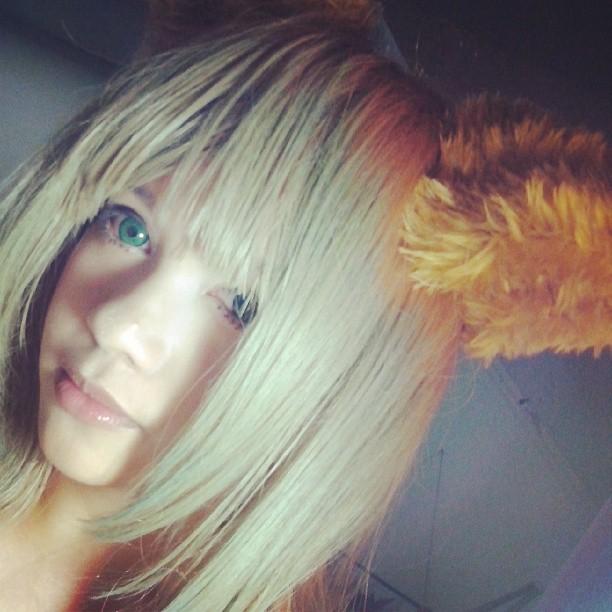
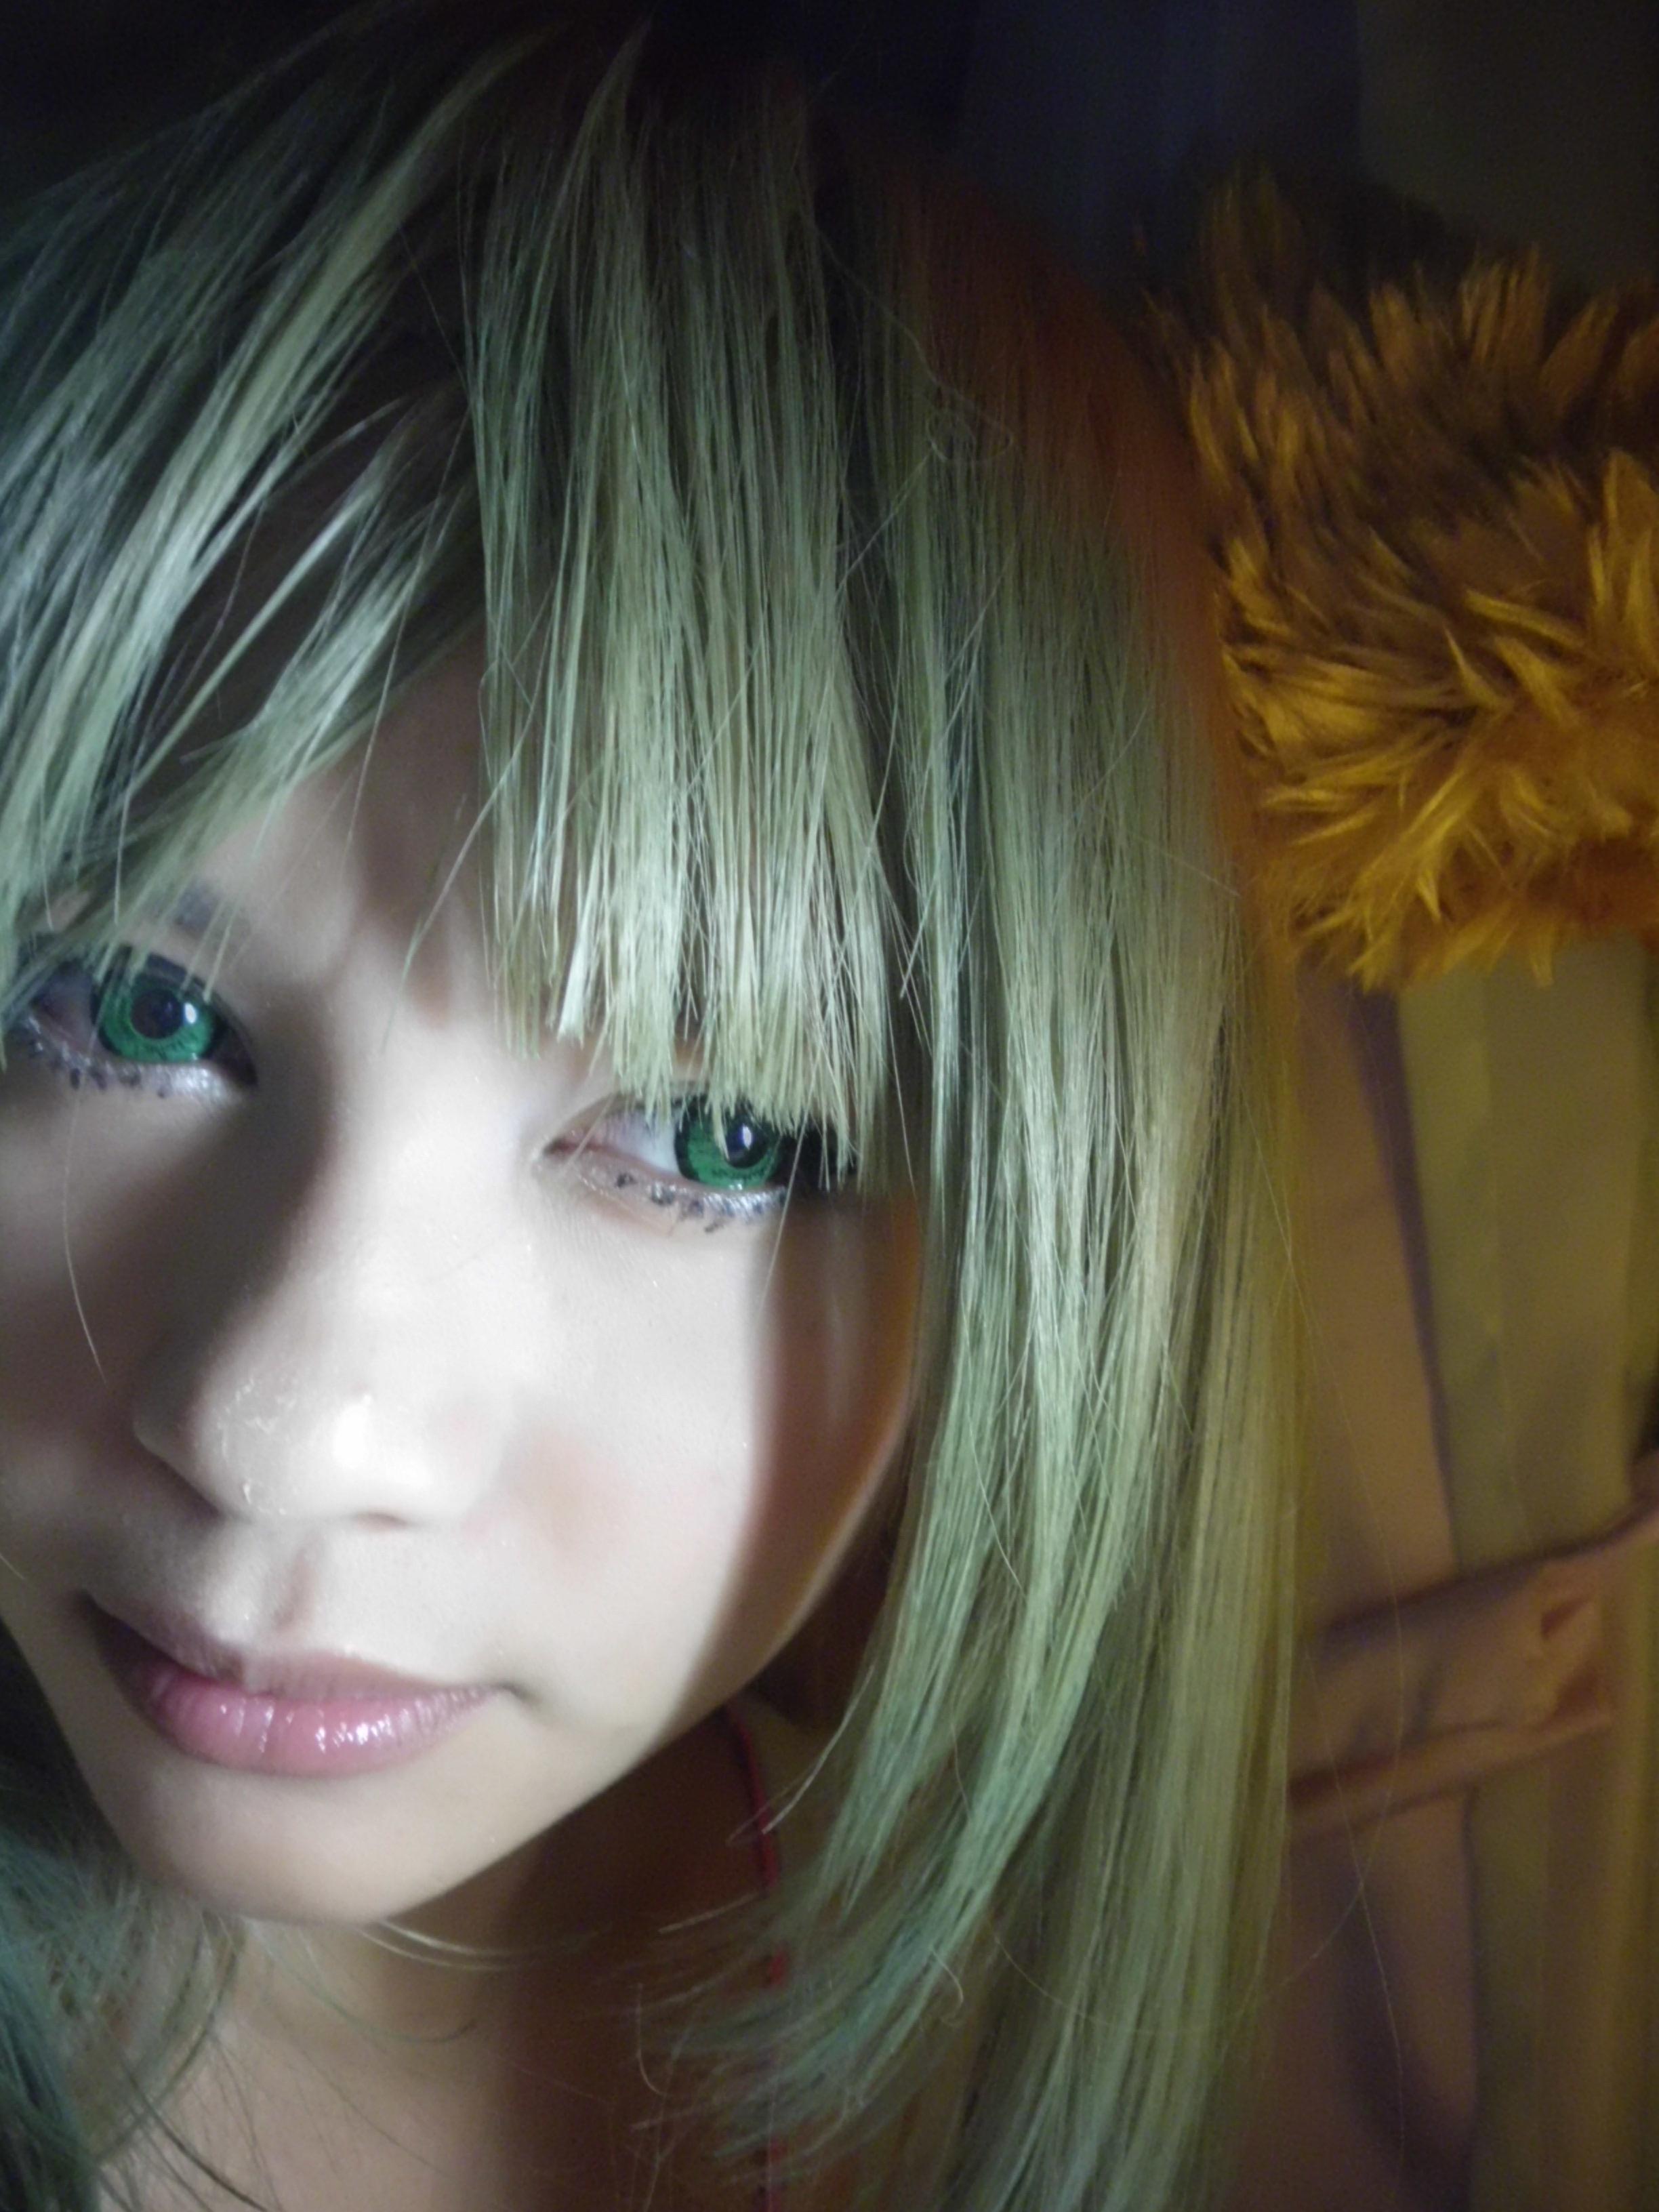
An example is creating specific two toned wigs. Sure there are two toned wigs out in the market and wefts are easily available, but sometimes placing wefts alone doesn’t give the realistic satisfaction a very detailed cosplayer wants. Here is an example: Atalanta of Fate/apocrypha (Archer of Red, The Chaste Huntress)
You are viewing: How To Make Atalanta Gloves

As you can see her front and side bangs are competing within the shades of green and blue. It is not within a solid, primary color but rather lands somewhere in the spectrum of teal. Although there are teal wefts available, they may end up looking unblended thus looking off to the original design.
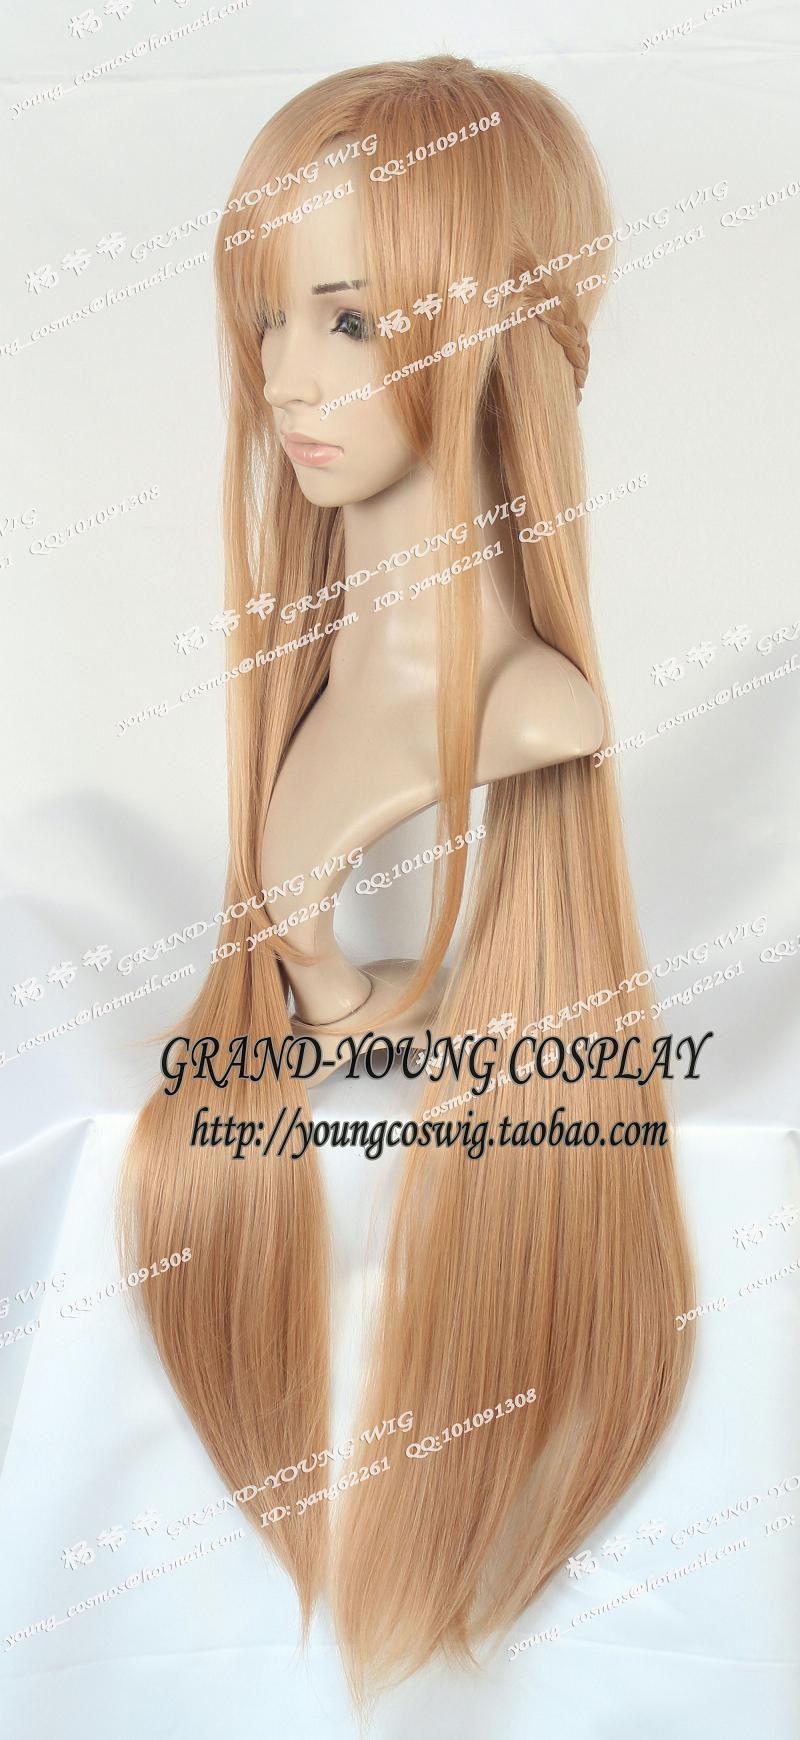
That is why this tutorial is dedicated to creating this output:
I will admit that this is not my original idea but rather from a “daughter” of mine who is a very good cosplayer herself. While studying this character, I remembered that she used to dye a couple of wigs back then and sought her help on how she did it. She was gracious enough to share what she knew and I am now passing it on to you guys.
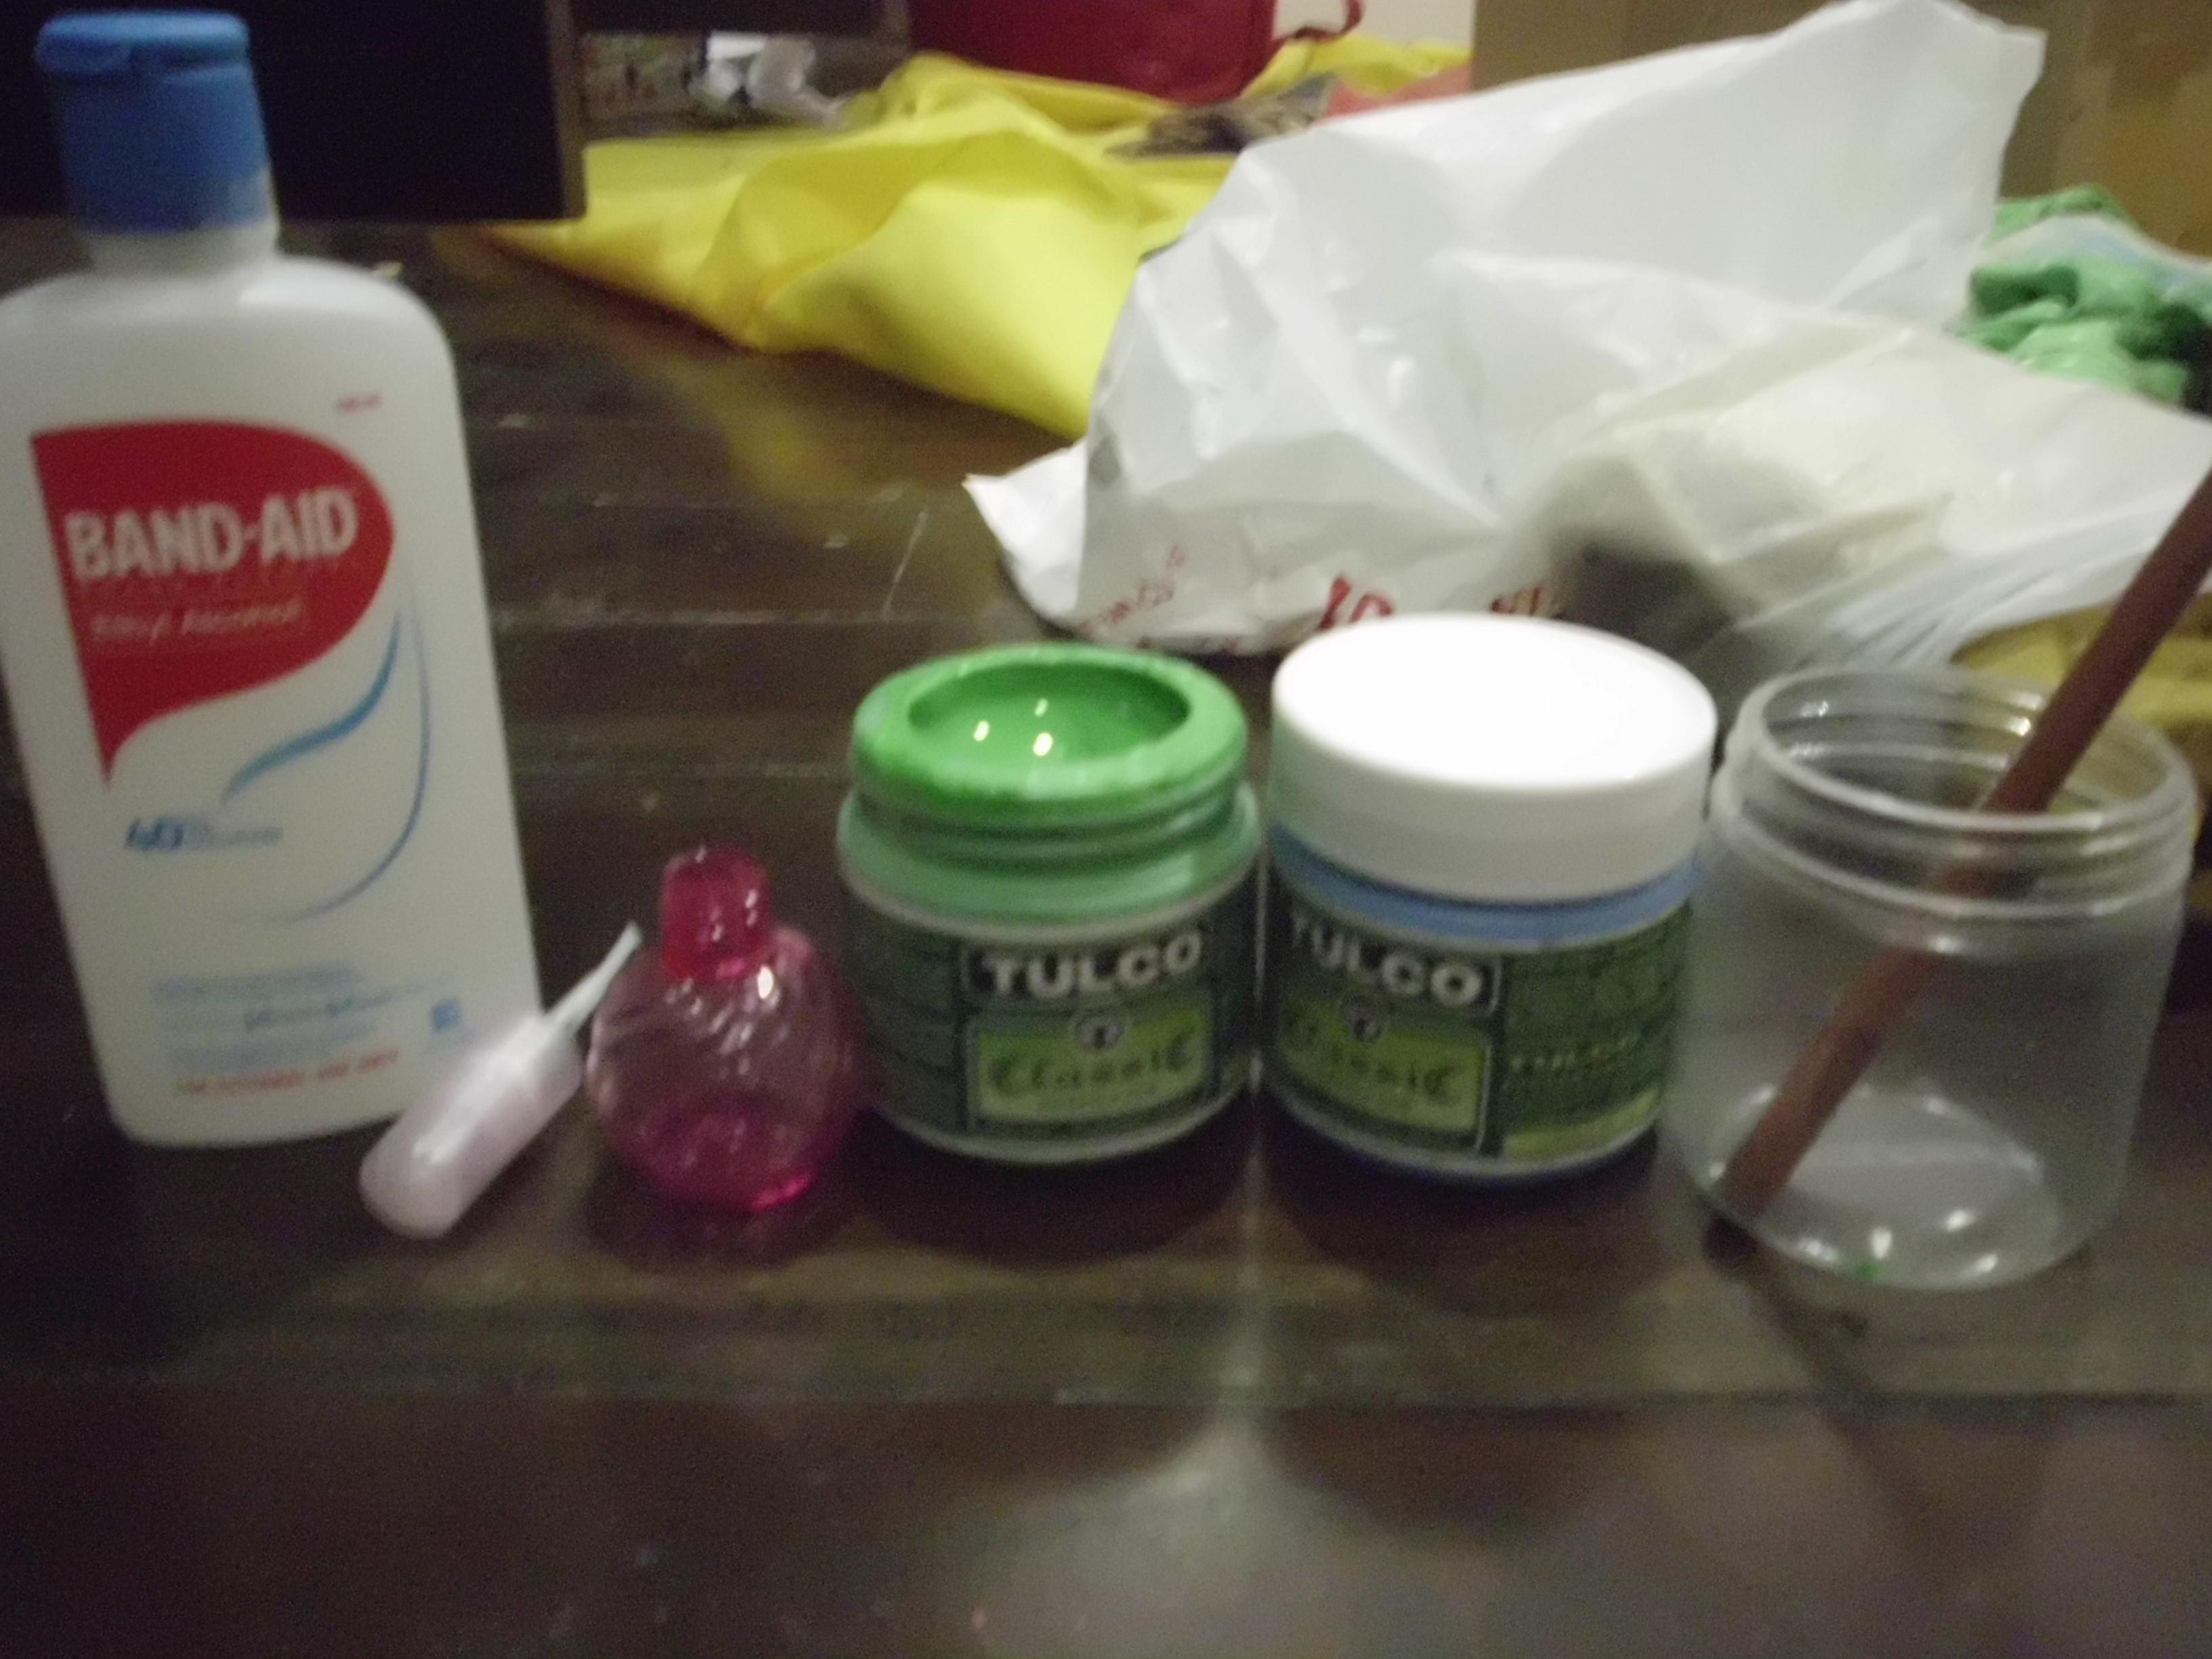
Materials:
1. Flat brush
2. Empty mixing container, it could be a cup, a pan or a piece of paper
3. Scratch paper (this is for trial mixing)
4. Plastic gloves
Read more : How To Buy Winning Boxing Gloves
5. Isopropyl alcohol
6. Tulco Paint Apple Green and Light Blue (or any paint used for silk screening printing)
7. Newspapers, old cloth, etc (to avoid mess)
8. Spraybottle (optional)
9. Your desired wig
10. A wig stand
You guys may be wondering what kind of wig I used for this cosplay. I used Grand Young’s Asuna Yuuki from Swor Art Online in brown because the other Asuna wigs are too orange for my taste.
Procedure:
1. First, spread out your cloth/newspapers on your work area and your mixing station. You wouldn’t like to work on a messy area, would you? This would also help lessen mess and mistakes on your part… and additional laundry.
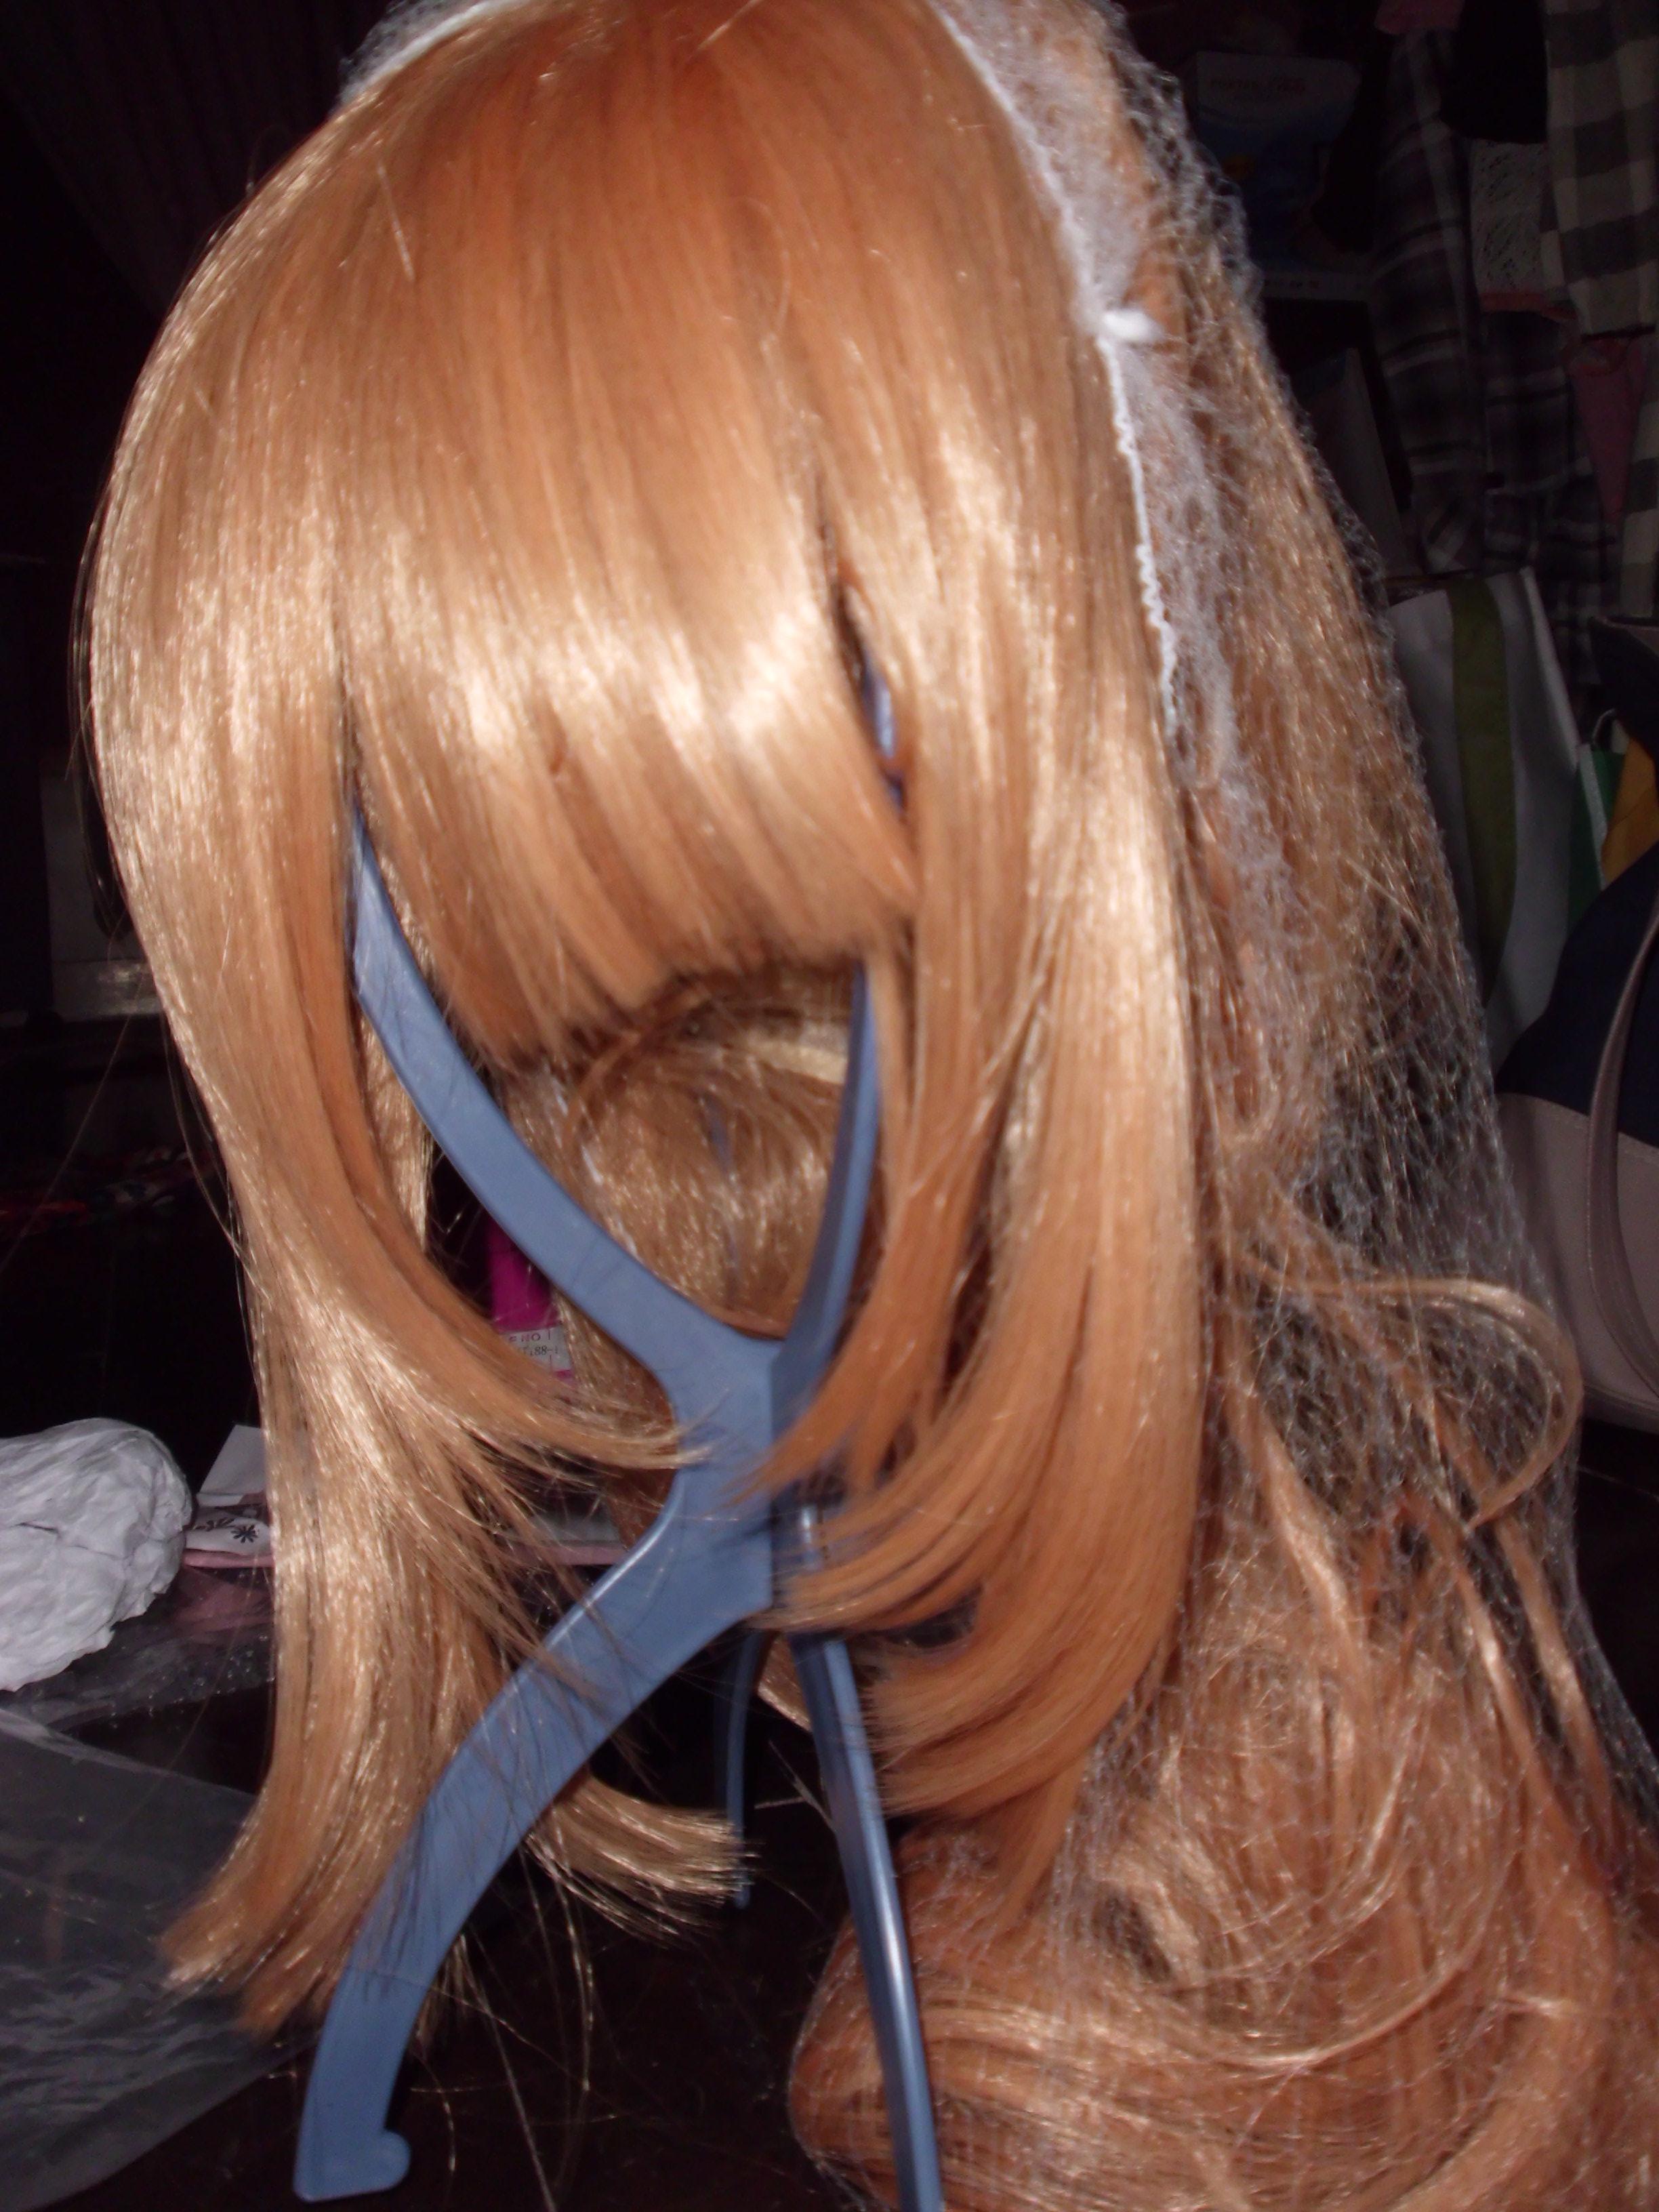
2. Prop your wig on your wig stand. Style it first if you haven’t. Segregate the parts you need to dye from the ones that don’t. This is to ensure a clean dyeing process.
3. Wear you glove and prepare your mix. I did not really use ratio and proportion on this because sometimes the color doesn’t come out right. Just keep adding part by part until you get the shade that you want. Afterwards, add alcohol to make a thick slurry. Alcohol is not only a mixing agent, it will also help in the drying process and will make the dye stick to the fibers more.
4. Once you have done that, you can either place the paint in the spray bottle or grab a brush and slather it on the wig. Either method is fine. Do this bit by bit. By every lock of hair you place dye on, always rub it in between your fingers, just like how you would dye your own hair. This is to ensure that each fiber is being ‘treated’ equally and distributing the dye evenly. You can comb the strands if you want to but rubbing the strands achieves more coverage and better results.
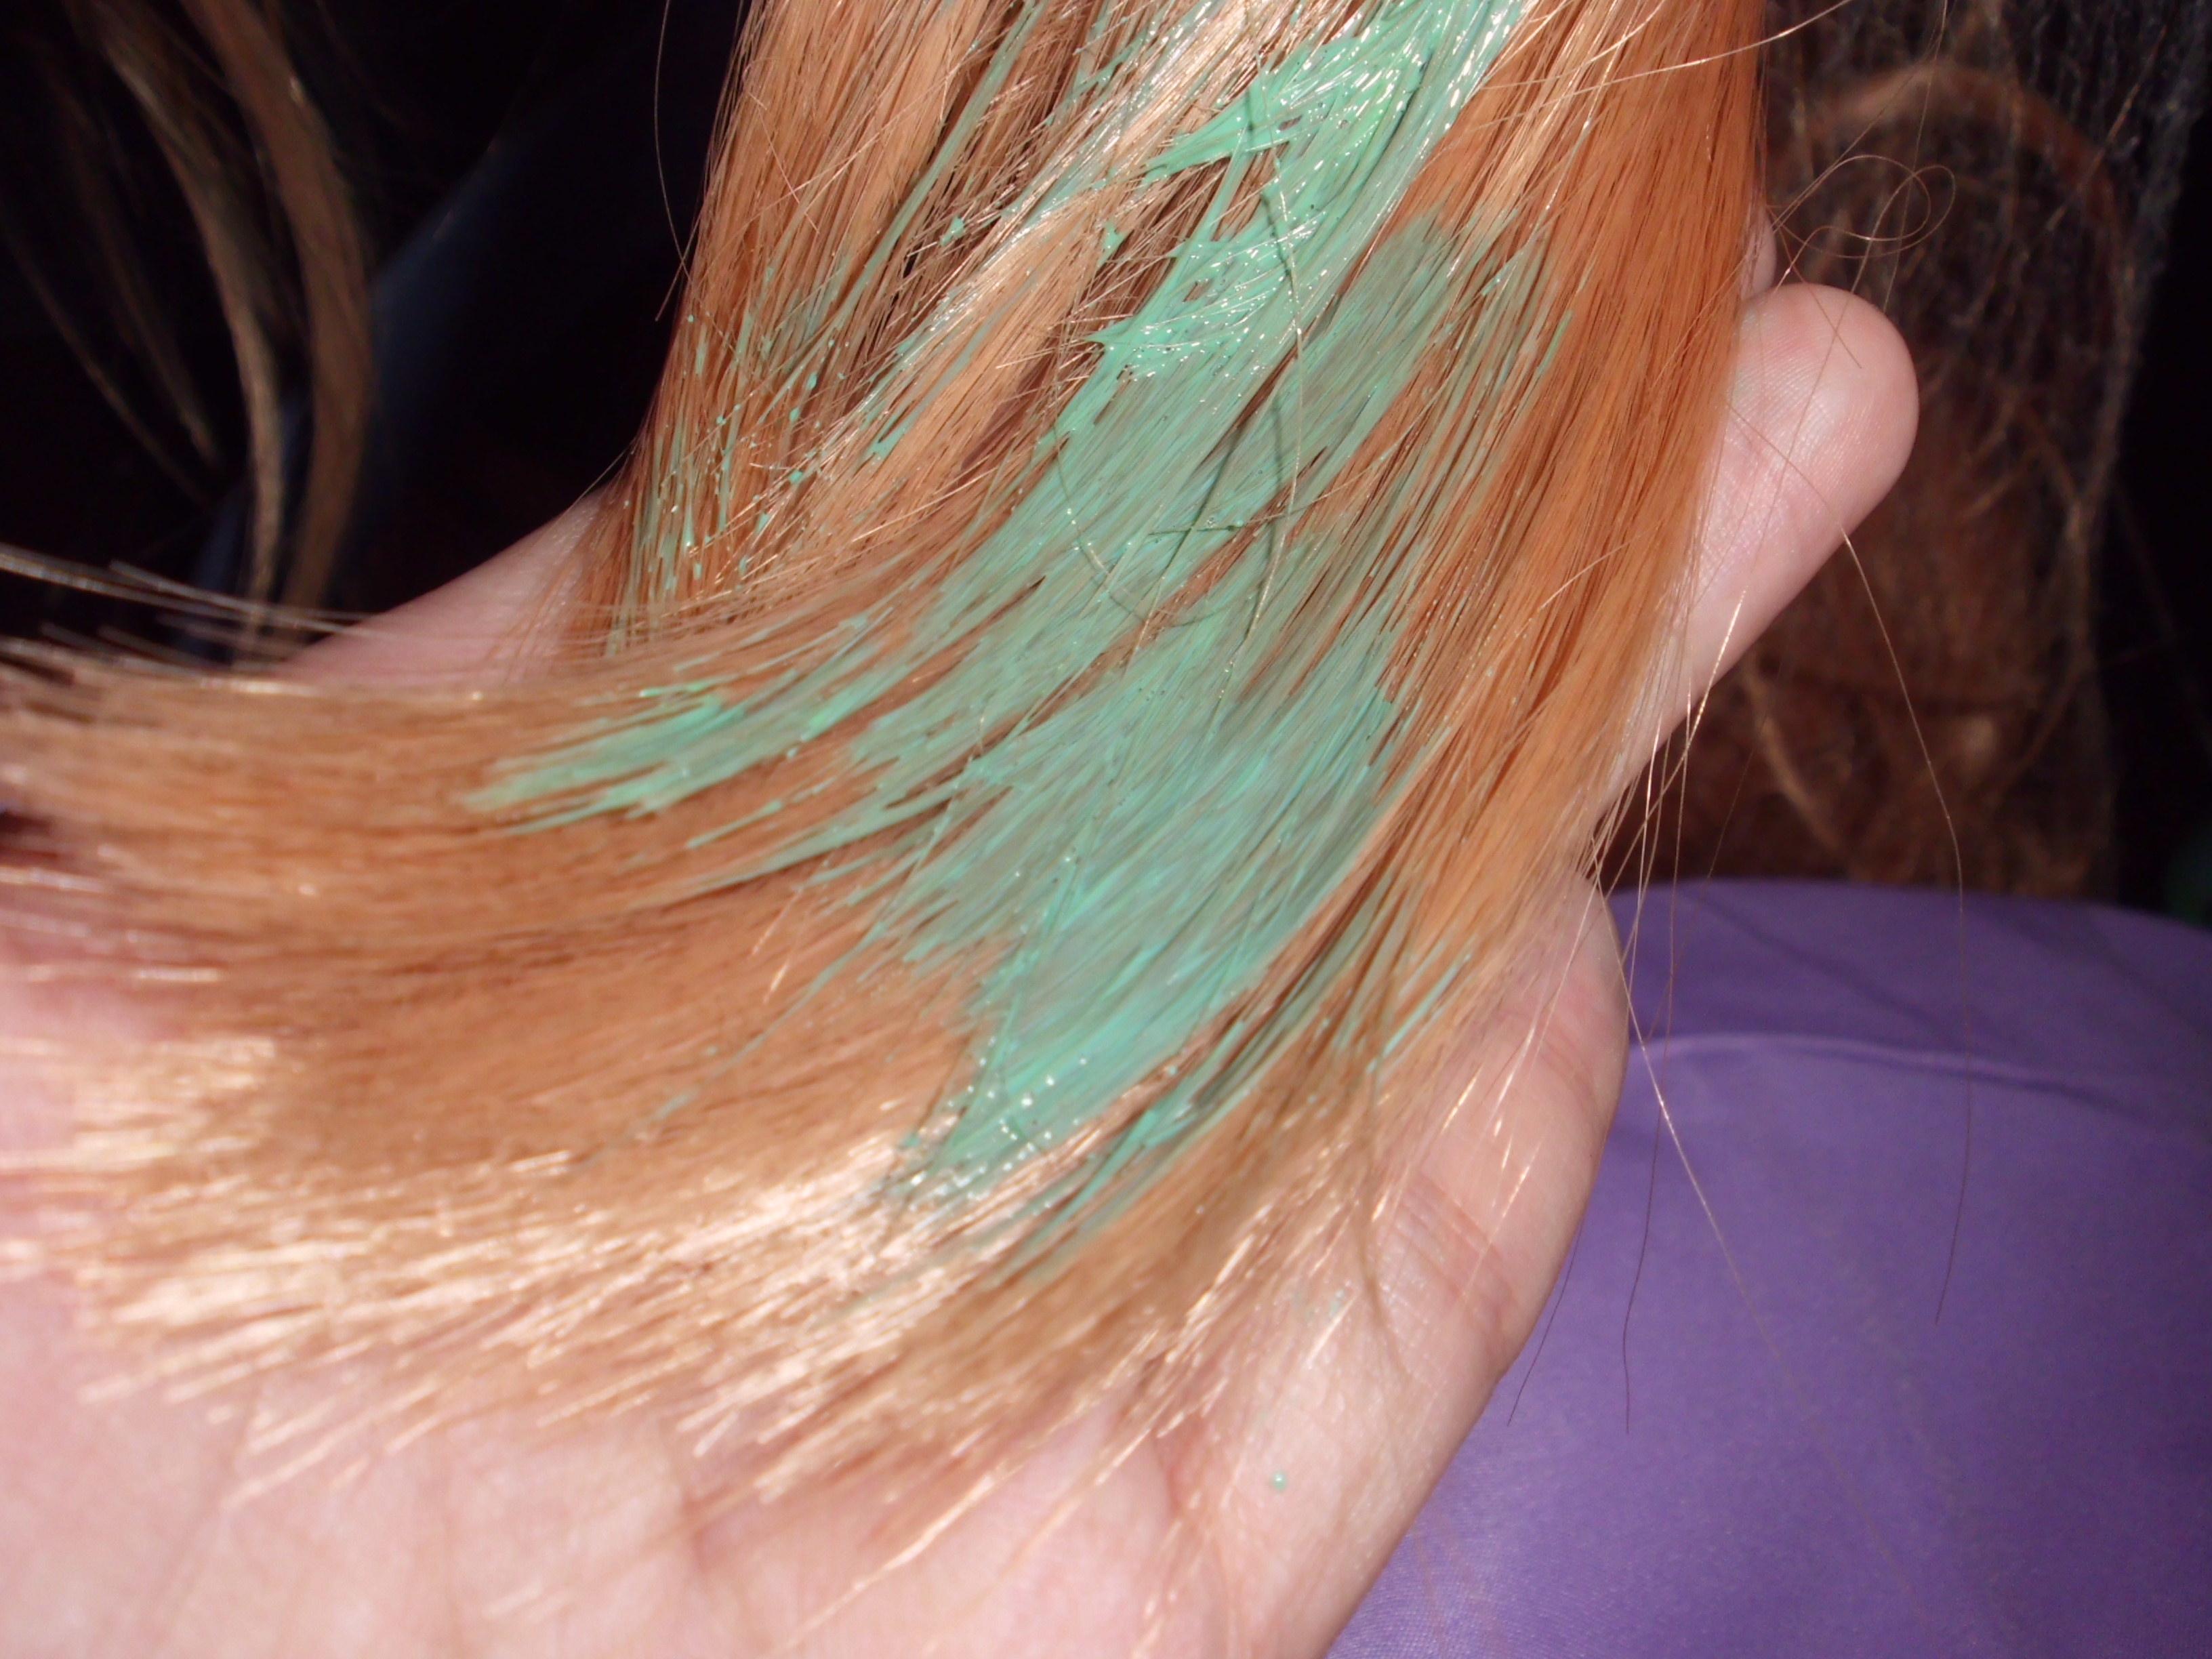
5. Once you have covered the necessary parts, leave to dry over night. It will somewhat look like this: darker in shade but trust me once it dries you will eat your words.
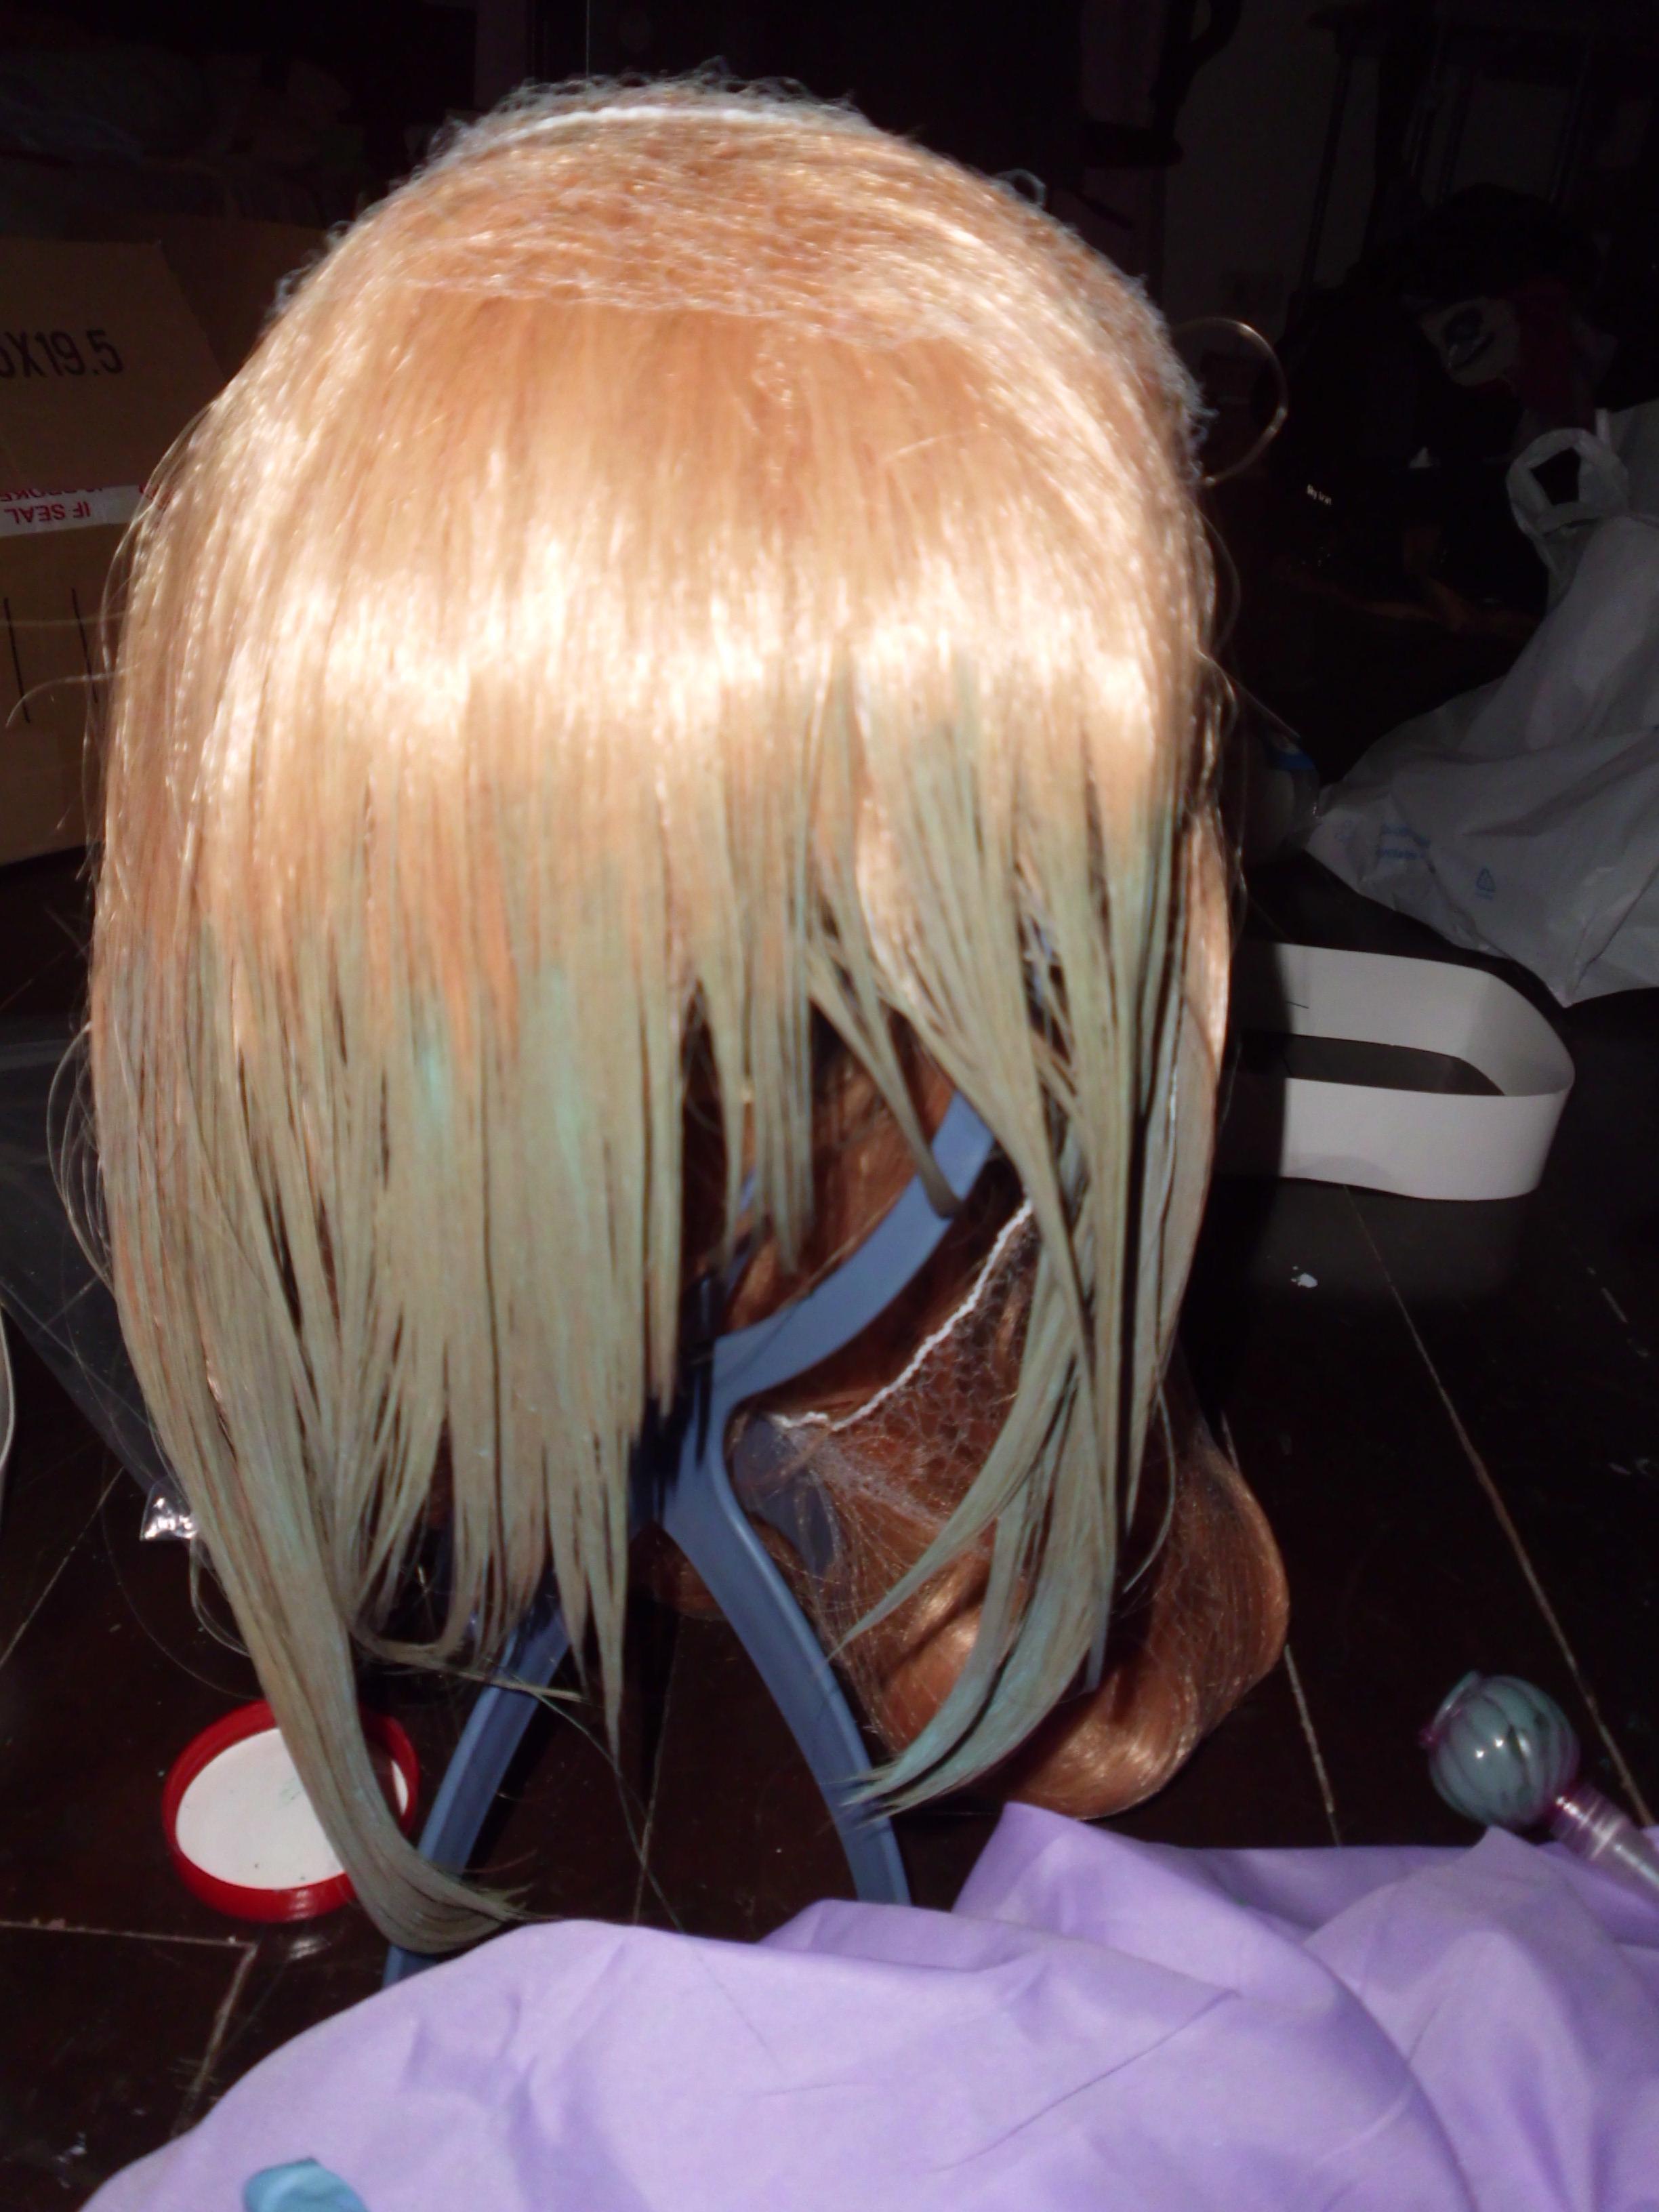
6. Once dry, comb it gently, separating the strands from one another. Remember than when you comb, treat it like how you gently would when a wig is frizzy and needs to be fixed. Start from bottom to top. If you, think that there’s not enough color repeat steps 4 to 5.
7. Admire your work!
End Note: The difficult part in this is achieving the correct color mix so I suggest you do trials first before jumping on to the full procedure.
I hope this tutorial is of use to you!
Source: https://t-tees.com
Category: HOW