
This is the 5th part of a multi-post series on the Skyrim mod, “The Forgotten City”.
Part I: LINK
You are viewing: How Do You Get Immaculate Dwarven Gloves
Part II: LINK
Part III: LINK
Part IV: LINK
THIS WILL BE A SPOILER-FILLED POST.

There are many ways that you can tackle the Abandoned Palace – this post is the one way that I tried. While I hit most of the areas, some areas were skipped. I’ll note when and where those skipped areas are; I may go back and explore them before wrapping up this series.
The Abandoned Palace
Entrance and Coffins
After wrapping up the quests from Part III and Part IV, the Palace was the next stop.
As you enter, you are treated to a dusty, cob-webbed hallway. On each wall are stacks of coffins (… creepy). Off in the far distance, the hallway is gated close (the gate closest to you is open); on the other side of the gate is a burned corpse and what appears to be a set of Immaculate Dwarven Gauntlets. Above you, a large Dwarven pipe runs:
Note: I am on the PC version; the Immaculate Armor looks “checkerboarded” to me. I don’t know if that’s a glitch or if that’s a graphics issue on my end.
You can check some of the coffins but you won’t get much: a few coins, some bone meal, maybe a torch.
The key to getting through that gate is not to go through the gate but over the gate. That happens via the coffins. The coffins on the right side of the hall are relatively straight, until you get about 15 feet up. The left side coffins, however, are not. You can jump from coffin to coffin, until you are about even with a lamp hanging from the ceiling and the start of the uneven part of the right side coffins:
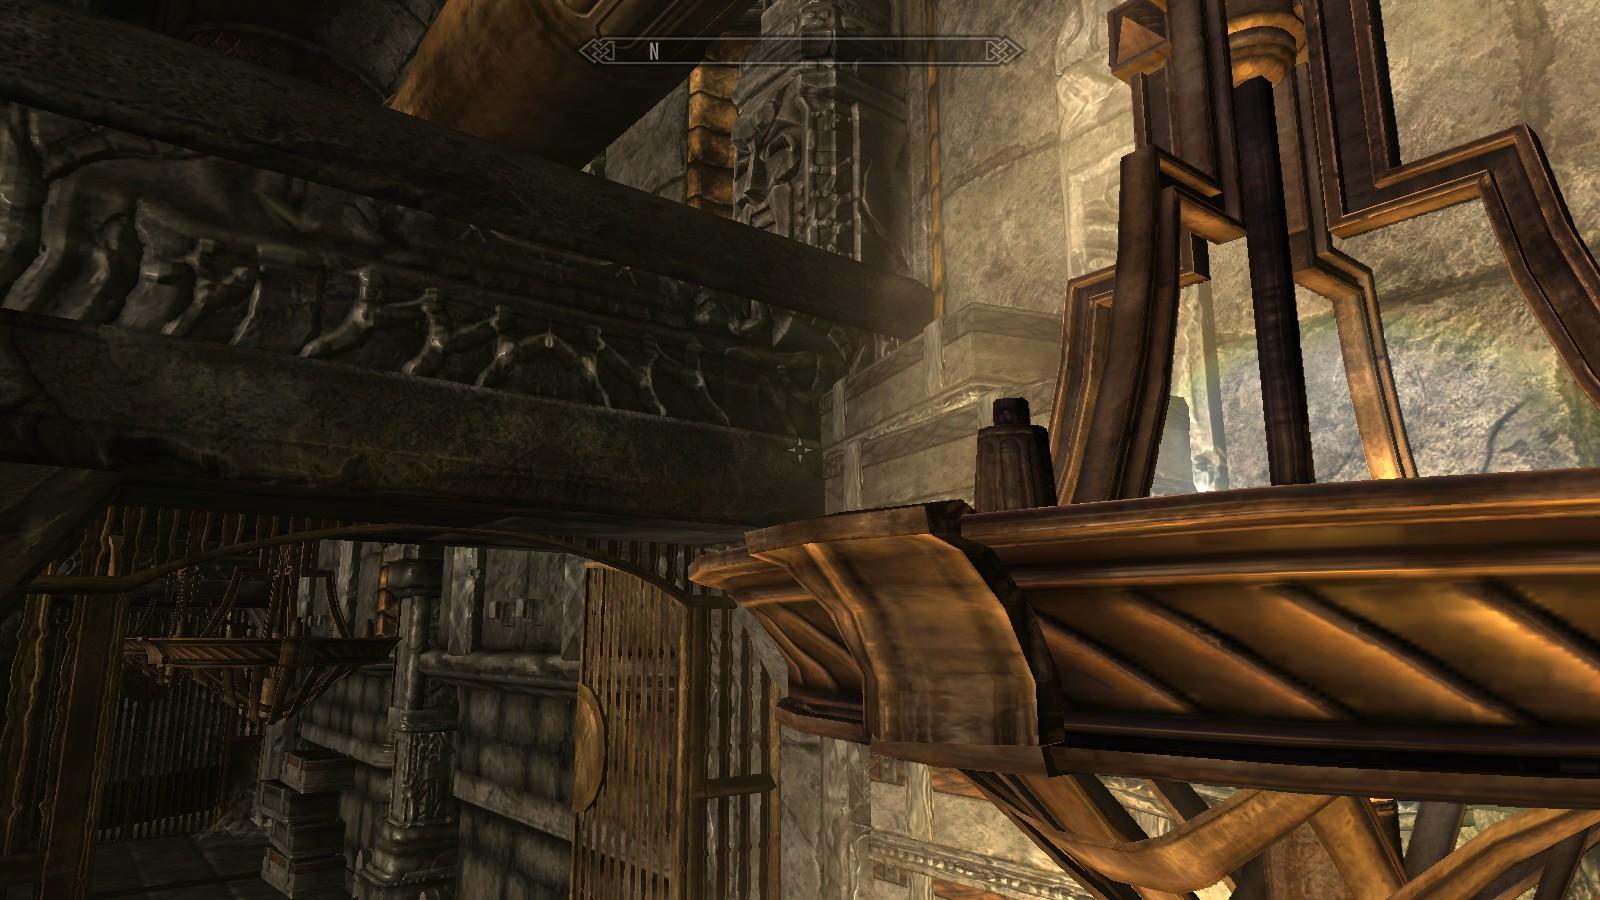
Once there, jump to the light, then CAREFULLY jump to the right-side coffins. This is not an easy jump, if you don’t have some kind of stat or potion help. It took me quite a bit of time – from missing the lamp, to landing on the lamp but overshooting the jump to the other coffins. Once you get to the right-side coffins, you make a couple of short jumps that put you onto the stone archway of the first gate, with the Dwarven pipe to your left. Jump onto the pipe – carefully, because you can fall off! – and walk across, until you are on the other side of the locked gate. Drop down, pick up the Immaculate Gauntlets (you don’t have to equip them now), and continue on.
Water Room and Hallway
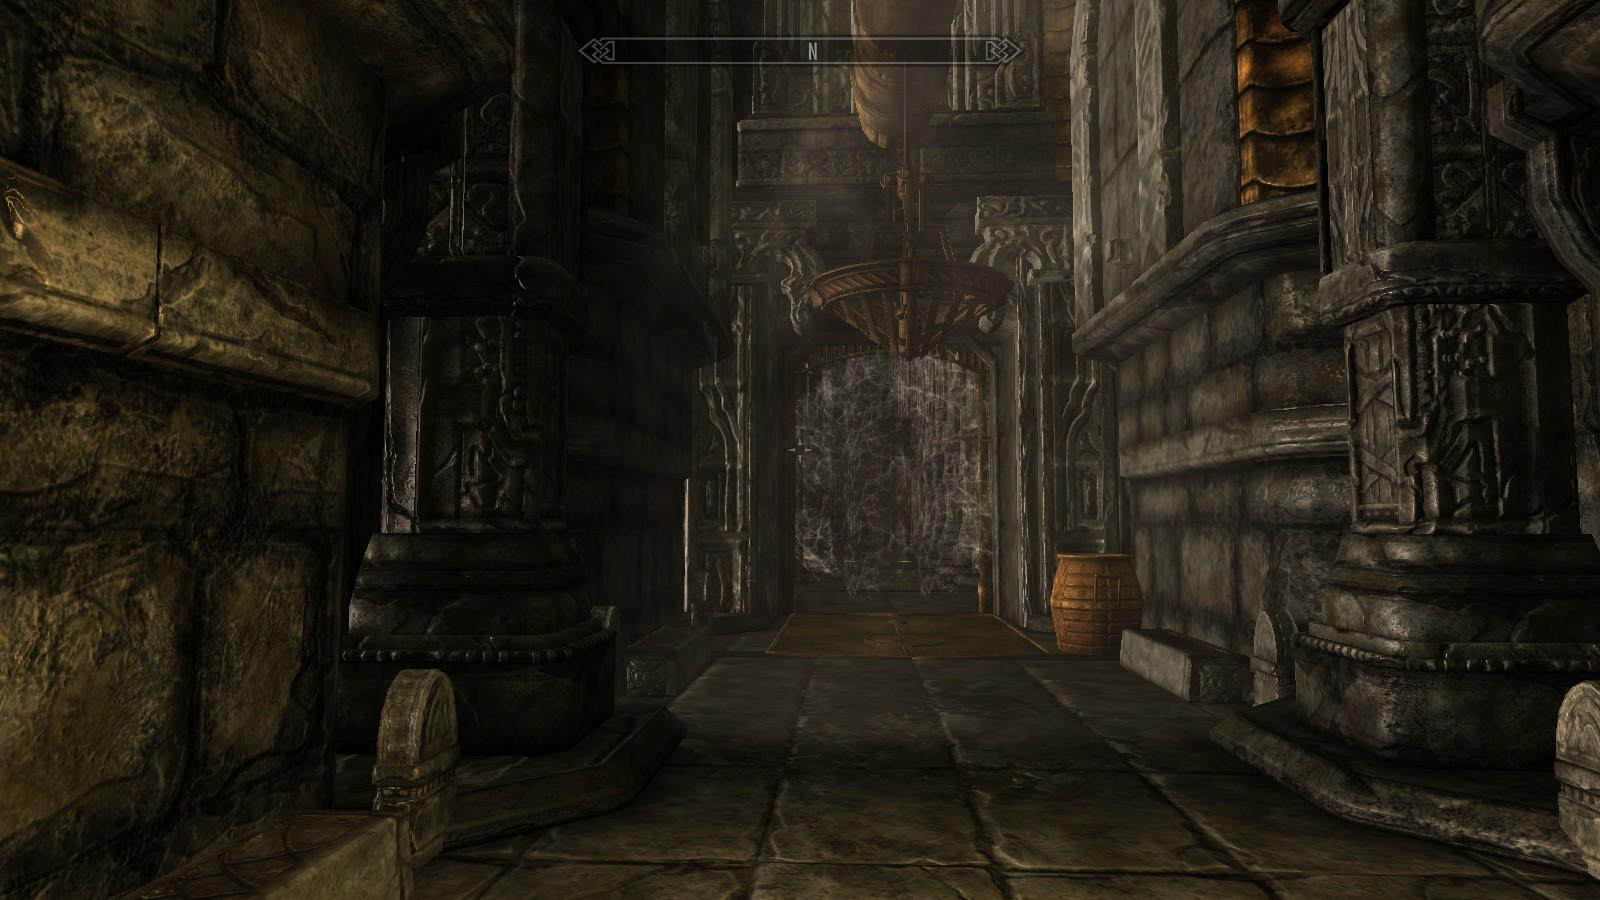
Once you have the gauntlets, you proceed forward a short distance, through the cobwebbed doorway pictured above, until you come to your first choice:
– in front of you, there is a locked gate, “Master” level
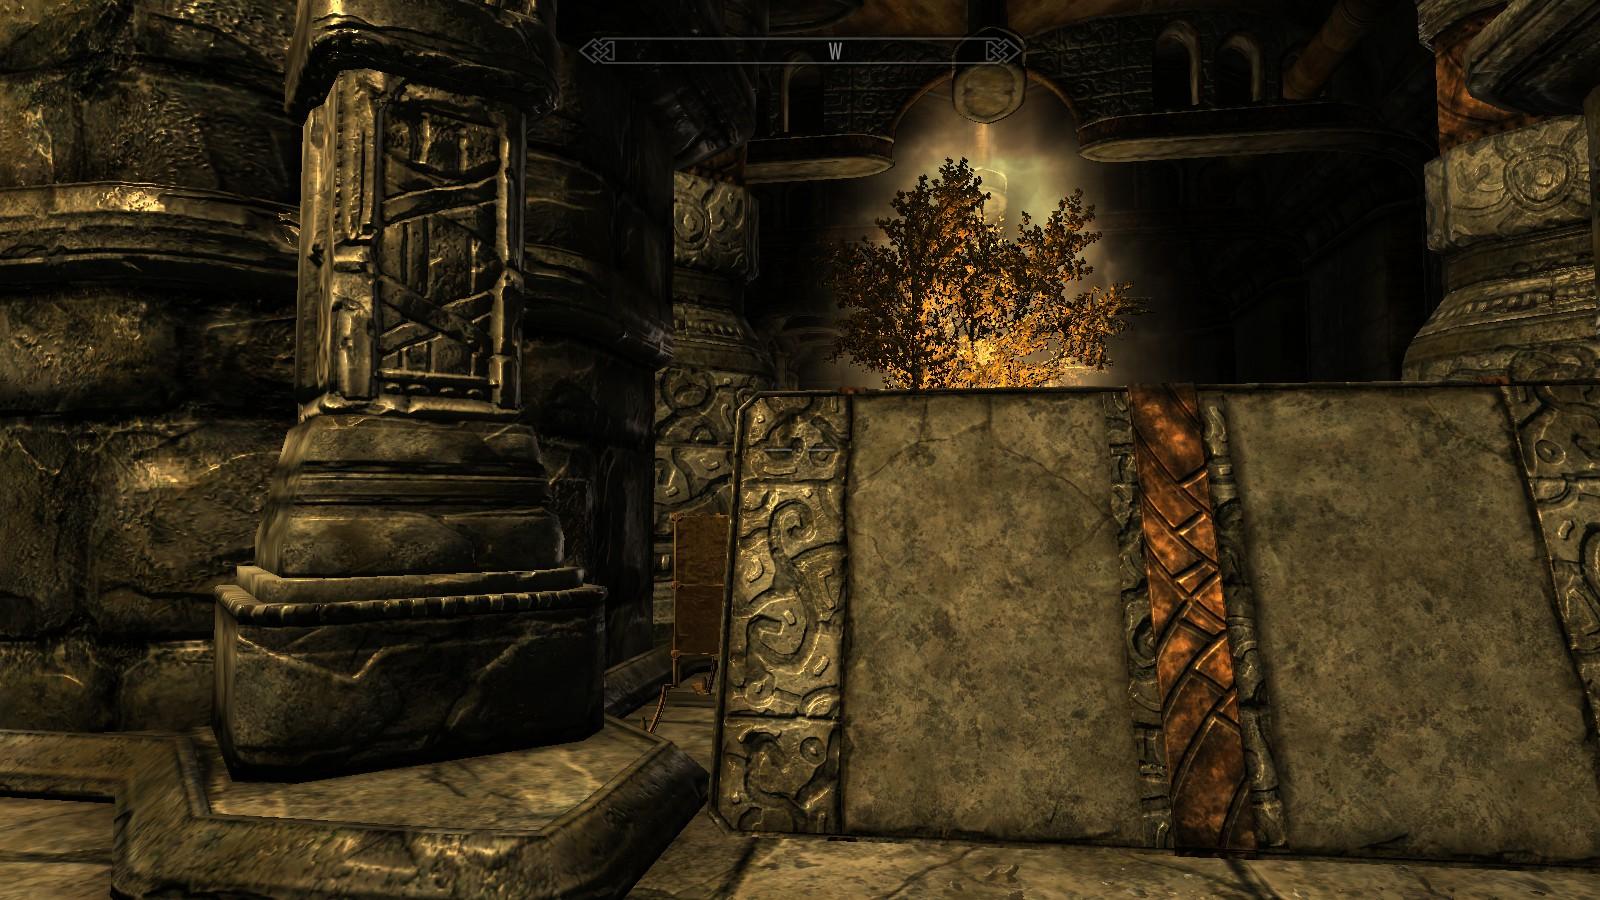
– to your left, there is a very Large Room with some kind of dark center section:
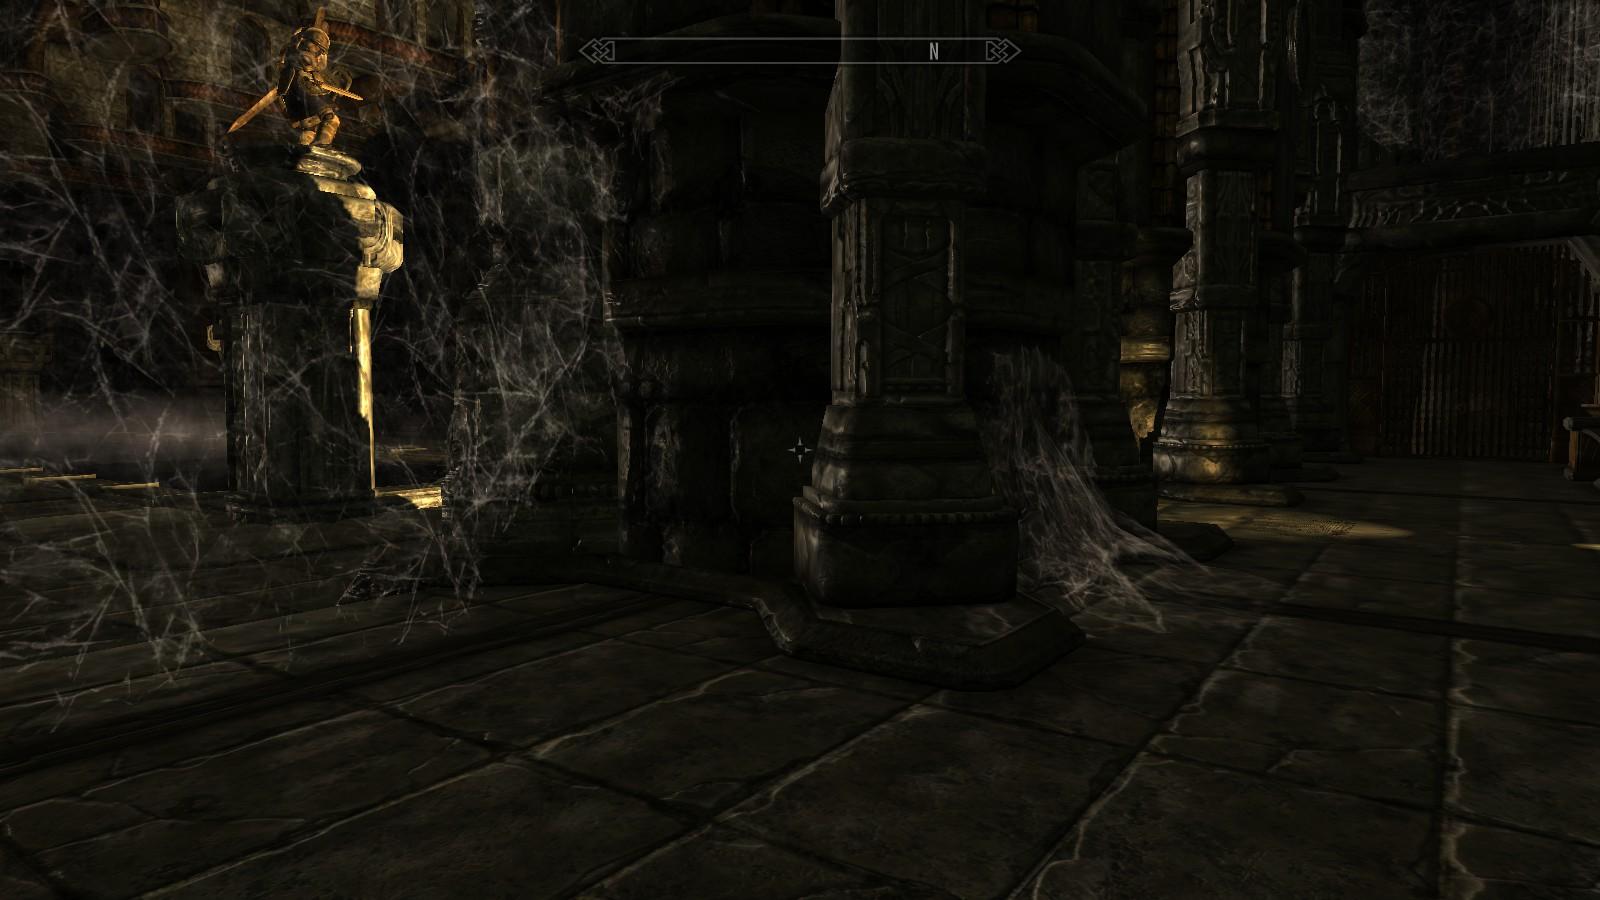
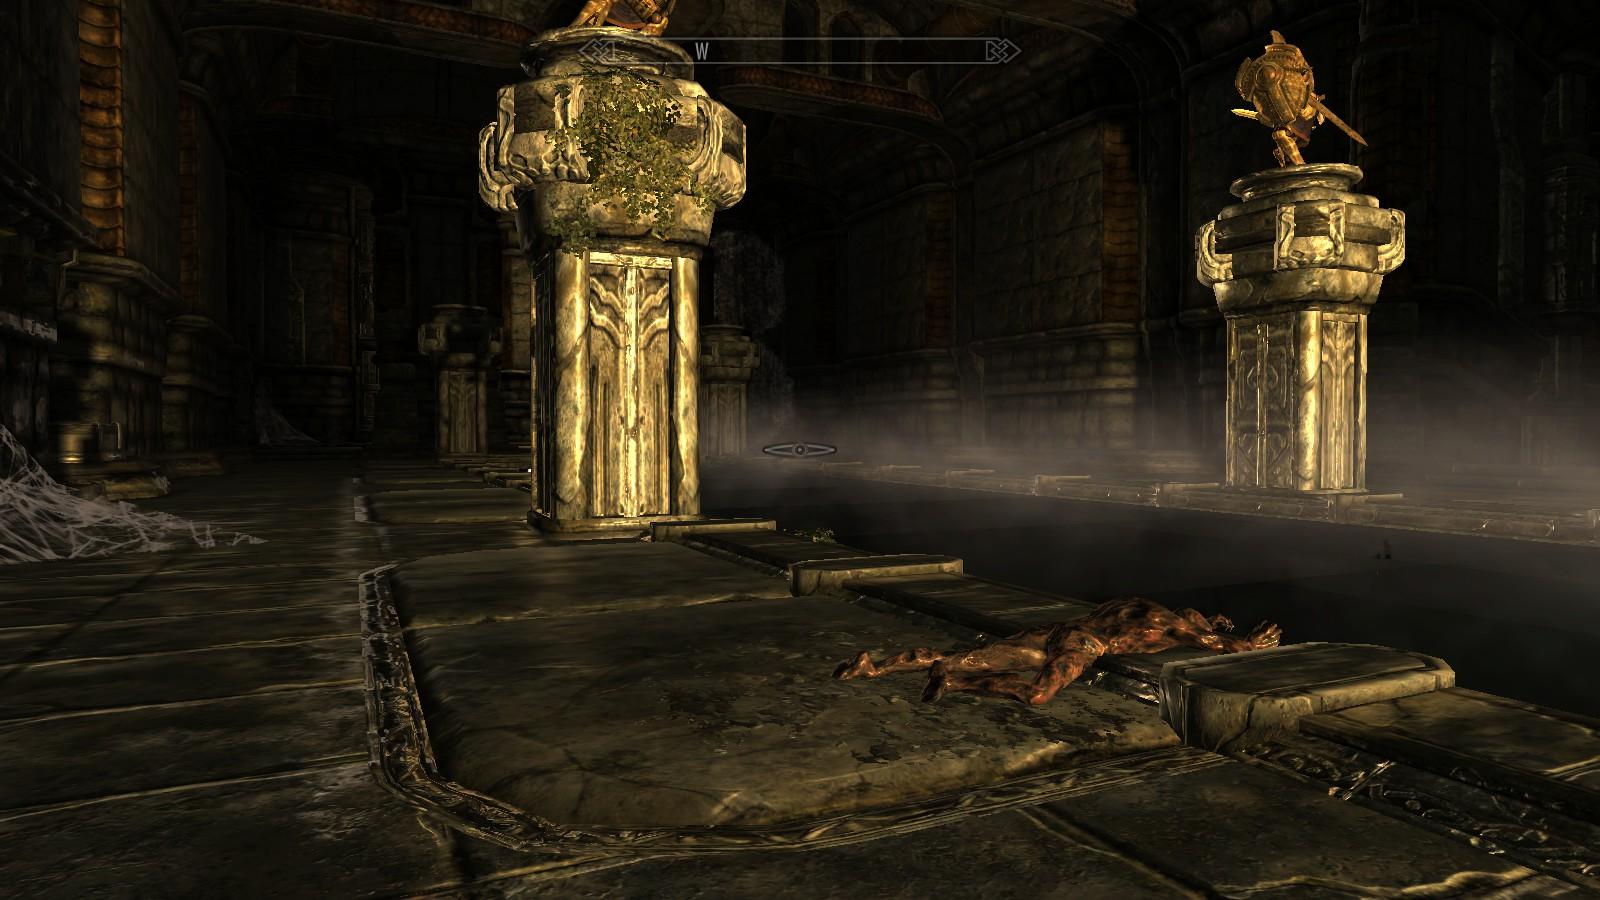
Since I am only at 28 on Lockpicking and I had about 16 Lockpicks, I skipped the locked gate. Inside the Large Room, the “dark” area in the center is actually a shallow stream of some kind. There are burned bodies scattered everywhere, in different positions (not much loot). There are what appear to be Dwarven statues on top of podiums – 6 or so – lining the stream. On the far side of the room, there is an opening to an adjacent, horizontal hallway. On the right side of the room, about 2/3 away, is a locked gate and a ramp leading down to who-knows-what-terrors. Probably in front of you by now, if you went in unstealthed and/or with magic glowing from your hands, are creatures called Charred Horrors, skeleton-shaped ghosts with red eyes and very painful Dwarven Maces:
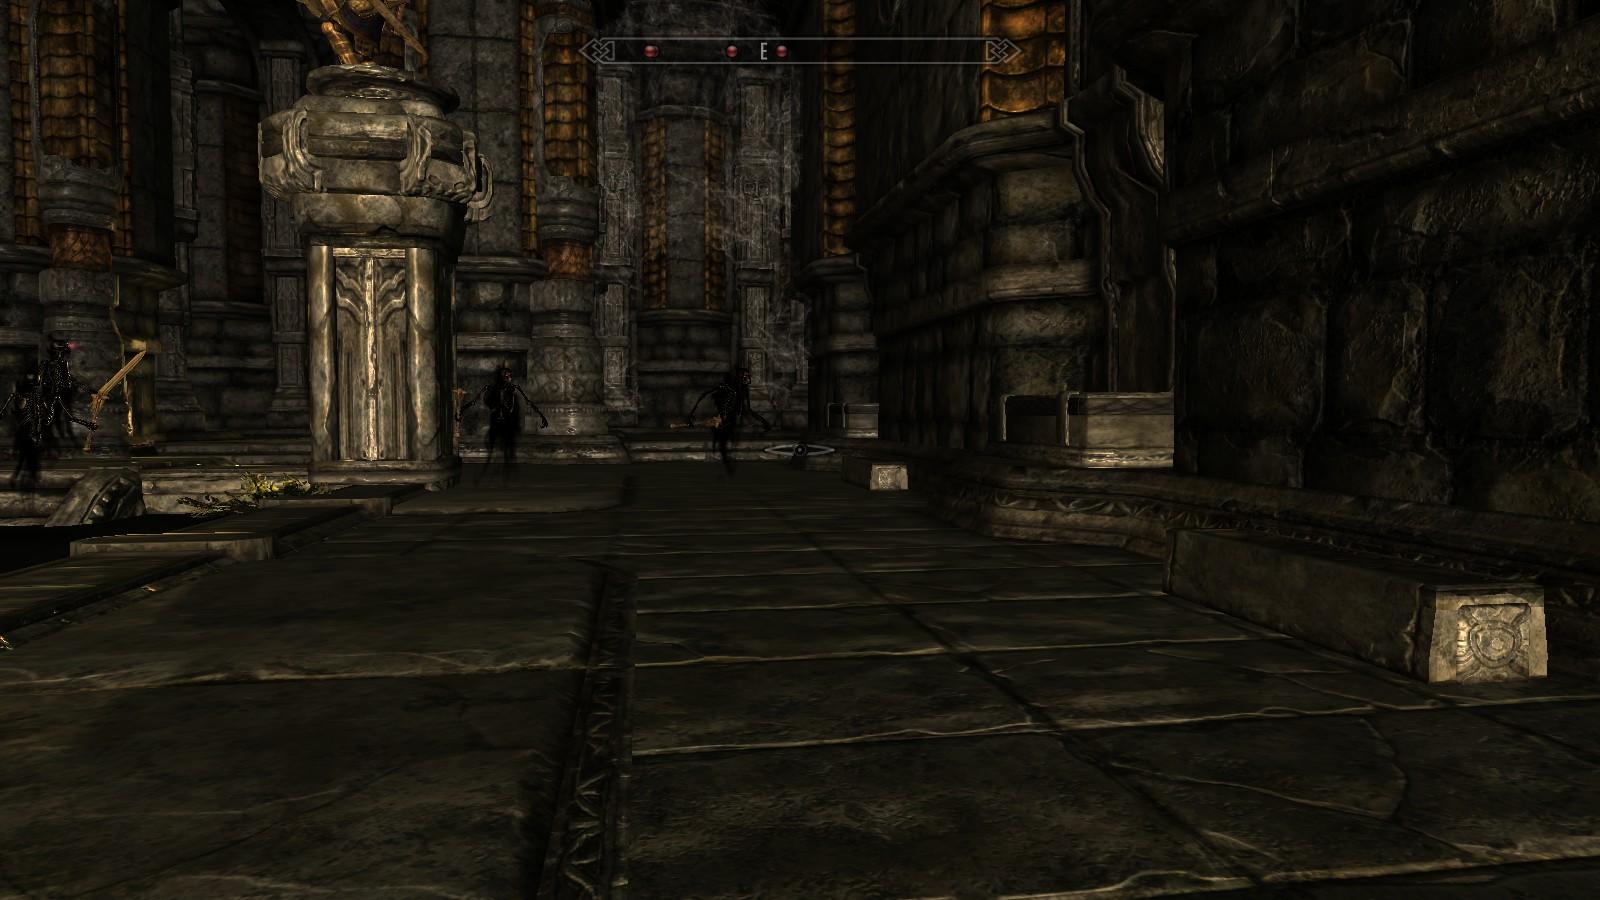
Normal weapons don’t faze them much; Dwarven, Elven, or higher grade metals do. Same with Bows. “Dawnbringer” (the Daedric sword that does big time damage to the Undead) would be an excellent choice against the Horrors, as well as Fire-based damage. I used a combo of Dawnbringer, a heavily enchanted Fire Bow, and the “Unrelenting Force” shout to take care of the 6(!) Horrors that showed up.
Inside the hallway on the far side of the room, there is… a Burned Man? With a ‘Talk’ option?? Ok… I think he didn’t like me, because he immediately attacked. Most weapons will take care of him – he’s not armored. The hall leads up and around the corner, through another cobwebbed doorway, and up a ramp to a very long hallway.
Grand Staircase Hall
There are some pretty interesting items in this general area… and some enemies.
There are 4 main branches from this room, all on the left: the pictured staircase (1); a small room (2), about halfway down the hall; a sealed gate, blocking a ramp downward (3); and an open gate to a ramp leading upwards (4) at the back of the hallway.
(1) – The Grand Staircase
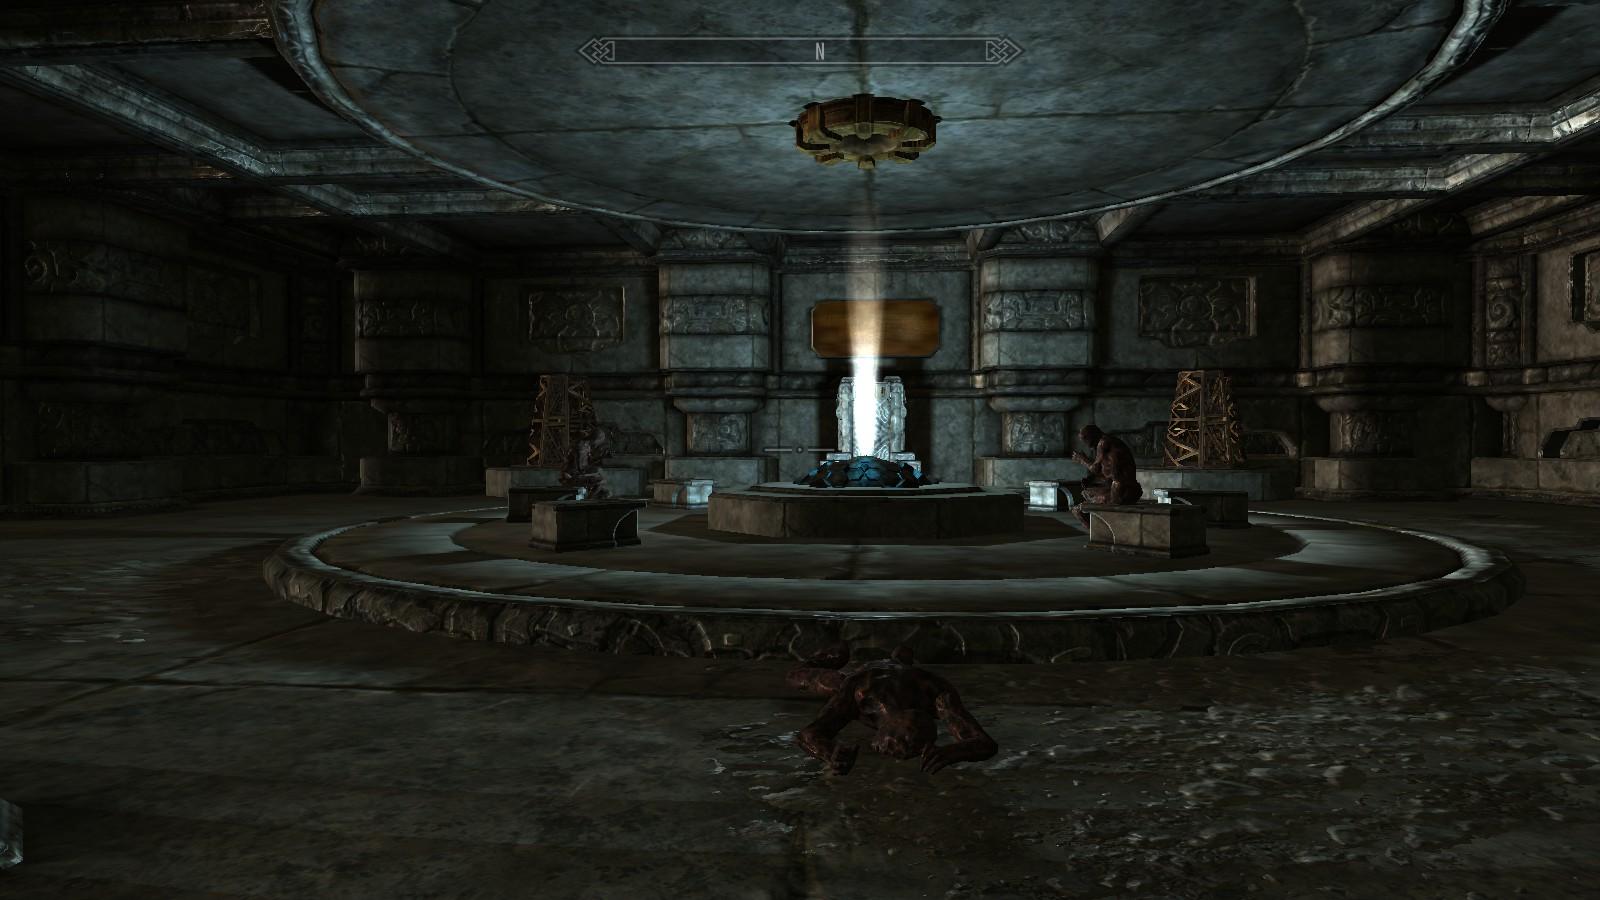
Beware: in front of the staircase are 3 Burned Horrors: charred men and women who are still alive, somehow. These 3 are not armored but at least 1 has a sword and a 2nd might cast Destruction spells at you. Once you dispatch them (or sneak by them), go up the ramp, into a room at the top:
There are Dwarven busts on the left and right walls. In the center, burned figures are sitting around some kind of glowing dome in the floor. I’d advise that you put on the Immaculate Armor before walking near that dome. Behind the dome, near the wall, is a throne… with a very armored, very alive Burned Horror seated on it. It’s not a particularly hard fight. Other than the armor, the Burned Horror doesn’t have anything of interest on him.
(2) – Small Room
There isn’t much of interest in here: there’s a fireplace (with 2 Burned Horrors) on the right wall, sets of tables and chairs in the center of the room, and a room to the left.
Passing through a short hallway, you’ll arrive inside the room to the left, there are more bodies (whatever happened in here, it was bad…). On the opposite wall, across from the doorway, is a Bust; there is a doorway to another room to the right. Take it.
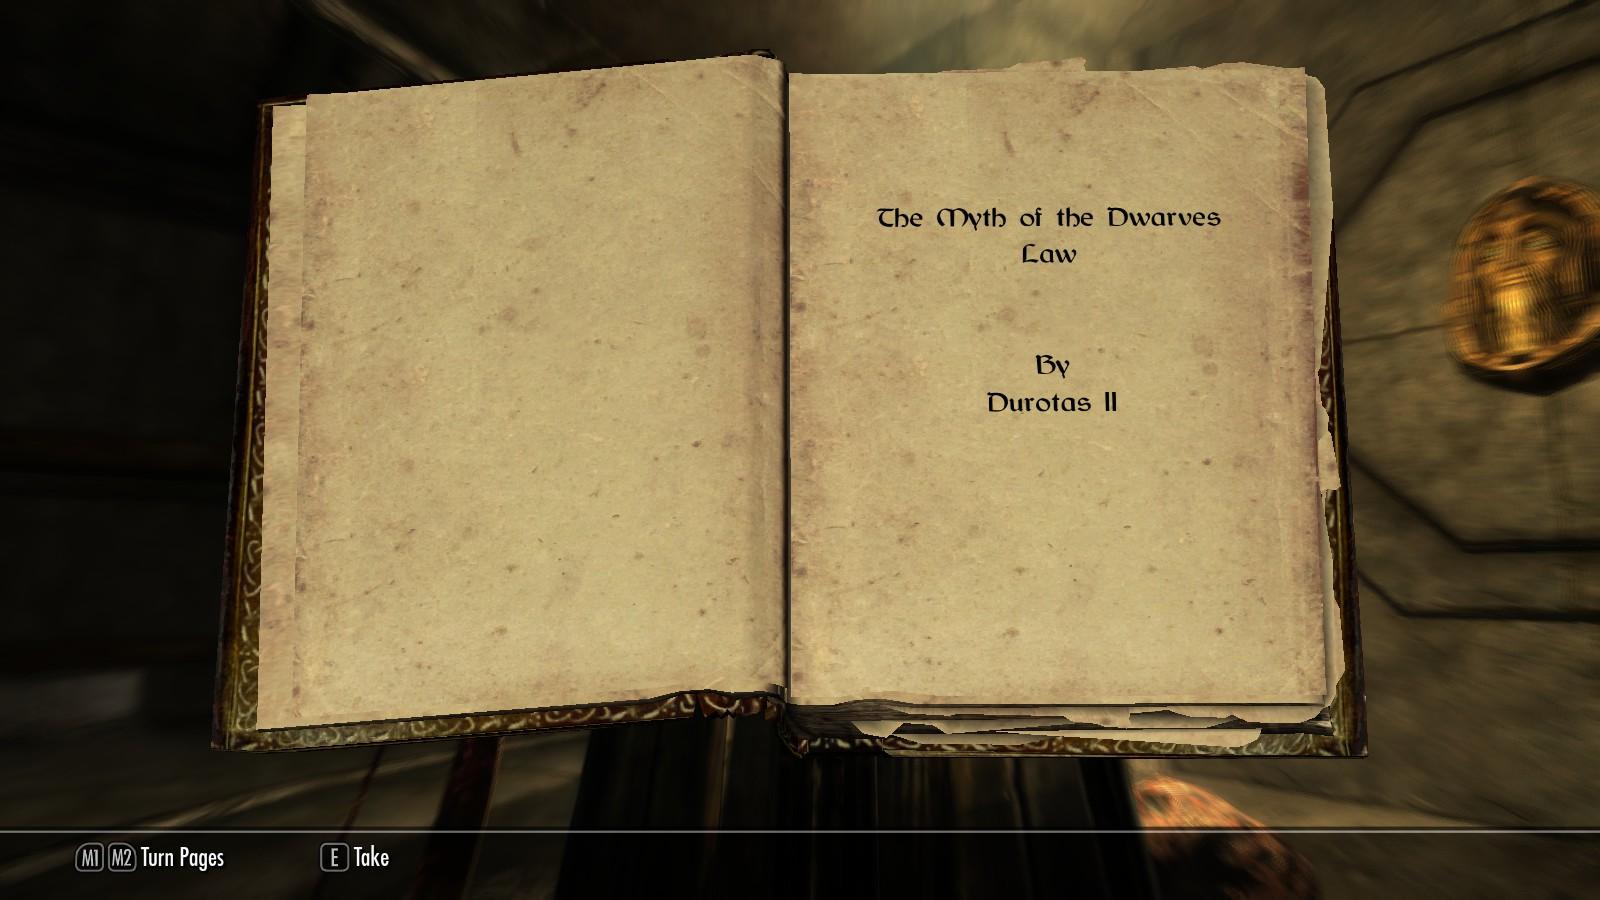
The next room has a doorway to the left and a podium in the center of the room. On the room is this very important book:
Take this book to Brol. The book, written by Durotas II, is a rejection of the Dwarves’ Law. Durotas II sets out to prove that the Law is fictional. He also mentions that there are tombs beneath the Palace – this might explain the locked gates. The results of Durotas II’s claims are the remains you see scattered throughout the Palace. Nothing else of interest is in this room.
(3) – Sealed Gate
At the time of this draft, I skipped this gate.
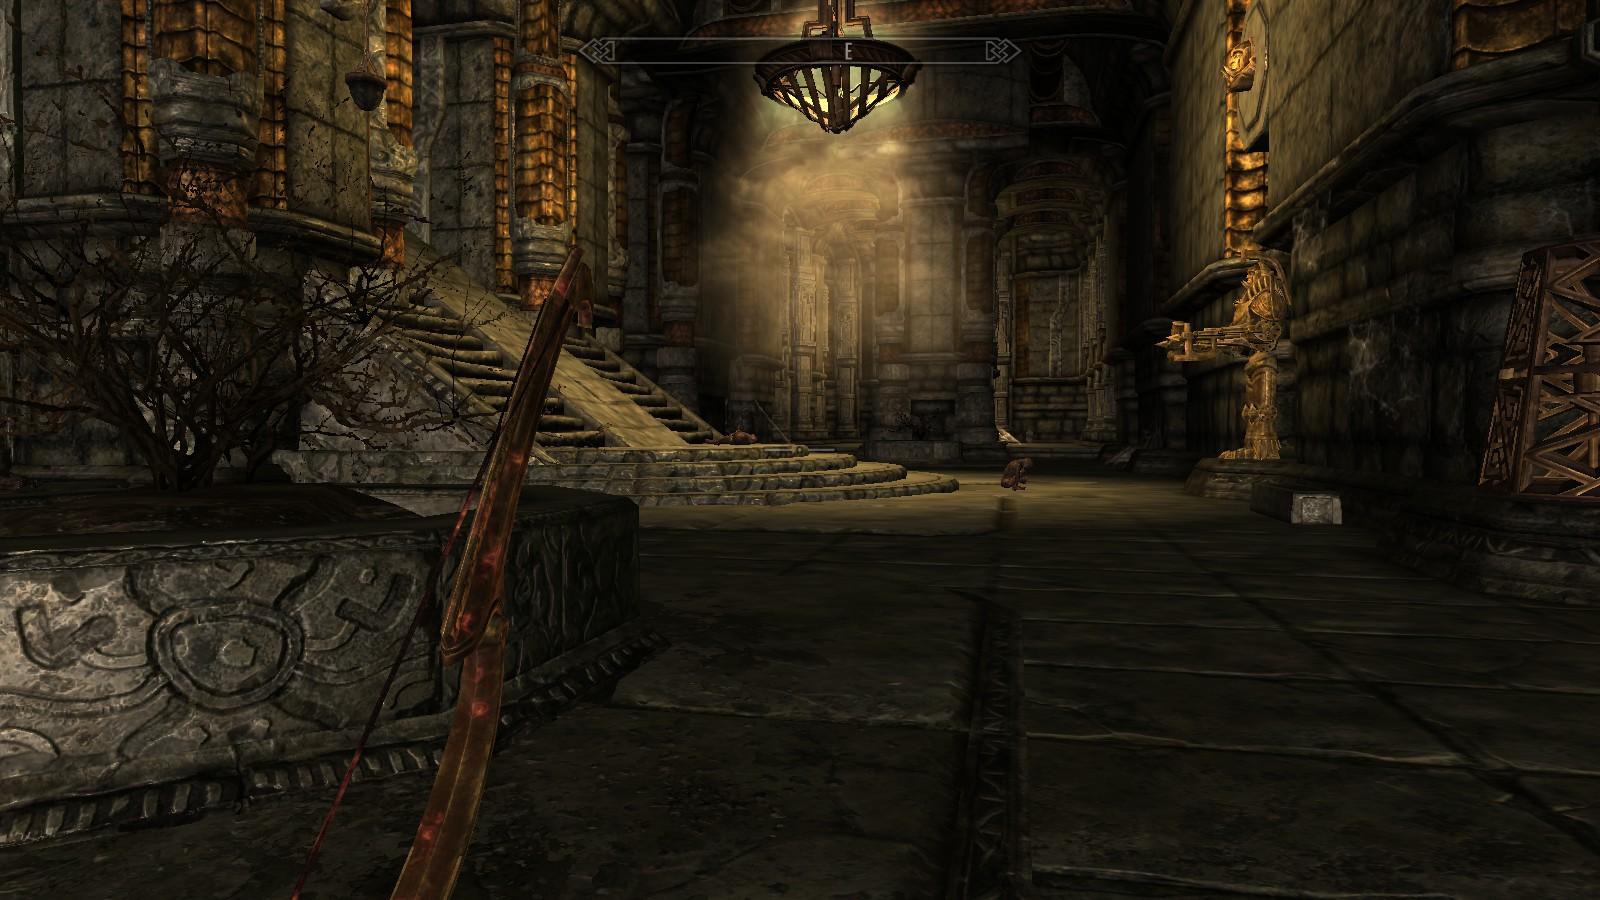
(4) – Ramp Leading Up
This long ramp leads up to a large hallway. On the left are two small alcoves, with locked display cases on podiums (nothing of value in there). At the end of this hallway is a locked gate. On the right are two openings into a large plaza/room. Each of these openings are mostly barricaded with tables, chairs, and… enormous ballistas. Did some kind of battle take place in here?
Nevertheless, the only way to go is into that plaza.
Read more : How Gloves Can Get Contaminated In Food Manufacture
There are benches throughout the room. The center of the plaza has tress, crops (leeks, potatoes, cabbages, etc.), and a chest. On the left wall, there is a table with a knapsack, book, and a few other odds and ends. At the far end of the room, there is a short passage that leads to a cross-hallway:
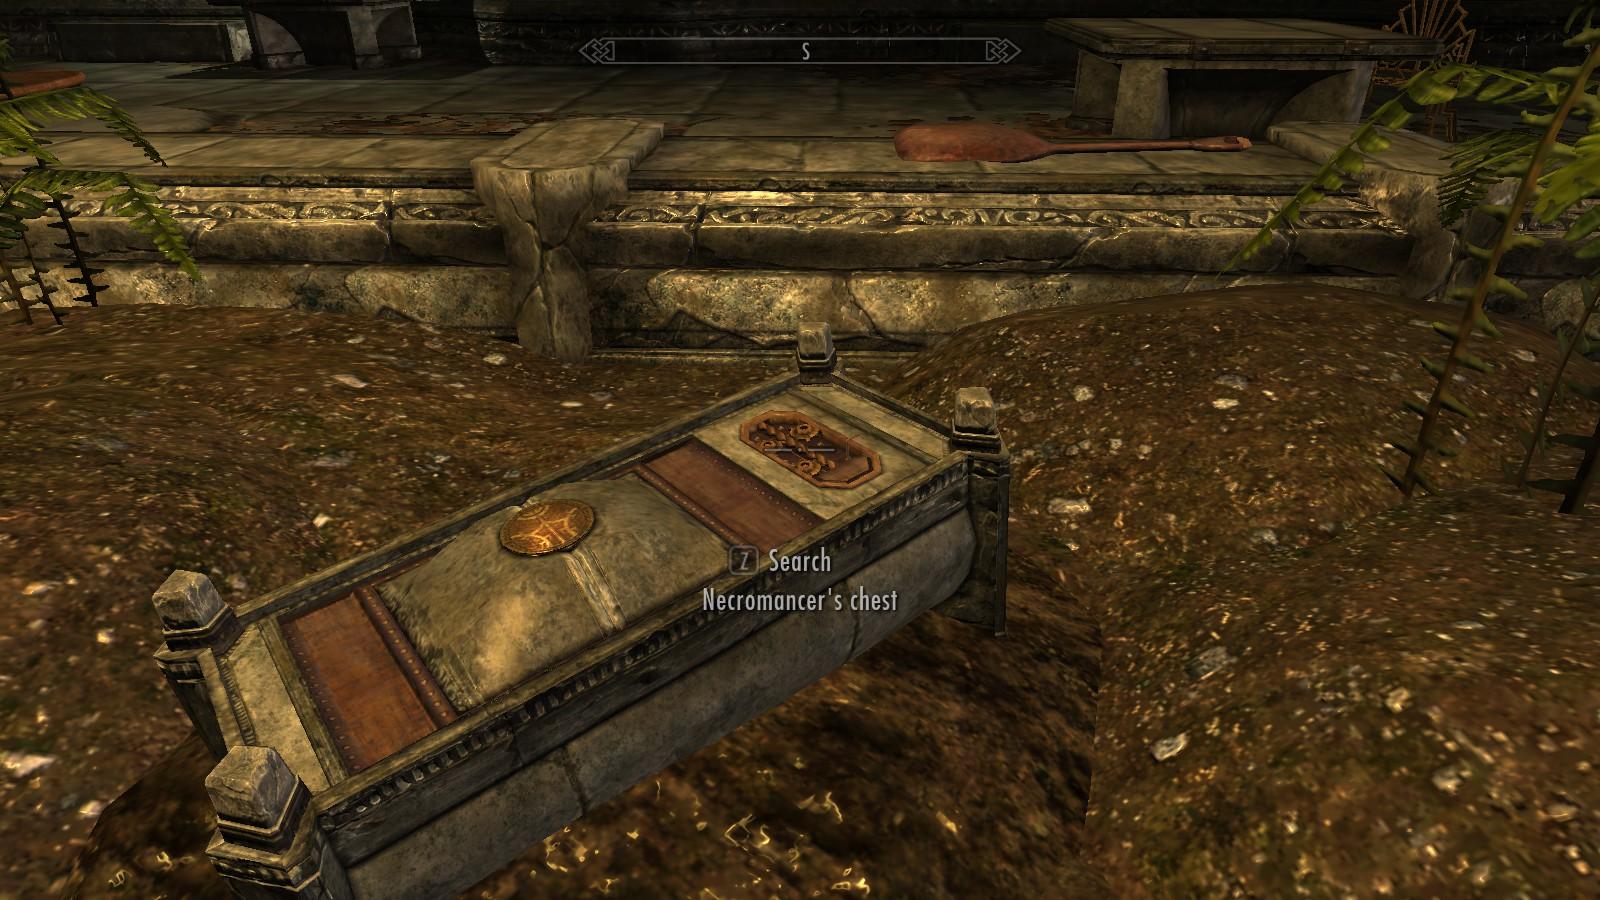
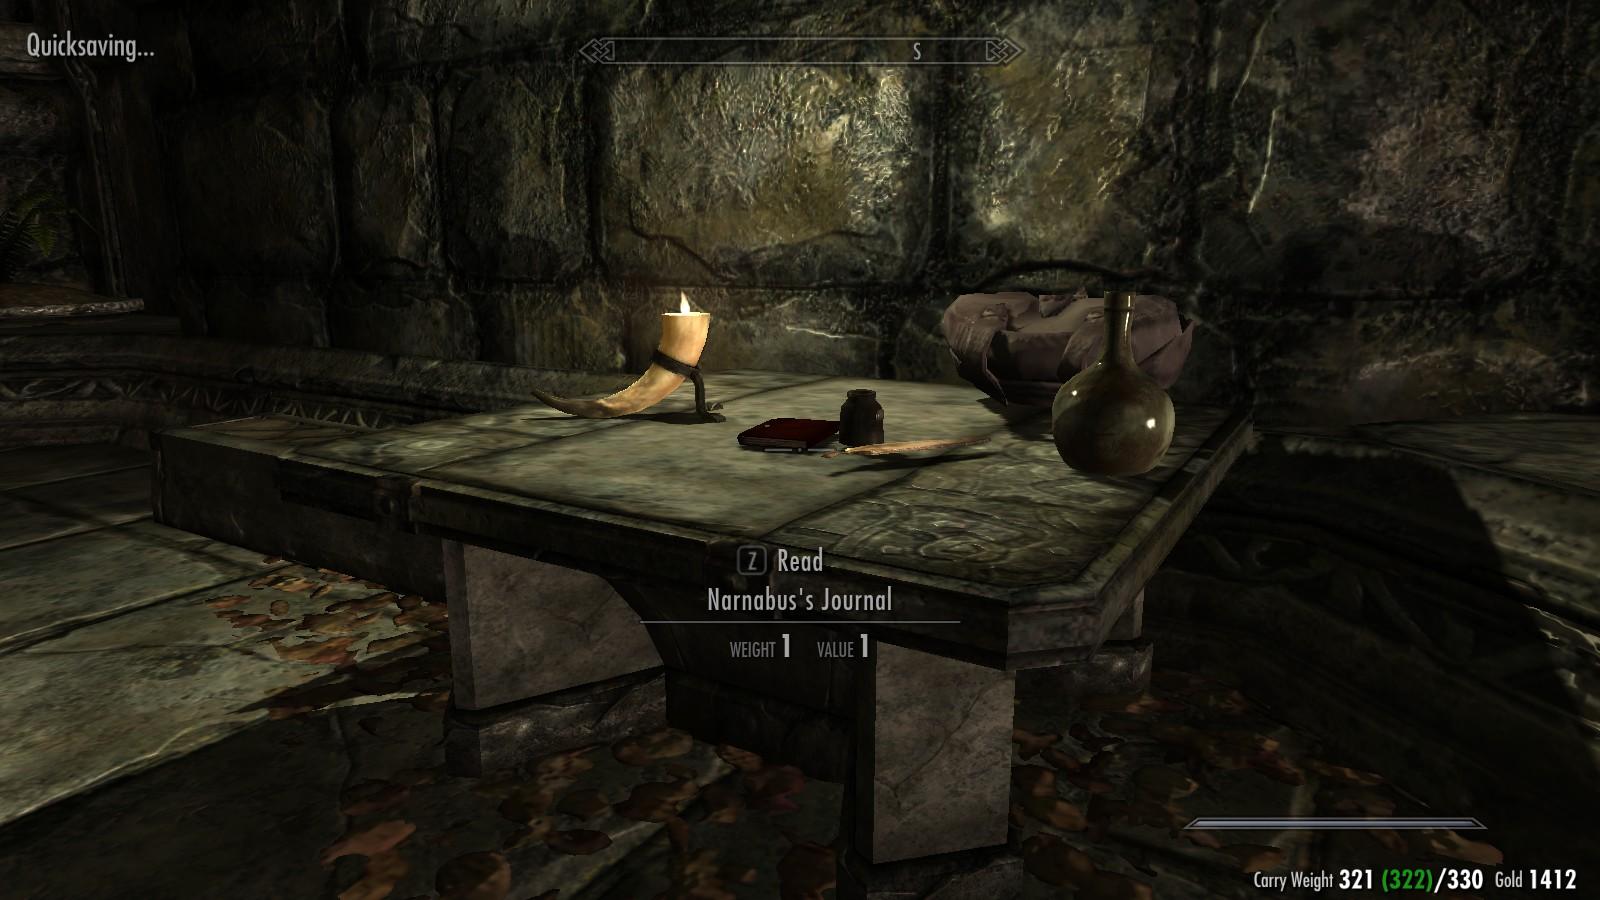
The Chest has a set of robes, a good amount of gold, some gems, and a dagger. The knapsack has various odds and ends. Naranbus’s Journal, in a very nice “Boo!” moment, has this:
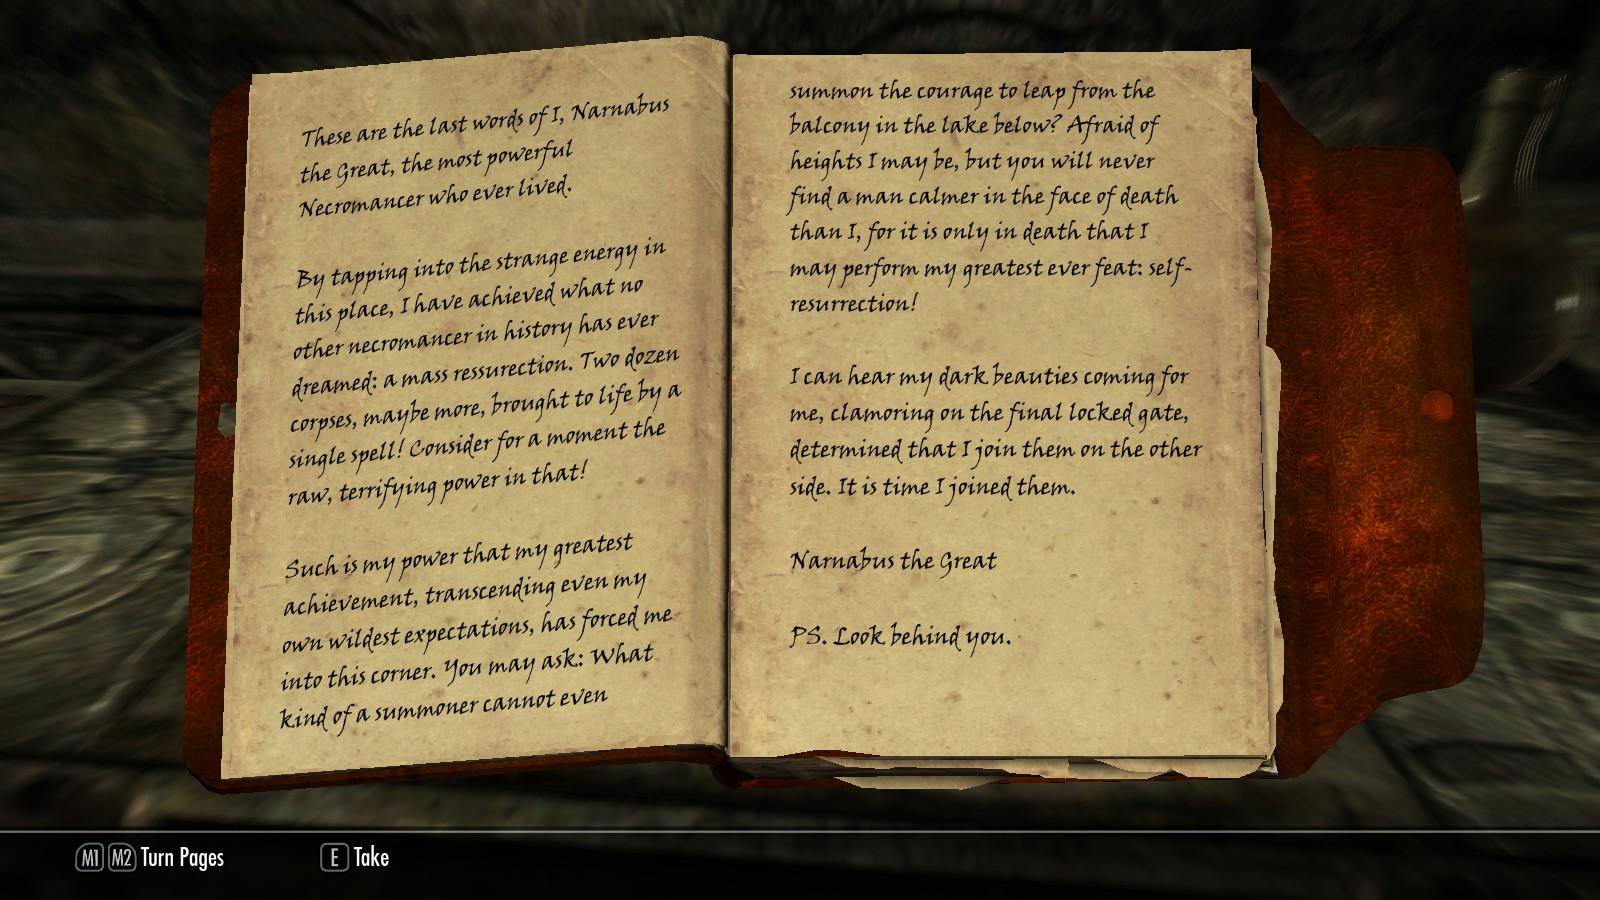
This explains the barricades and the ballistas. Naranbus managed to not only resurrect the dead, but also to turn into some form of Lich!
And he is standing behind you.

Be prepared for a fight. Naranbus has an arsenal of Destruction spells and Drain Life/Drain Stamina spells. If you can knock him away from you with a Shout or stun him briefly, you can turn the fight in your favor. He doesn’t appear to recover quickly from knockbacks or stuns: he typically stands there for up to 10 seconds afterwards. This might just be a PC thing. Take advantage of that time and finish him off. Again, the “Dawnbreaker” is a very useful weapon for this encounter.
Once you finish off Naranbus, head to the cross-passage at the end of the room. On the left end of the passage is a door that leads to a balcony overlooking the Forgotten City. The right end of the passage leads to a locked gate, barring a ramp that leads down to… something.
Other than the locked passages, this is the end of the Palace. I will return to unlock those gates to the tombs in the very near future
Return to Brol
Once you leave the Palace, return to Brol with Durotas II’s book. Tell him that the Dwarves’ Law is real; he’ll respond with mixed emotions (he’s glad that his theory was confirmed but not happy that the Dwarves’ Law exists). He states that Someone or Something must be under the city, judging the city and enforcing the Dwarves’ Law. He wants you to go back to the Tunnels and find out what’s there.
It feels like I’m approaching the “End Game” for the mod. I am going to go back to the Palace first, to unlock those Gates that lead to the Tombs (and probably spending a lot of lockpicks and Save Slots in the process). The bulk of Part VI, however, will be on the Search for this Judge that is pulling the strings for the Dwarves’ Law and the Forgotten City.
Edit:
I went back to the Palace to try to unlock those gates. It turns out that they just lead to rooms and halls that I wrote about above. Disappointing.
However, I did miss one unlocked ramp. Let’s backtrack allll the way to the Water Room (the 1st room you encounter after the Palace entrance):
On the right side wall, there is a ramp leading down. This ramp leads to the Tombs, not the ramps behind the locked Gates!
The Tombs are are a maze of coffins, stacked 3-or-4 high or just laying on a waterlogged floor. The coffins might have some minor loot and gold in them. There are also Charred Horrors (6-8) and Burned Horrors (at least 1) throughout, so stay sharp:
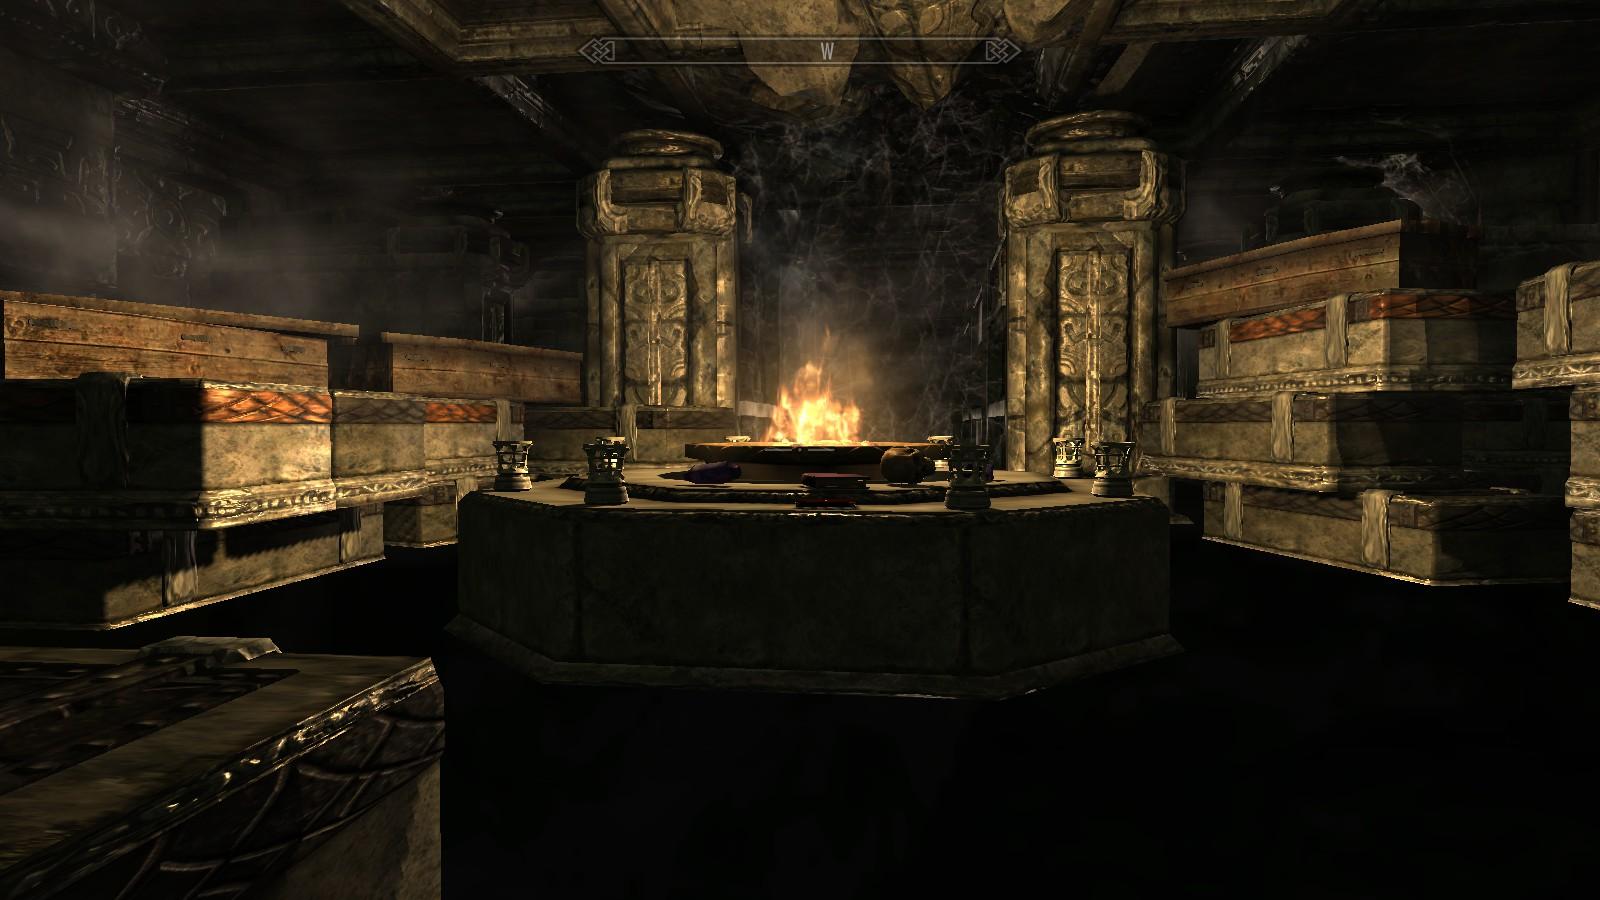
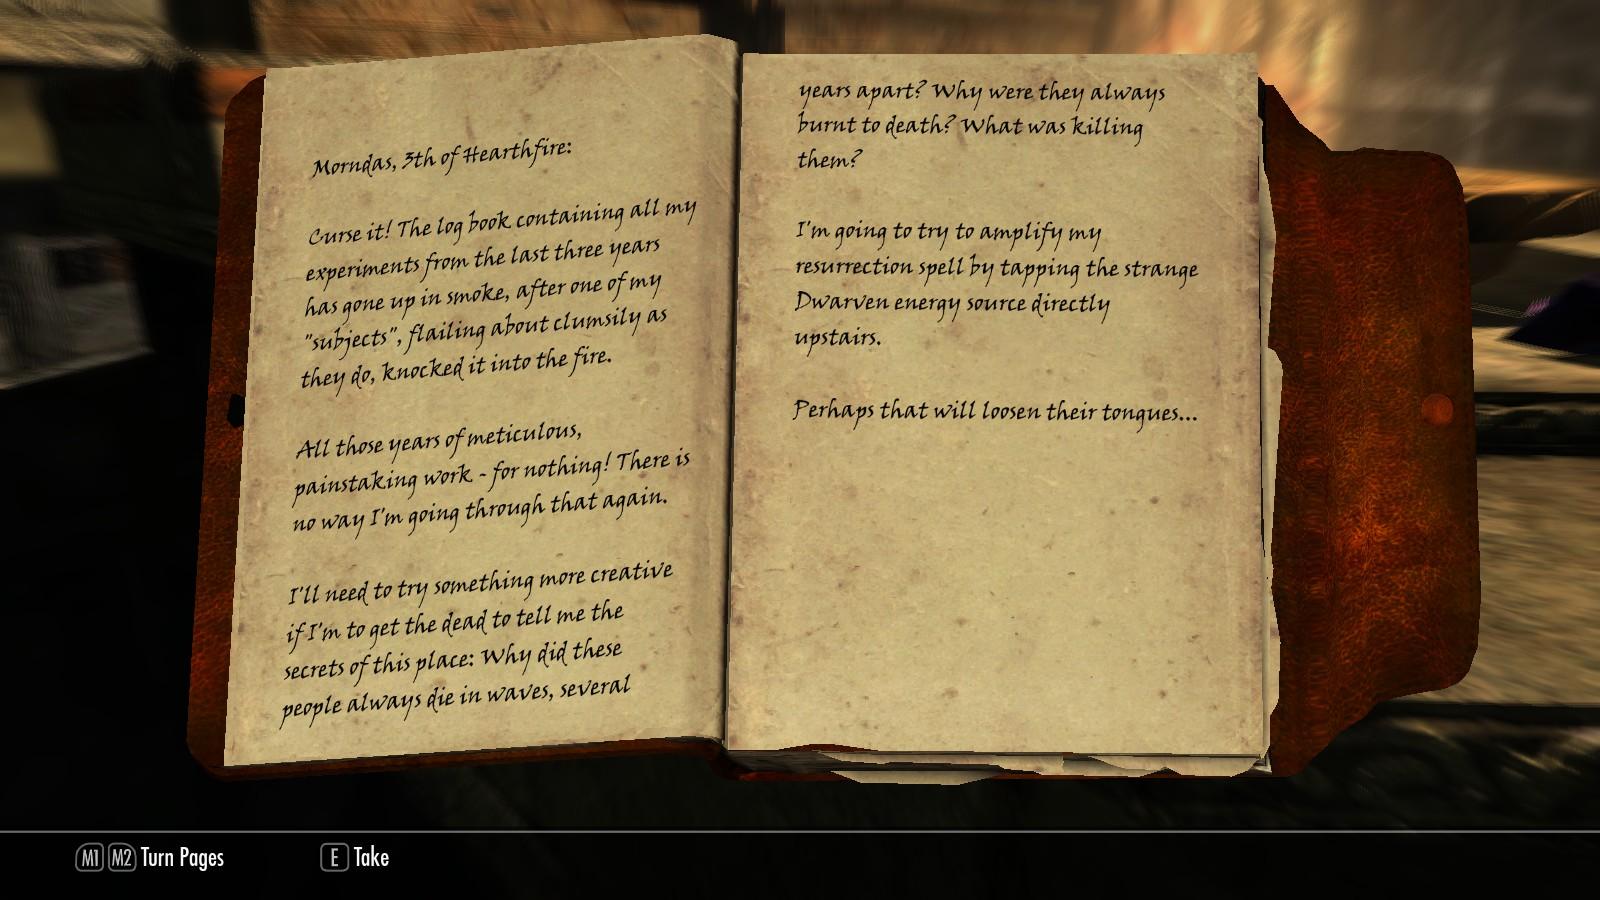
After a winding trip, you’ll come to the center of the maze (the above pic). There is a Black Soul gem on this platform, plus a Journal, and other small items. The journal is similar to the Naranbus Journal – it might be a “prequel” journal:
You can also take this journal to Brol, especially if you don’t have the first journal. Work your way back to the ground floor of the Palace and head off to parts unknown.
Source: https://t-tees.com
Category: HOW