

Crochet Ribbed Cuff
These instructions are for making the ribbing first and then sewing onto the sleeve afterwards. There are methods where you attach the ribbing directly to the garment as you make it, but in this instance, because the sleeve is considerably wider and I wanted the cuff to be a specific fit around my wrist, I chose to make the ribbing independently.The ribbing is created sideways, i.e. worked perpendicular with the edge of the sleeve, with slip stitch rows, where each stitch is made in the back loop of the slip stitch from the previous row.You can make the ribbed cuff as wide as you like, in this case my cuff is 8cm with 22 sts.
The sweater I have made the ribbed cuff for is the Claremont Sweater. You can find the pattern for the motif and join here : Claremont Granny Square with Join
You are viewing: How To Attach Glove To Cuff Crochet
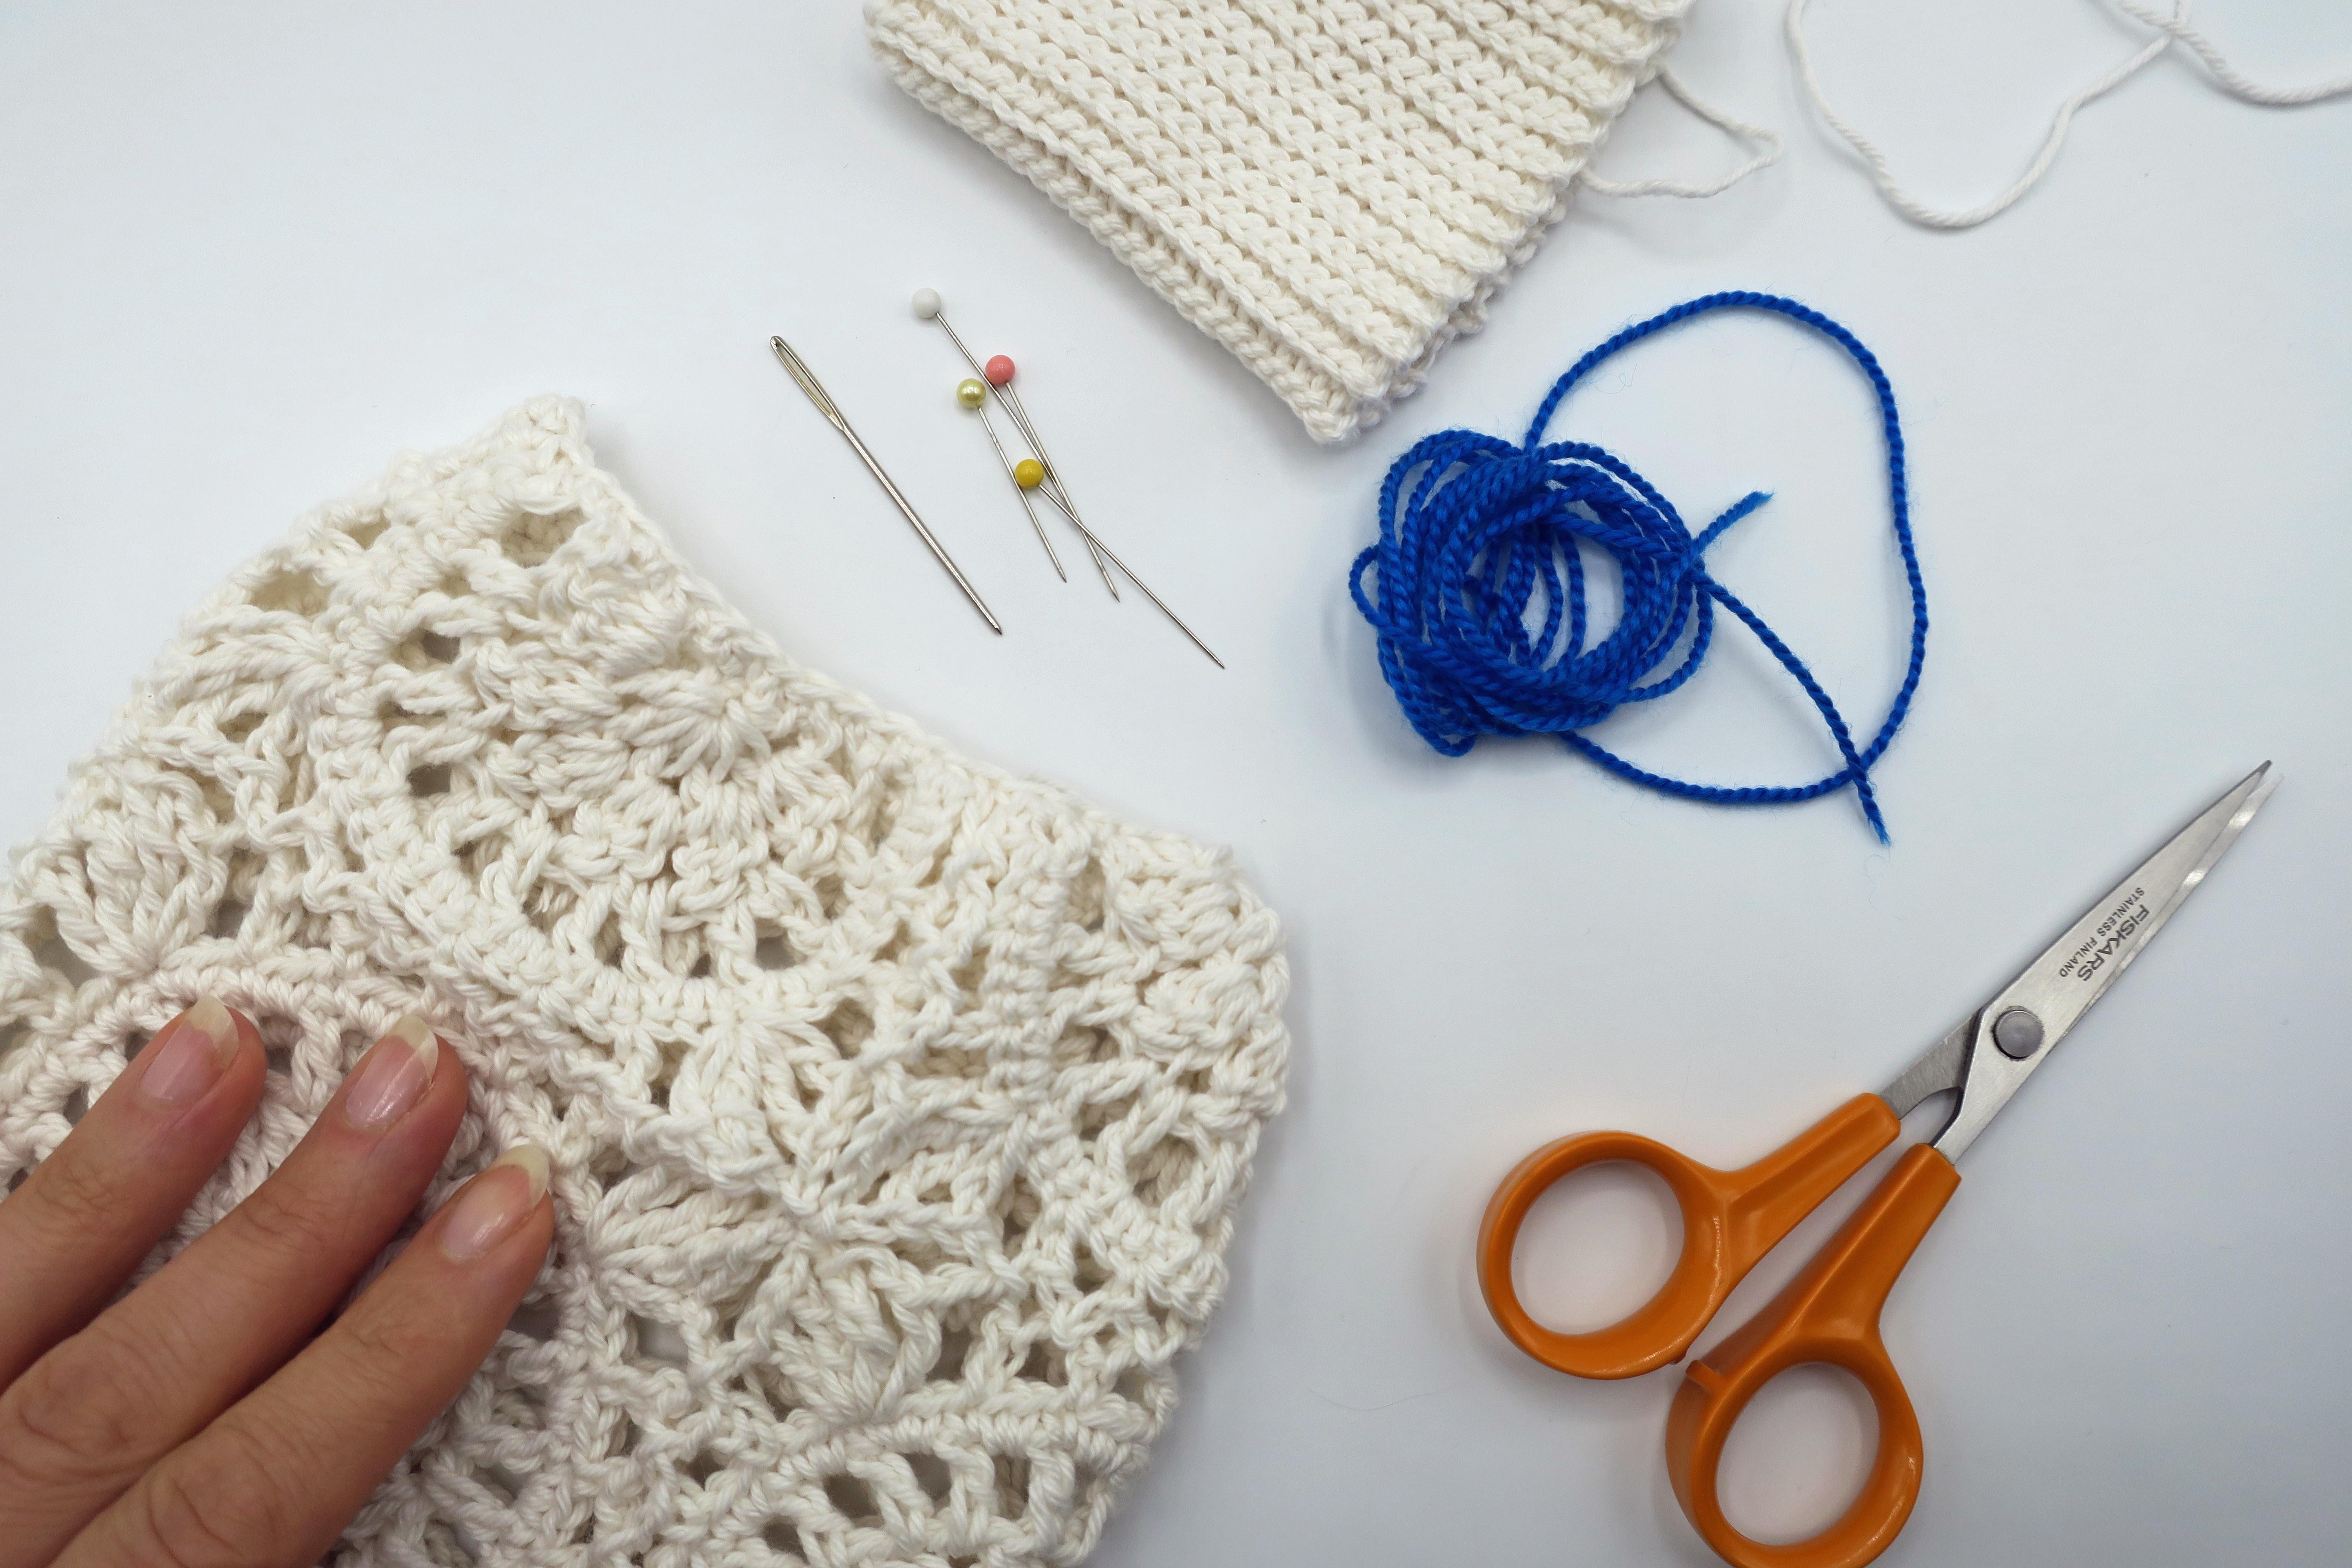
Tools & Materials
You can use any yarn weight and corresponding hook size but for these instructions, I am using a Light DK / Sport weight yarn in one colour (Paintbox DK in Champagne White) with a 4mm / G hook – this is the same size hook that I crocheted the rest of the Claremont Sweater with.
Crochet a Stretchy Rib Cuff Instructions
Scroll down for video tutorial and downloadable pdf version of the instructions.
Starting chain : Leaving a long tail (for seaming the edges of the cuff together later), start with a slip knot loop on your hook and chain the required number of stitches and add 1 chain as a turning chain – I chained 23 for 22 stitches.
Row 1 : sk the 1st ch, work 1 sl st into the back loop of each chain (see fig.1).
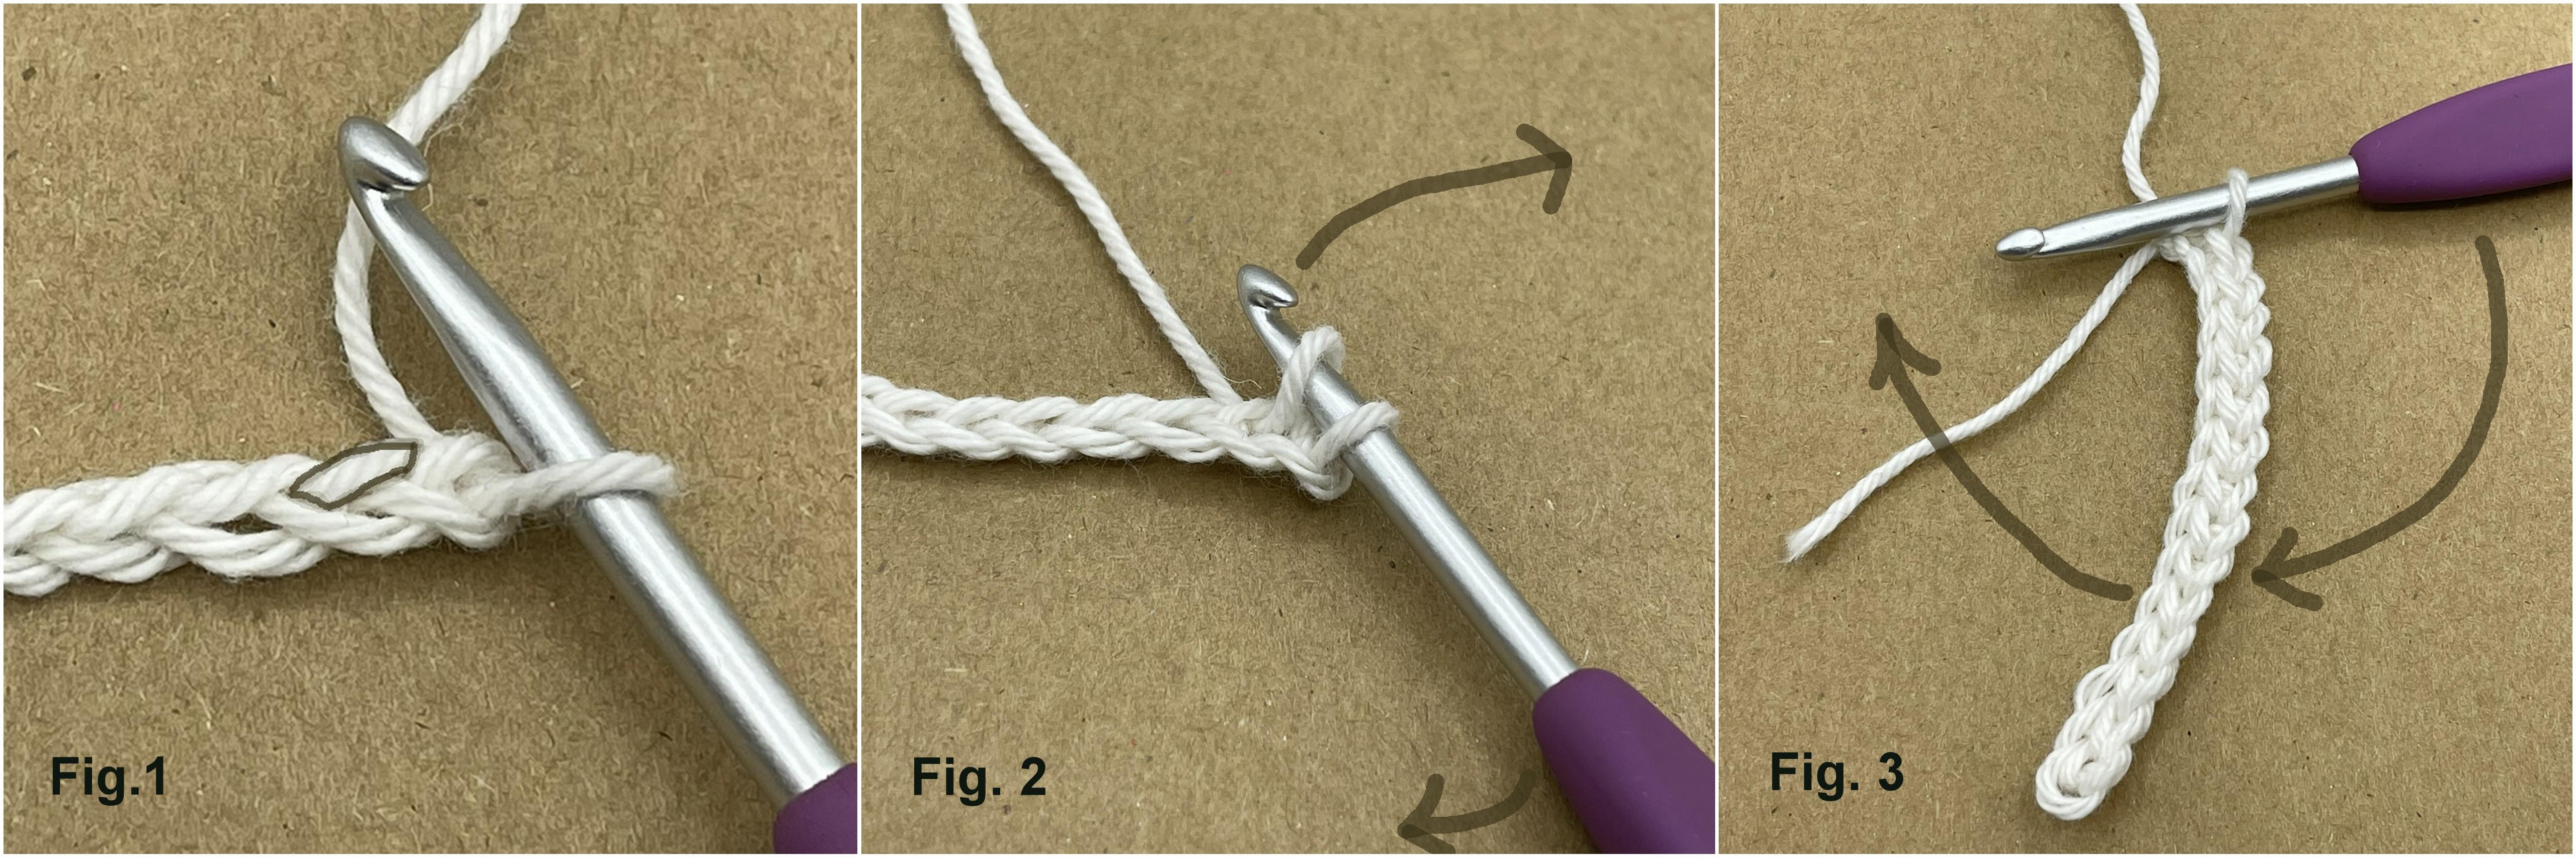
Row 2 : ch1 (see fig.4), do not sk any sts, sl st into the back loop of each st, bearing in mind you may need to tilt the back of the fabric towards you to see the back loop as this stitch sits very flat to the fabric and therefore the loops are only visible when you tip the top edge of the work towards you (see fig.5). Take care not to miss the last stitch (see fig.6)! This can often be smaller and is sometimes accidentally missed. If you are unsure whether you need to crochet into what’s left of the row, count the stitches you have already made! Remember to crochet loosely by opening up the loop you create when you pull it put through the stitch.

Repeat Row 2 as many times as needed.
Finish with an even row. Fasten off leaving a nice long tail – you’ll use this to sew the cuff to the sweater sleeve.
Read more : How Are Mma Gloves Made
Keep Going!
This stitch may require a new bit of muscle memory for you so don’t be disheartened if the first few rows seem difficult – keep going, keep the stitches relaxed, keep the pulled-up loop nice and open… after a while it will start to come easily and you’ll be able to work the stitch much more quickly and neatly.
You need to make at least 12 rows before you can experience the stretch effect of this slip stitch ribbing.
For my Claremont Sweater, I have crocheted 60 rows of sl st, giving me an 18cm strip of ribbing.
Seam the Cuff
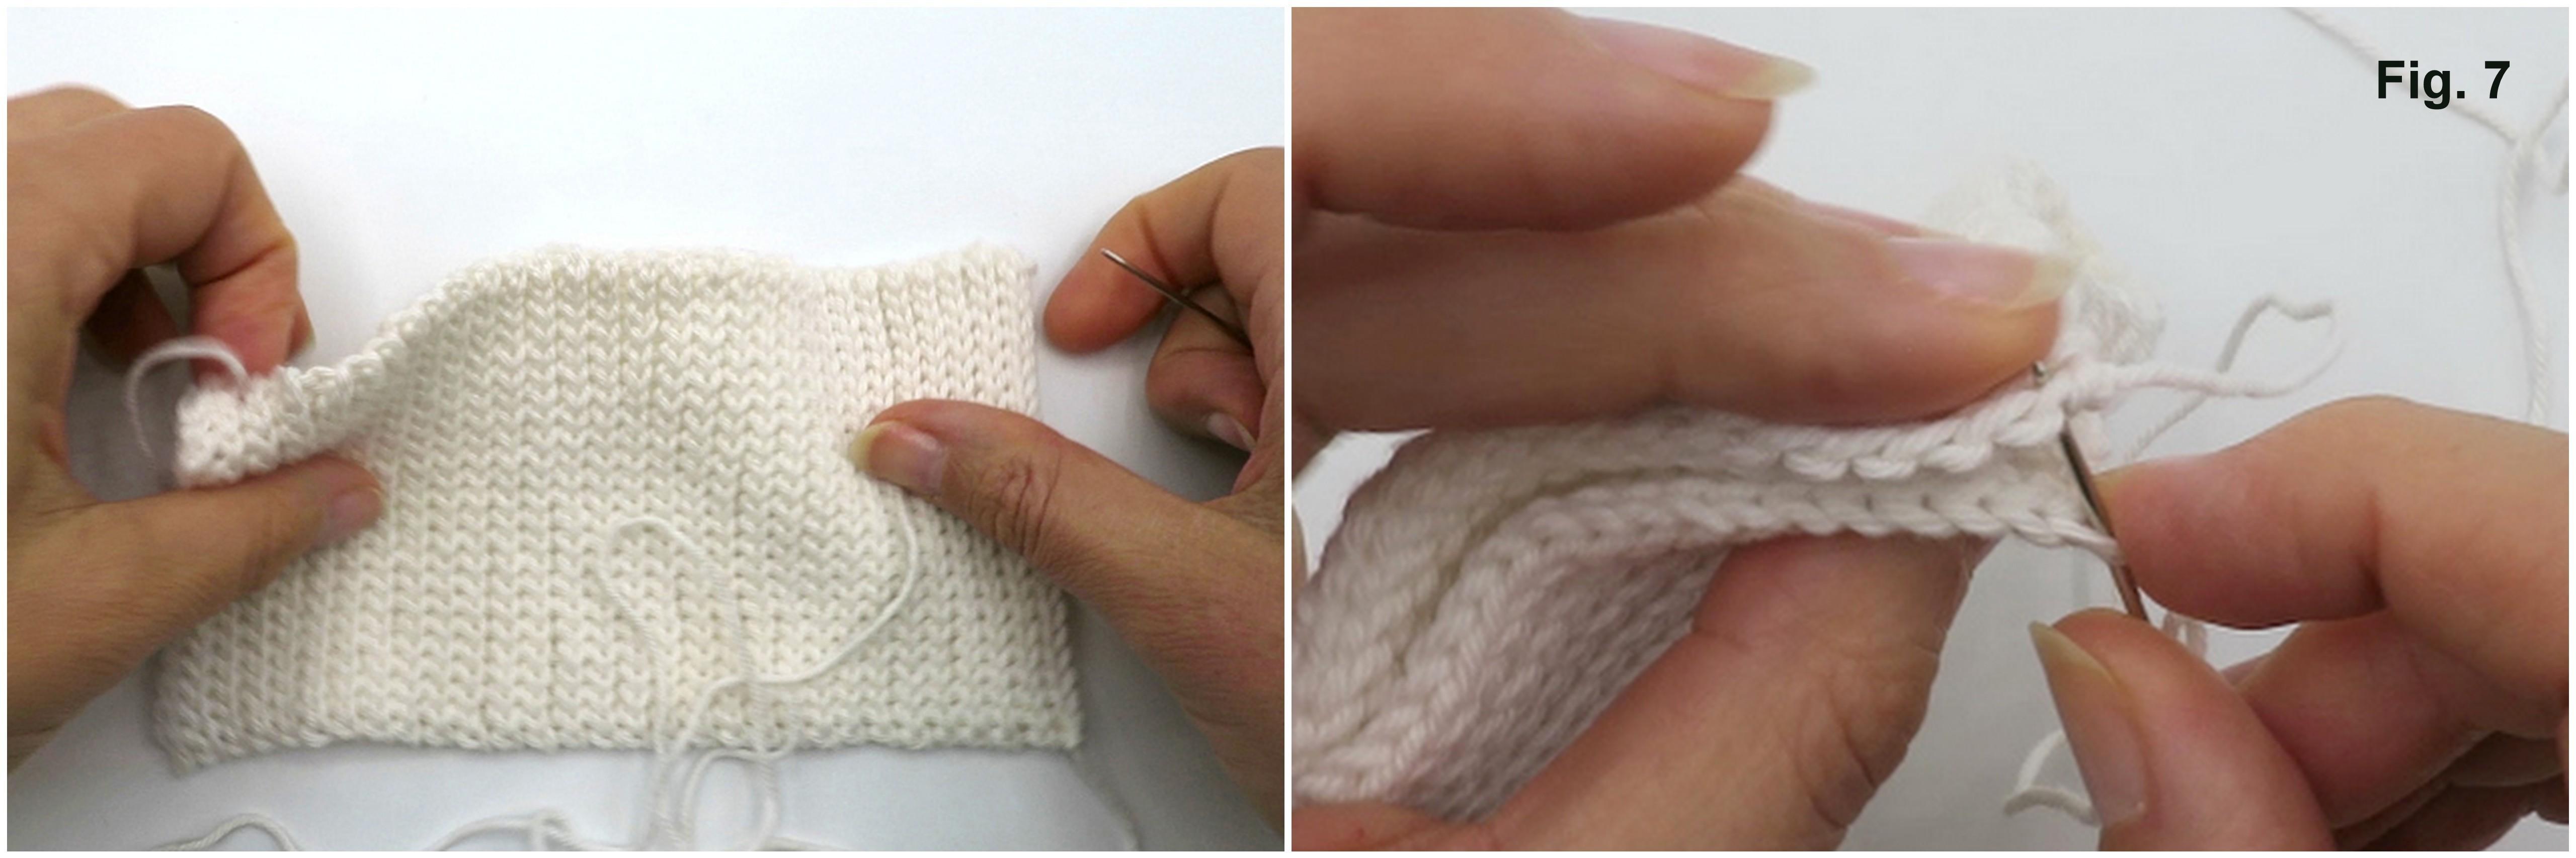
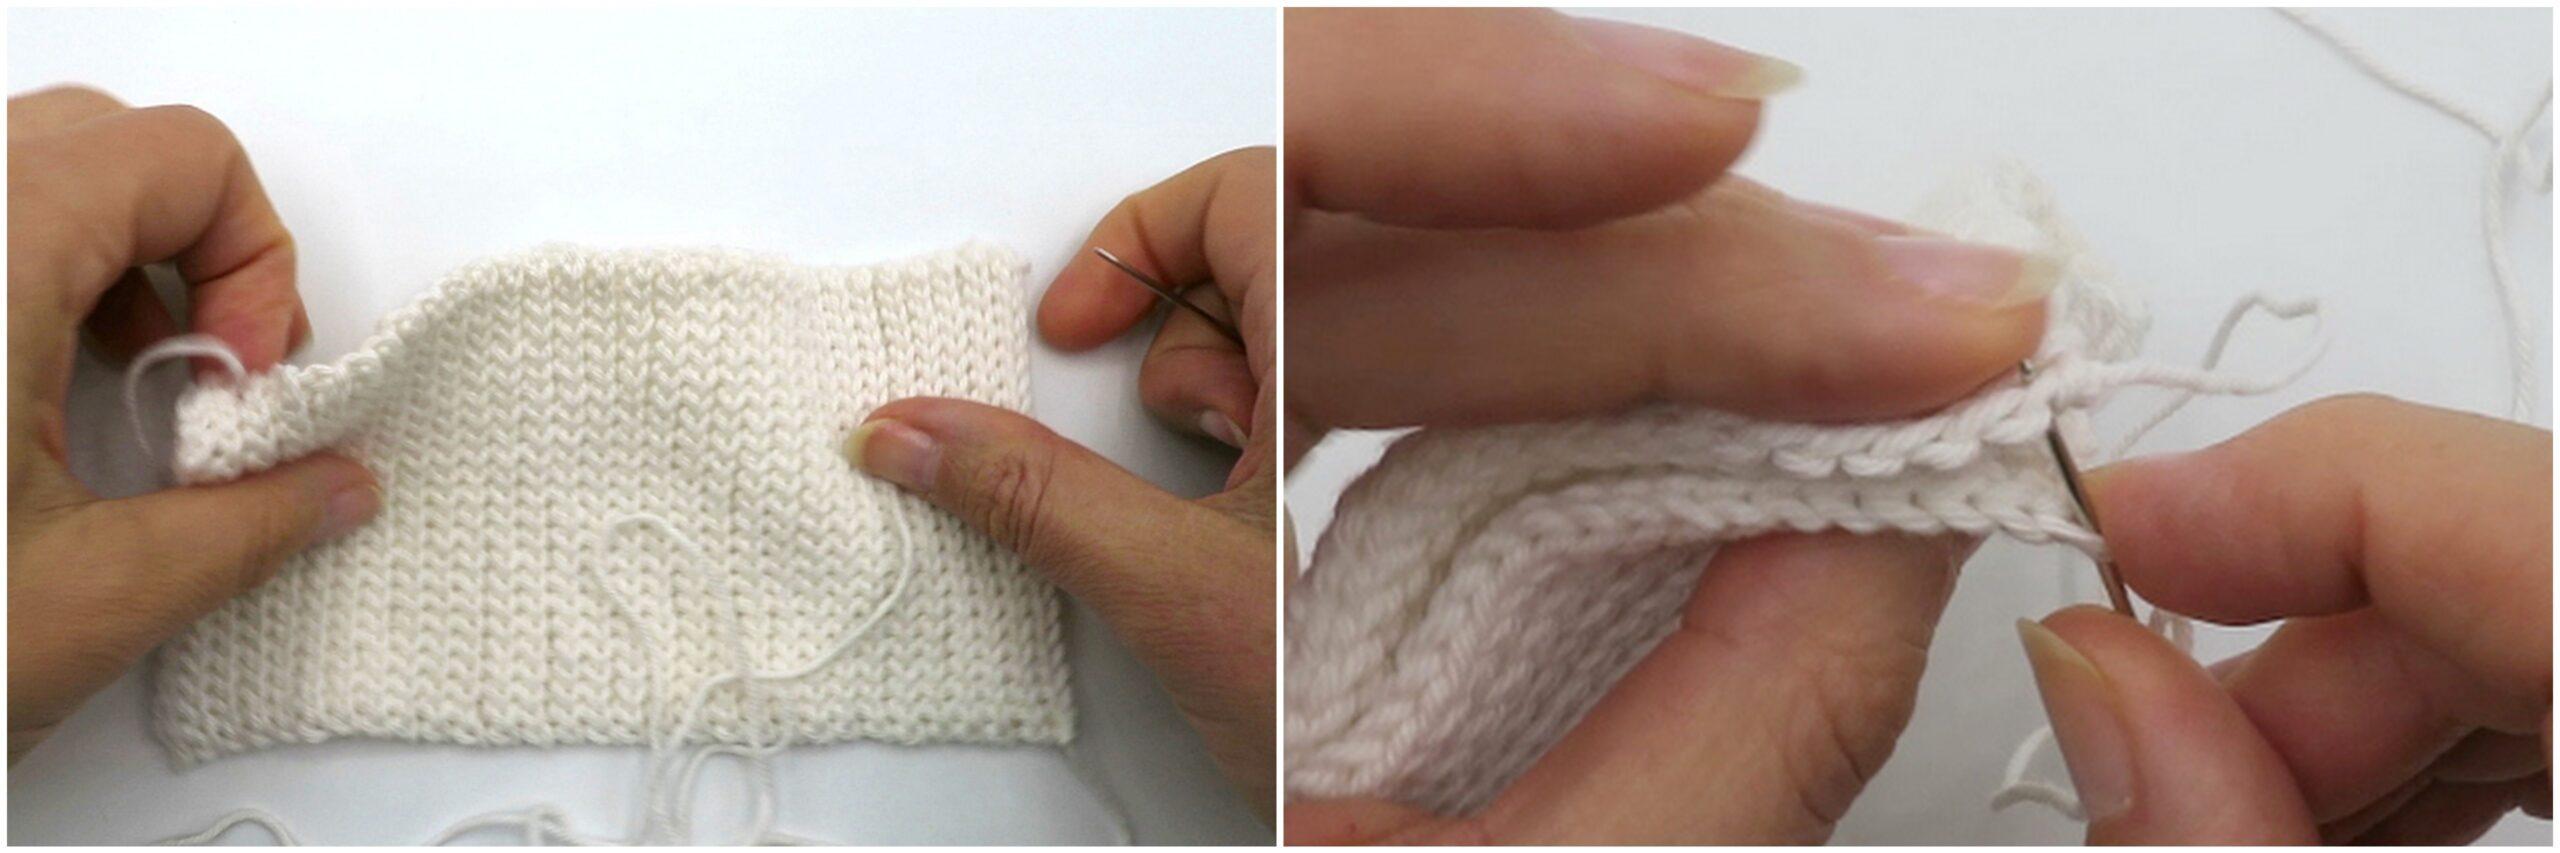
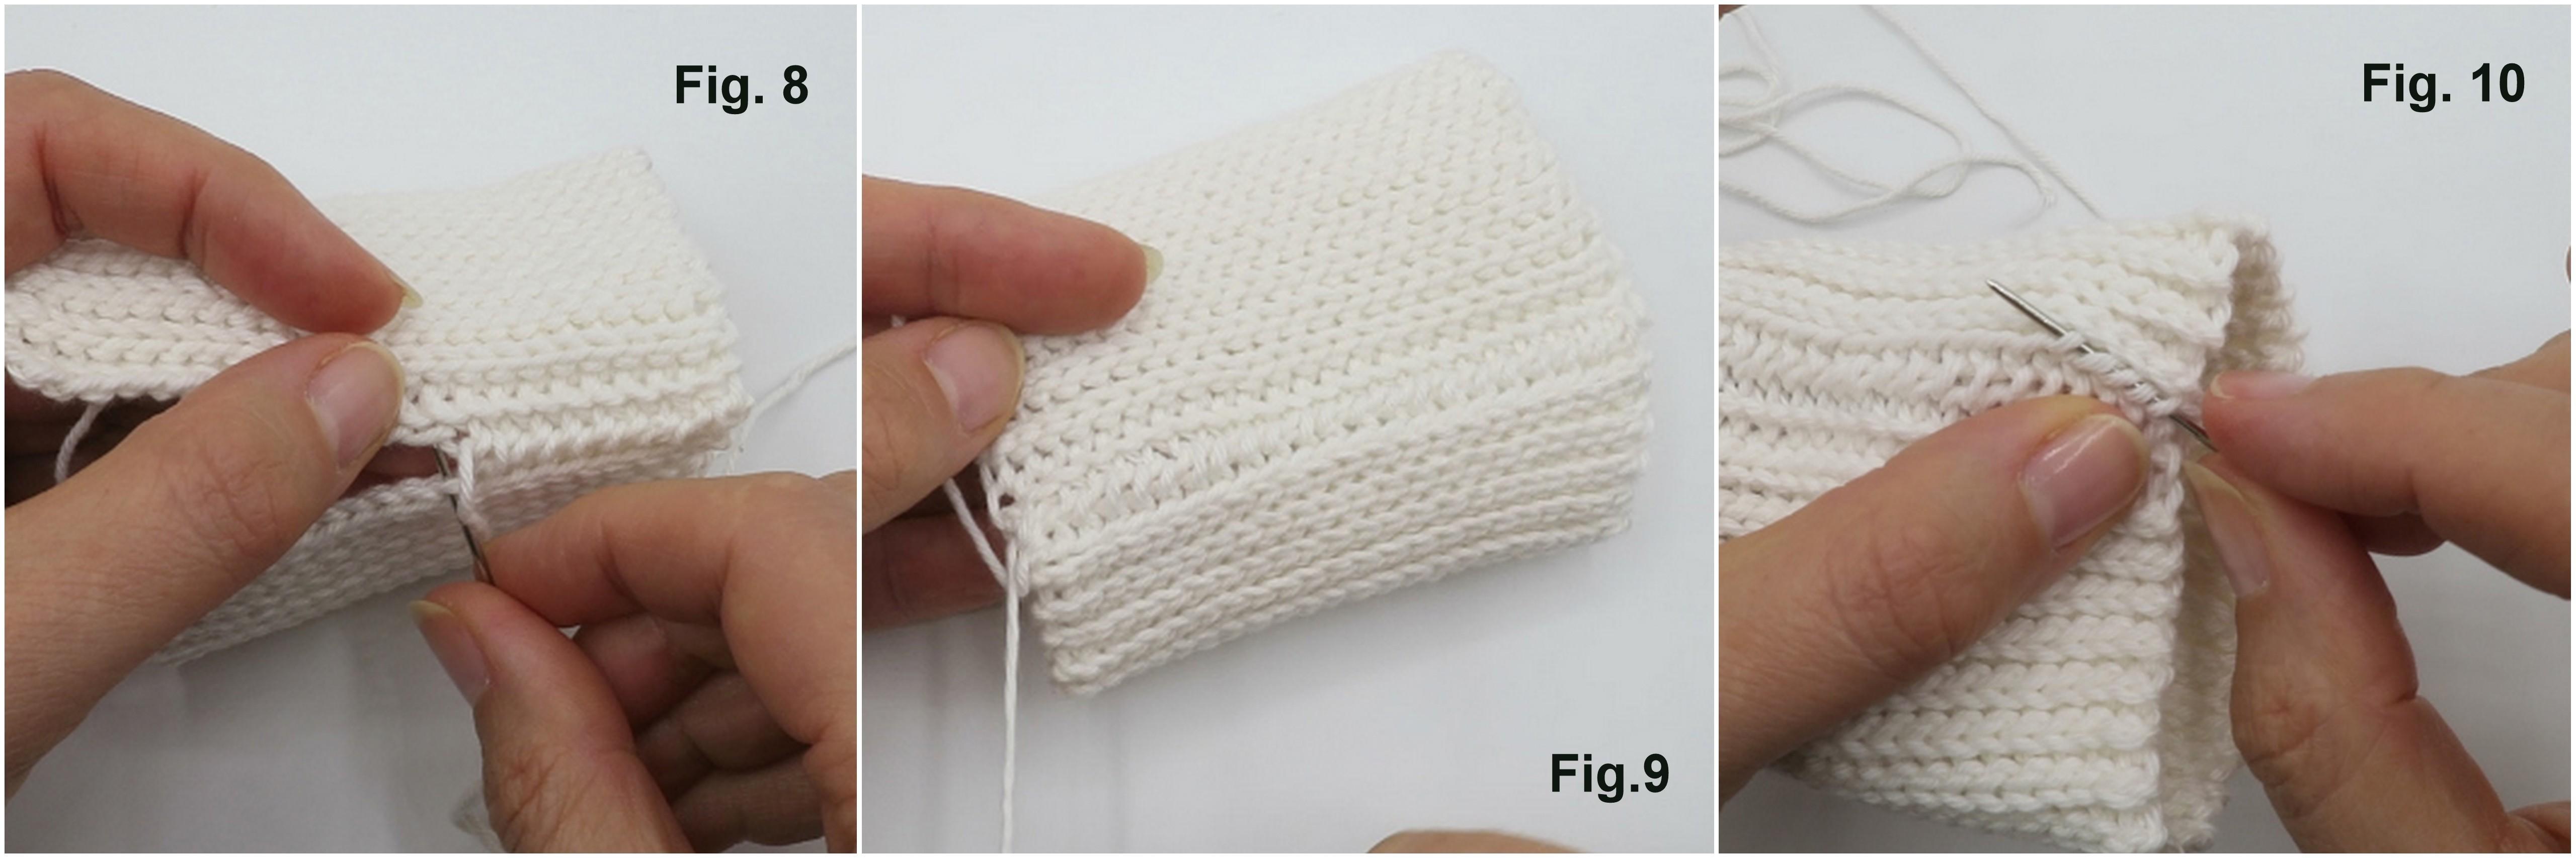
Using the tail you left at the start (see fig.7), seam the edges of the cuff with a whip stitch through the back loops only of the starting ch and last row made – work front to back, matching stitch for stitch (see fig.8). Sew a double stitch for the first and last whip stitches made for security (see fig.9). Fasten off and weave in the end (see fig.10).


Attaching the Ribbing to the Sweater Sleeve
You will need:
- Wool needle.
- Dressmakers’ pins.
- Scrap yarn for tacking (either 4ply or sewing thread in a different colour to sweater).
- Scissors
Turn the sleeve inside out. Insert the cuff, with right side facing, inside the sleeve. Line up the seam of the cuff with the inside seam of the sleeve. Pin in place (see fig. 11). Locate the middle of the sleeve edge – in this case, as the sleeve is 3 motifs wide, the middle is the starting ring of the 2nd motif. With the cuff folded at the side seam, match up the fold of the cuff with the middle of the sleeve edge and pin in place (see fig. 12).
Gather the Sleeve to Match the Cuff with a Running Stitch
Starting close to one of the pins, attach the tacking thread in the sc border row on the sleeve. Make a double stitch to secure the tacking thread (see fig.13). Make a simple running stitch through the sc border of the sleeve (you’re not attaching the cuff yet, this stitch is ONLY going through the fabric of the sleeve). Stop when you reach the second pin. Carefully pull the tacking thread so that the sleeve fabric gathers (see fig.14). Once you’ve pulled it in enough to match the width of the cuff, make a double stitch to secure the gathers. Massage the gathers to distribute evenly and pin to the cuff (see fig.15).
Now do the same for the other half/side of the sleeve. Cut the tacking thread.
Sew the Cuff to the Sleeve
Read more : How Does Blood Shrink Gloves
Thread the extra long tail from the cuff onto the wool needle. If you’ve ended up the long tail at the wrong end/side of the cuff, simply start with a fresh piece of yarn, ensuring it’s about 5 times as long as the circumference of the cuff and secure near the inside seam of cuff.
Whip stitch the cuff to the sweater – insert the needle through both loops of the sc border on the sweater (same way as you’d insert a hook) and then sew to the part of the ribbing that’s directly adjacent, making sure to catch 2 “strands” of yarn from the ribbed edge (see fig. 16). If you only catch one strand it will not be very secure and can also create holes where the loop you’ve caught on the ribbing pulls open.
Remove pins as you go. Finish with a double stitch. Before securing and tying off, carefully remove all tacking, turn the work inside out and check you are happy with your work before you commit to tying off and sewing in ends (see fig.17).

Crochet a Stretchy Rib Cuff – Download pdf Instructions
Click on the image below – opens in a new window.
Crochet a Stretchy Rib Cuff – Video Tutorial
Best used in conjunction with written instructions!
Did you crochet it?
I hope you like my Claremont Granny Square Pattern – if you give it a try, please let me know!
Connect with me!
You can often find me on Instagram. Please do follow and tag me @mezzamay if you make one of my patterns, use one of my tips or stitch patterns. I really love to see what you’re making.
Newsletter
Why not sign up to my newsletter to receive news about my latest patterns, tutorials and courses!First name or full name.
Affiliate Links
I use affiliate links in my posts usually for Amazon & Lovecrafts. If you click on a link and buy something I may receive a small commission, at no additional cost to you.
Support me!
If you have enjoyed my free content or have found my tips and techniques useful, please consider making a small donation by buying me a coffee via Ko-fi. This helps towards the running costs of my website.
Source: https://t-tees.com
Category: HOW