
Gielinor is never short on monsters and fiends to test yourself against. If you’ve seen it in Mythology, you’re likely to find it in OSRS as well. One such creature is the mighty Hyra. This many-headed monster is just one of many challenges that are awaiting you in the game right now.
You might as well start to prepare for it as soon as possible. While regular Hydras found on the Karuum slayer dungeon are easy, it’s the Alchemical Hydra that poses a serious threat to players. If you aren’t prepared, it’s going to be a tough battle ahead. Let’s talk about the Hydra first.
You are viewing: How To Combine Hydra Leather And Barrows Gloves
What Are Hydras in OSRS?
Hydras are formidable draconic creatures residing in the depths of the Karuulm Slayer Dungeon on Mount Karuulm. To take on this task, you’ll need a Slayer level of 95 or higher.
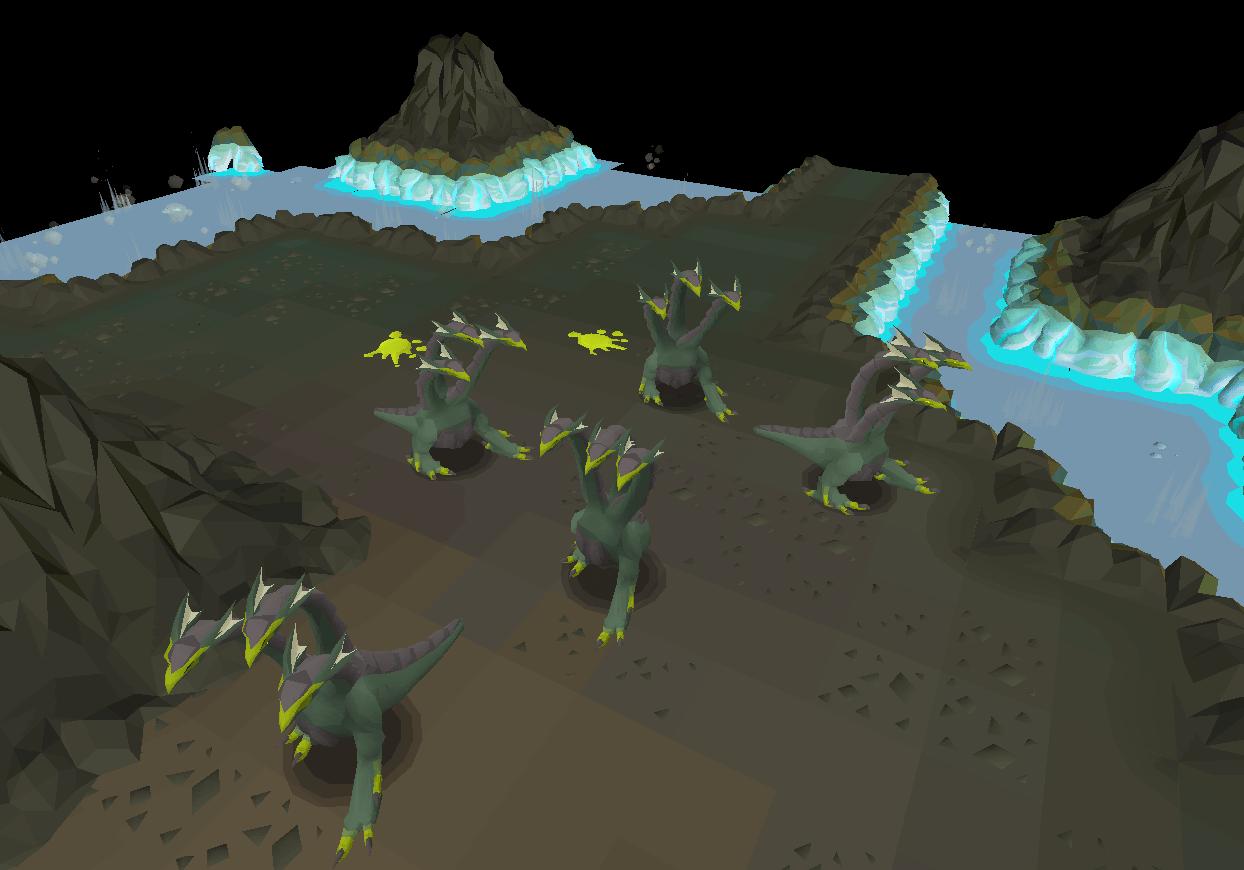
Navigating the dungeon requires caution and preparation. There are two distinct areas within the dungeon that house hydras, but one is reserved for those on a hydra Slayer assignment. As you venture forth, ensure you don boots of stone, boots of brimstone, or granite boots if you haven’t completed the elite Kourend & Kebos Diary. Neglecting this precaution will subject you to rapid damage due to the dungeon floor’s intense heat.
This Slayer challenge also plays a crucial role in completing the elite Kourend & Kebos Diary. While the Alchemical Hydra boss is exclusive to those on a task, standard Hydras on the lower level of Mount Karuulm are not. This flexibility allows you to boost your Slayer level from as low as 90 using a Wild pie or other temporary skill-boosting methods.
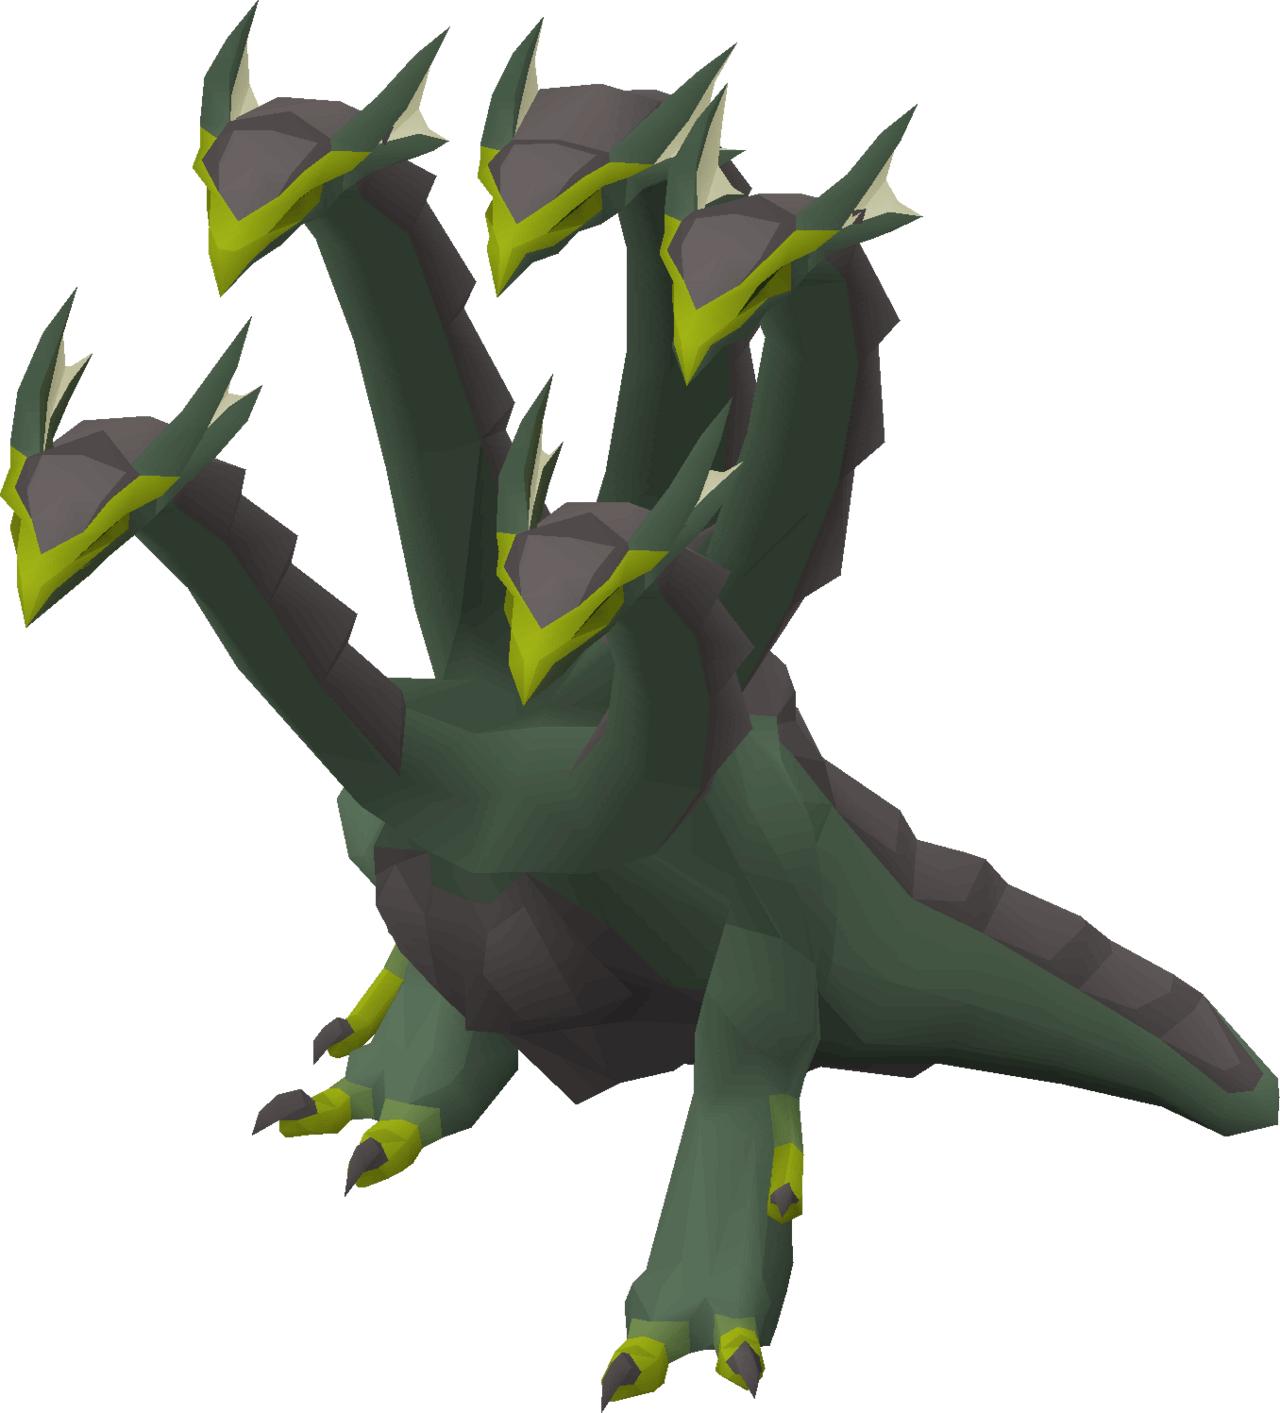
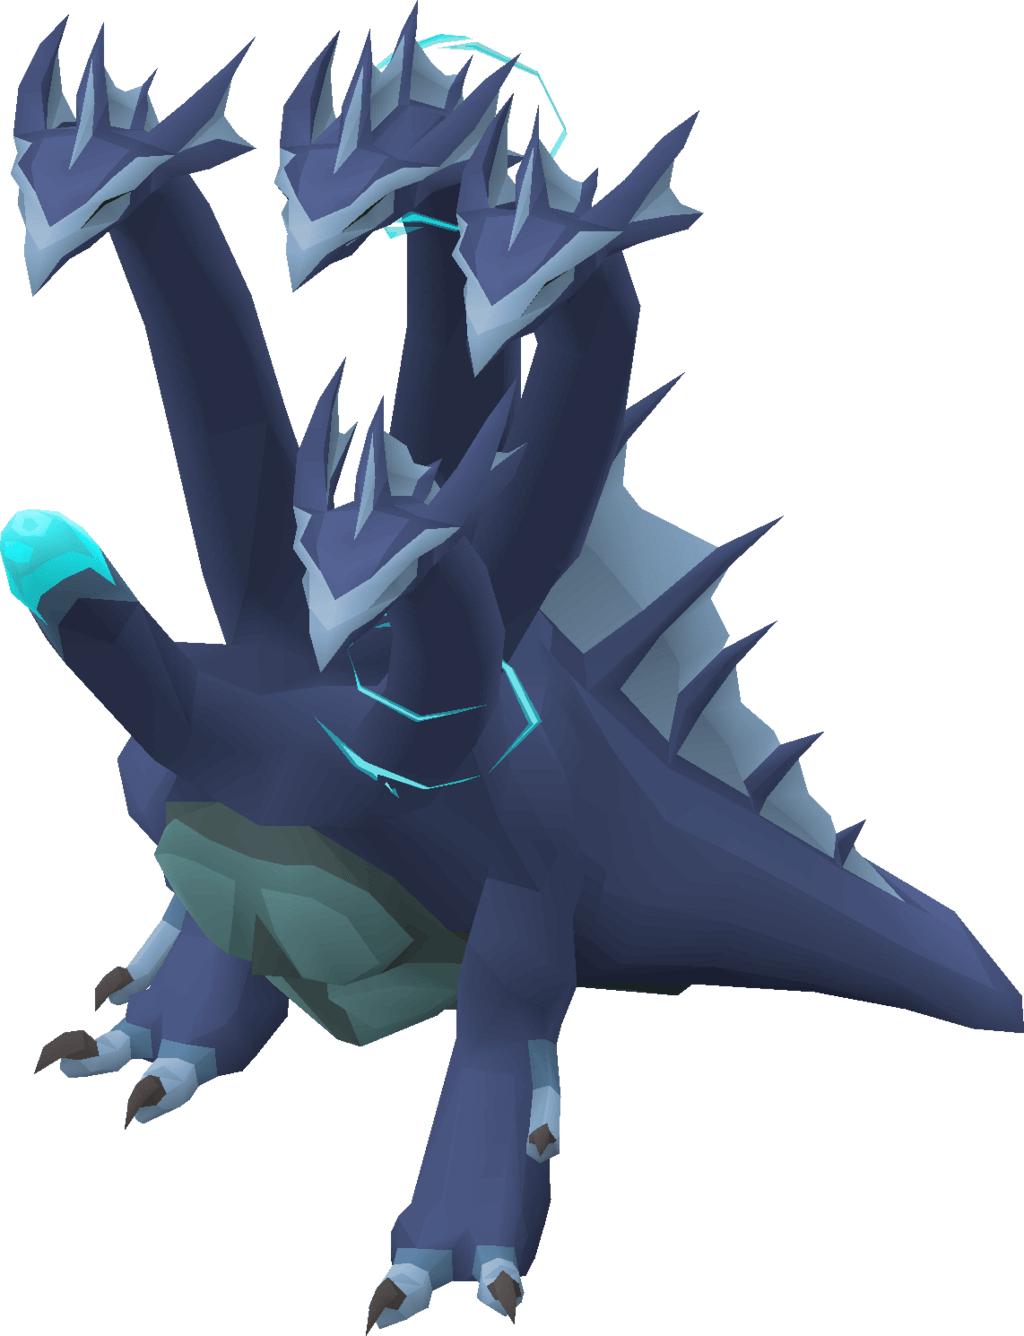
The Alchemical Hydra
To face the Alchemical Hydra, you need to delve into the depths of the Karuulm Slayer Dungeon within Mount Karuulm. This formidable boss, an upgraded version of the hydra, awaits those with a Slayer level of 95 or higher. Crafted by a Dragonkin named Karuulm, the Alchemical Hydra was deemed a failure by its creator due to an inability to replicate its unique traits. Abandoned alongside other creations like the Wyrms, Drakes, and Hydras, it remains a challenging adversary.

Unlike standard hydras, you can only vanquish the Alchemical Hydra while undertaking a hydra Slayer task assigned by Konar. Moreover, within the volcano’s confines, if you haven’t completed the elite Kourend & Kebos Diary, you must don boots of stone, boots of brimstone, or granite boots to shield yourself from the dungeon floor’s intense heat.
Exercise caution when retrieving items post-death, as the scorching floor can disrupt recovery attempts, rendering it impossible. Succumbing to a second death will result in the loss of stored items.
Aside from the conventional hydra drops, the Alchemical Hydra boasts unique loot such as hydra leather. This valuable material is utilized on the machinery south-west of the pool in the Lithkren Vault to fashion ferocious gloves. Additionally, the hydra claw, another coveted drop, can be combined with a Zamorakian hasta to forge the formidable dragon hunter lance.
Where To Find The Alchemical Hydra?
The Alchemical Hydra is located in the Karuulm Slayer Dungeon. To reach the boss, you must run north past the Tasakaal, then head east past the hydras. You will then arrive at the entrance to the lair by Orrvor quo Maten. Alternatively, if you have a level 88 Agility, you can safely reach it by using the mysterious pipe located just behind Kaal-Ket-Jor. However, it’s worth noting that this method takes roughly the same amount of time as reaching the boss by running past the hydras.

For the next section of the guide, we’ll talk about how you can deal with the regular Hydras first as they’re going to be the one you’ll face first.
How To Kill Hydras in OSRS
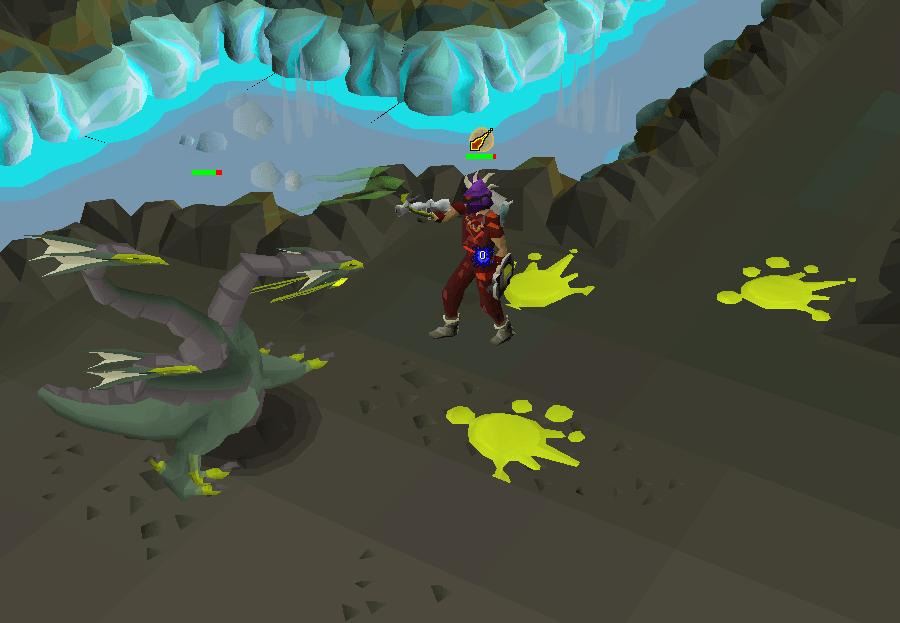
At the commencement of the battle, hydras initiate with a random combat style, switching after three attacks, regardless of whether the attacks land. The magic attack manifests as a trio of three dark green trails of spit, shot from the left head and arcing toward the player (distinct from the light green poison splats). Simultaneously, the ranged attack takes the form of a throwing knife launched at the player from the right head, moving in a straight path. Throughout the encounter, the hydra’s middle head sporadically releases poison onto three random tiles—one at the player’s location and two elsewhere. This poison inflicts 4 damage every two ticks (or 1 to 2 damage if the player has poison immunity) when standing on an affected tile. The initial splat has a 3×3 Area of Effect (AoE).
Hydras have the potential to drop eyes, fangs, and hearts, essential components for crafting the brimstone ring. Similar to the progression of dark totem pieces, these body parts are dropped sequentially, and additional parts can be acquired once players possess one of each.
Furthermore, hydras can yield their tail as a drop, which, when combined with a dragonbone necklace and a bonecrusher, results in the creation of the bonecrusher necklace.
Hydra Money Making Guide
You can make a profit of at least 942,327 per hour while killing Hydras. For this method, it’s recommended to have level 90 Attack, Strength, and Defence, level 70 Prayer, and level 95 Slayer. This profit rate assumes that you’re able to kill 80 Hydras per hour.
Next up, let’s talk about what you need to do when facing the Alchemical Hydra.
How To Prepare For Alchemical Hydra
The fight with the Alchemical Hydra is a lot more difficult than the regular counterpart. As such, you’ll need to prepare well for it. Having the right gear and items will do you well in the fight ahead. Here’s what you need to have.
Recommended Equipment
It’s highly recommended to fight Alchemical Hydra with a ranged setup. It will help you deal damage from safespots, while keeping you safe from the boss’ attacks.
Read more : How To Clean Cut Armour Gloves
Embarking on a ranged combat journey requires the right gear to ensure your success. Here’s a comprehensive guide to equip yourself effectively, from the most potent to the least effective items in each slot.
Head:
- Slayer helmet (i)
Neck:
- Necklace of anguish
- Dragonbone necklace
- Amulet of fury
Back:
- Ava’s assembler
- Max cape
- Ranging cape(t)
- Ava’s accumulator
- Ranging cape
Body:
- Masori body (f)
- Crystal body
- Armadyl chestplate
- Ancient d’hide body
- Black d’hide body
Legs:
- Masori chaps (f)
- Crystal legs
- Armadyl chainskirt
- Ancient chaps
- Black d’hide chaps
Weapon:
- Twisted bow
- Dragon hunter crossbow
- Toxic blowpipe (with rune/amethyst or dragon darts)
- Bow of faerdhinen
- Any crossbow besides Dragon hunter
Shield:
- Twisted buckler
- Dragonfire ward
- Odium ward
- Book of law
Ammo/Spell:
- Dragon arrows (Twisted bow)
- Ruby dragon bolts (e) (crossbow)
- Rada’s blessing 4 (blowpipe or bow of Faerdhinen)
- Any god blessing / Rada’s blessing 3 (blowpipe or bow of Faerdhinen)
Hands:
- Zaryte vambraces
- Ancient bracers
- Barrows gloves
- Black d’hide vambraces
Boots:
- Pegasian boots (after Kebos elite diary)
- Devout boots (after Kebos elite diary)
- Ancient d’hide boots (after Kebos elite diary)
- Boots of brimstone
- Boots of stone
Ring:
- Lightbearer (with a Zaryte crossbow switch)
- Ring of the gods (i)
- Ring of suffering (i)
- Archers ring (i)
- Brimstone ring
Special Attack:
- Zaryte crossbow (Ruby dragon bolts (e))
- Toxic blowpipe
When gearing up for this boss encounter, it’s essential to prioritize prayer bonus over ranged accuracy. This strategic choice stems from the boss’s comparatively low defensive stats and the minimal damage incurred when handling mechanics correctly. However, for players adept at prayer flicking, an alternative approach is to opt for gear that maximizes ranged accuracy. This approach significantly diminishes the reliance on prayer potions. With ample experience, players can aim for nearly damage-free kills, with the only unavoidable damage being the initial hit at the start of the encounter and potential self-inflicted damage from Divine potions or the special attack of Ruby bolts (e).
To prepare for the encounter, bring along 4-20 prayer potions or super restores. With a toxic blowpipe, each kill is expected to take approximately 2:00-2:30. To maximize the effectiveness of potions, consider incorporating prayer flicking, enabling longer stays in the fight.
Ensure you have some food on hand, typically 4-10 sharks or manta rays. As your proficiency in battling the boss increases, the damage taken per kill should decrease, allowing you to replace excess food with additional prayer potions.
Include Antidote++, and choose between Divine ranging potion, ranging potion, or bastion potion. While the latter is often redundant, as adept players can mitigate all damage through prayer and strategic positioning, it’s a personal preference based on your experience.
Carry house tablets or rings of dueling for stat restoration and banking purposes. If you’re using a twisted bow, equip Rada’s blessing 4 for a swift teleport back. This can also be equipped if you’re using a bow of Faerdhinen or toxic blowpipe.
Alternative Equipment
If you’re going the melee route, it’s stil viable but there’s going to be a lot of resistance from the Alchemical Hydra. Check out this melee build.
- Head: Slayer helmet (i)
- Neck: Amulet of torture
- Back: Infernal cape
- Body: Torva platebody
- Legs: Torva platelegs
- Weapon: Dragon hunter lance
- Shield: Avernic defender
- Ammo/Spell: Rada’s blessing 4
- Hands: Ferocious gloves
- Boots: Primordial boots (after Kebos elite diary)
- Ring: Ultor ring
- Special attack: Dragon claws / Voidwaker (faster kills)
Alternative options:
- Amulet: Amulet of blood fury (HP sustain)
- Legs: Bandos tassets / Inquisitor’s plateskirt
- Weapon: Osmumten’s fang
- Shield: Dragon defender
- Ammo/Spell: Holy blessing (Any god blessing) / Rada’s blessing 3
- Hands: Barrows gloves
- Boots: Dragon boots (after Kebos elite diary) / Granite boots / Devout boots (after Kebos elite diary) / Boots of brimstone
- Ring: Berserker ring (i) / Lightbearer / Brimstone ring / Berserker ring
- Special attack: Saradomin godsword (HP and Prayer sustain) / Bandos godsword / Dragon warhammer (to lower defence)
Alchemical Hydra Strategy Guide
The battle against the Hydra takes place in an instanced environment. In the unfortunate event of player death during the confrontation, item retrieval can be accomplished from Orrvor quo Maten outside, albeit at the cost of 100,000 coins per attempt. It is crucial to note that items left with Orrvor quo Maten will be permanently lost if the player perishes elsewhere.
A key aspect to bear in mind is that once the Hydra engages, players are unable to exit through the doors, as they become jammed. However, teleports remain a viable means of escape. The Hydra boasts a respawn time of 20 seconds.
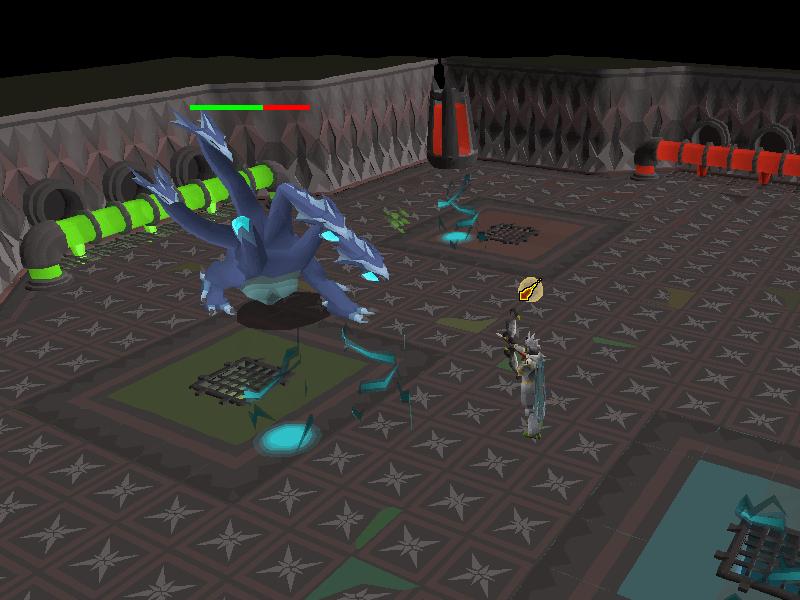
The Hydra’s encounter unfolds in four distinct phases, each triggered upon reaching or surpassing 25% health thresholds (~275 health).
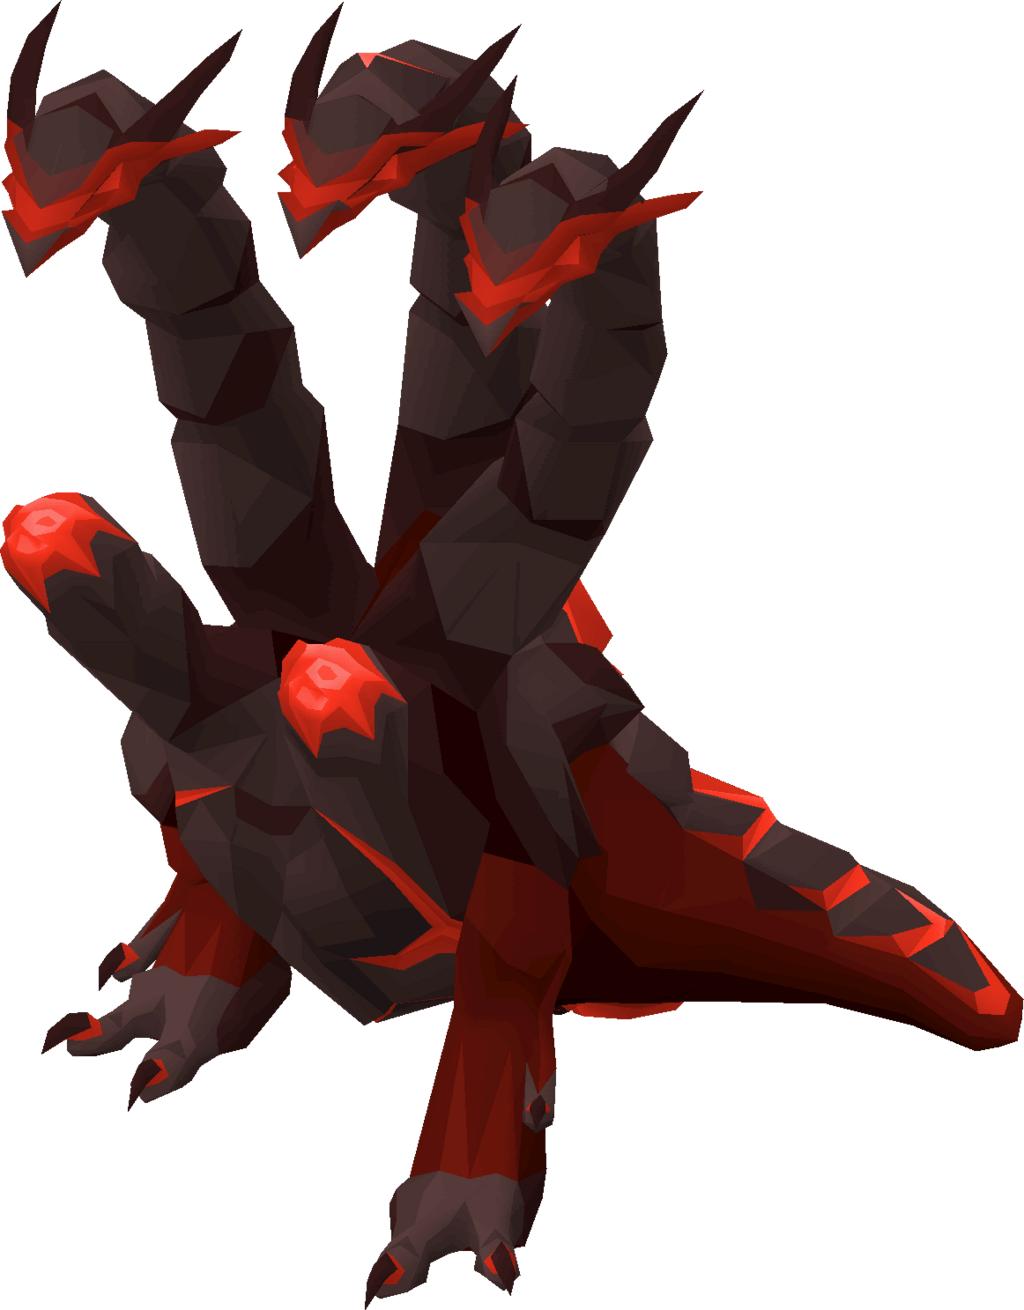
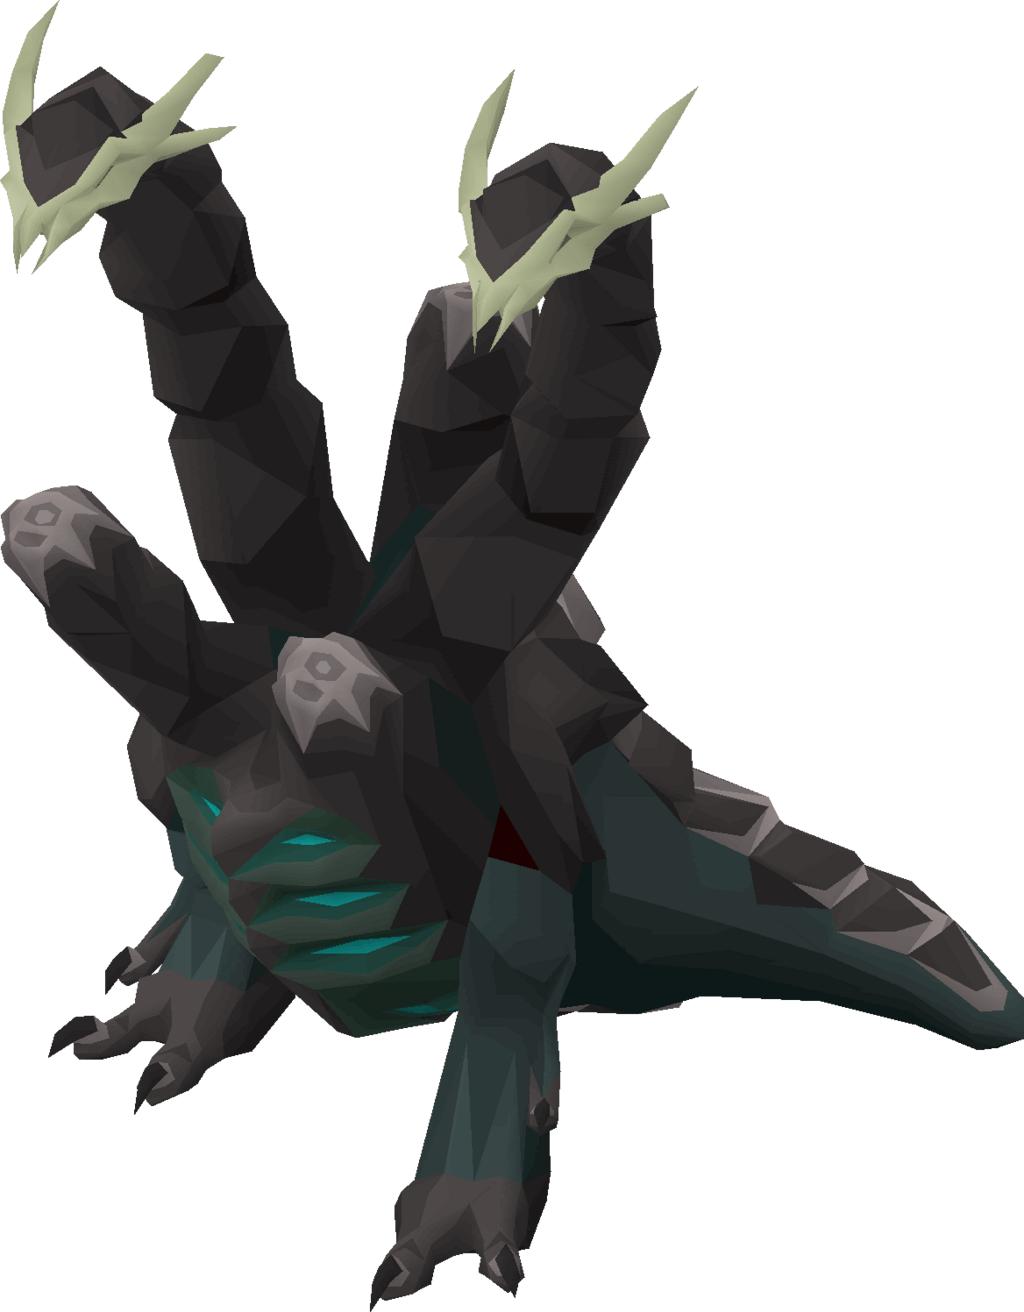
The commencement of a new phase is marked by the Hydra roaring, accompanied by the loss of one head and a transformation in appearance.
Engaging with both Magic and Ranged attacks, the Hydra’s left heads utilize magic, while the right heads employ ranged attacks. In the initial two phases, these attacks consist of two swift hits with reduced individual damage. However, during the final two phases, a single hit inflicts higher individual damage. The Hydra commences the battle with either combat style. After every three basic auto-attacks in the first three phases, the Hydra signals a change in combat style by swaying its heads backward. It’s important to note that phase-specific special attacks do not factor into these three attacks. Despite the potential override of the attack swapping animation by the phase transition animation, counting attacks remains a beneficial strategy.
Poison Phase:
In this phase, the Hydra initiates with a green carapace and should be guided to the red chemical pool. After the initial kill, position yourself next to the red chemical vat to the west, ensuring the Hydra is automatically lured to the red chemical pool upon spawning.
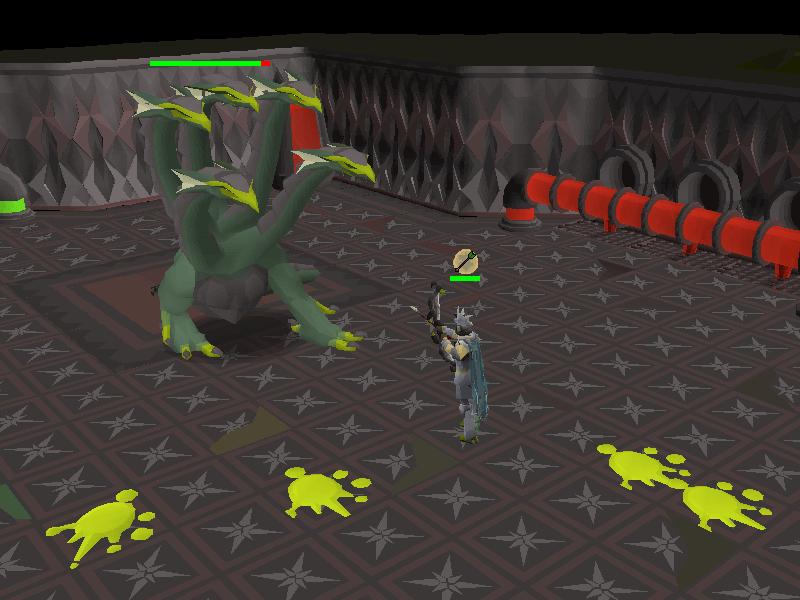
Following the first three attacks, the Hydra releases 4 or 5 poison blobs around your location—1 on you and 4 randomly around you. These blobs create a 3×3 splatter effect, dealing up to 7 damage, while standing on the poison pools inflicts up to 12 poison damage per tick. Both trigger a poison effect dealing 4 or 6 damage; clear this effect immediately if poisoned. To avoid this attack, stand west of the red chemical vat, all the way south, then move north two tiles when the Hydra is positioned over the chemical pool. When it spits poison, move west two tiles to evade the player-targeted blob, and the remaining four will splatter east.
Upon reaching 75% health, the bottom-right head falls off, and the carapace changes to blue. Proceed north to the green vent.
Lightning Phase:
With a blue carapace, lure the Hydra to the green chemical pool.
Throughout this phase, the Hydra launches an electric ball at the room’s center, spawning four lightning currents in random corners, converging on your location. If hit, these currents bind you and deal up to 20 damage. To avoid damage, start near the middle and loop around one of the last lightning spawns, escaping the box they form. Alternatively, hug the northern wall and move west while damaging the Hydra, especially effective with ranged weapons having a distance of 10. Another strategy involves trapping the lightning in the north-west corner, moving diagonally south-east when the lightning is two tiles away, and instantly moving one tile north.
Once the Hydra hits 50% health, the bottom-left head falls off, and the carapace changes to red. Head west to the blue vent if not already there.
Note: If the Hydra transitions phases while lightning is present, they will dissipate immediately.
Flame Phase:
Read more : How Long Does It Take For Compression Gloves To Work
Now sporting a red carapace, lure the Hydra to the blue chemical pool.
Throughout this phase, the Hydra occasionally walks to the chamber’s center, inflicting a stun on you. While stunned, the Hydra breathes a 5×5 layer of fire to your sides based on your location before launching tracking fire down the middle. This tracking fire follows your movement, dealing up to 20 damage if hit and causing a subsequent bleed of 5 damage for five hits. Reset the bleed by moving onto another fire. Fires can be tile skipped, but it’s advisable to do so only after the tracking fire stops. The Hydra doesn’t attack until four seconds after the tracking fire is sent out.
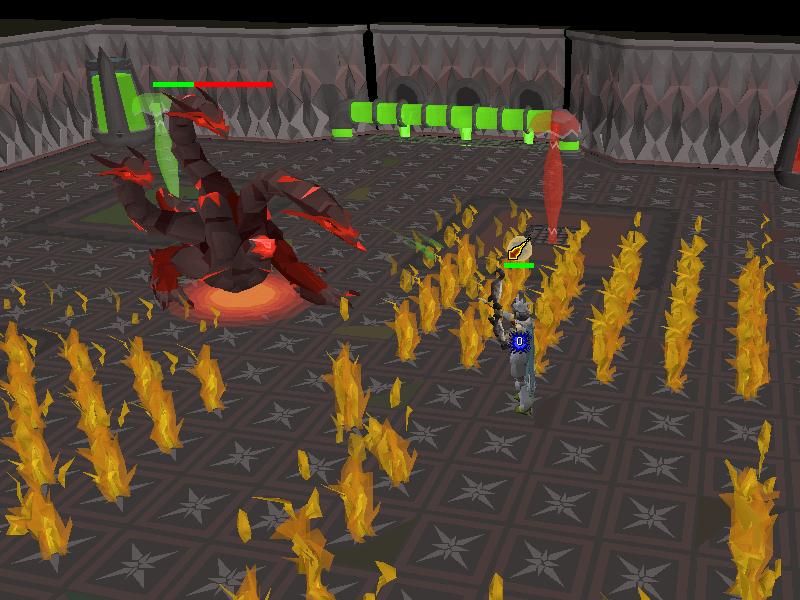
Similar to the lightning trap in the prior phase, trap flames by standing next to the Hydra facing a corner. Corner run immediately when the fire is launched, trapping it on the first flame tile.
Upon reaching 25% health, the middle head falls off, and the carapace changes to grey.
Note: If the Hydra transitions phases during the attack, it ends abruptly. Fires started before the transition persist as usual.
Enraged Phase:
Now adorned with a grey carapace, the Hydra no longer needs luring to chemical pools, as its damage reduction ability persists. In this phase, the Hydra’s attack speed accelerates to every four ticks, and its enrage stack maxes out, allowing it to deal up to 55 damage per hit.
This phase begins with the combat style opposite of the previous phase. The Hydra alternates between both combat styles after each auto-attack, starting without a warning animation. Switch prayers with each basic attack for the rest of the fight. You can safely switch prayers as soon as the Hydra starts its attack animation for the current attack.
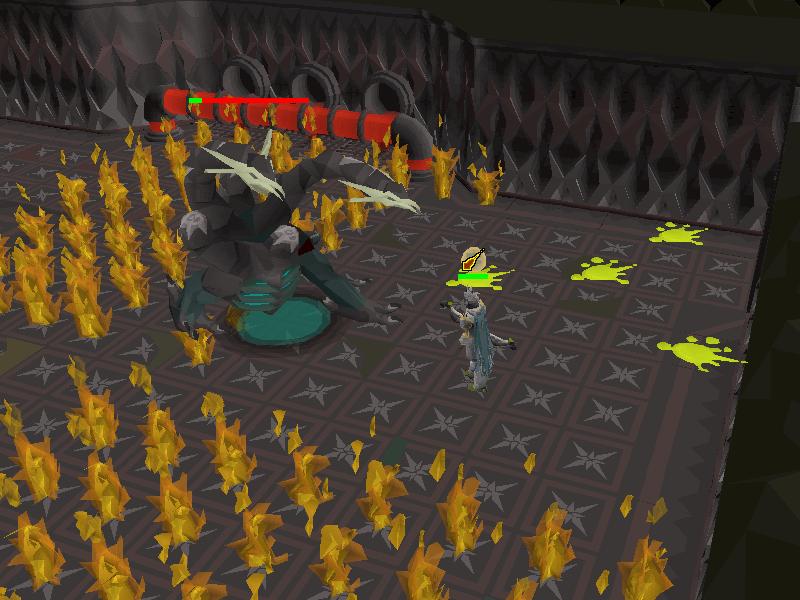
After the initial three auto-attacks, the Hydra uses the poison attack from phase 1 after every nine subsequent auto-attacks. Note that the poison special attack doesn’t count as a basic auto-attack; the next attack style remains opposite to the auto-attack preceding the poison special. If the Hydra is killed just as it sends an auto-attack, it deals no damage, but poison blobs will still inflict damage.
Consider bringing a bracelet of slaughter to extend Slayer tasks, switching it during this final phase for optimal efficiency. It’s convenient to switch to the bracelet while dodging the poison special, as prayer doesn’t need adjustment during this attack. However, offensive gloves should be worn for as long as possible.
Throughout the initial three phases, the Hydra’s carapace is fortified, resulting in a substantial 75% reduction in incoming damage. To nullify this effect, players must lead the Hydra to the appropriate chemical vent. A message, “Roaaaaaaaaaaar!” displayed above the Hydra’s heads signals that it has been sprayed by the correct vent. If chemicals from an incorrect vent make contact, the Hydra’s enrage stack increases, amplifying the damage of its attacks. Each phase kicks off with three auto-attacks before the Hydra executes a special attack.
Hydra Drops And Rewards
Let’s first talk about the drops and rewards you can get from the Hydras.
100%
Pre-roll
Weapons and armour
Runes
Herbs
There is a 4/128 chance of rolling the herb drop table. There is a 2/128 chance to hit the noted herb drop table.
Seeds
There is a 4/128 chance of rolling the rare seed drop table.
Bolt tips
There is a 2/128 chance of rolling the bolt tips drop table.
Other
Gem drop table
Tertiary
Alchemical Hydra Drops
As for the Alchemical Hydra, here’s what you get.
100%
Pre-roll
Due to a unique mechanic, items are slightly rarer than officially announced. The effective rates are displayed here.
Weapons and armour
Runes and ammunition
Herbs
There is a 10/101 chance to get noted herbs.
Seeds
There is a 2/101 chance of rolling the tree-herb seed drop table.
Other
Rare drop table
There is a 1/101 chance of rolling the rare drop table. This will give the player two rolls on the rare drop table
Tertiary
Combat Achievements
Lastly, let’s check out the Combat Achievements. There are 12 Combat Achievement tasks (totalling 61 points) available for Alchemical Hydra.
Chop The Hydra Heads, One By One
Fighting the Hydra is an epic and rewarding experience in OSRS. If not for the thrill of the fight itself, just being able to get your hands at the reward waiting at the end is sure to be good enough reason to fight this boss.
Source: https://t-tees.com
Category: HOW