
Designed by Renita Harvey
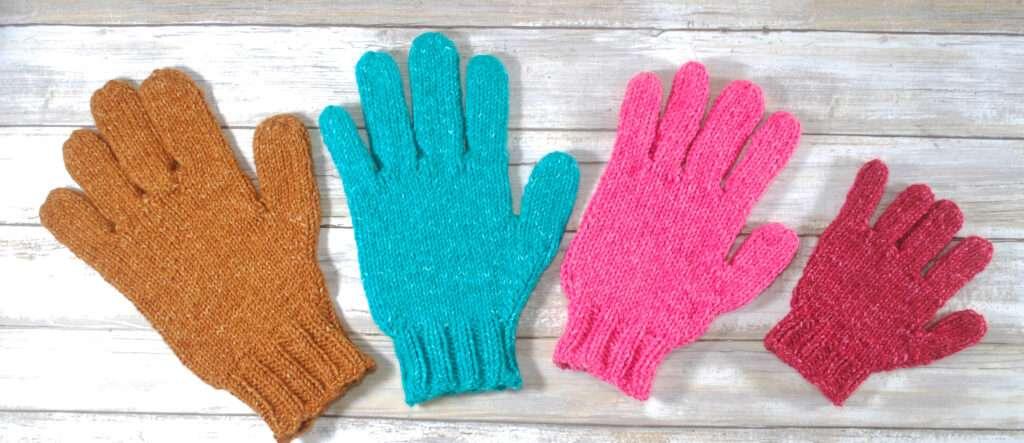
You are viewing: How To Knit Gloves On Loom
Get ready to knit the entire family custom-sized gloves!
These basic gloves have full fingers that are worked for the length desired.
Detailed written instructions with pictures as well as a video tutorial will help even the beginner loom knitter that is adventurous to be able to create a work of art to keep their hands warm.
Great small project to work on in the summer months so grab the All-n-One Loom with 2 sets of sliders for the size needed and get started on a project like no other! 
Loom: 18″ All-n-One Loom with 2 sets of 2 peg sliders for sizes Small and Medium, and 2 sets of 1 peg sliders for sizes Child and Large
Yarn: 125-246 yds Worsted/4 weight yarn. Lion Brand Yarn Jeans and Jeans Colors, 1 ball per pair, Colors Jumpsuit, Bermuda Shorts, Capri, and Top Stitch used in Samples
Notions: loom tool, stitch markers, stitch holders, tapestry needle, US size 6/4.00mm double point needles
Gauge: 10 sts x 16 rows = 2”
Sizes: Child, Small – Teens/Ladies Small, Medium – Ladies Average, Large – Ladies Large/Men’s Small
Step by step VIDEO
ABBREVIATIONS
K – Knit Note: E-wrap knit is not recommended for this project. True knit is the recommended knit stitch. U-wrap or flat knit may be used if needed to achieve gauge.
P – Purl
YO – Yarn Over
CO – Cast On
BO – Bind Off
SSK – Slip Slip Knit
K2tog – Knit 2 Together
C – Child
S – Small
M – Medium
L – Large
TECHNIQUES
SSK
Left slanting decrease.

Worked over 2 stitches with stitch 1 on the right and stitch 2 on left,move the stitch from peg 2 to peg 1. Knit both together as one.
K2tog
Right slanting decrease.

Worked over 2 stitches with stitch 1 on the right and stitch 2 on the left, move the stitch from peg 1 to peg 2. Knit both together as one.
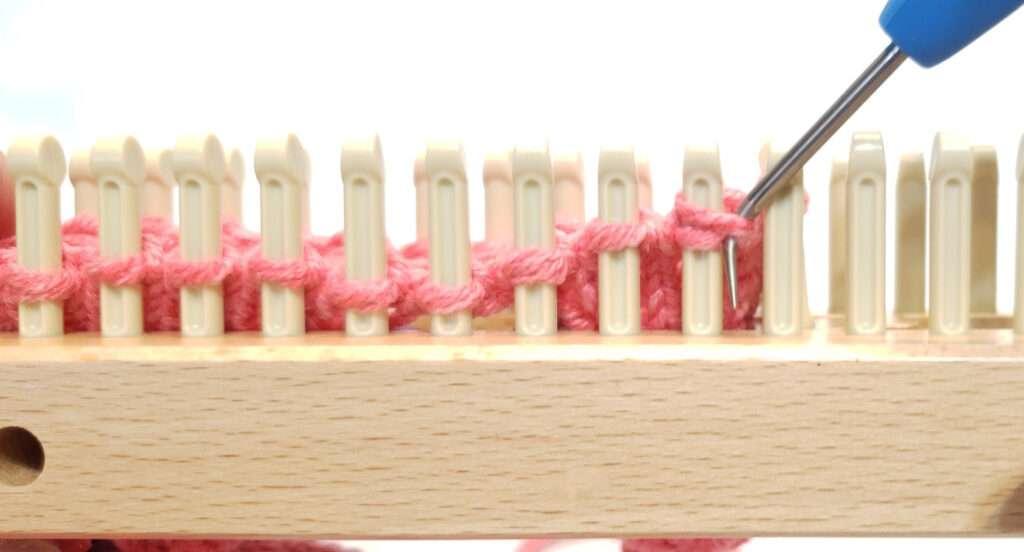
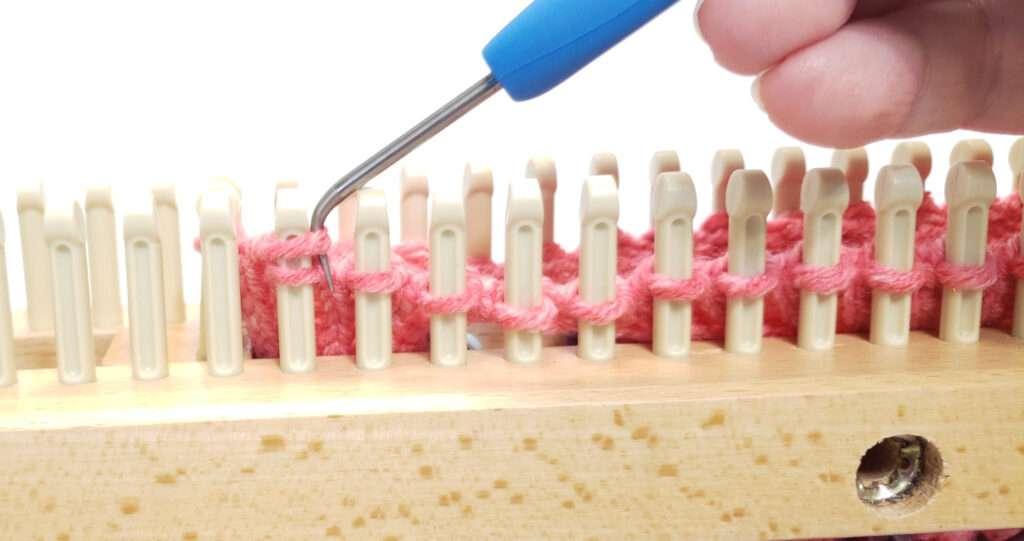
Gathered Cast On
Place slip knot on neighboring peg.

Round 1: Working from right to left, wrap peg 1, skip peg 2 with working yarn to the back of the peg, and continue wrapping the odd number pegs and skipping the even number pegs around until back to peg 1.
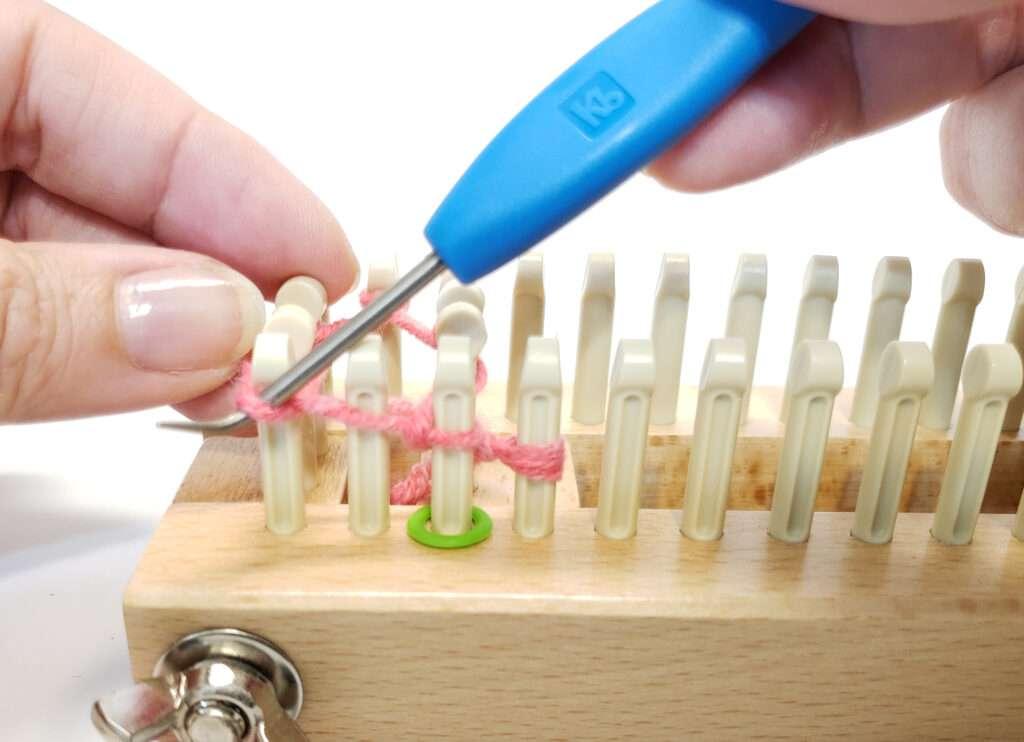
Round 2: Knit pegs that have been wrapped and bring working yarn to the front of the pegs that were skipped until all pegs have been worked.

Cast on complete and ready for row 1. After working several rows, remove slip knot and gather the cast on edge.
INSTRUCTIONS
Make 2.
Instructions are written for size Small with the other sizes in parentheses. Small (Child, Medium, Large)
Note: Pictures are showing size Small being worked. Peg counts and sliders used may differ for other sizes.
Use the peg sliders as follows for the size being worked:
Child – 1 peg sliders
Small – 2 peg sliders
Medium – 2 peg sliders
Large – 1 peg sliders
Row Chart for Fingers
Pinky Finger
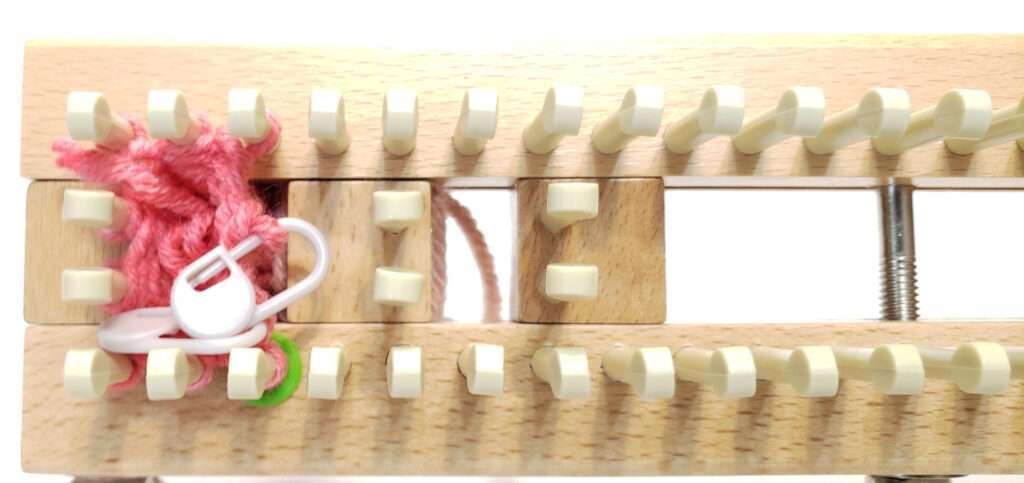
Set up the loom with the peg sliders for the pinky finger with 10 (8, 12, 14) pegs.
CO with the gathered method and prepare to work in the round.
Work number of rows for the length of the pinky finger from the Row Chart for Fingers.
Read more : How To Make A Balloon Out Of A Glove
Cut working yarn leaving an 8” tail for seaming.
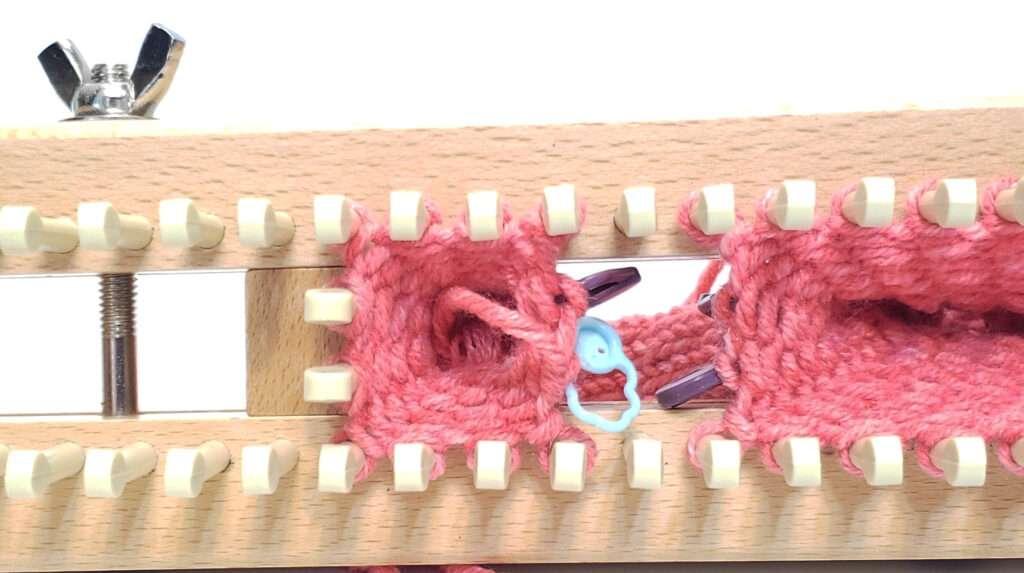
 Place stitches from the inside slider on stitch holders. For size L, also place the stitches next to the inside slider on stitch holders as well. Number of stitches on stitch holders: 2 (1, 2, 3)
Ring Finger
 Take the slider on the inside of the loom off. Turn it around so the groove is facing the pinky finger and place it back on. Add the 3rd slider.
Set up the loom with the peg sliders for the ring finger with 10 (8, 12, 14) pegs leaving 1 empty peg on each side between fingers for sizes C, S, and M. Do not skip a peg on size L.
CO the pegs set up with the gathered method and prepare to work in the round.
Work number of rows for the length of the ring finger from the Row Chart for Fingers.
Read more : How To Make A Balloon Out Of A Glove
Cut working yarn leaving an 8” tail for seaming.
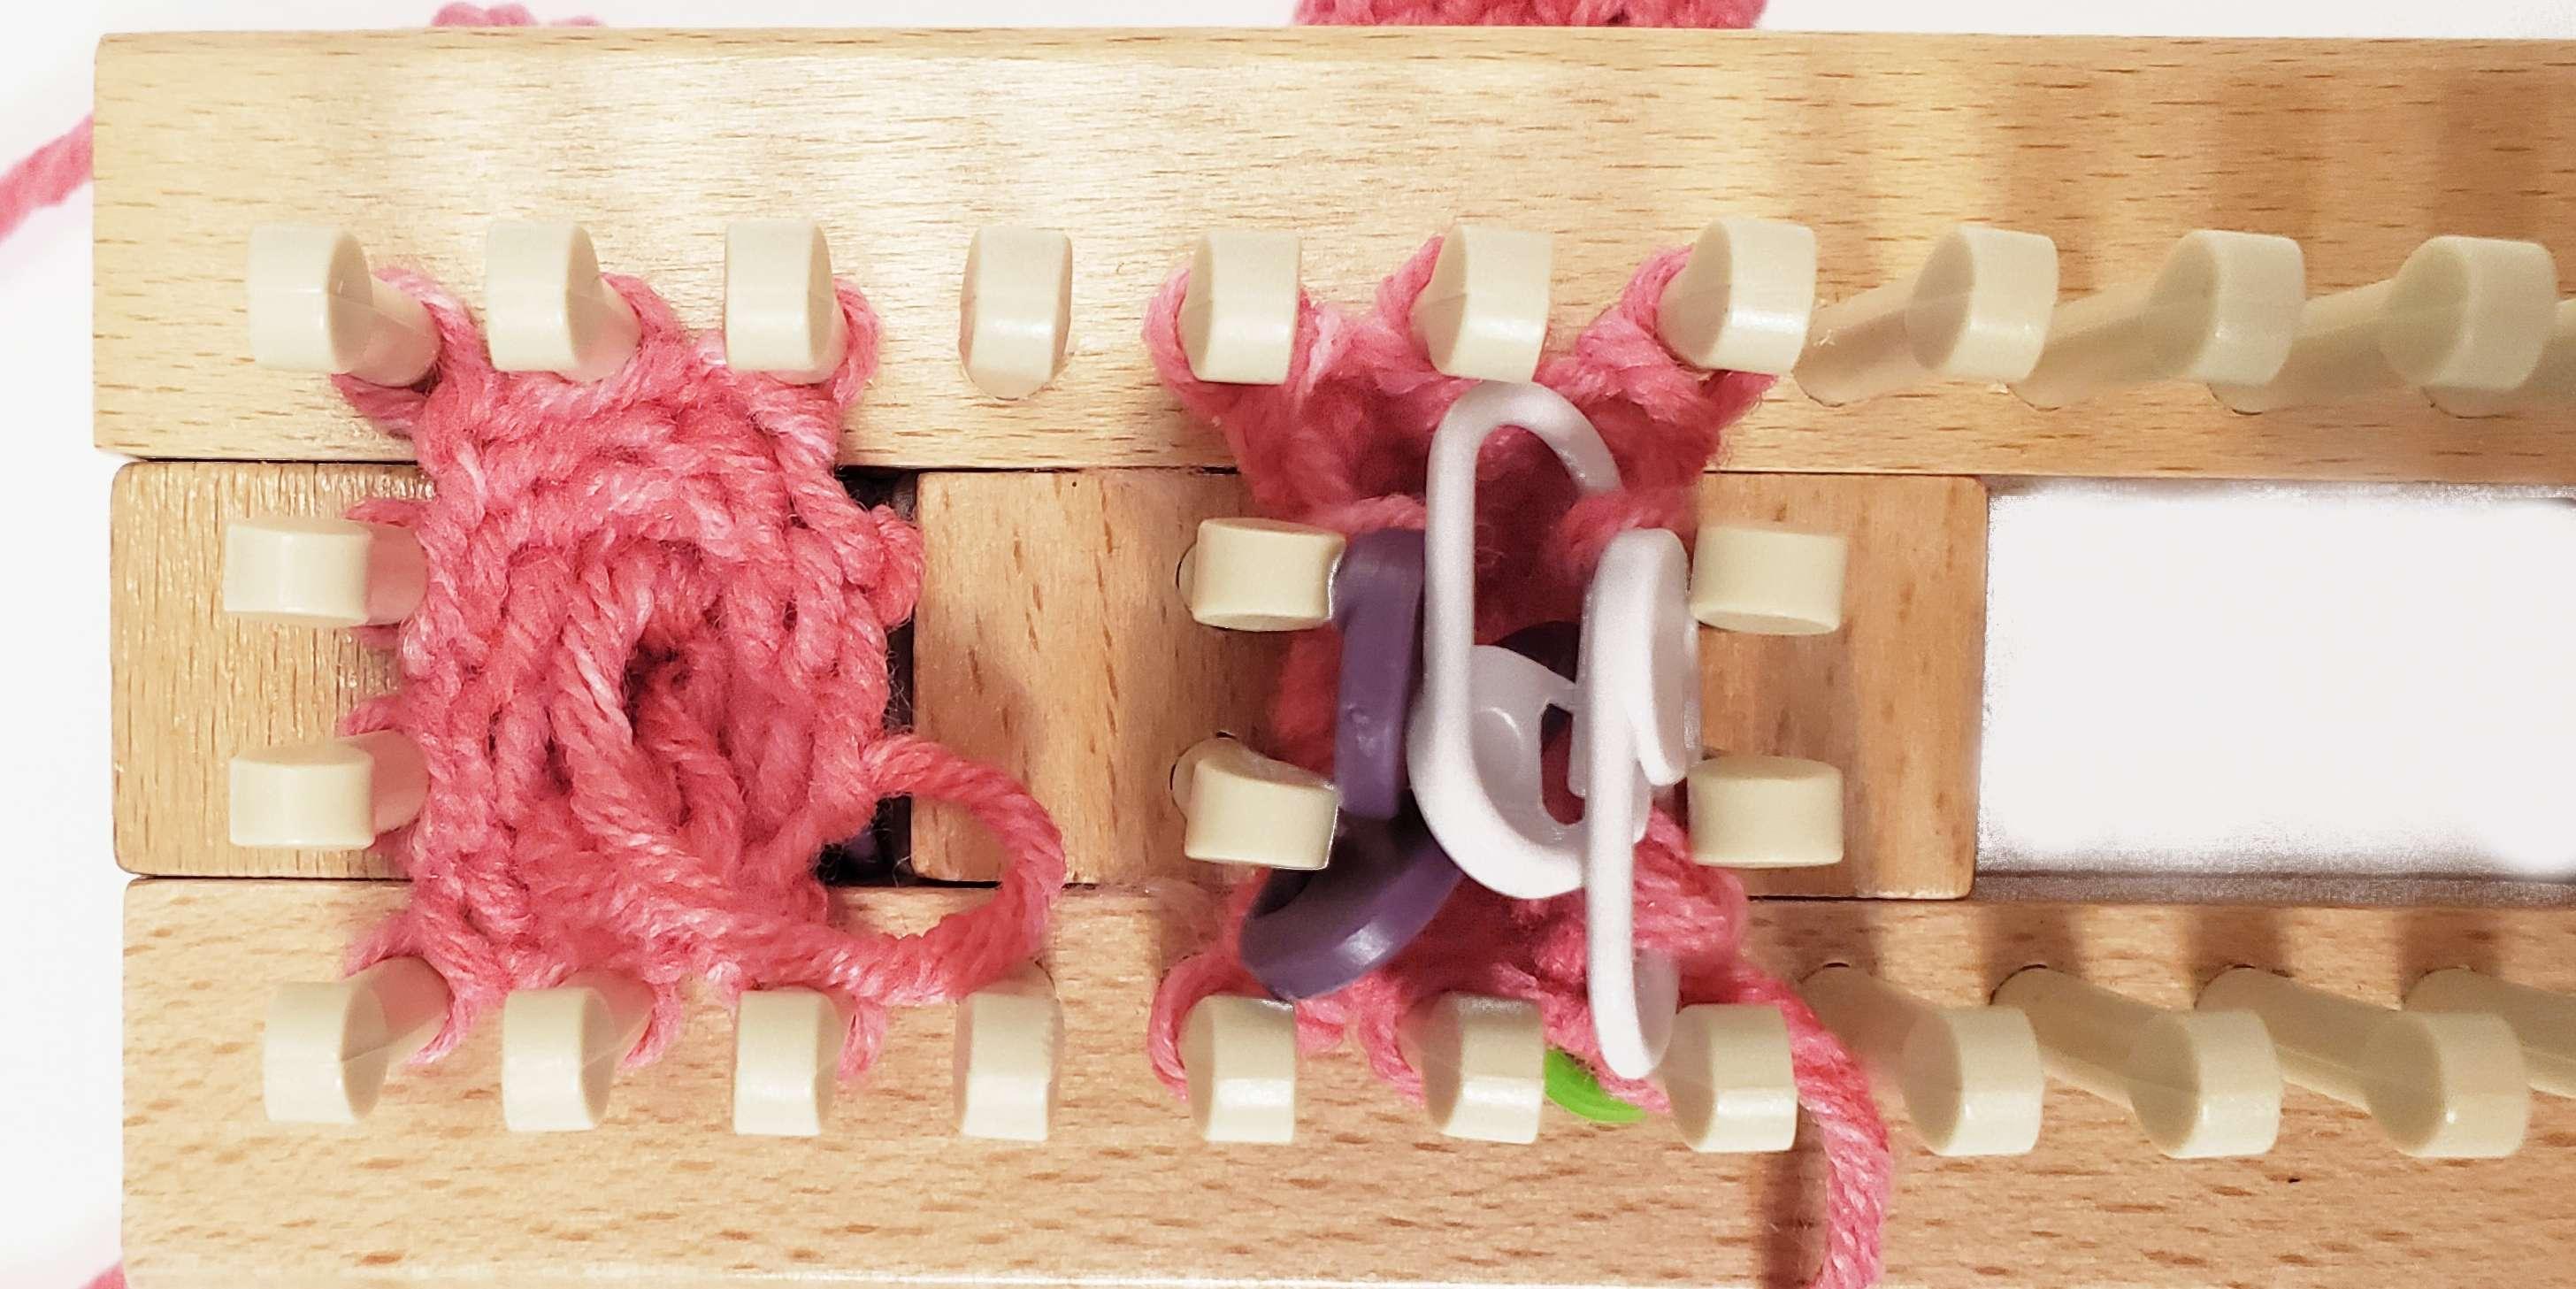 Place stitches from both sliders on stitch holders. For size L, also place the stitches next to the both sliders on stitch holders as well. Number of stitches on stitch holders: 2 (1, 2, 3) on each end of the ring finger. 1 peg remains empty between the pinky and ring fingers on both sides on all sizes now.
Middle Finger
 Take the slider on the inside of the loom off. Remove the slider that is between the pinky and ring fingers by loosening the nut on the end bolt and gently pulling the rails apart enough to slip the slider out. Tighten the nut again. Turn the second peg slider around so the groove is facing the ring finger and place it back on. Add the 3rd slider.
Set up the loom with the peg sliders for the middle finger with 12 (10, 14, 16) pegs leaving 1 empty peg on each side between fingers for sizes C, S, and M. Do not skip a peg on size L.
CO the pegs set up with the gathered method and prepare to work in the round.
Work number of rows for the length of the middle finger from the Row Chart for Fingers.
Read more : How To Make A Balloon Out Of A Glove
Cut working yarn leaving an 8” tail for seaming.
 Place stitches from both sliders on stitch holders. For size L, also place the stitches next to the both sliders on stitch holders as well. Number of stitches on stitch holders: 2 (1, 2, 3) on each end of the middle finger. 1 peg remains empty between the ring and middle fingers on each side on all sizes now.
Pointer Finger
 Take the slider on the inside of the loom off. Remove the slider that is between the ring and middle fingers by loosening the nut on the end bolt and gently pulling the rails apart enough to slip the slider out. Turn the second peg slider around so the groove is facing the middle finger and place it back on. Add the 3rd slider.
Set up the loom with the peg sliders for the pointer finger with 10 (10, 12, 16) pegs leaving 1 empty peg on each side between fingers for sizes C, S, and M. Do not skip a peg on size L.
CO the pegs set up with the gathered method and prepare to work in the round.
Work number of rows for the length of the pointer finger from the Row Chart for Fingers.
Read more : How To Make A Balloon Out Of A Glove
Cut working yarn leaving an 8” tail for seaming.
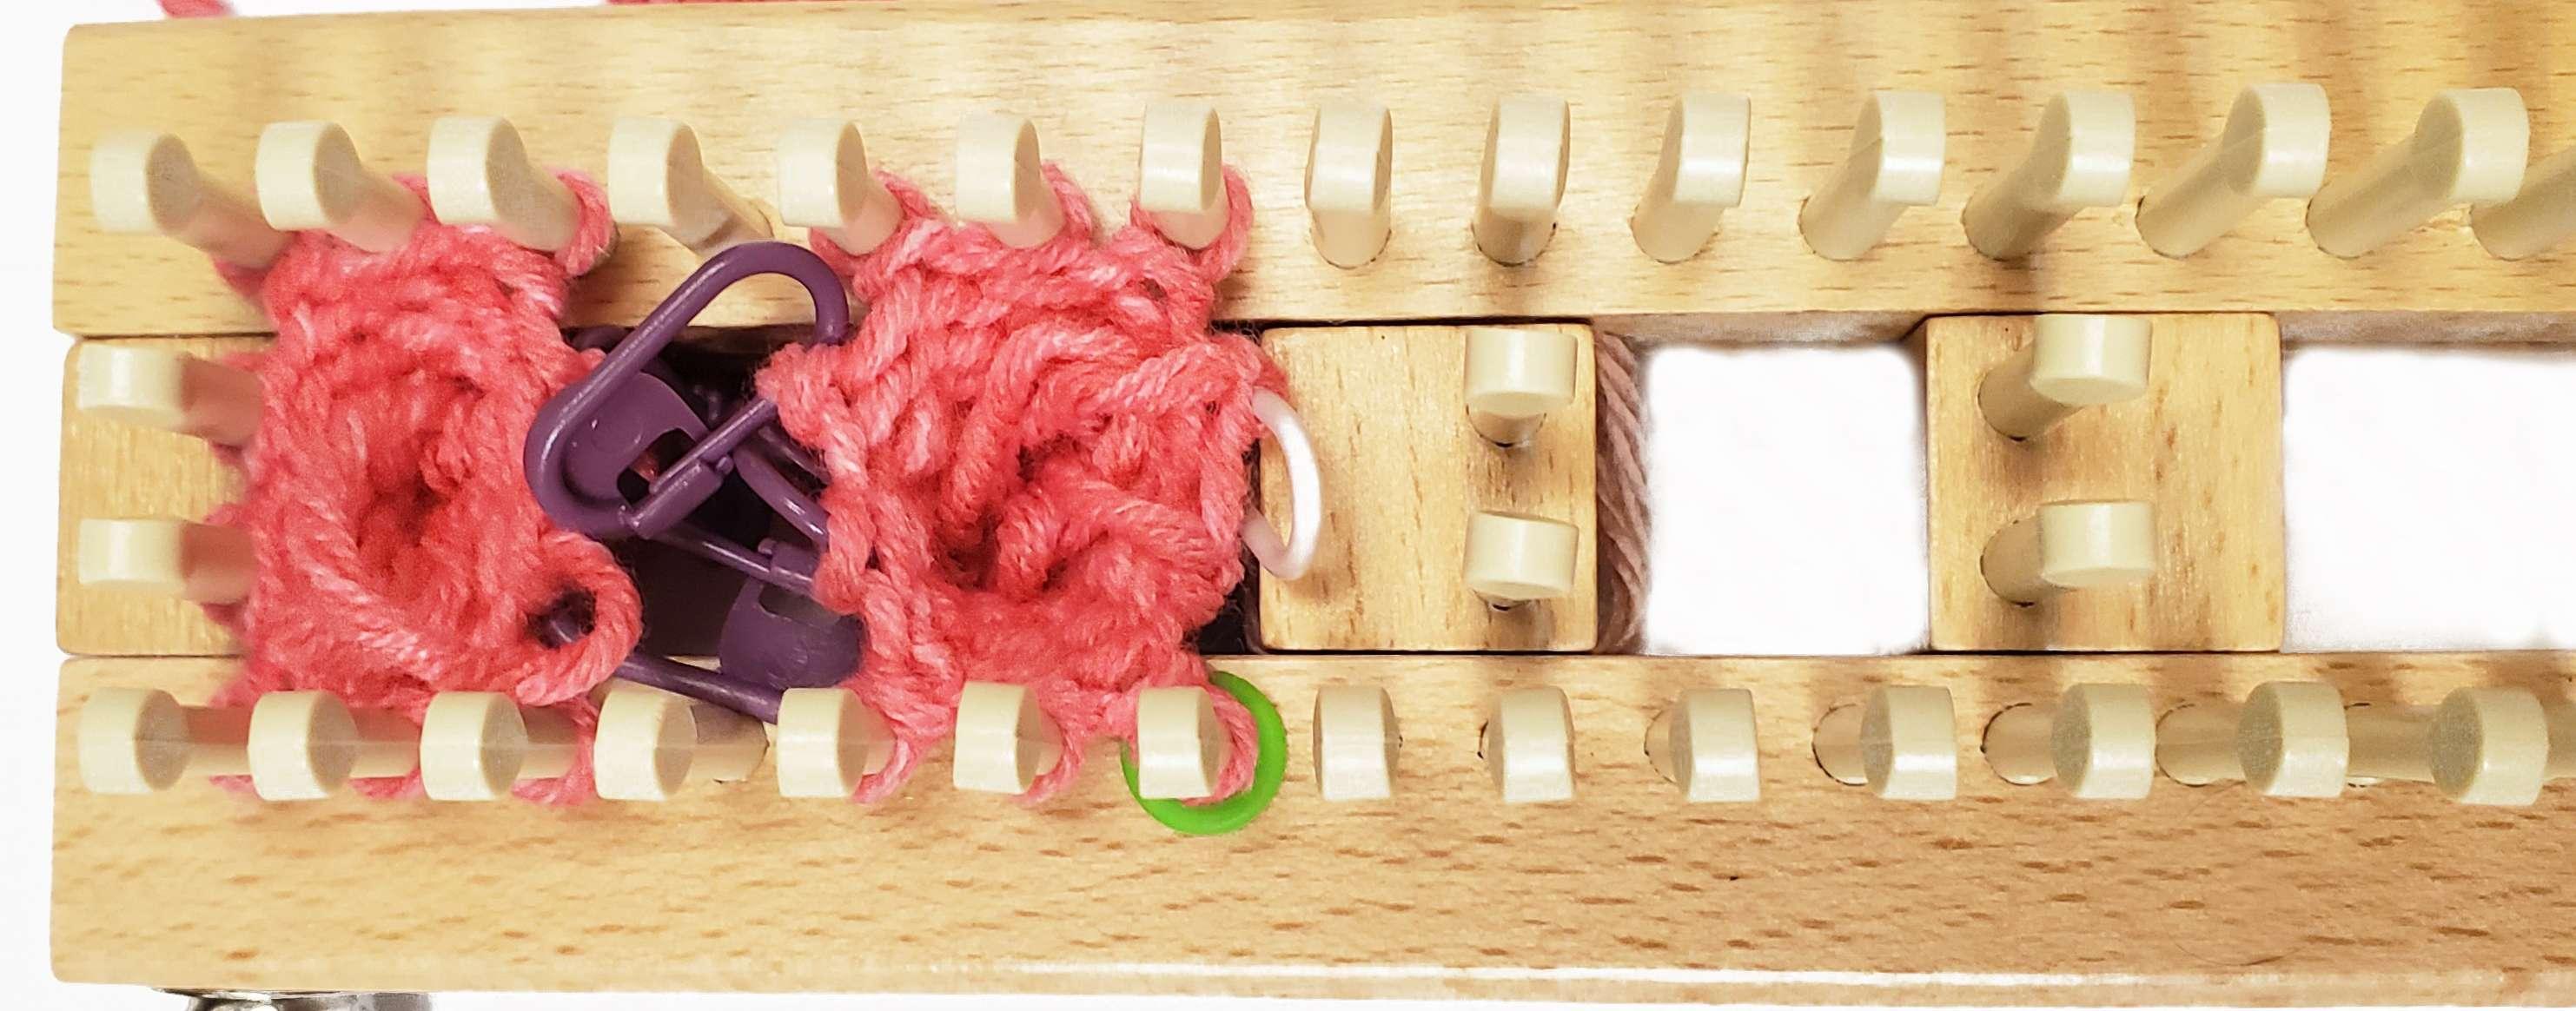
Place stitches from both sliders on stitch holders for all sizes. For size L, also place the stitches next to the slider by the middle finger on stitch holders as well. Number of stitches on stitch holders: 2 (1, 2, 1) on the end of the loom by the pointer finger and 2 (1, 2, 3) between the pointer and middle fingers. 1 peg remains empty between the middle and pointer fingers on both sides on all sizes now.
Take the slider on the inside of the loom off. Remove the slider that is between the middle and pointer fingers by loosening the nut on the end bolt and gently pulling the rails apart enough to slip the slider out.
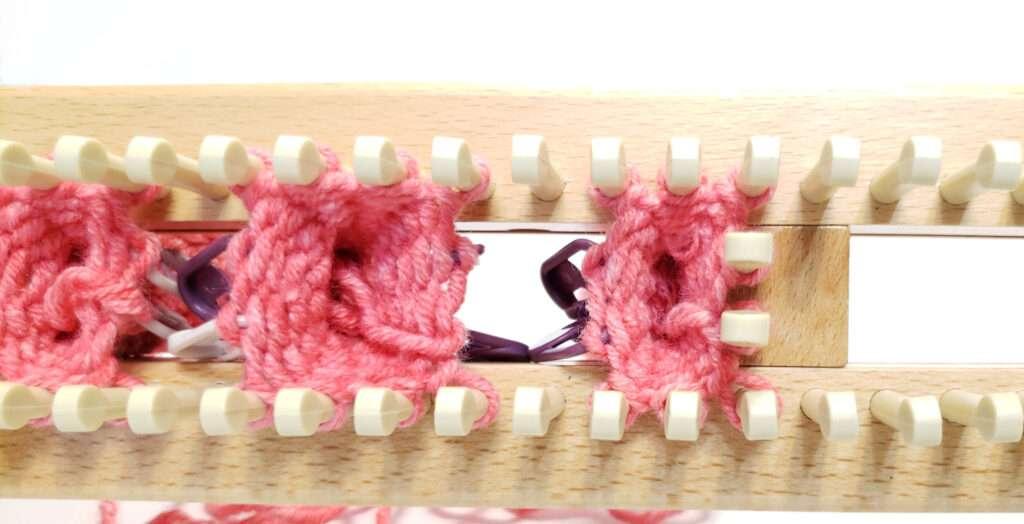
Replace the end slider and place the stitches on stitch holders on the end back on the slider.
Hand Between Base of Fingers and Thumb
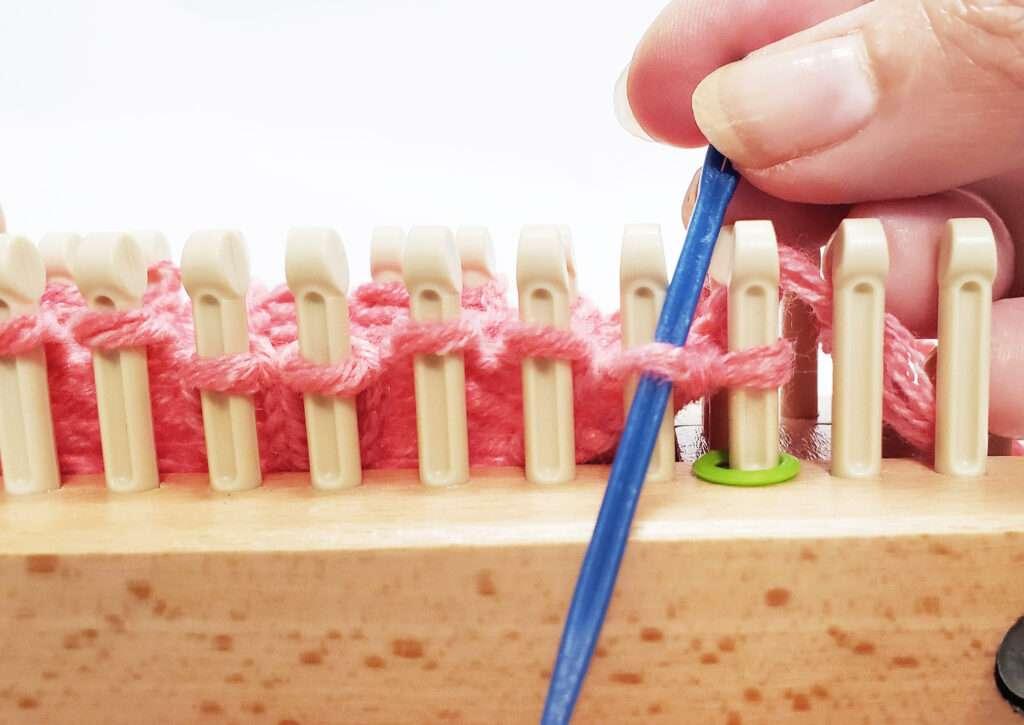
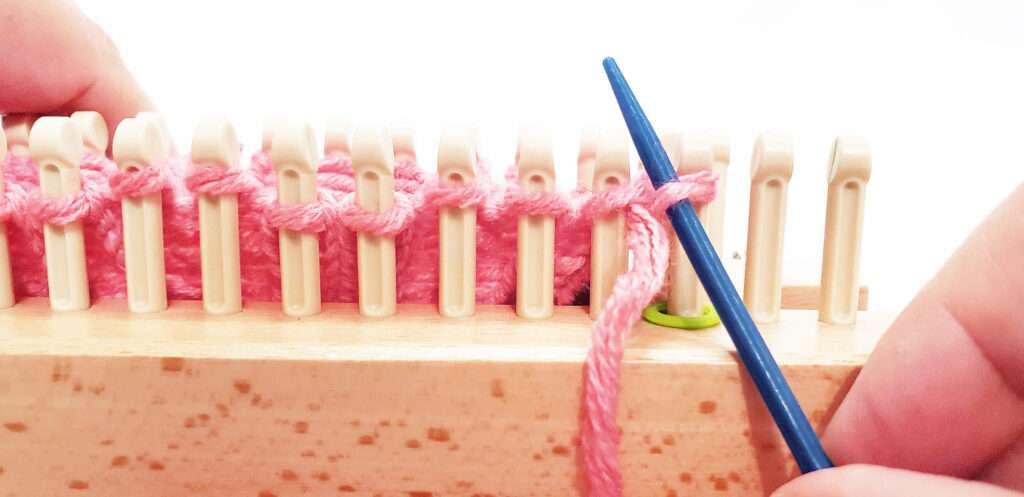
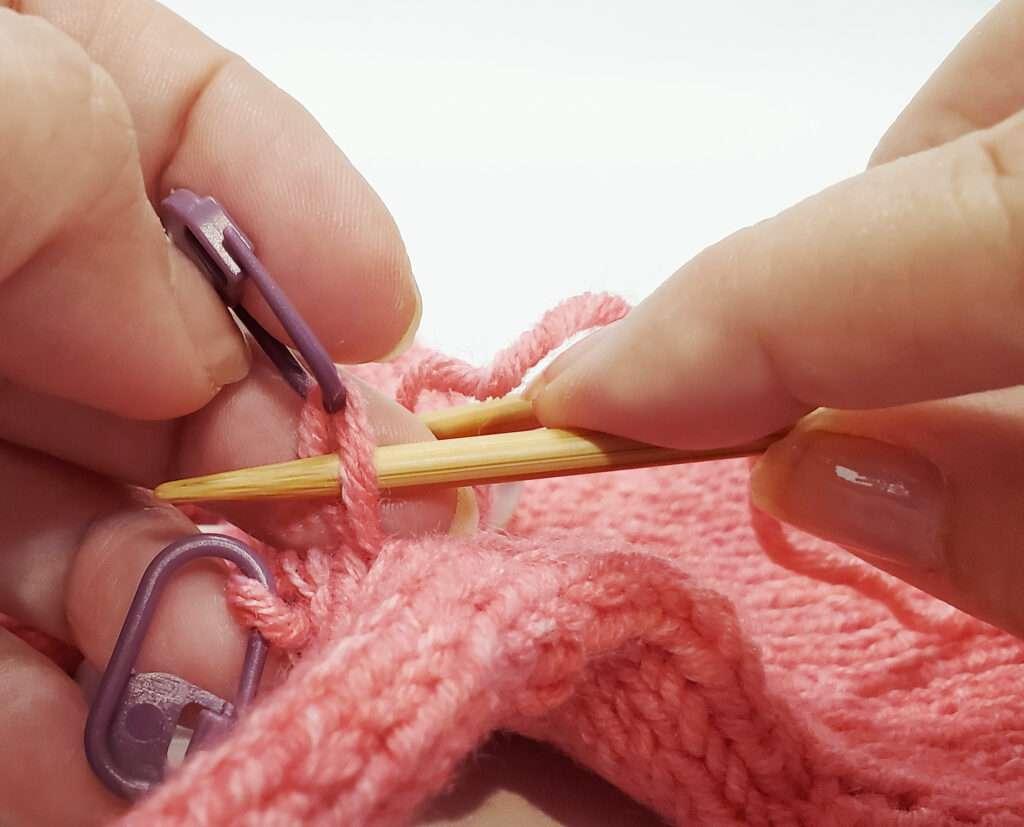
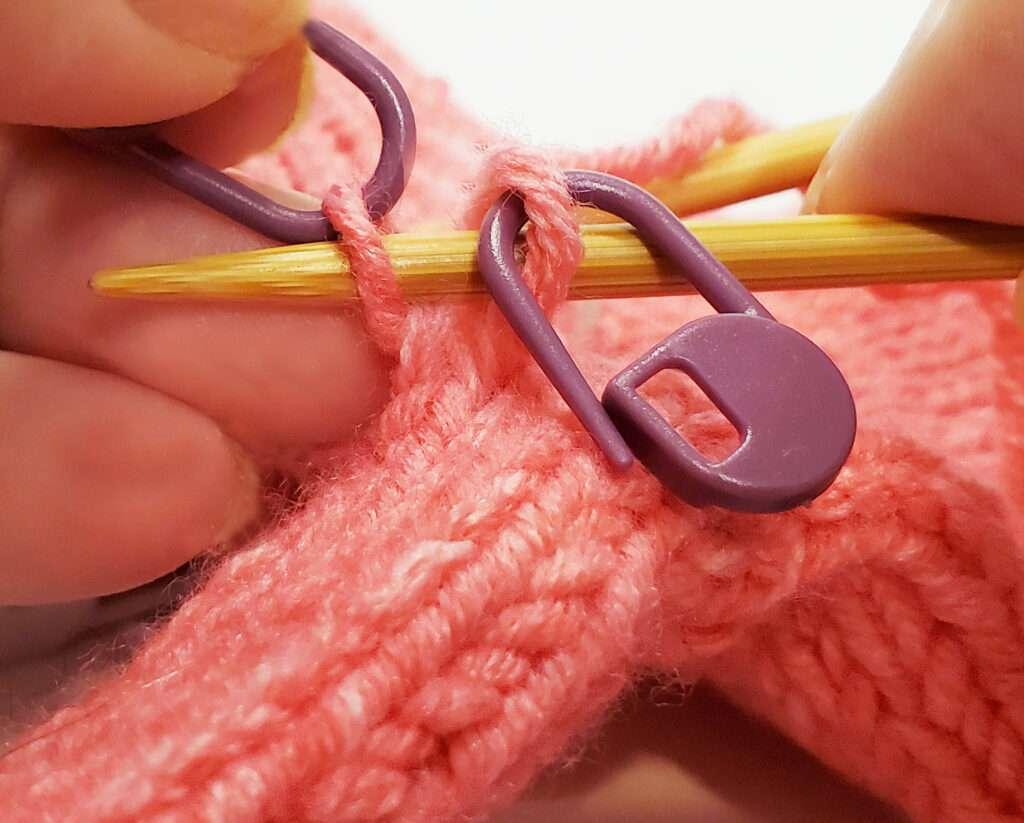
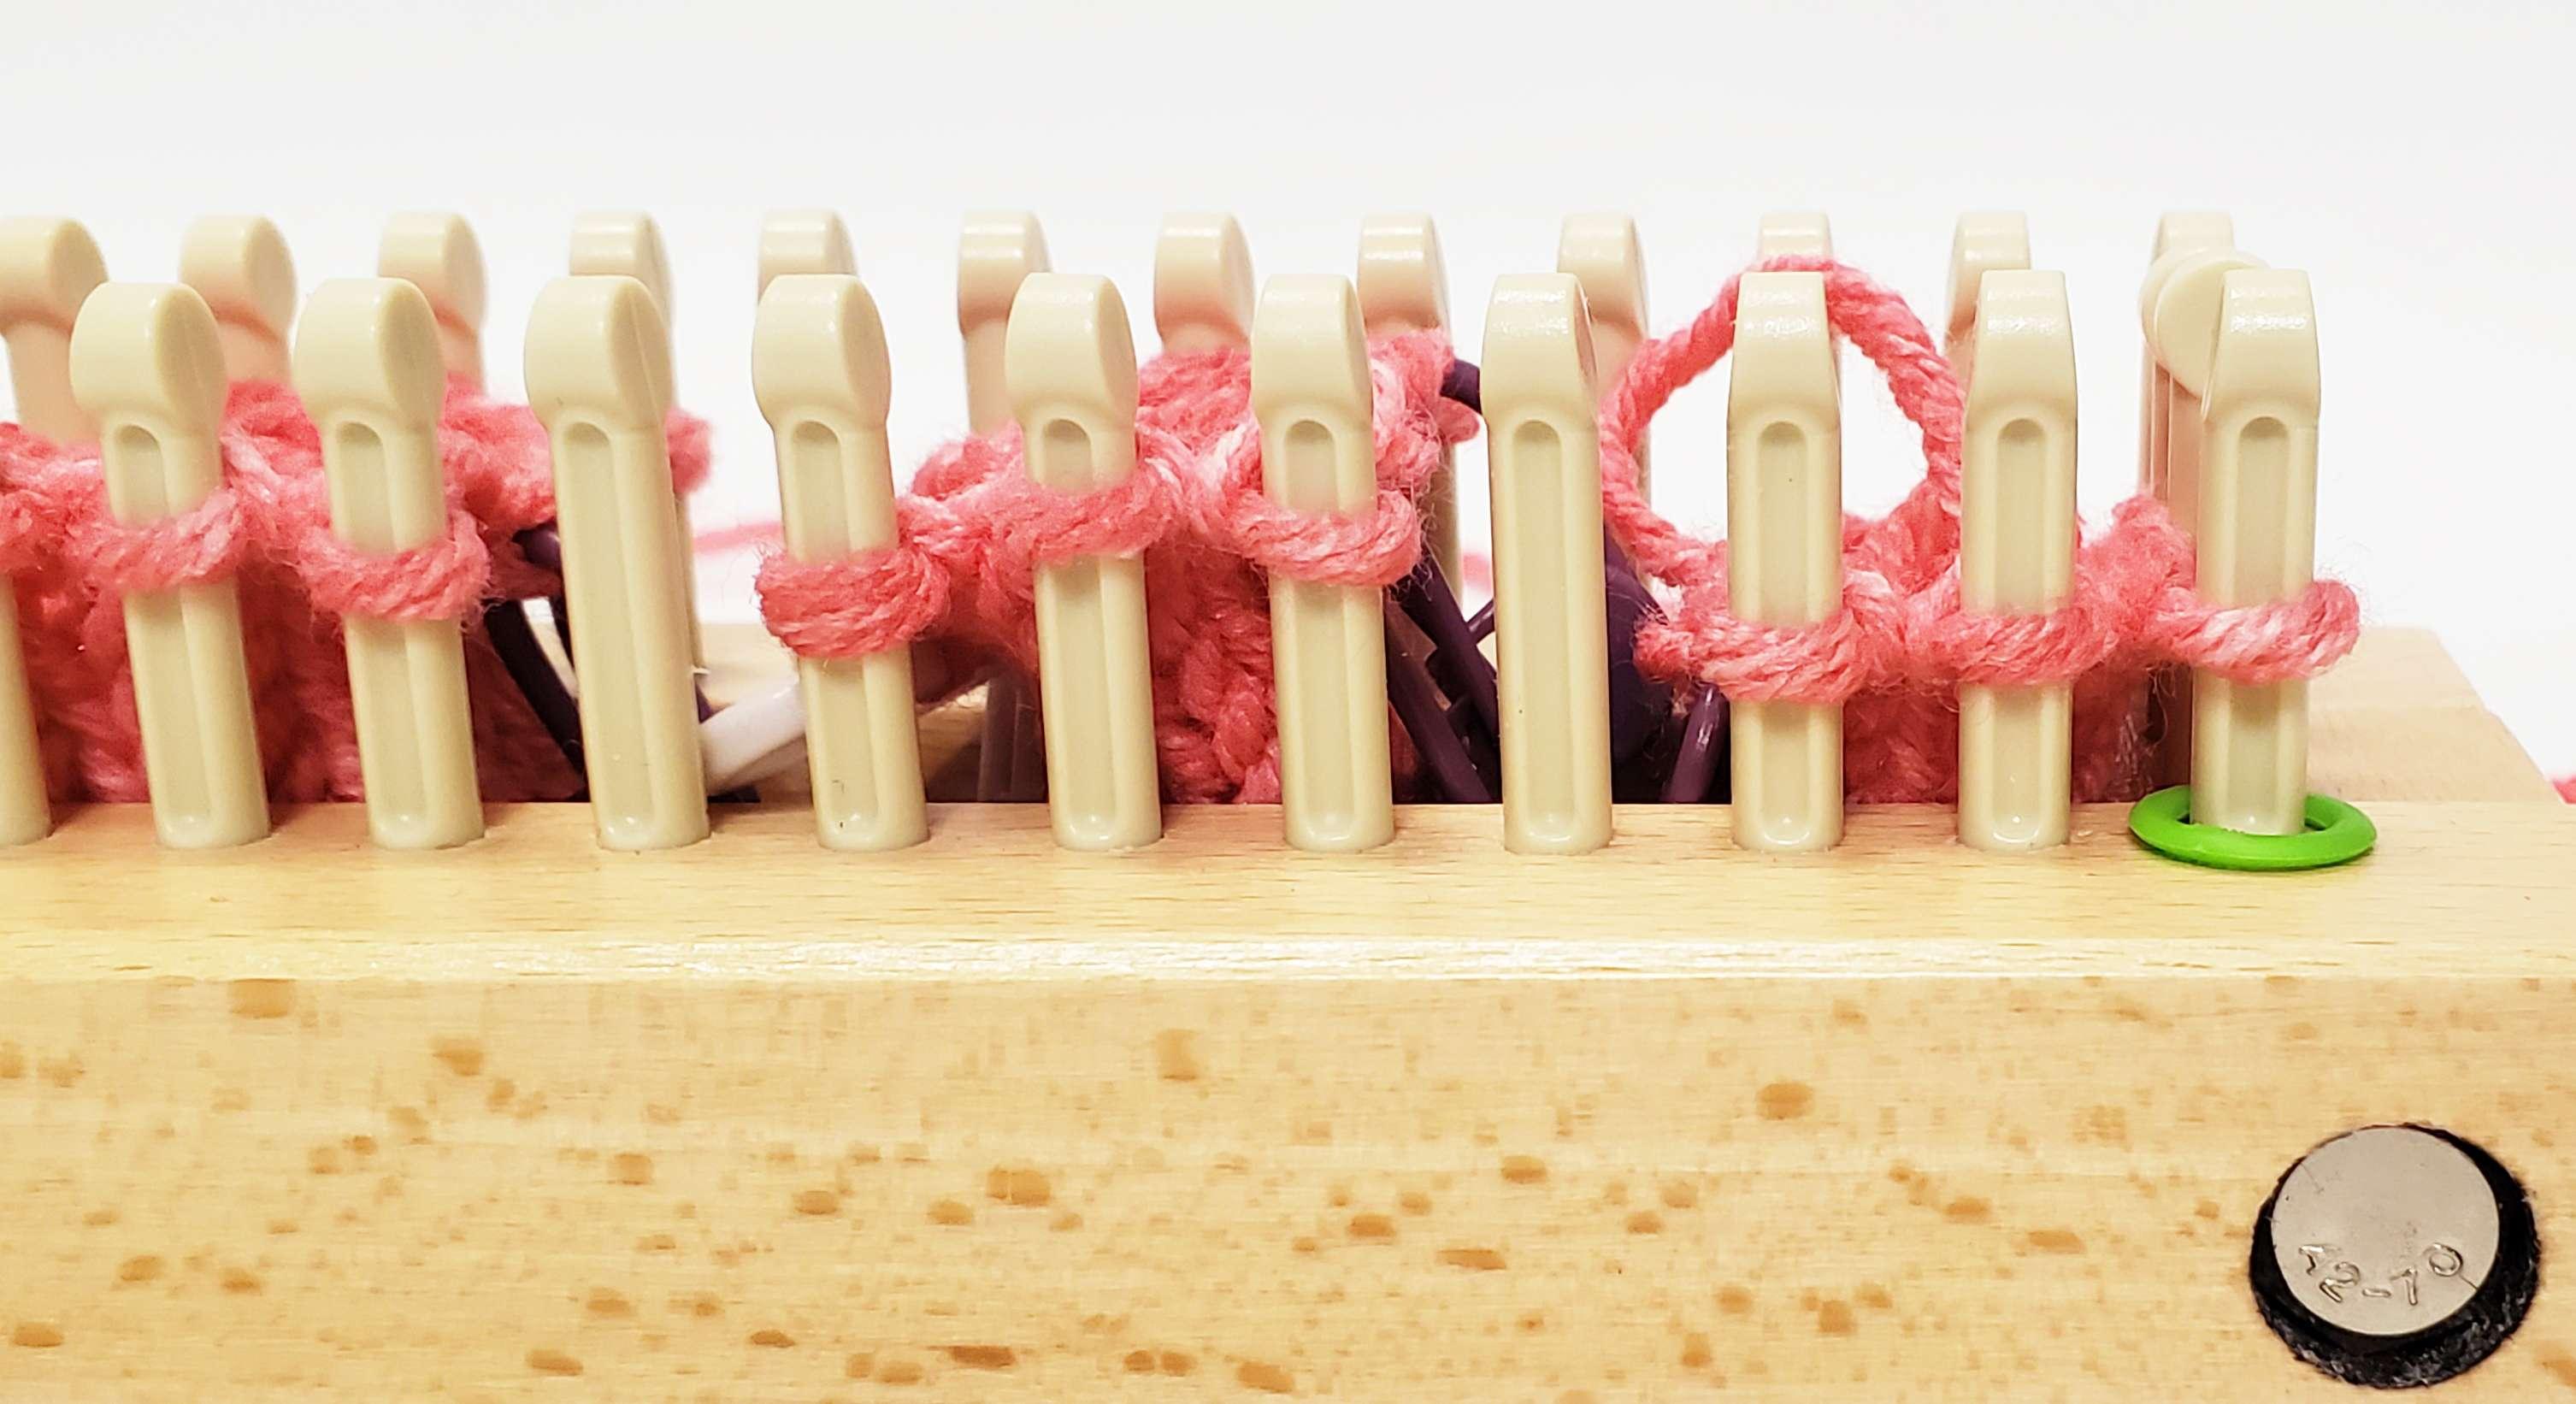 Place stitch marker for peg 1 on pinky finger as shown at the end of the loom. Join working yarn and prepare to work in the round.
Next 12 (10, 14, 15) rounds work all knits. YO empty pegs on the 1st round and knit those on round 2. 36 (36, 44, 46) stitches total.
Place stitches from insider slider on stitch holders. For size L, also place the stitches next to the both sliders on stitch holders as well. Number of stitches on stitch holders: 2 (1, 2, 1, ) on the end by the pointer finger.
Do not cut working yarn.
Thumb
 Turn the second peg slider around so the groove is facing the pointer finger and place it back on. Add the 3rd slider.
Set up the loom with the peg sliders for the thumb with 12 (10, 14, 16) pegs leaving 1 empty peg on each side between fingers for sizes C, S, and M. Do not skip a peg on size L.
Using the yarn end from the other end of the ball, CO the pegs set up with the gathered method and prepare to work in the round.
Tip: Start on the other side of the loom so the ending yarn tail will be between the thumb and pointer finger to use for seaming.
Work number of rows for the length of the thumb from the Row Chart for Fingers.
Read more : How To Make A Balloon Out Of A Glove
Cut working yarn leaving an 8” tail for seaming.
Place stitches from both sliders on stitch holders for all sizes. For size L on the side next to the pointer finger, also place the stitches next to the both slider on stitch holders as well. Number of stitches on stitch holders: 2 (1, 2, 1) on the outside of the thumb and 2 (1, 2, 3) between thumb and pointer finger. 1 peg remains empty between the thumb and pointer finger on all sizes now.
Take the slider on the inside of the loom off. Remove the slider that is between the pointer finger and thumb.
 Replace the end slider and place the stitches on stitch holders on the end back on the slider pegs.
Bottom of Hand Below Thumb
Pick up working yarn from peg 1 on pinky finger.
Next 3 (2, 4, 5) rounds work all knits. YO empty pegs on the 1st round and knit those on round 2. 46 (46, 56, 58) stitches total.
Note: sizes are written individually from here to cuff. Please use the appropriate instructions for the size being made.
Child Size
Begin decreasing on thumb end. Move the slider on the decrease end inward with each decrease row.
R1: K20, SSK, K1, K2tog, K21
R2: K all
R3: K19, SSK, K1, K2tog, K20
R4: K all
R5: K18, SSK, K1, K2tog, K19 – 40 stitches total
R6: K all
Begin decreasing on both ends. Move both sliders inward with each decrease row.
R7: K2tog, K15, SSK, K1, K2tog, K15, SSK, K1
R8: K all
R9: K2tog, K13, SSK, K1, K2tog, K13, SSK, K1
R10: K all
R11: K2tog, K11, SSK, K1, K2tog, K11, SSK, K1 – 28 stitches total
R12: K all
Proceed to Cuff
Small Size
Begin decreasing on thumb end. Move the slider on the decrease end inward with each decrease row.
R1: K19, SSK, K2, K2tog, K21
R2: K all
R3: K18, SSK, K2, K2tog, K20
R4: K all
R5: K17, SSK, K2, K2tog, K 19 – 40 stitches total
R6-10: K all
Begin decreasing on both ends. Move both sliders inward with each decrease row.
R11: K2tog, K15, SSK, K2, K2tog, K15, SSK, K2
R12: K all
R13: K2tog, K12, SSK, K2, K2tog, K12, SSK, K2 – 32 stitches total
R14: K all
Proceed to Cuff
Medium Size
Begin decreasing on thumb end. Move the slider on the decrease end inward with each decrease row.
R1: K24, SSK, K2, K2tog, K26
R2: K all
R3: K23, SSK, K2, K2tog, K25
R4: K all
R5: K22, SSK, K2, K2tog, K24
R6: K all
R7: K21, SSK, K2, K2tog, K23
R8: K all
R9: K20, SSK, K2, K2tog, K23
R10: K all
R11: K19, SSK, K2, K2tog, K21 – 44 stitches total
R12: K all
Begin decreasing on both ends. Move both sliders inward with each decrease row.
R13: K2tog, K16, SSK, K2, K2tog, K16, SSK
R14: K all
R15: K2tog, K14, SSK, K2, K2tog, K14, SSK – 36 stitches total
R16: K all
Proceed to Cuff
Large Size
Begin decreasing on thumb end. Move the slider on the decrease end inward with each decrease row.
R1: K26, SSK, K1, K2tog, K27
R2: K all
Read more : How To Buy Nitrile Gloves From Uci Stockroom
R3: K25, SSK, K1, K2tog, K26
R4: K all
R5: K24, SSK, K1, K2tog, K25
R6: K all
R7: K23, SSK, K1, K2tog, K24
R8: K all
R9: K22, SSK, K1, K2tog, K23 – 48 stitches total
R10-14: K all
Begin decreasing on both ends. Move both sliders inward with each decrease row.
R11: K2tog, K19, SSK, K1, K2tog, K19, SSK, K1
R12: K all
R13: K2tog, K17, SSK, K1, K2tog, K17, SSK, K1 – 40 stitches total
R14: K all
Proceed to Cuff
Cuff
Next 10 (8, 12, 14, 16) rounds, *K2, P2, rep from * to end
BO off with the ribbing method.
Ribbing Bind Off
Wrap working yarn 3x around the pegs with the work.
Cut working yarn and thread on a tapestry needle.
Tip: Keep yarn tail pulled tight while working bind off.

Run needle DOWN through the stitch on peg 1.

Run needle UP through the stitch on the last peg (to the right).
Bring yarn tail behind peg 1, run needle DOWN through the stitch on peg 2.
Run needle UP through the stitch on peg 1.
Proceed to peg 3 and continue with running the needle DOWN through the stitch that hasn’t been worked and then back UP through the stitch to the right that was previously worked until all stitches have been worked.
Finish by running needle back UP through peg 1.
Take glove off the loom.
Finishing
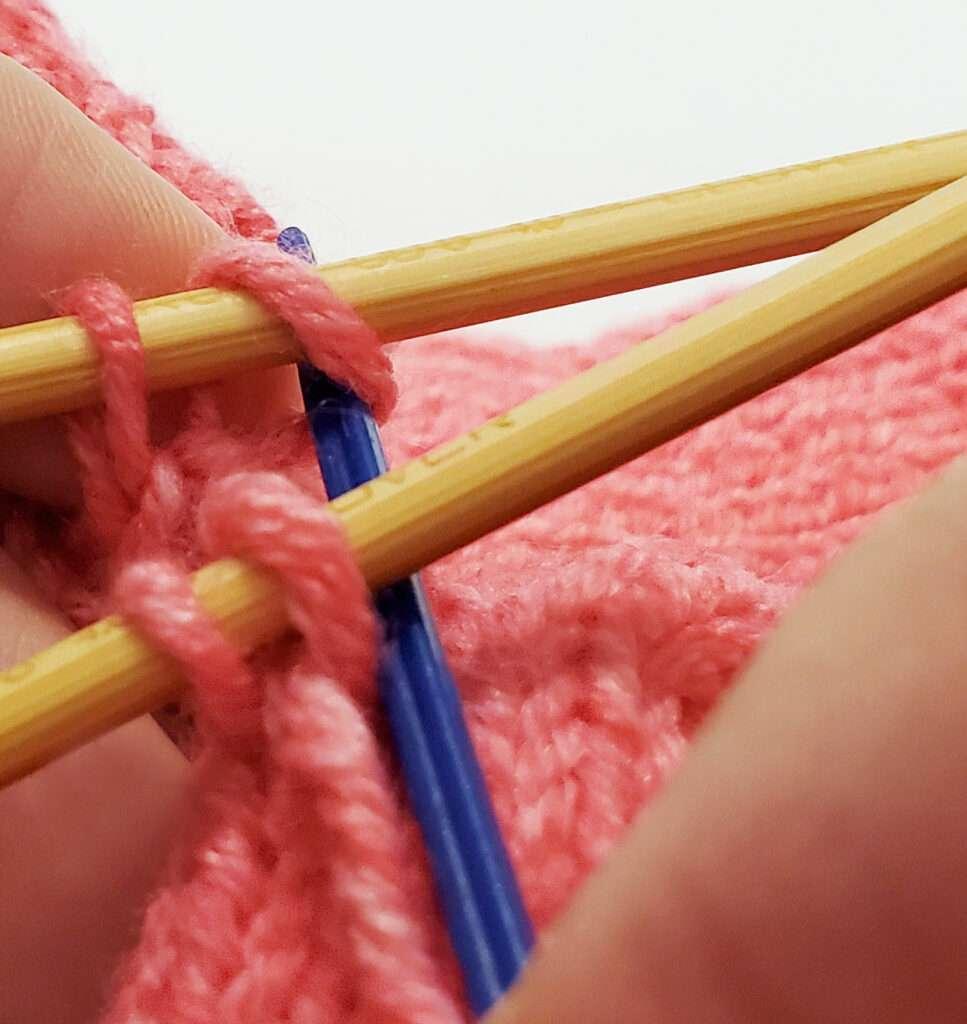
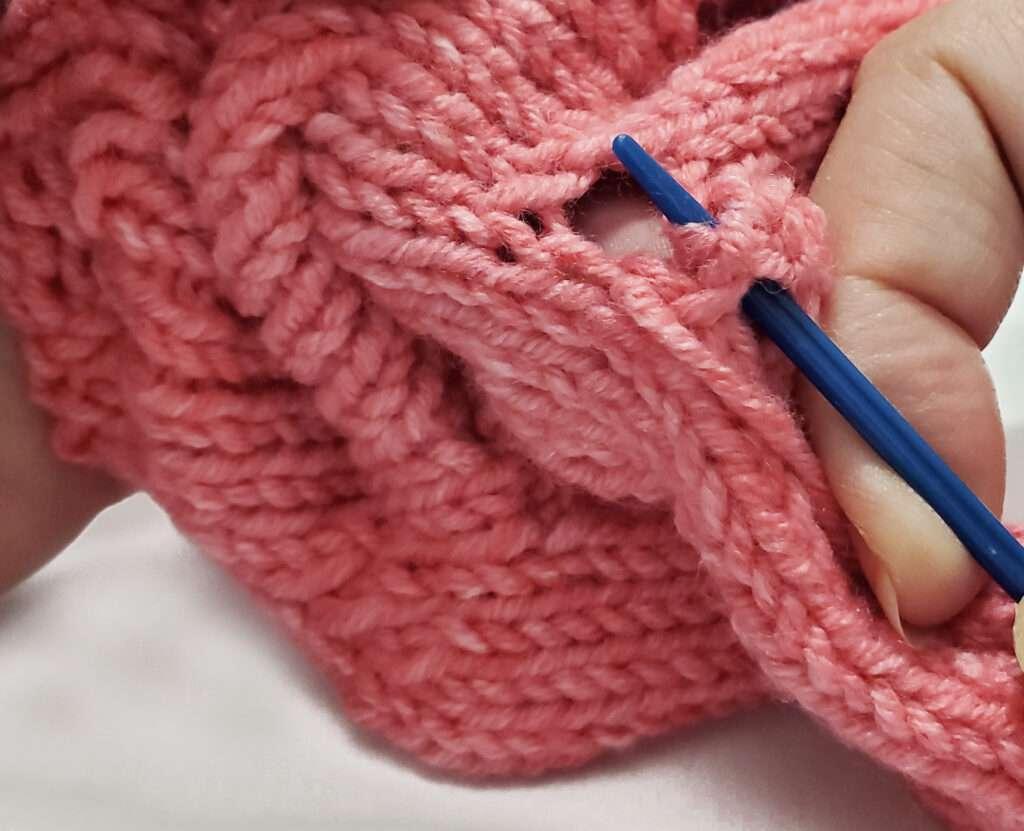
Work Kitchener Stitch to join the stitches left on the stitch holders between the fingers.
Note: While the holes between the fingers may be simply sewn closed, the combination of the Kitchener and Mattress Stitches is recommended for a cleaner seam.

*Place the live stitches on stitch holders between the Pinky and Ring Fingers on the double point needles.
Hold work with the side with the yarn tail that was left for seaming toward the back.
Run the first double point needle through the first stitch on the right from right to left from the back of the stitch to the front.

Continue to run the double point needle from right to left from the back of the stitch to the front until all stitches on the back are loaded on the needle. Number of stitches will range from 1 on child size to 3 stitches on the large size.
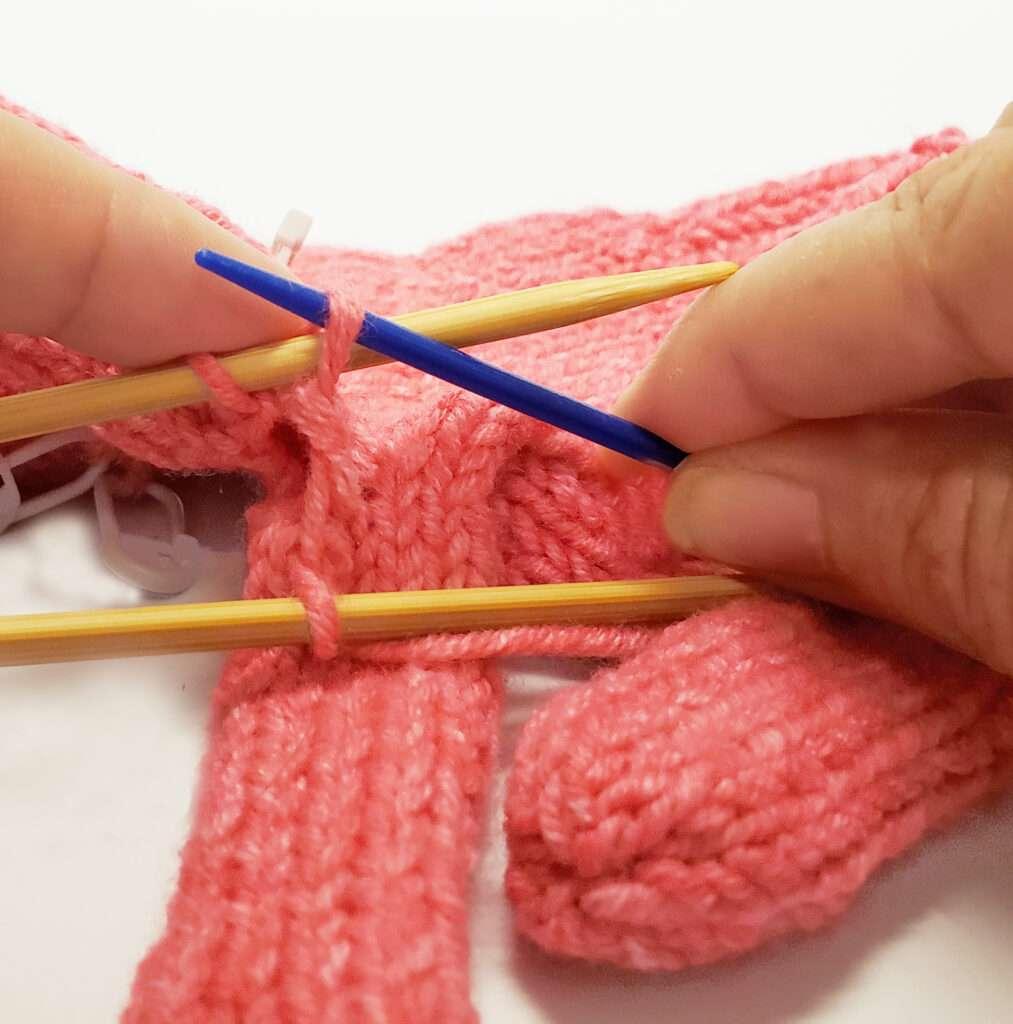
Run the second double point needle through the first stitch on the right from right to left from the front of the stitch to the back.
Continue to run the double point needle from right to left from the front of the stitch to the back until all stitches on the front are loaded on the needle. Number of stitches will range from 1 on child size to 3 stitches on the large size.

Thread tapestry needle with yarn tail.
**Run tapestry needle through first stitch on front needle from right to left as shown. Leave stitch on double point needle.
Run tapestry needle through first stitch on back needle from left to right as shown. Leave stitch on double point needle.

Run tapestry needle through the front stitch from left to right. Remove the stitch from the double point needle.

Run tapestry needle through the next front stitch from right to left. Leave stitch on double point needle.
Run tapestry needle through the stitch from right to left. Remove the stitch from the double point needle.

Run tapestry needle through the next back stitch from left to right. Leave stitch on double point needle.
Continue from ** until all stitches have been removed from the double point needles.

Stitches are joined with yarn tail on the left side.
Now to seam each side of the Kitchener join with the Mattress stitch.

***Run tapestry needle through the bottom stitch on the right side of the opening.

Run the tapestry needle under the leg between the stitches on the left side.
Run the tapestry needle back through the same place the needle was drawn through before and back up between the stitches.
Run the tapestry needle through the top of the stitch on the left side.

Repeat on the right side as before.

Run the working yarn back to the inside down between the line of stitches to finish closing.

Repeat from *** on the other side of the Kitchener join.
Repeat from * between each finger until all are seamed.
Weave in ends.
Step by Step Pattern Video
Source: https://t-tees.com
Category: HOW