
It’s baseball season! Perfect occasion for a tutorial. Today we have a guest blogger Sandy Thompson to share with us her super cute baseball glove cake!
Materials needed:
You are viewing: How To Make A Baseball Glove Cake
(2) 9×13” cakes 2” tall
Foam Core Board for cake base
Cake board for final cake display (Tutorial has a 16” round base)
Ivory or White fondant and small amount of Black fondant
Buttercream (White and Black)
Airbrush machine
Airbrush colors: Yellow, Orange, Ivory
Palette knife
Xacto knife or scalpel
Veining tool
Stitching tool
Clay gun
Gold luster dust
Clear alcohol or lemon extract to mix with luster dust
Paintbrushes (one for painting with luster dust and one for water to glue fondant pieces)
Small amount of water for gluing fondant pieces together
Carving knife (I use a steak knife)
Round circle cutter (1 ½ inches…I used the end of a big icing tip)
Piping tips: 1, 2 3
Turntable for airbrushing
Transparency or acetate paper
Dowels
Read more : How Many Times Has Donald Glover Been On Snl
Modeling chocolate or Rice Crispy Treats
Red nontoxic marker
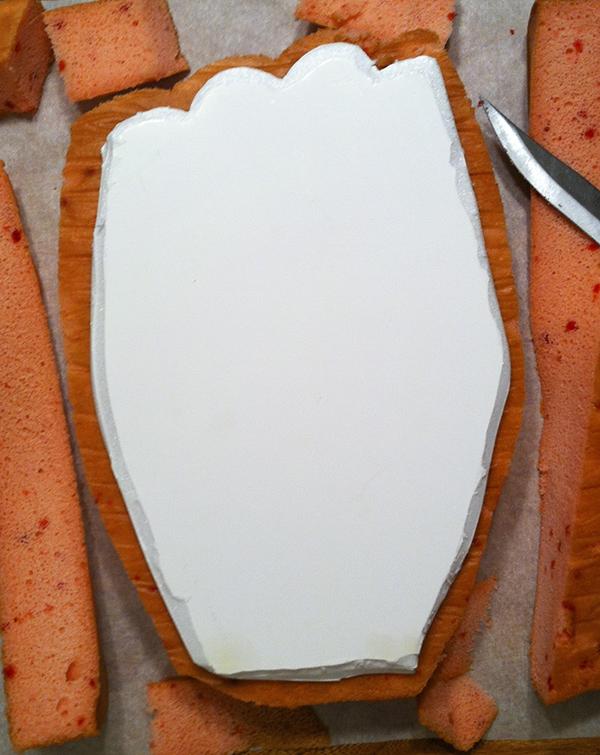
Step 1 – Using (1) ½” thick Foam Core Board or (2) ¼” thick Foam Core Board glued together draw two templates. Use the “back” of the glove to draw your first template and the “top” of the glove to draw your second template.
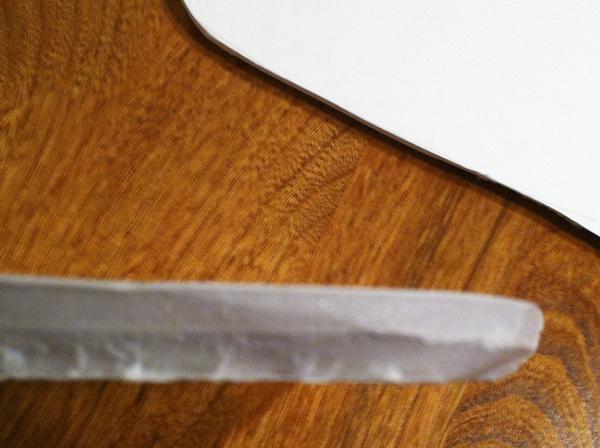
Step 2 – Bevel the sides of your templates – this will give the glove a “rounded” appearance on the side.
Step 3 – NOTE: Anytime you carve a cake, it should be very firm. Either refrigerated overnight or in the freezer for an hour or so. Position one of your 9×13 cakes face down, then lay your “back” template face down on the cake…now you’re ready to start carving along the outside edge. I like to carve an inch or so away from my template…that way if I make a mistake it doesn’t cause any issues. Once you’re done carving, then you can turn your cake right side up.
Step 4 – Position your knife at an angle so it lines up with the angle of your Foam Core Board and begin beveling the edge of your cake.
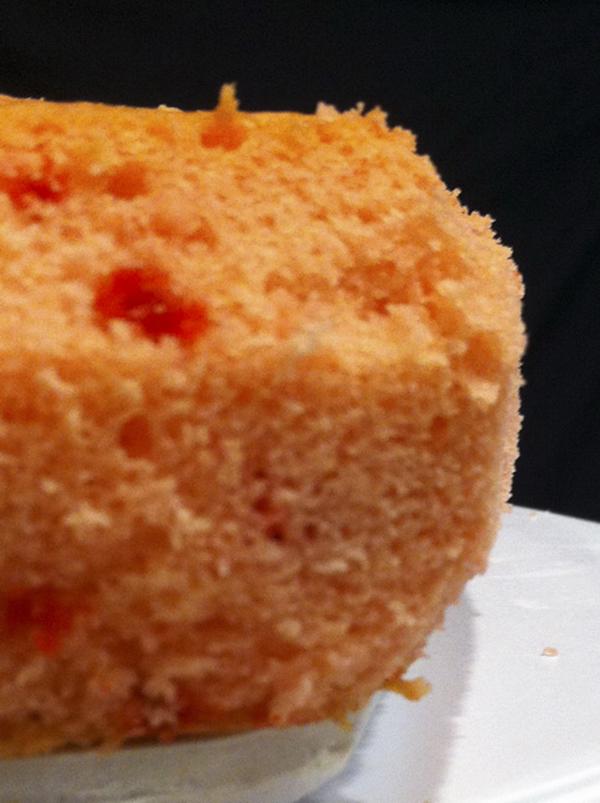
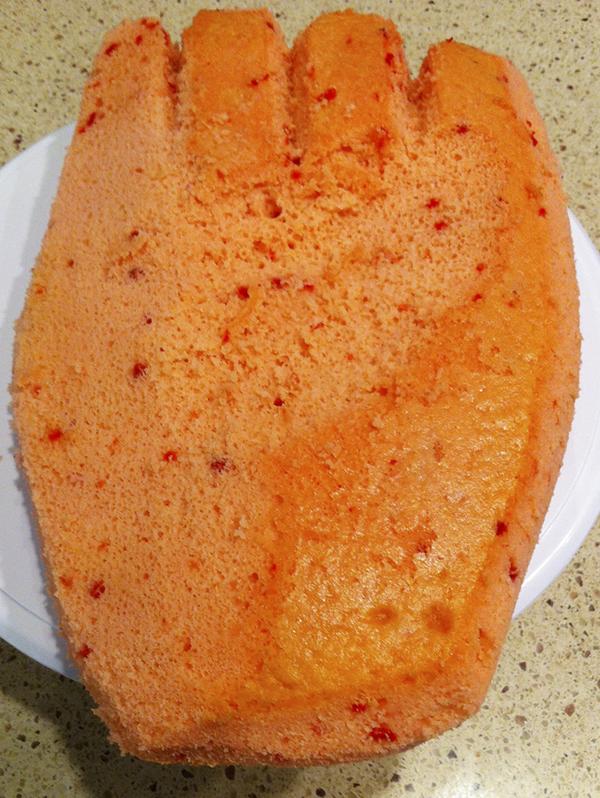
Step 5 – For the top of the cake, position your knife once again at an angle to smooth out the fine lines. We’re going for a rounded look along the top.
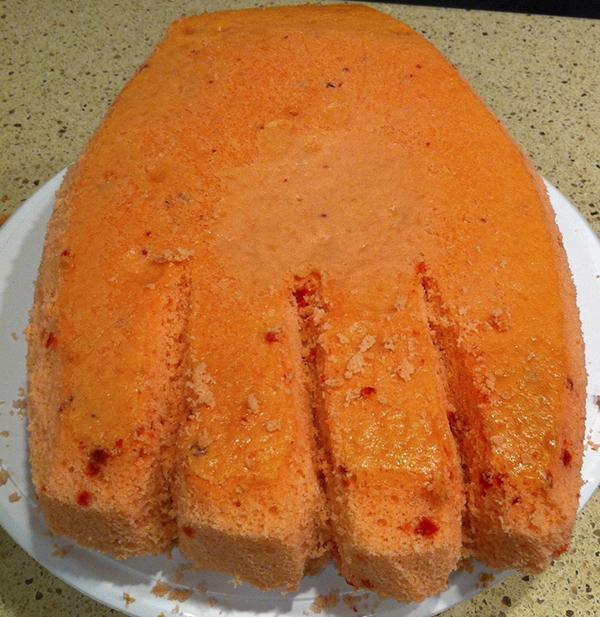
Step 6 – Making small cuts at first, carve a notch along each “finger”. Since you’ll be adding icing and fondant later, you’ll want to make the notches more pronounced during this step. At this point if your cake looks like an oversized “Big Foot” impression, you’re doing the right thing!
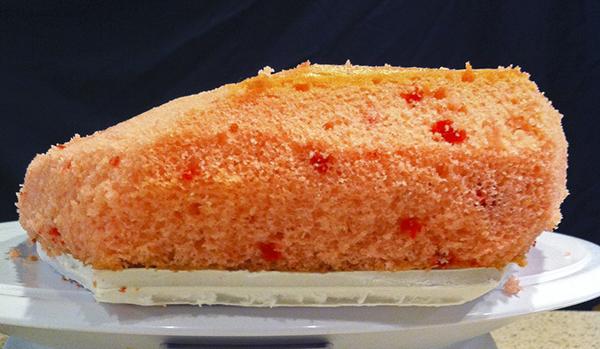
Step 7 – On the left side of the cake, cut an angled slice off the top, down towards the side of the cake. This will allow you to place the other 9×13 cake on top at an angle. (See side view of Step 7 for a visual)
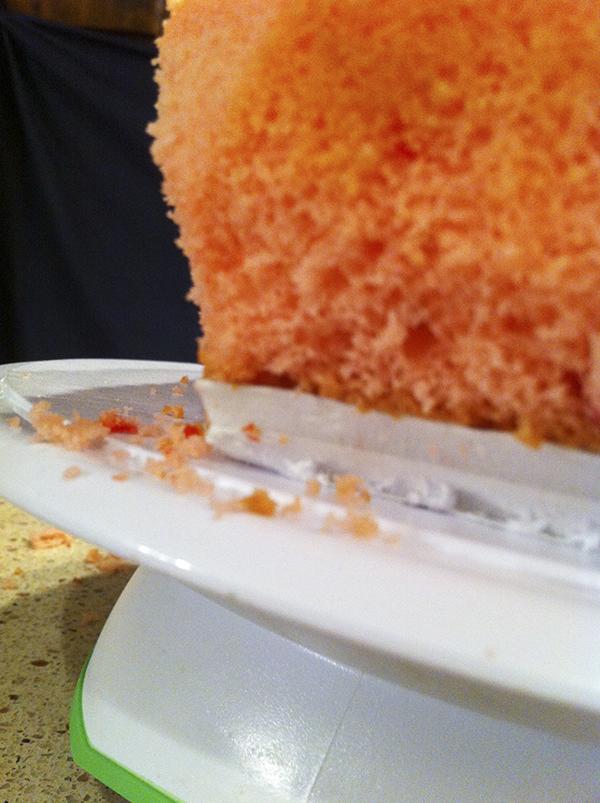
Step 8 – Ice the cake. Icing a curved cake can be tricky so see the next step for a helpful hint.

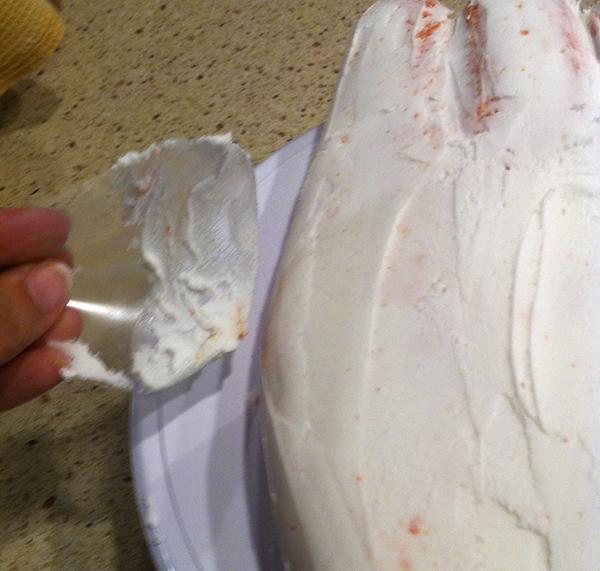
Step 9 – Using transparency paper (also known as Acetate paper), cut a 3” square piece, then round the corners – you don’t want any sharp edges. Cup the paper in your hand as shown in the picture and gently smooth your icing. Be sure to wipe the paper after each smoothing…if you get icing build up on the paper, it will end up removing the frosting from the cake.
Step 10 – Note: Before rolling out your fondant, add about a teaspoon of food grade glycerin for every 2 lbs of fondant. This will keep the fondant more pliable and give you more time to work. Roll out white or ivory fondant in a rectangular shape.
Step 11 – Taking your time, smooth out your fondant and using your palette knife or other tools, tuck the fondant along the Foam Core Board. If you happen to get a little “elephant skin” that totally works for this cake…it is after all a well-used leather glove so it only adds character.
Step 12 – Using your stitching tool, make stitch marks along the entire edits of the cake and in between the fingers.
A quick note about airbrushing…..when it comes to airbrushing there are a few things to keep in mind:
- Airbrush colors are transparent. Why does that matter? This means you can “layer” colors and achieve a very realistic effect.
- This also means you can always add more color to achieve a dark color but you can never start with a dark color and go all the way back to a white color.
- Whatever colors you use for your project, you’ll want to start with the lightest color first working your way to the darkest color last.
- You’ll always want to test your colors before you use them. Sometimes a color may ‘sound” right but after your spray it, it looks different than you imagine. For example, for this piece the glove is a brownish color but to achieve the look, I actually went with Ivory rather than Brown.
Step 13 – Airbrushing fun starts now! This may sound crazy, but we’re going to start with a Yellow airbrush color. It may take several passes to achieve an allover yellow so take your time. You may even need to let the cake sit for a few minutes for the color to dry.
Step 14 – Next, spray a little Orange. It won’t take much…just a light layer over the entire cake…on the edges that would normally have “wear and tear”, go even lighter in those places and darker in the creases and stitching areas.
Step 15 – Now for your final coat on the bottom cake, using Ivory spray the entire cake until you achieve the desired color. Be sure to spray a little heavier along the stitching, crevices and the very bottom of the cake. You cake should now look like a giant ‘Bear claw” you get at the donut store.
Step 16 – While your airbrushed cake is drying, you can create your “baseball”. I used Modeling Chocolate but you can also use Rice Krispy Treats. Either way, shape your “baseball” then cut a slice off the top and the bottom so it will rest correctly in your glove. The bigger the ball, the wider the opening of your glove will be. Set your ball in place so you can mark where a dowel needs to be place. You’ll also want to dowel the left side of the glove so your top layer will be supported.
For the top layer of cake, just follow the exact same steps above (Steps 2-9).
Step 17 – Before placing the top layer of cake on the bottom cake, remove your baseball (we’ll add it back later).
Step 18 – Roll out more fondant in a rectangular shape and drape it over the top cake. Be sure the fondant goes all the way down the back of the cake. (This means you’ll have a double layer of fondant in the back)
Step 19 – Using your tools, tuck the fondant under the top cake (you can use a little shortening on your board or the back of the fondant to make it stick). At either end, fold the fondant so the edge has a nice appearance. Then make your lines on the fondant (based on your glove design).
Step 20 – To make the “webbing” of the glove, roll out more fondant and cut 1/4” strips. Then interlace the strips as shown.
Step 21 – Make the “facing” that goes slightly over and around the webbing. (It will look like an oversize pocket). Then cut out the center of the “pocket”.
Step 22 – First place the “webbing” on the cake, then lay the “facing” over it. Finally, airbrush your top layer of cake just as you did in Steps 13-15. If you airbrush a little on the bottom layer, no problem. To make the stitching and webbing really stand out, be sure to go a little darker in those areas.
Step 23 – Now CAREFULLY add your baseball back in (my baseball is small so the glove opening isn’t very big. If you go with a bigger baseball, you may want to color the bottom of the board holding your top layer. In other words, you wouldn’t want someone to see the white board).
Step 24 – As great as your cake is already looking at this point, now the real fun starts…adding all the details! Using your clay gun and the 2nd to largest round disc, make the round “roping” that goes on the “glove”. Next, using the smallest rectangular disc, make the “laces”. Use your pictures or real glove to guide the placement.
Step 25 – Add more “lacing” along the top and use your veining tool to add “sew” marks.
Step 26 – Still using your rectangular disc, make a knot in the fondant strip and attach to the cake.
Step 27 – Work your way around the cake to add all the details.
Step 28 – More details….feel free to use your veining tool to make indentations at the end of the laces.
Step 29 – The glove I based my design on had black “grommets” on some of the “laces”. I used fondant but you can also use black icing.
Step 30 – Final fondant details…don’t forget your red logo circle, make your red stitching lines on your baseball and paint the gold buckle for the back strap. For small items like the red logo circle it’s hard to use a stitching wheel, instead use a toothpick.
Final cake – Using white buttercream and Tip #2 or 3, add the “R” logo to the red circle. Then using black buttercream and Tip #1 or 2, add the writing to the cake….this would be a great place to write a message to your customer as well.
Thank you Sandy!
What a great cake! If you guys make one I would love to see it!
Sharon, SugarEd Productions
————————————————————————————————————
Join SugarEd Productions Online School
Use Coupon Code 3MONTH for one month membership for $3
NOLA Photography http://bentzphotography.com/
Source: https://t-tees.com
Category: HOW