
Learn how to sew an oven mitt with this easy sewing tutorial for beginners! Includes a free oven mitt pattern and simple instructions.
Please note: This post may contain affiliate links, for our full disclosure click HERE.
You are viewing: How To Make A Oven Glove
How much do I love sewing cute and easy things for the home?… let me count the ways! I love it a lot LOL. I’m assuming you do too?! Or you’re learning?
What better easy and cute sewing project than a DIY oven mitt?! If you’ve been wanting a good, beginner sewing project and you decided to try out making your own oven mitts, then you’re in the right place.
I’ll give you my free oven mitt pattern, and a step by step tutorial that will show you how to sew your own.
A couple of years ago I made a post and video on sewing potholders. Check it out HERE if you want to try that next! I’ve been meaning to make a follow-up post for DIY oven mitts for SO long and I’m just now getting around to it.
NOW, you can make a matching set of potholders and oven mitts, with cute fabric that coordinates with your kitchen. OR you can make a set for a friend. OR you can gift a set to your mama for Mother’s Day. You can also throw in a DIY apron with them! The options are endless;)
Insul Bright for Oven Mitts
These DIY oven mitts are made with Insul Bright, which is a heat resistant material that’s perfect for this type of project. You don’t need any advanced sewing knowledge to use this material; all you need is some basic sewing skills and a little patience.
There’s NO bias tape in this tutorial, I wanted to make it as simple and easy as possible. But there are plenty of other tutorials out there that use bias tape on the cuff for a pretty detail, if you’d like to try that.
Best Fabric for Oven Mitts
You may be wondering what the best fabric is for oven mitts. Don’t worry, you DON’T need to track down some kind of special, heat resistant fabric that only comes in two colors.
You can basically use ANY kind of cotton, canvas, or home decor fabric you like. There isn’t really a heat resistant fabric recommendation for oven mitts. BUT we are going to be using a special batting (filling) on the inside that will make it heat resistant. This batting will help to keep the heat from going through the oven mitts to your hands.
Choose a fabric that coordinates well with wherever you’re going to keep your oven mitts. Or a fabric that matches the person you’re gifting it to! You can do all of the same fabric, or do a double-sided mitt with different fabrics on each side. Be sure to find a coordinating, soft fabric for the lining.
Free Oven Mitt Pattern
First, you’re going to want to download your free oven mitt pattern. Click the button below to to open up the download. Once its open, print it at 100%. You it to look exactly like my print out in the pictures below.
Read more : How Can Medical Gloves Be Improved
After you’ve printed your oven mitt pattern, gather up all of your supplies.
(you can also use an oven mitt that you already have and that you know you love the size and shape of, to trace.)
DIY Oven Mitt Supplies
Here is everything you need to make your own DIY oven mitt. This is enough to make ONE mitt. Adjust the material if you’d like to make more.
Equipment/Tools
- sewing machine
- scissors
- iron and ironing board
- pins or sewing clips
- tracing pen or pencil
- free oven mitt pattern
Materials
- two pieces of fabric for the outside, 9″x12″, you can use cotton, canvas, or home decor fabric, whatever you like.
- two pieces of fabric for the lining on the inside, “9x”12, cotton would be best for this so its nice and soft
- {2} pieces of insulated batting (get some on Amazon HERE), 9″x12″
- one piece of fabric 2″x5″ for the loop (optional)
How to Make an Oven Mitt
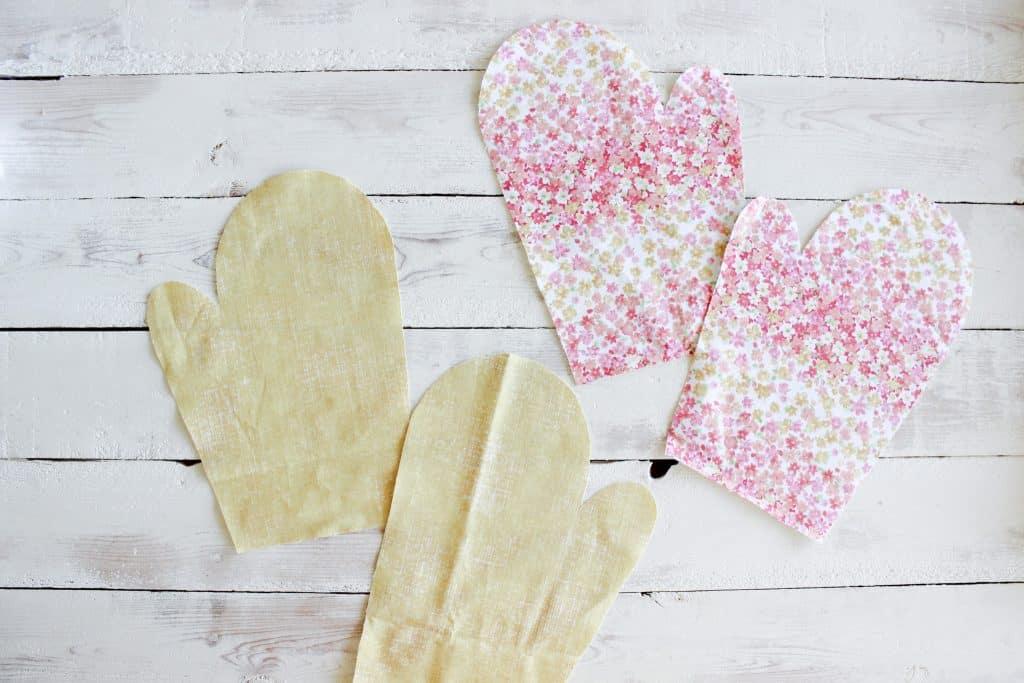
Start by cutting out your pattern. Cut on the outside of the thick black line.
Place your two pieces of fabric for the outside, right sides together. Trace your pattern onto the center of the fabric using a pencil or tracing pen. Make sure your pieces of fabric stay snug, right sides together, and cut out your pattern, cutting through BOTH pieces of fabric.
You can also just cut them out one at a time, but you need to make sure you flip your pattern piece over when you do the second cut. This way you’ll have two opposite pieces when the right sides are up.
Sew the Lining
Now, do the same for the lining fabric. Again, put the two pieces of lining fabric right sides together, then trace your mitt onto the center. Keeping the pieces together, cut out the oven mitt pattern, cutting through BOTH pieces of fabric.
If you’d like you can cut them all out one by one, but make sure you lay your pattern piece down, trace it, then flip the pattern piece over and trace it again for the next piece.
After these two cuts you should have FOUR pieces of fabric in the shape of an oven mitt, that are opposites. Two outside pieces that can sit, thumbs together or backs together, when the right sides are up. And two inside pieces that can do the same.
Next, you’ll want to cut your insulated batting down to {2} 9″x12″ pieces.
Now that you have all of your pieces cut out, you’ll start to sew. Start first by placing one piece of the insulated batting onto the wrong side of one piece of your outside fabric. Make it so that the shiny side is facing the fabric. You can clip it into place. Head over to your sewing machine.
Sew the batting and the outside fabric together using whatever design you would like. I did one with random lines, overlapping, all over it. Another one I did with vertical lines, spaced evenly apart. You WILL see these stitch lines. But random lines or something more structured will both look cute.
Do this with both of your outside pieces of fabric. So you’ll end up with two outside pieces each stitched to one of your insulated batting pieces.
Read more : How To Make A Glove Box Clean Room
Once they’re sewn together, trim off the excess batting all around the edges.
Once those pieces are finished, you can put them together, right sides together, and clip or pin. Do a stitch all the way around, about 1/4″ from the edge, leaving the bottom open. Go slow, especially by the inside of the thumb. Flip it right side out when you’re finished and push out the edges as best you can.
Once that’s finished, its time to sew the lining. Place your two lining cut outs right sides together, and sew around, leaving the bottom open AND 2″-3″ on the side. Do a backstitch at the beginning and end of this little opening. This will be for turning it all right side out at the end.
Sew Your Loop
Take your 2″x5″ piece of fabric and fold it in half lengthwise. Iron it down. Unfold it, and fold both of the long edges into the middle, so that they meet at the middle crease you just made. Iron it again. Now, fold it in half again, so the all of the raw edges are on the inside and you have a skinny piece of fabric with folded edges on each side. Take this over to your sewing machine and sew down the long, open edge to seal it.
You should have your outside fabric pieces, your lining pieces, and your loop piece. Now its time to assemble!
Assemble Everything
Put your hand inside of your oven mitt with the batting and outside fabric sewed together. Use your hand to wiggle the oven mitt into the lining fabric (which should still be inside out) so that right sides are touching on the inside. Once you have it all the way in, fix it so all of the seams are lined up. Make sure its all the way in and snug.
Fold your loop fabric in half and place it inside of the oven mitts, in between the outside/batting fabric and the lining fabric, with the raw edges UP. Place it on the opposite side of the thumb.
Now we’re going to sew ALL of these pieces together. First, pin the loop in place and pin all of the bottom, raw edges together. Wiggle it all if you need to, to make sure everything lines up well. At your sewing machine place the inside of the bottom edge of the oven mitt under your needle, like in the picture below. As you sew, pull and turn the opening of the mitt in a circle, until you’ve sewed all the way around it this opening.
Now, use your opening that you left in the lining, to turn the oven mitt right sides out. When you get it all wiggled out, it should look like this below.
You’re SOO close to done! Fold the raw edges of that opening on the lining inside of itself (you can iron it also if you’d like) and do a top stitch down those 2″-3″ to seal it.
Now, press the lining inside of the oven mitt, making sure its pushed to all of the edges and lined up right at the seams. You are DONE! You should have a beautiful, heat-resistant oven mitt, complete with a lining and a loop for hanging.
Enjoy Your Handmade Oven Mitt
I hope you enjoy your DIY oven mitt! The first time you make them it can be a little confusing, but if you do it a couple of times it will feel like a breeze. You can make these up with potholders and an apron for your mom on Mother’s Day, or your girlfriends at Christmas.
Make them in a fabric that TOTALLY coordinates with your kitchen. When you can sew your own textiles, you can make things completely custom to your home and your style. So neat! Let me know below if you have any questions.
Happy sewing friends!
If you loved it, PIN it!
Other Sewing Posts You May Like
Source: https://t-tees.com
Category: HOW