
Clawed Glove Tutorial
i.e. How to make yourself some bird hands out of a pair of tights. I made these for my kenku costume.
If you already have gloves, skip to step 12. Otherwise:
You are viewing: How To Make Bird Claw Gloves
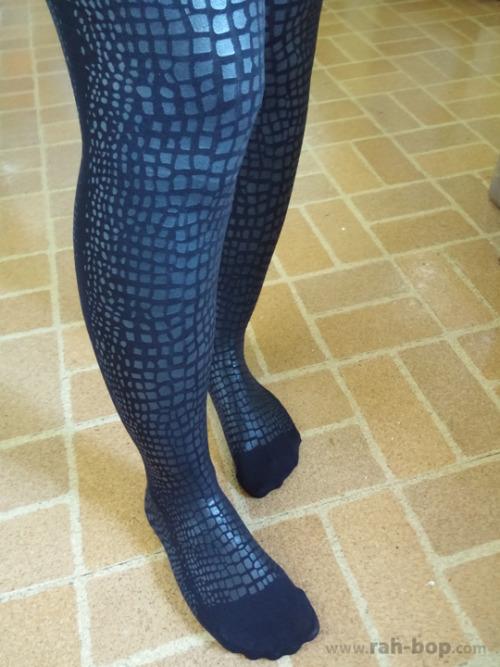
1. Get yourself some tights. The ones I used were HUE Python Print Tights, which I REALLY ENJOY and recommend, if you need something like this. I got two pairs so my arms and legs would match.
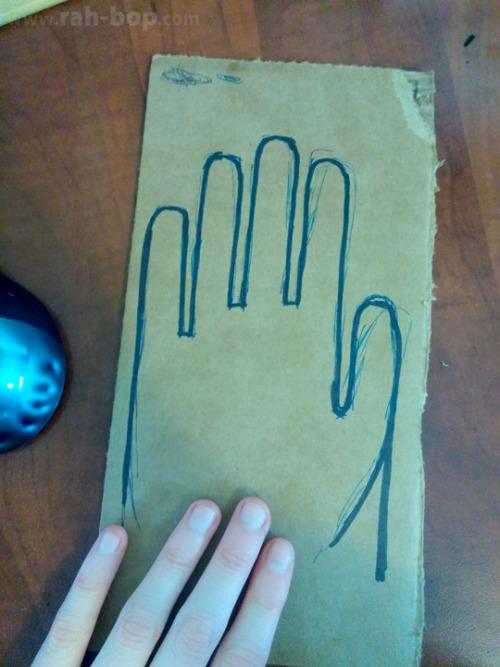
2. Trace your hand onto some paper. I used cardboard for some reason but any paper is fine. You can see where I traced my hand with ballpoint pen and went over it again with sharpie to even it out.
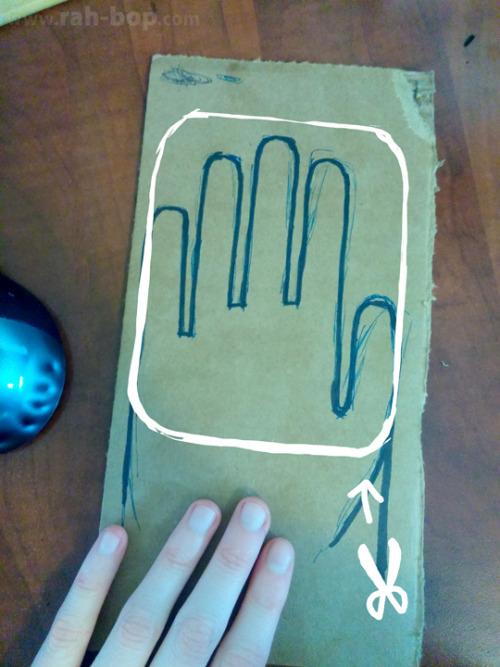
3. Cut your hand pattern out.
4. Use your pattern as a guide to cut a separate rectangle out of cardboard. The cardboard rectangle must be tall enough to cover all the finger detail and the edges should be flush with the edges of your pattern. Round the corners or it’s gonna get stuck in your tights. Why make life harder for yourself?
5. Turn your tights inside-out and put your cardboard rectangle in there. Make sure it’s oriented the correct way. This stretches out your tights to the correct width so you can trace your pattern on there evenly.
*Note: The scaly pattern on my tights don’t go all the way to the toe. If your tights don’t have a pattern then you can put the rectangle all the way into the toe; otherwise you need to line it up with the edge of the fabric pattern.
Read more : How To Buy Softball Glove
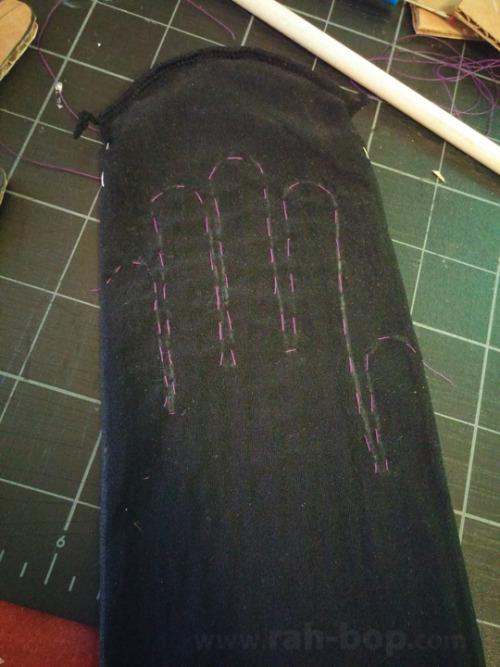
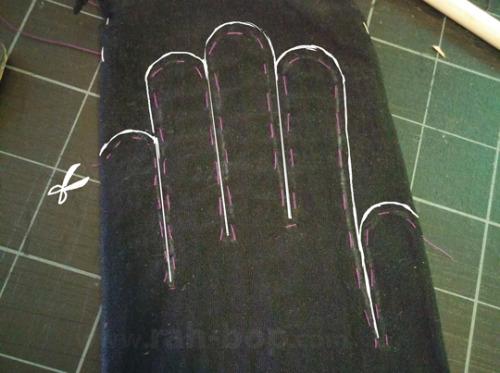
6. Trace your hand onto one side of the tights with a chalk pencil.

In the photo above, the cardboard rectangle is inside the tights and then I traced my hand pattern onto it.
7. Remove the cardboard, flatten out the tights and pin the two sides together. Then baste along the lines with a running stitch. You’ll pull this out later so don’t worry about making it beautiful or using a matching thread color or anything.
8. Cut OUTSIDE the line. Make a single cut between the fingers.
9. Using a thread in the color of your fabric (not like me), whip stitch between the edge of the fabric and the line you drew. When you’re done, remove the basting thread.
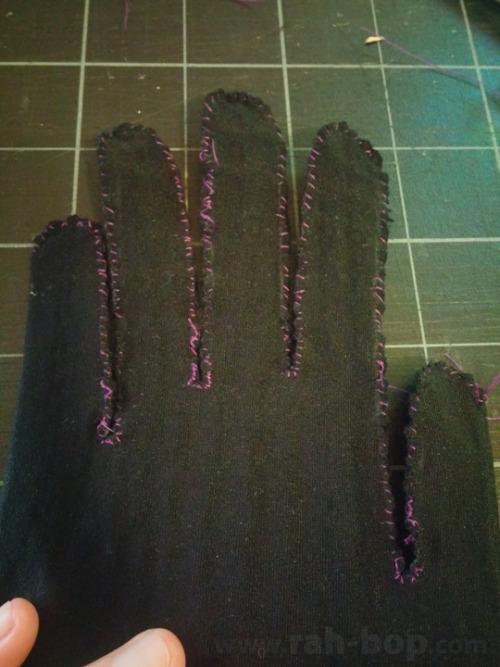
As you can see, I did a really great job.
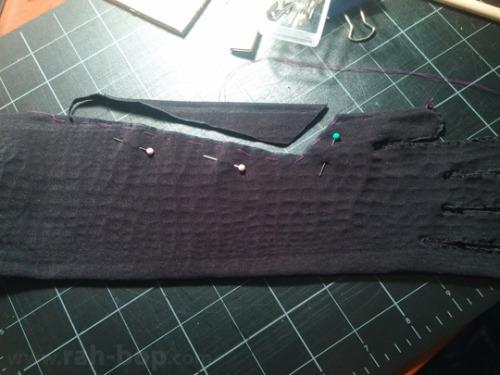
10. Put your hand down on top of your glove and line up all your fingers. Align the outside edge of your hand and arm with the edge of the glove. Carefully trace the triangle between your thumb and forearm onto the tights and then repeat steps 7-9 on this part. If you thought about it ahead of time (not like me) I bet you could have integrated this triangle bit with the rest of your paper pattern when you were tracing your hand. But this works fine too. Whatever.
11. Once everything is all sewn together, carefully coat all the stitching on both sides with something to keep the fabric from running, such as Fray Check. Listen, you can use clear nail polish if you absolutely must, but it dries stiff and it’s going to feel scratchy and uncomfortable every time you put the gloves on. Only use it if you’re okay with feeling like you lined your glove with butter knives.
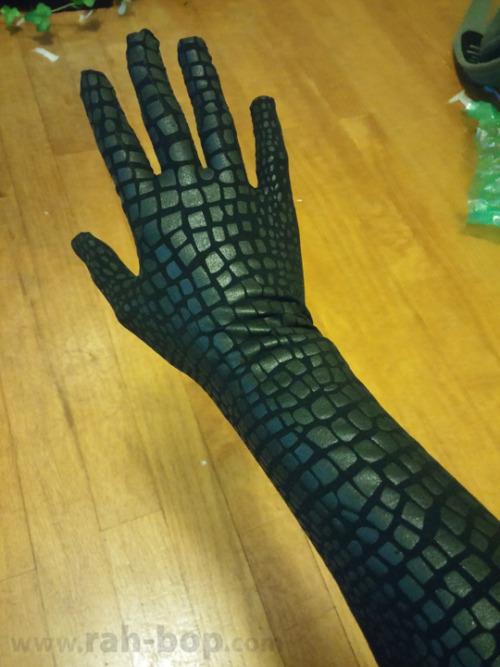
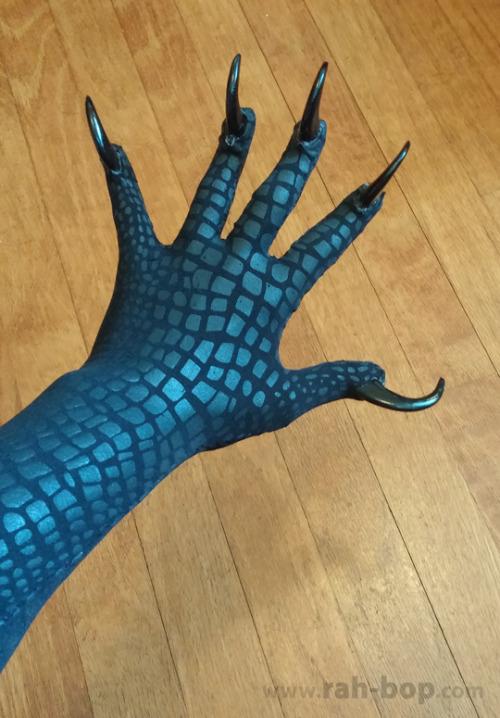
12. Turn that thing right-side out! Feel like maybe you’re on to something here.
Read more : How Do I Dry A Baseball Glove
12. Meanwhile, make yourself some claws! I used (and highly recommend) sculpting epoxy such as Magic Sculpt or Apoxie sculpt. Sculpey might work but they’ll be delicate so be careful.
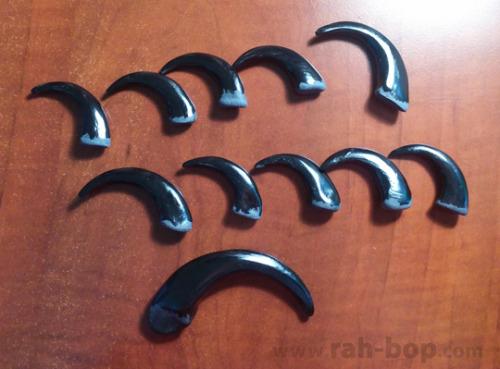
(btw please ignore that one huge claw. It was for a toe.)
To make claws, roll out a tapered tube and curve it into the size and shape you like, then bake/let cure. I personally like them to have a triangular cross-section with a ridge along the top and a flat underside, and slightly larger claws for the thumbs. That’s me, though. You should do whatever makes you happy. One thing that is SUPER IMPORTANT is that the end of the claw has a flat base. This is the part that’s going to sit on the top of your finger. If it’s not flat it’s going to be really uncomfortable and hurt you. Make sure there are no sharp edges on the base for the same reason.
13. Sand the claws (if necessary) and paint them the color you like.
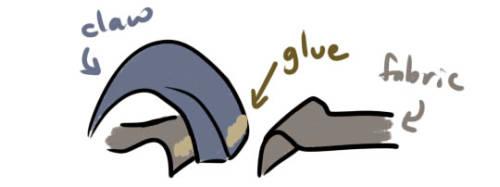
14. Cut a small slit on the top of each finger. Put a tiny bit of hot glue on the bottom edge of either side of the claw and carefully glue it into the slot. Try to fold the edges of the fabric over so the raw edges are on the inside of the glove.
15. (optional) Chances are the parts where claws meet fabric looks like a hot (glue) mess. Cut a very thin strip of craft foam (in a matching color) and cover up that shameful area. It will look like a cuticle, and, ideally, a little tidier. This step is not necessary. Only if you want.
16. (optional) Sew some conductive thread into the fingertips of pointer fingers and thumbs if you have a smartphone you want to use while in costume. If you have a dumbphone or, even better, a nice friend to carry your stuff for you, this is not so important.
Good luck!
Was this tutorial helpful to you? If you use my techniques or tutorials to complete your own costumes, especially if you are doing so on commission, please consider buying me a coffee through ko-fi or paypal! I also have a Patreon where I post more costume WIPs and tutorials. Thanks for looking!
Source: https://t-tees.com
Category: HOW