
Time needed: 3 hours
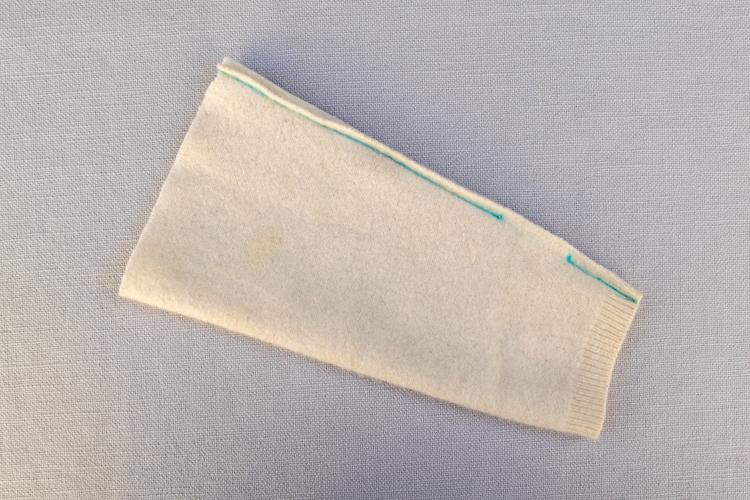
- Cut off the sleeve of the sweater
Using your rotary cutter, cutting mat, and a ruler or straightedge, cut off the lower part of the sleeve about 9 inches from the cuff, or however long you want to make your gloves. I also use my sewing shears to do a final trim to get the edge nice and even and pretty.

You are viewing: How To Make Gloves From Old Sweaters
- Sew up the side seam (optional)
Read more : How Much Does Danny Danny Glover Take For A Movie
You only need to do this step if you find the sweater sleeve too wide. It will completely depend on the sweater, your hand and wrist (or of the person you are making them for), and how you want your gloves to fit. If you want to make your fingerless gloves a little tighter:• First, figure out exactly how much you want to take in the side seams. I find that 3 inches at the cuff widening to 4 to 4 1/2 inches at the top works well for me, but keep in mind how much stretch your sweater fabric has.• Then, turn your sweater sleeve inside out, and mark the seam you want to sew with a washable fabric marker or tailor’s chalk.• Also mark where the thumb hole starts and ends. It should start about 1 1/2 inches from the cuff and be about 1 1/2 inches long.• Pin both layers together. • Sew the side seams. Starting at the edge that will be closest to your fingers (the cuff), sew up to the beginning of the thumb hole, backstitching at the beginning and end. Then do the same from the other side of the thumb hole up to the top of your glove. Be sure to adjust the pressure of your presser foot so it doesn’t squish down your sweater fabric and distort its shape. I also increased the stitch length a little bit.• Trim the seam allowance of your sewn pieces to 1/4 inch. Flip right side out and steam/lightly press.
- Cut the thumb hole
If you skipped Step 2 and didn’t sew the side seams, then you need to cut a thumb hole in your sweater sleeves. Using a sharp pair of fabric scissors, cut a slit along the seam 1 1/2 inches long that starts 1 1/2 inches from the cuff edge and ends 3 inches from the cuff edge.
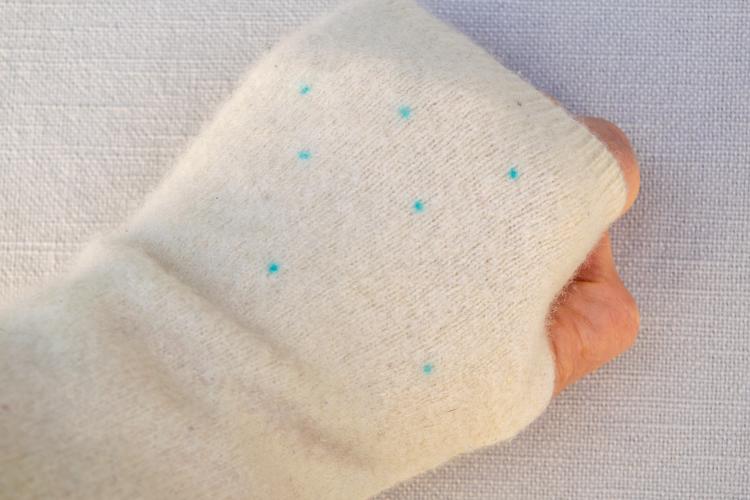
- Mark/plan out your embroidery (optional but helpful)
Read more : How To Clean A Glove Box
Use your fabric marker or chalk to mark where you want your embroidery to go. I recommend putting one glove on at this point — it’s much easier to see where you actually want the embroidery on the finished gloves when it’s on. When they are laid out flat they have a very different shape. Also, start by just marking out one hand/side, all the way through to finishing the embroidery, and then do the other side. You will likely want to make changes to your design as you go along, and it’s easier to get it all figured out on the first one and then just sew the other side to match (or not match, up to you!).
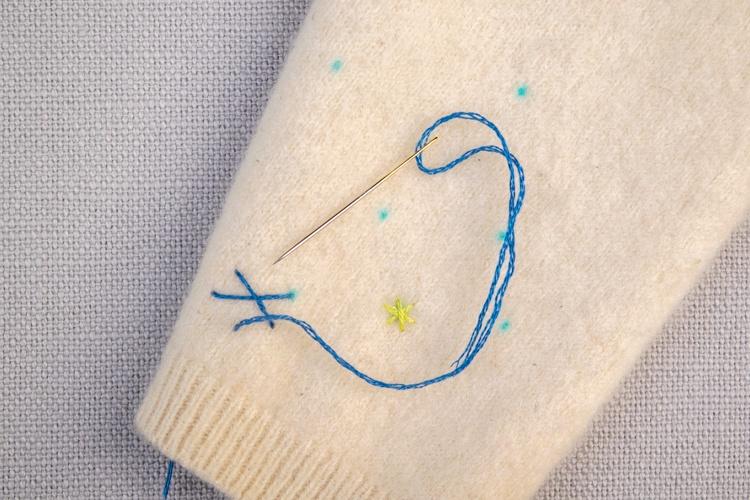
- Sew your embroidery design
I sewed six-petaled flowers of different sizes on my gloves, using three strands of floss for the petals, and then one strand to sew the flower centers. You can see in the diagram at the end of this post how to sew this style of flower if you want to do the same. Note: the flower centers are not french knots — they are basically a repeat of the flowers themselves, so three passes with the floss going over the center and between the petals.
- Secure your embroidery knots with glue
This is also optional, but I like to secure the backside of my embroidery knots with a tiny dot of fabric glue just to make sure nothing comes undone.

Source: https://t-tees.com
Category: HOW