
How to Make Gloves for Cosplay
This tutorial is excerpted from “Spandex Simplified: Sewing for Superheroes” by Marie Porter. All photos and accompanying tutorial are copyright @ 2012 Marie Porter, all rights reserved.
You are viewing: How To Make Nails Gloves
If you’ve read my post on How to Make Spandex Gloves, you may be looking ahead to the various ways you can play with it.
So, here are a few quick tutorials on some ways to dress up your basic spandex glove: Adding a cuff, applique, fringe, and built in claws / nails!
Each of these is intended to show a basic concept, which you can then run wild with. The applique can be anything you want, the cuff can vary in shape, etc.
Have fun with it!

An Important Update for This Tutorial
Since photographing this – almost a decade ago – I’ve slightly changed how I make gloves: I bond the main fabric to swimsuit lining, or to another layer of the same spandex.
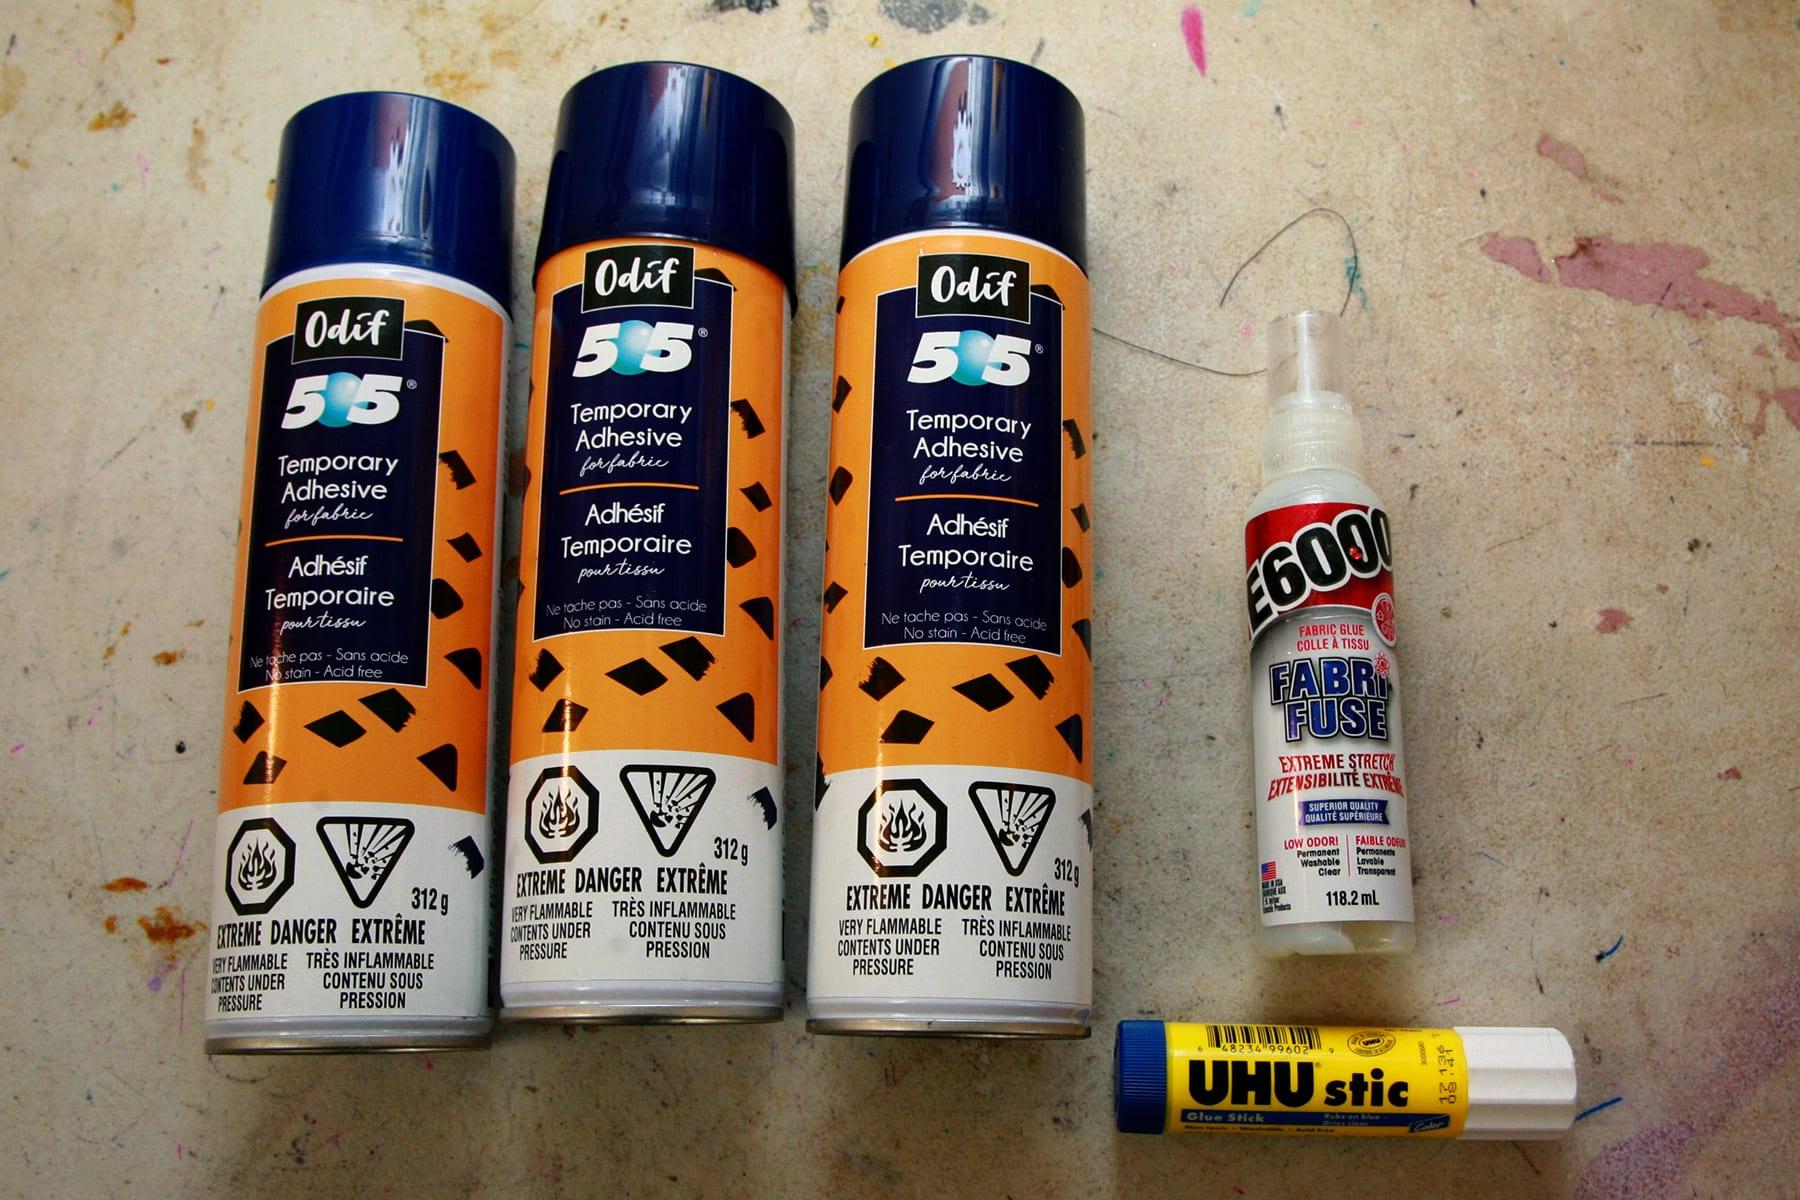
I spray the wrong side of the main fabric with Odif’s 505 Temporary Fabric Adhesive, and adhere it to the second layer.
Once dry, I proceed with the technique as laid out, treating each piece of fabric/lining as a single piece of fabric.
This makes for a much sturdier glove, with much more secure seams. It also looks nicer when worn, than an unlined glove.
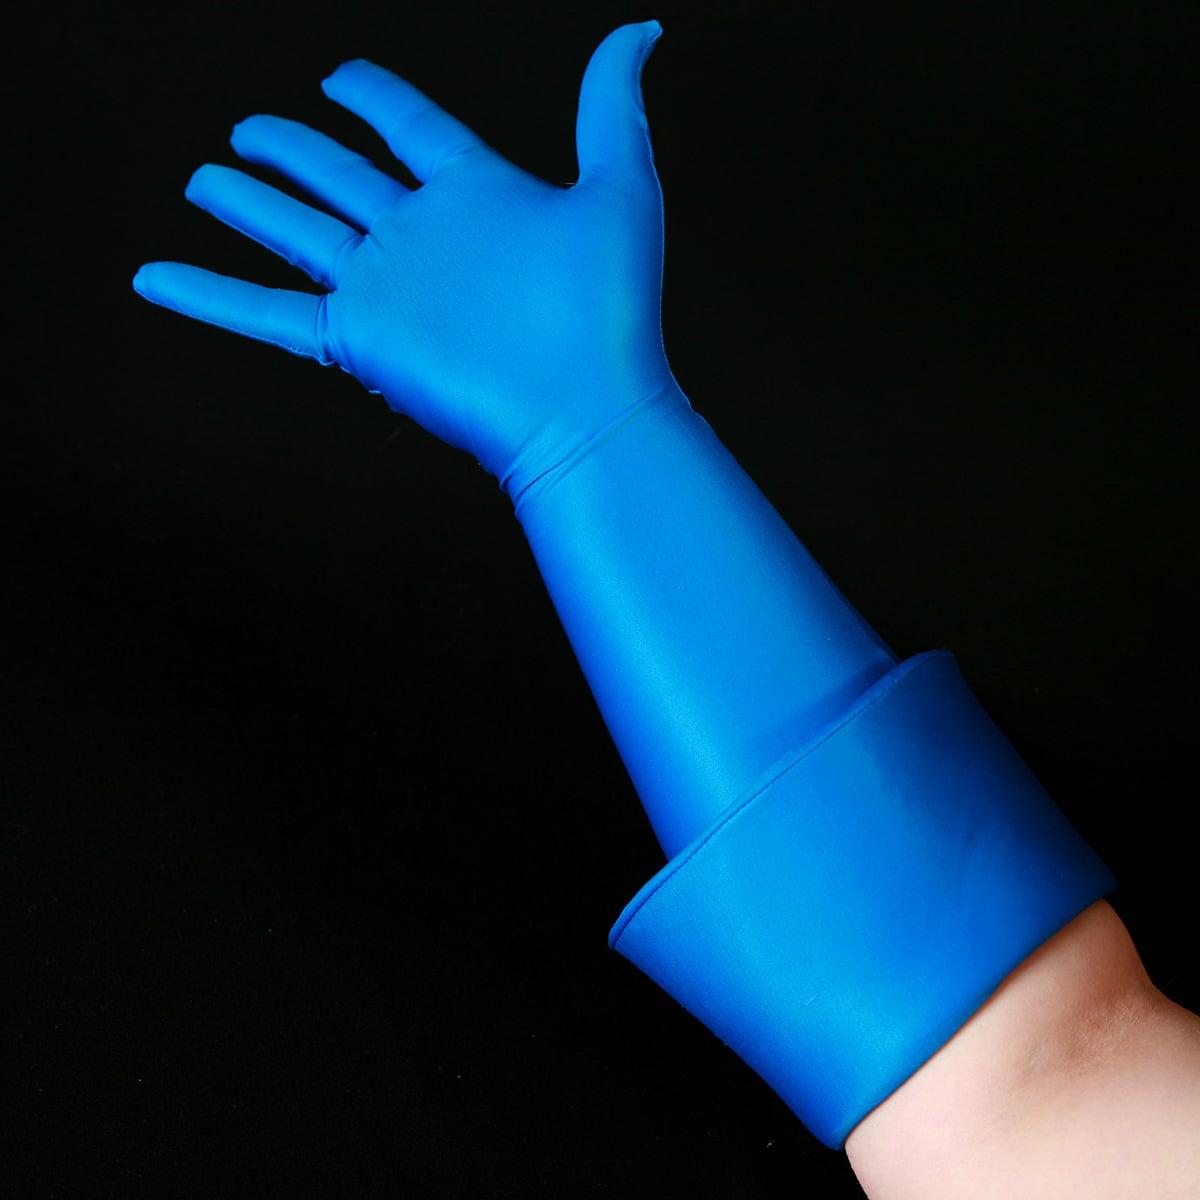
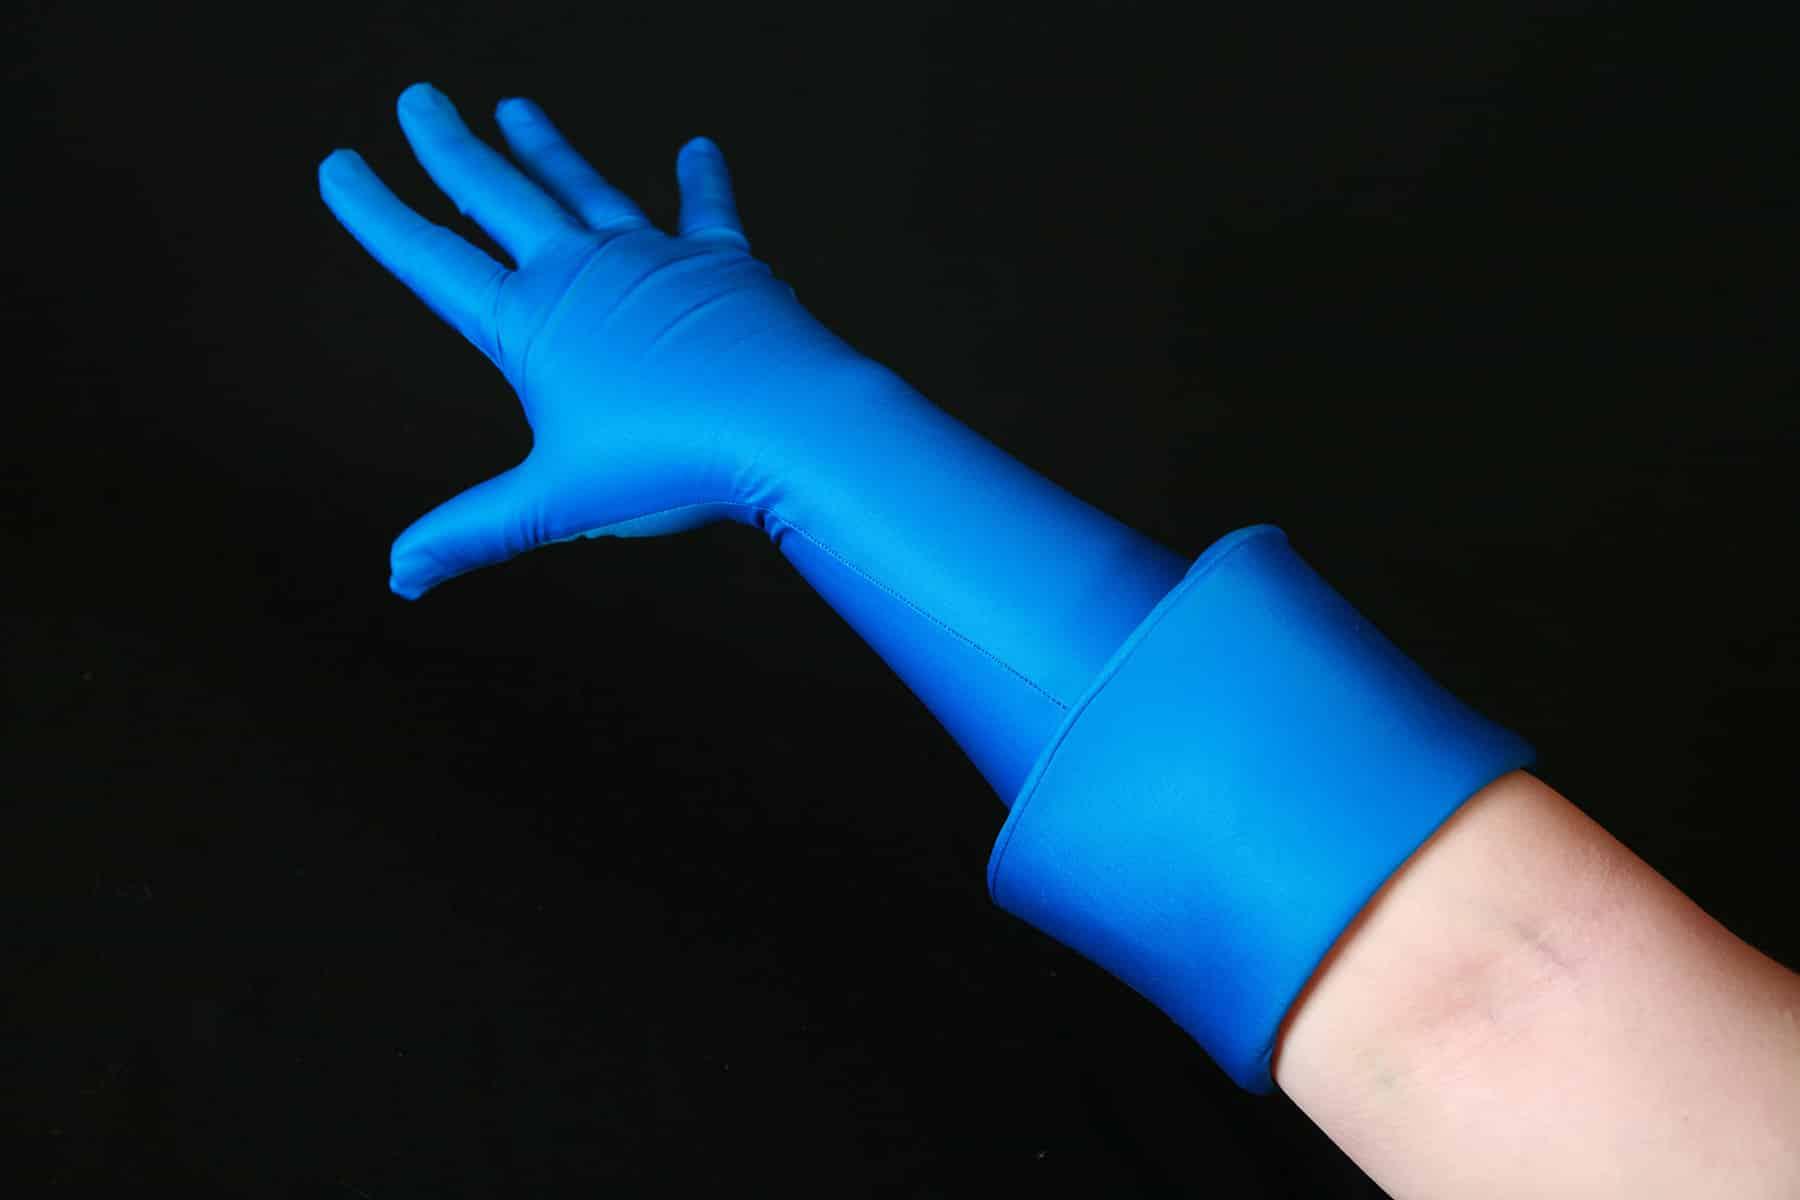
How to Make Spandex Gloves with Foam Cuffs
Cuffs can be a fun way to add some structure and interest to your costume. I like to use poly laminate foam – commonly used in bra making – for this.
I’m demonstrating a super basic version here, but you can do all kinds of designs with this. You can make a spiky, wavy, or otherwise shaped bottom edge of the cuff, you can do applique to the outer cuff fabric.. Whatever you want!
Design Your Gloves
Design and cut out your glove pattern, as described above.
When designing the opening to the glove, consider whether or not your cuff will stretch.
A spandex-only cuff will stretch well, but a structural cuff with poly laminate foam will not, and will need the opening to be wide enough for your arm to fit through!
SO, I’ll cut a strip of the foam and wrap it around my arm, to determine how much I need.
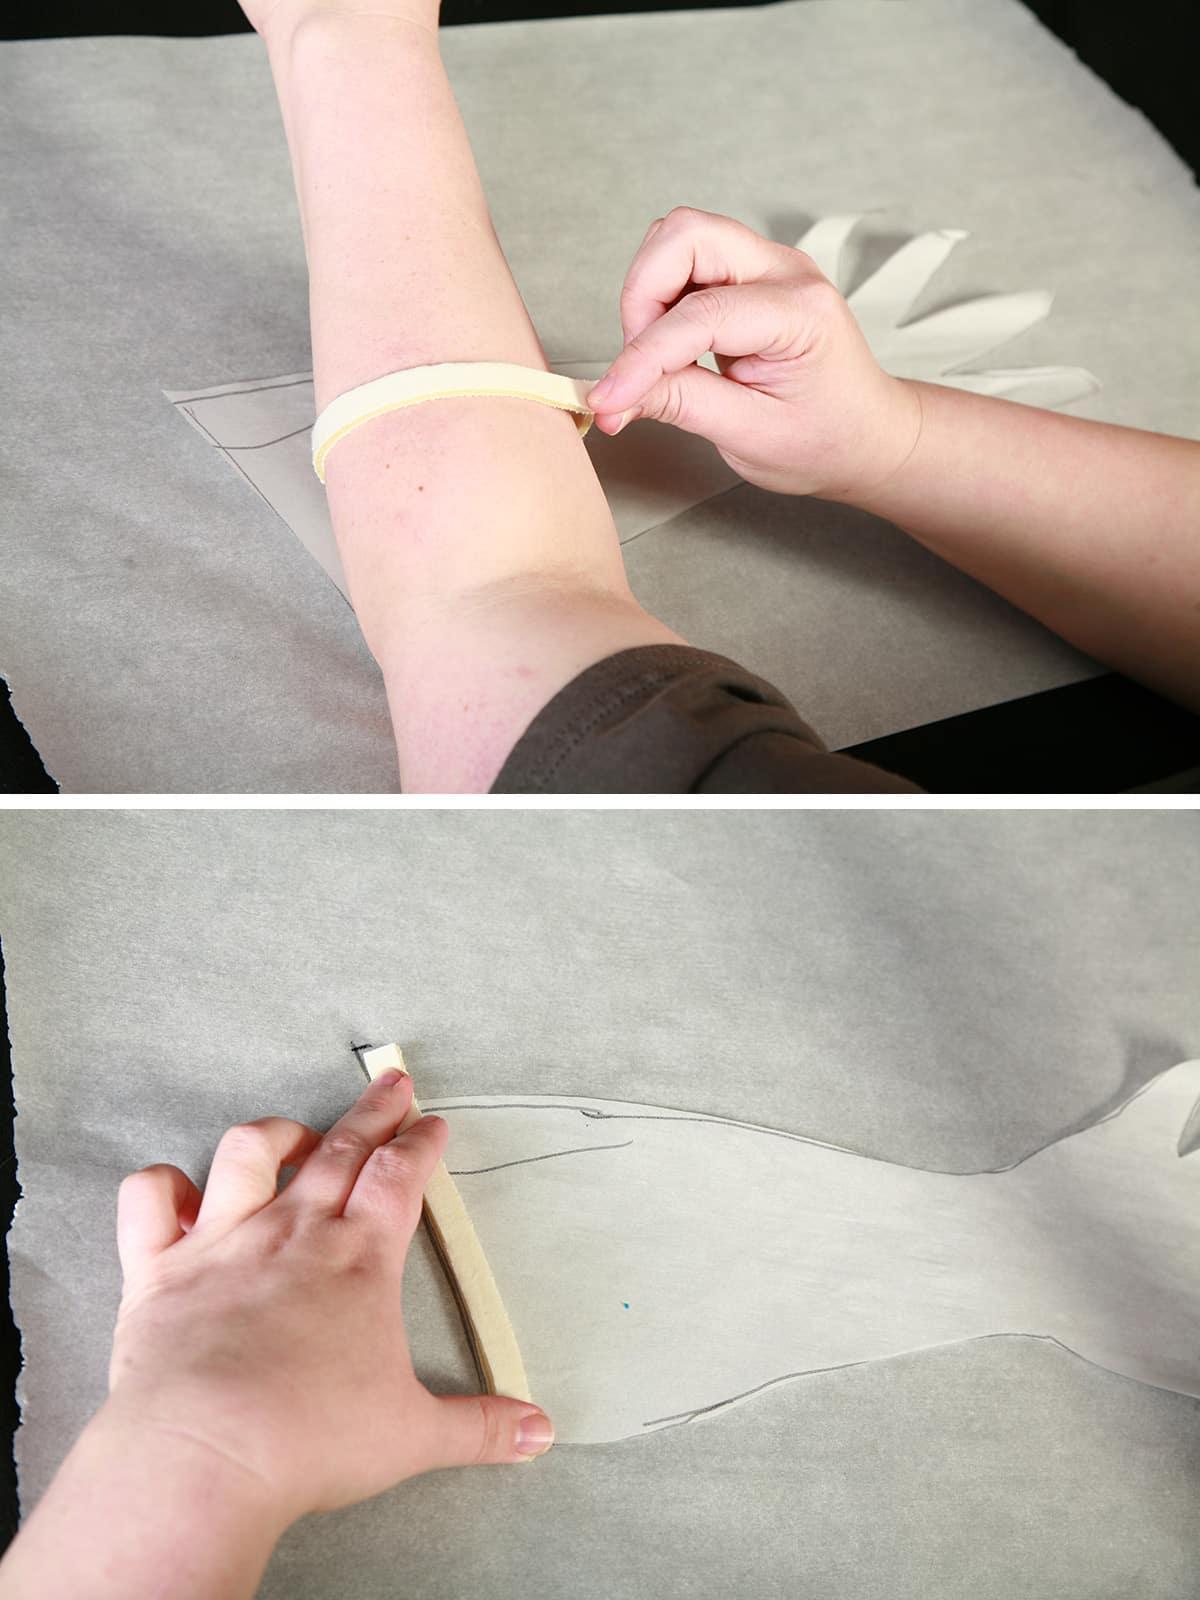
Use this basic glove pattern to design your cuff pattern. The cuff should flare out at least slightly from the main pattern… and can flare out pretty significantly, depending on the look you’re going for.

Cut It Out!
Cut your cuff out.
Poly laminate should be cut to the final pattern size, with a seam allowance on JUST the side seam(s) .
The fabric that will cover it should be cut with ¼” seam allowance around ALL edges.
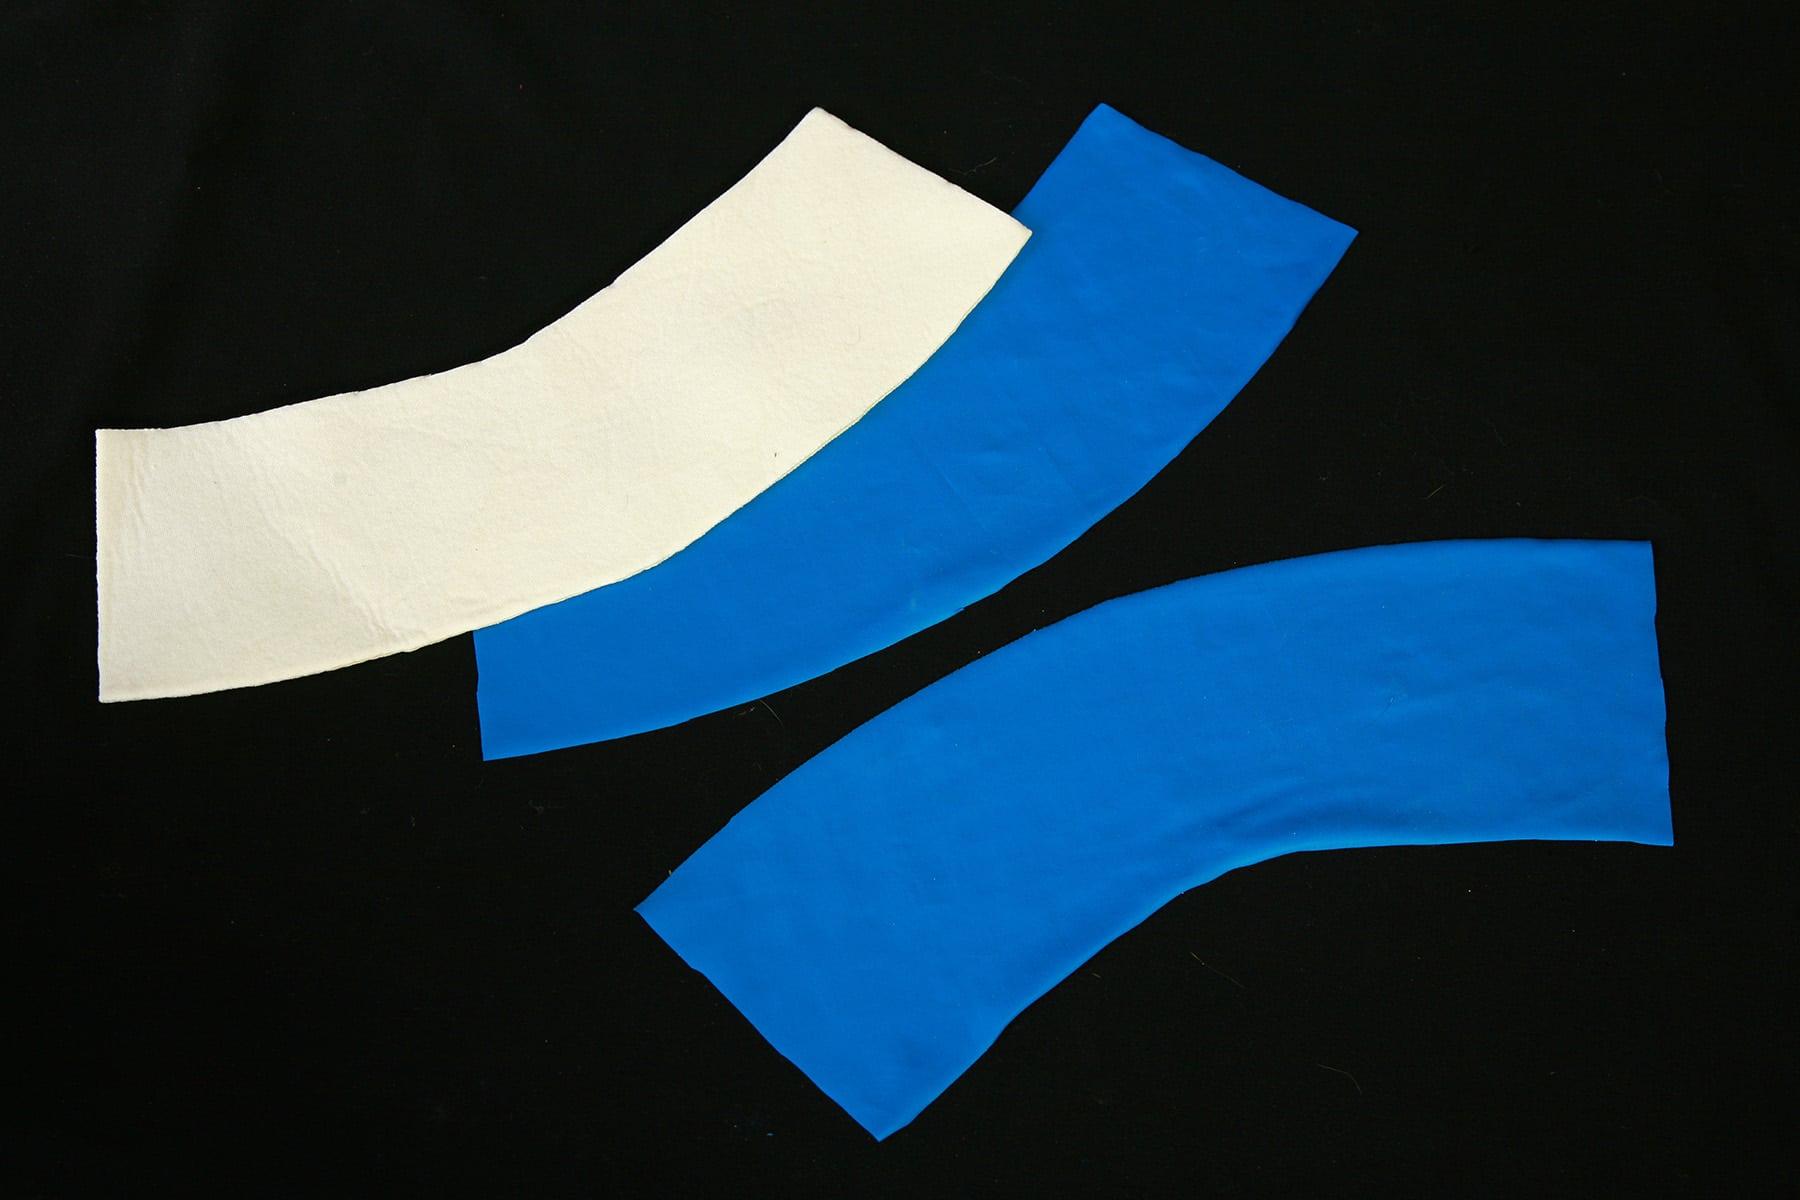
For each poly laminate piece, you’ll want two mirror-image cuts of outer fabric.
Sew The Cuff
If you have any colour blocking or applique work to be done on your cuff, do it now.
Sew the side seams on your foam pieces, set aside. Sew your side seams on the main fabric cuff pieces.
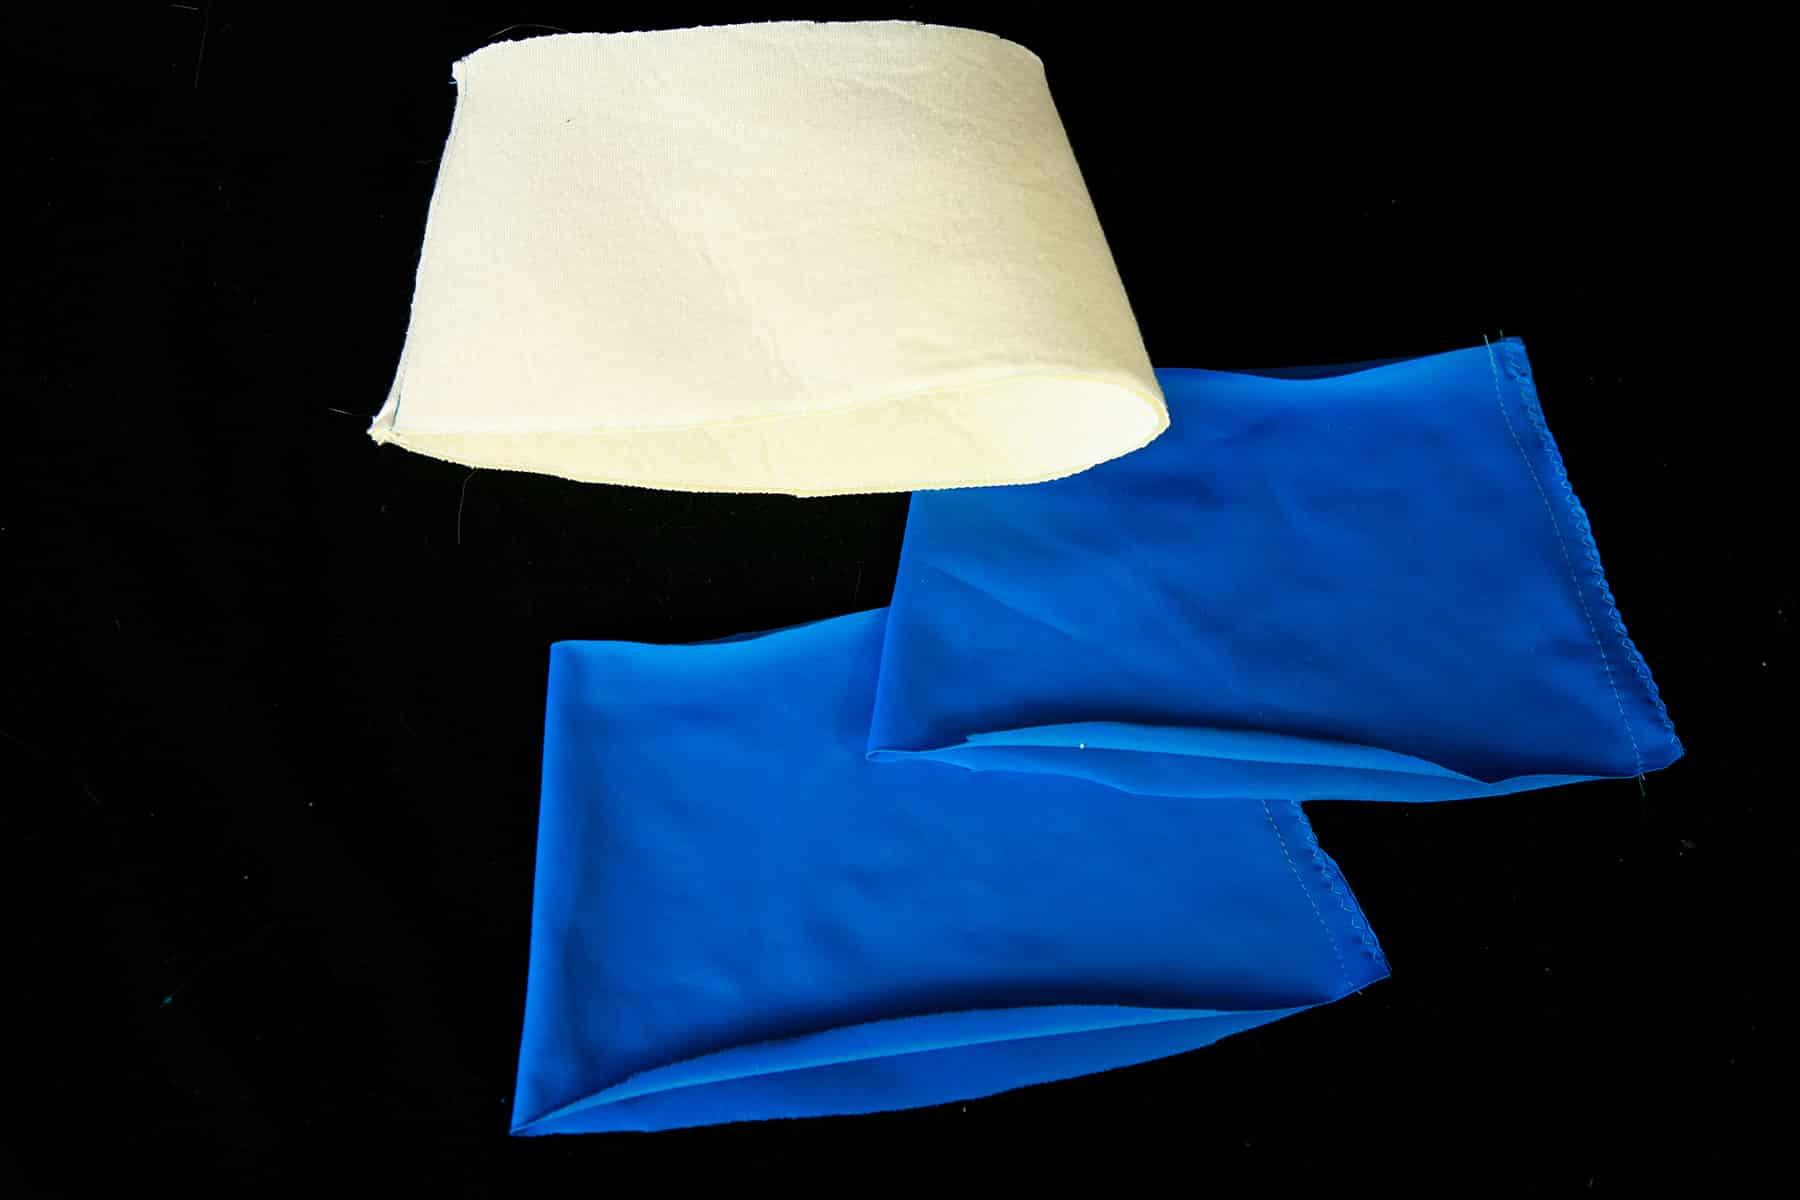
For each cuff, line up two mirror-image pieces, and sew them together along what will be the bottom edge (closest to the fingers). Flip right side out.

Use outer cuff piece to completely envelop the foam cuff piece, with all raw edges (top edge) lining up.
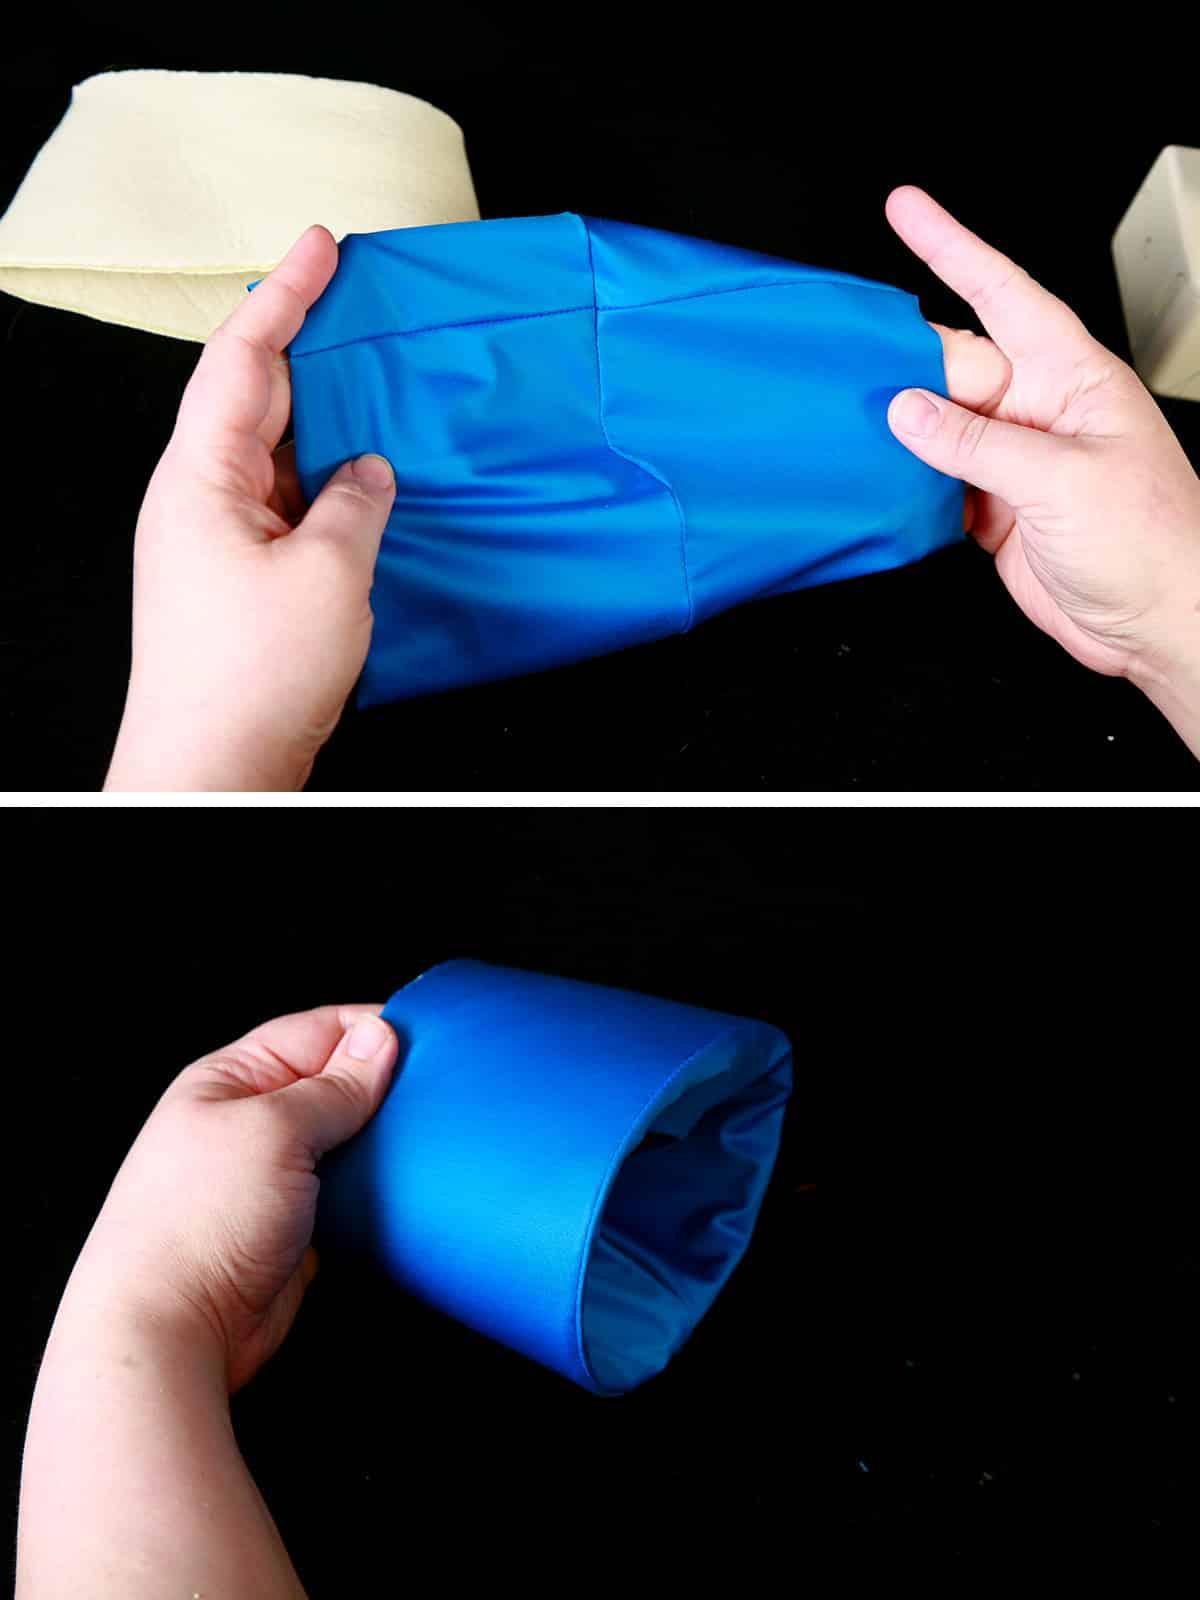
Zig zag along this edge to hold everything together. Pull the spandex pieces out beyond the edge of the foam – remember, they have a ¼” seam allowance there, the foam does not.
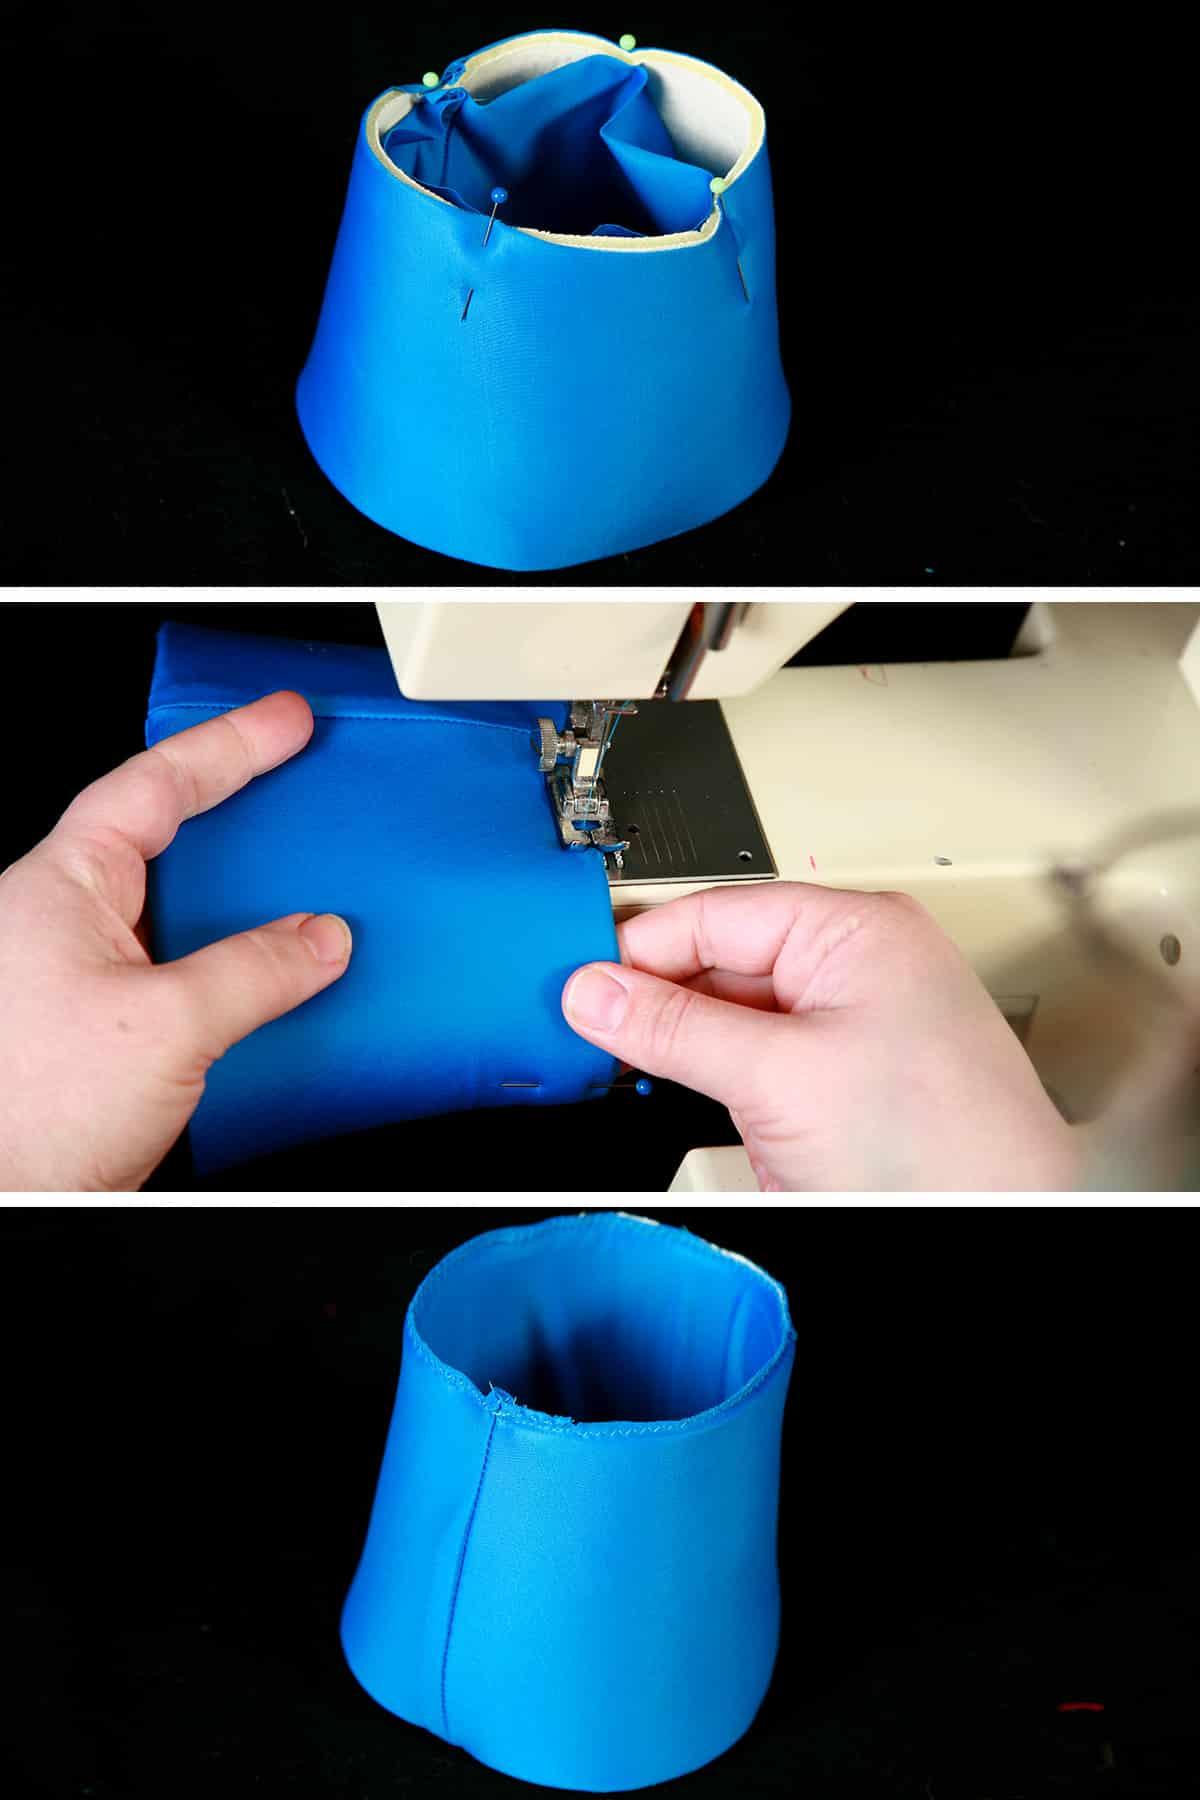
Sew your gloves as described in the “Basic” instructions, but do NOT hem the top edge.
Turn your gloves right side out. Keeping track of which cuff goes with which glove, turn your cuffs so that the side that will the underside is facing inwards, and what will be the outside (visible) side of the cuff is facing out.
Place cuff inside glove opening, lining up side seams and top edges.
Sew together, finish off the seam with a zig zag or serger edge.
Pull cuff out.
Flip cuff down over the glove, so that the right side of the glove is where it should be.
How to Make Appliqued Spandex Gloves
First of all, be sure to read my post on How to Applique Spandex, to learn how to do the actual applique portion of this technique!
– Design your pattern as described in the “Basic Spandex Gloves” instructions. (Ignore the seam allowance drawn on the pattern as shown, unless you plan to cut out the fabric before sewing it).
– Right on that pattern piece, design your applique. Keep placement in mind!
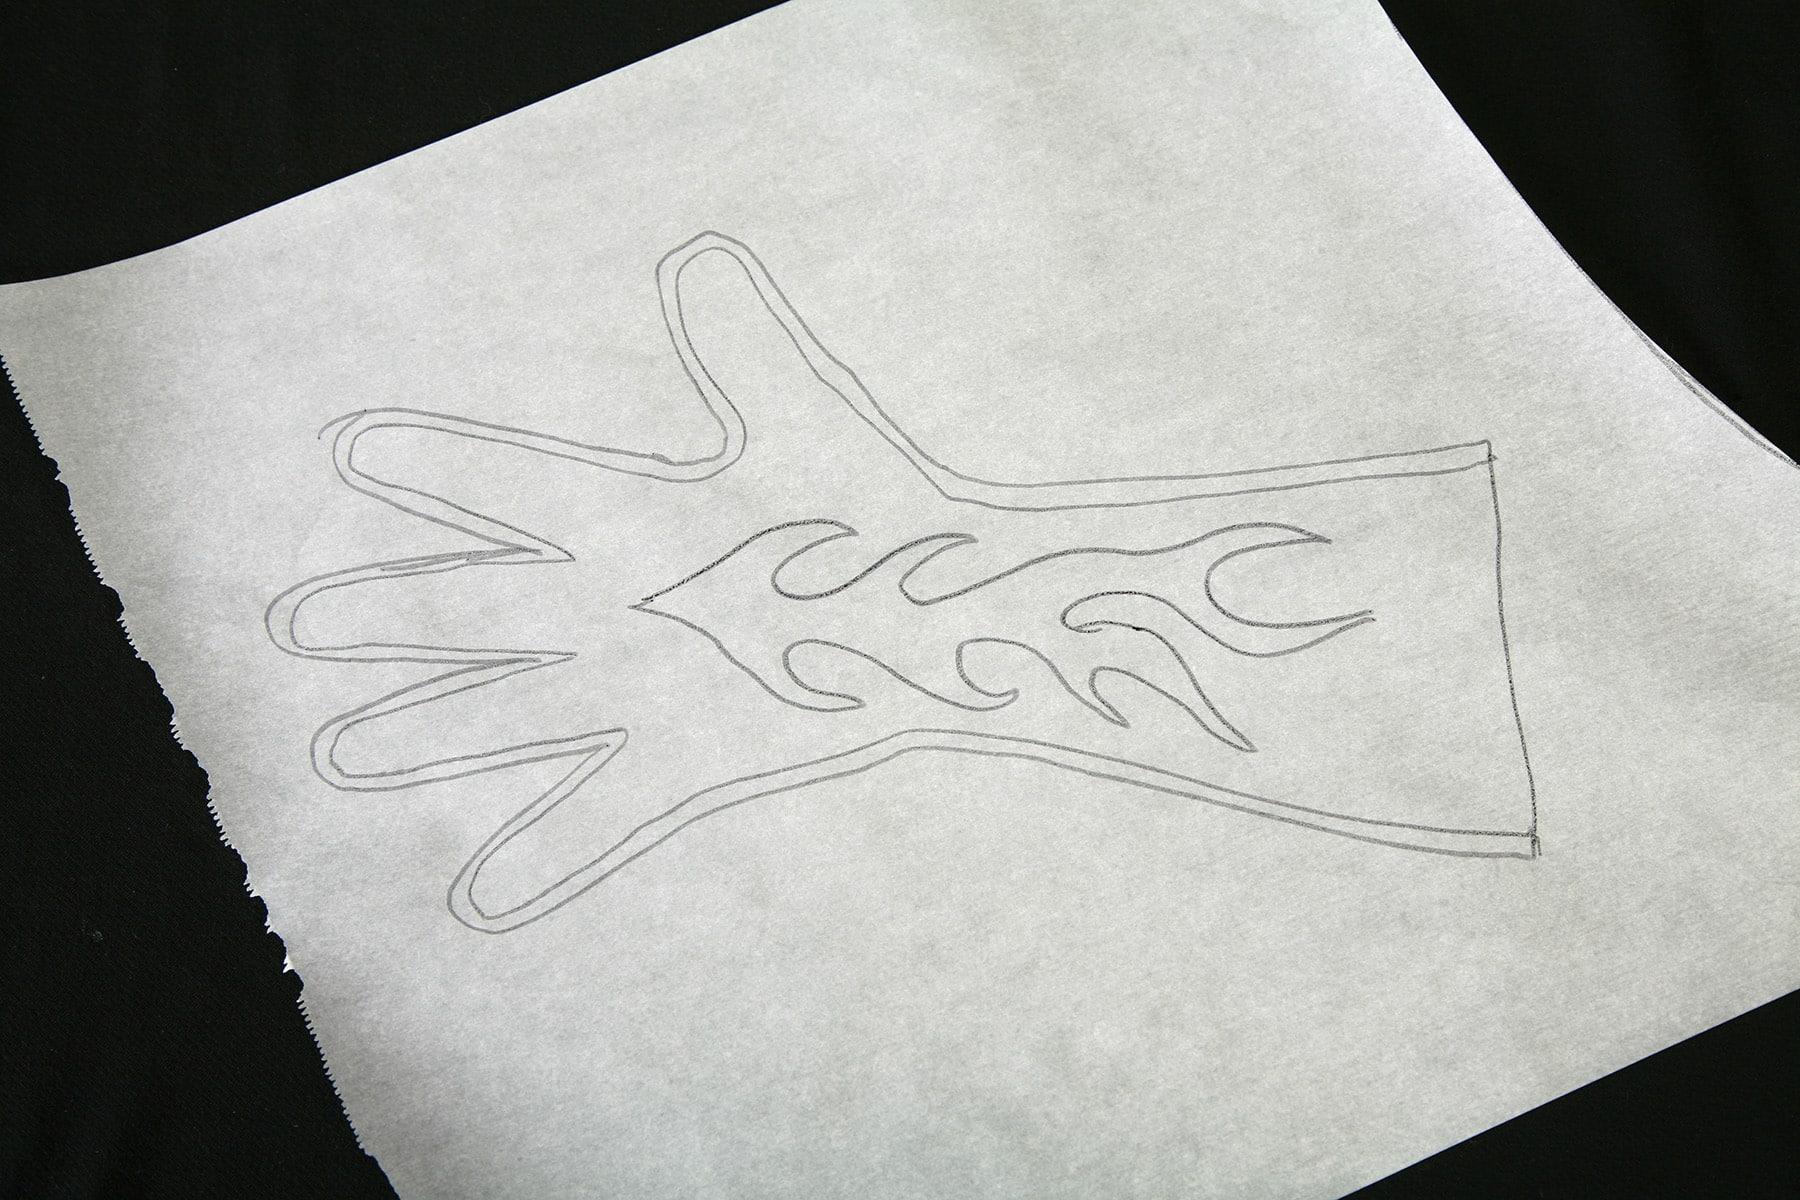
– Transfer this applique pattern to another piece of medical exam table paper, cut out from the applique fabric.
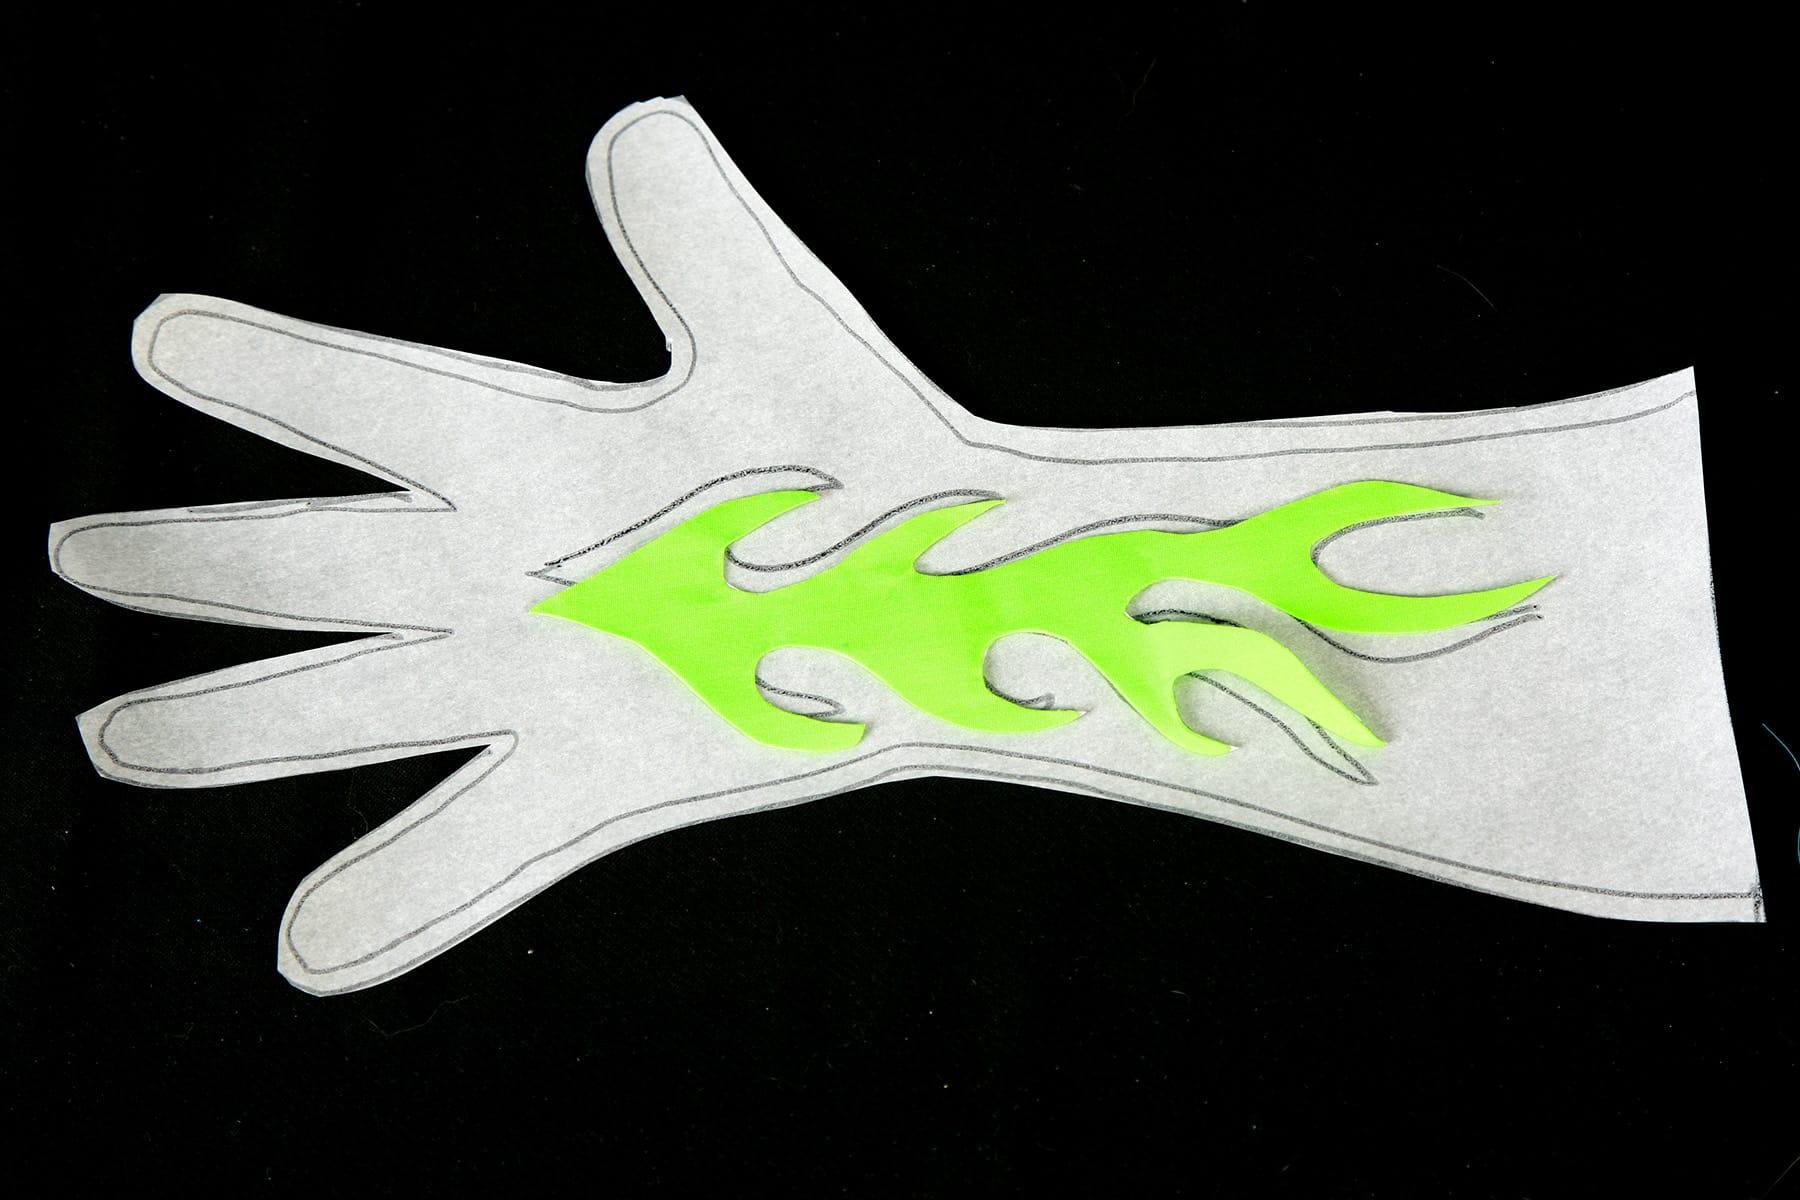
– Use a temporary bond fabric spray – like Odif’s 505 Temporary Fabric Adhesive – to spray the wrong side of your applique pieces, and lay them out on your main glove fabric.
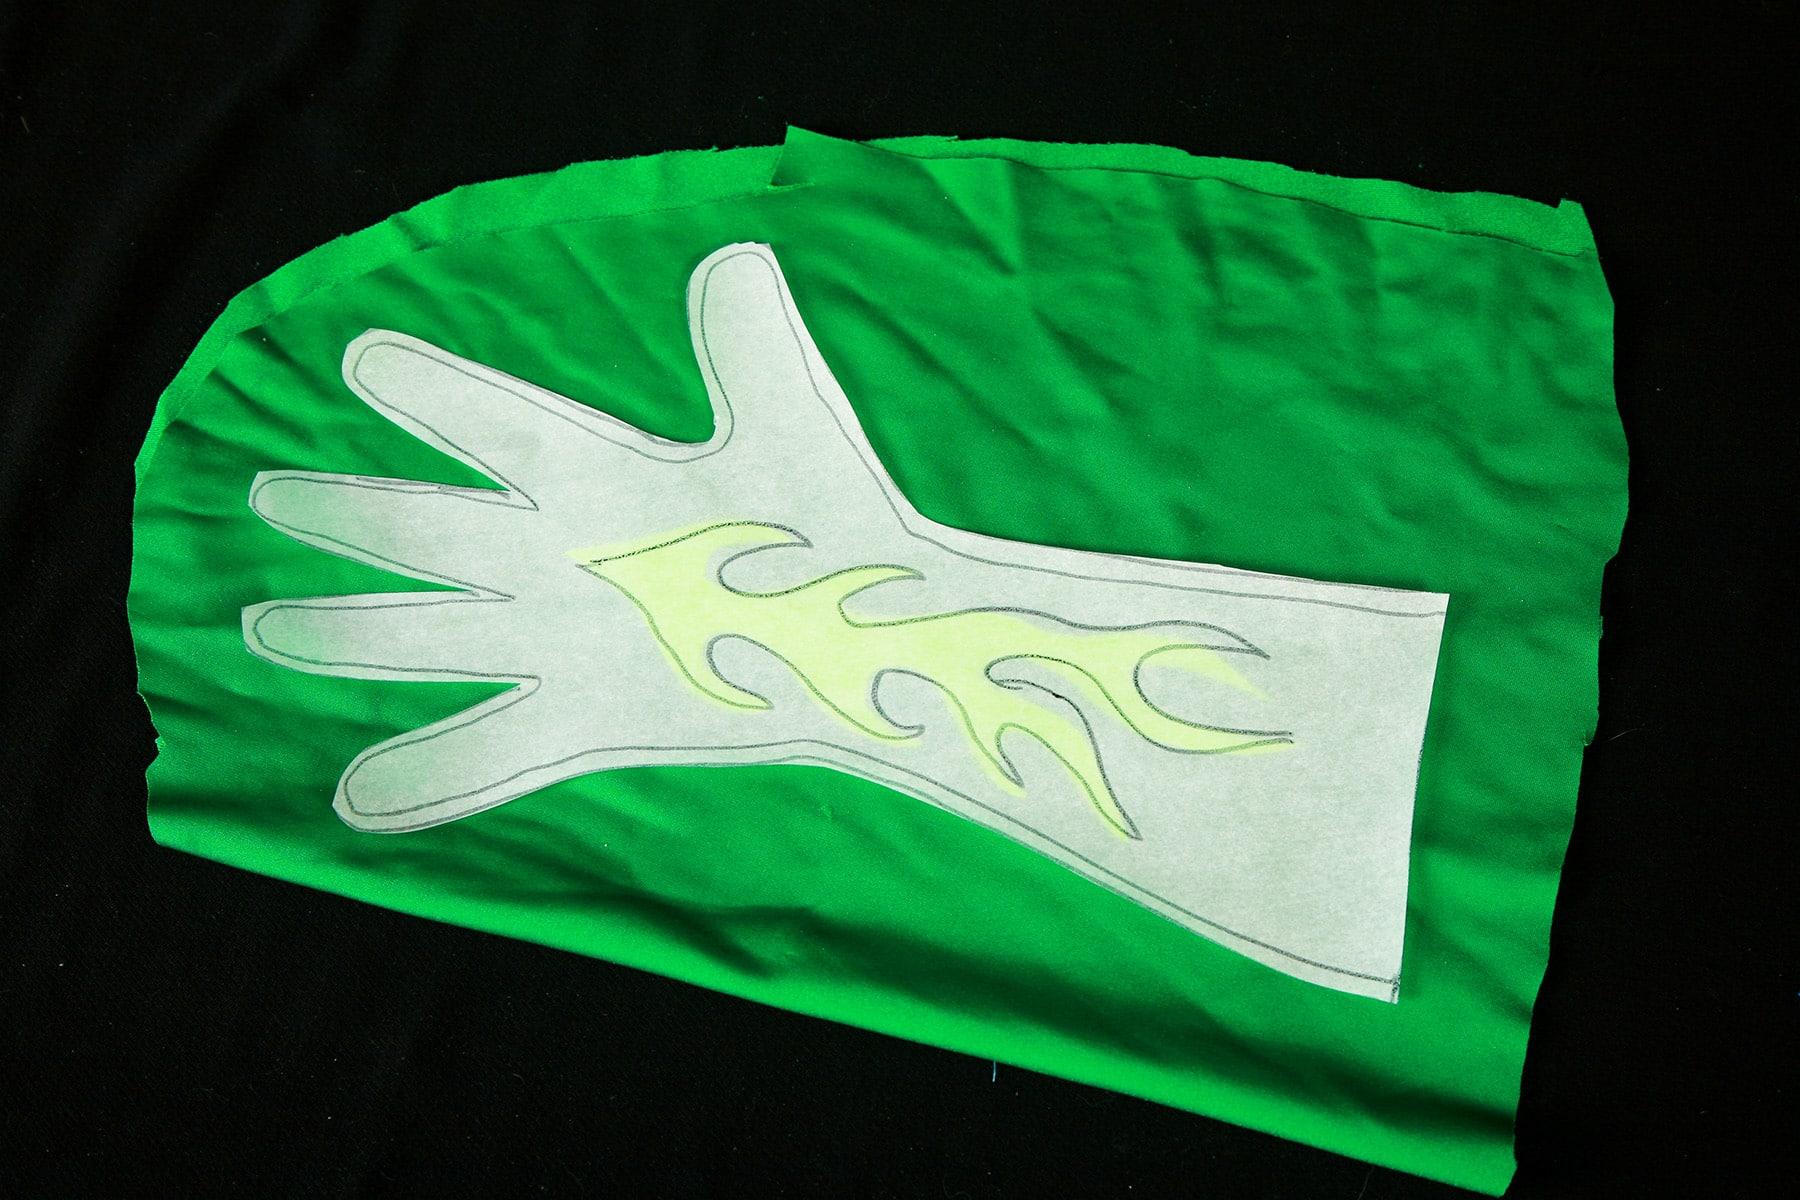
When laying out, be sure to leave enough space around the applique to cut the glove out! Stitch as you would any other applique.

– Using your original applique-included glove design, position the pattern so that the applique is in the appropriate place, trace out your glove pieces.
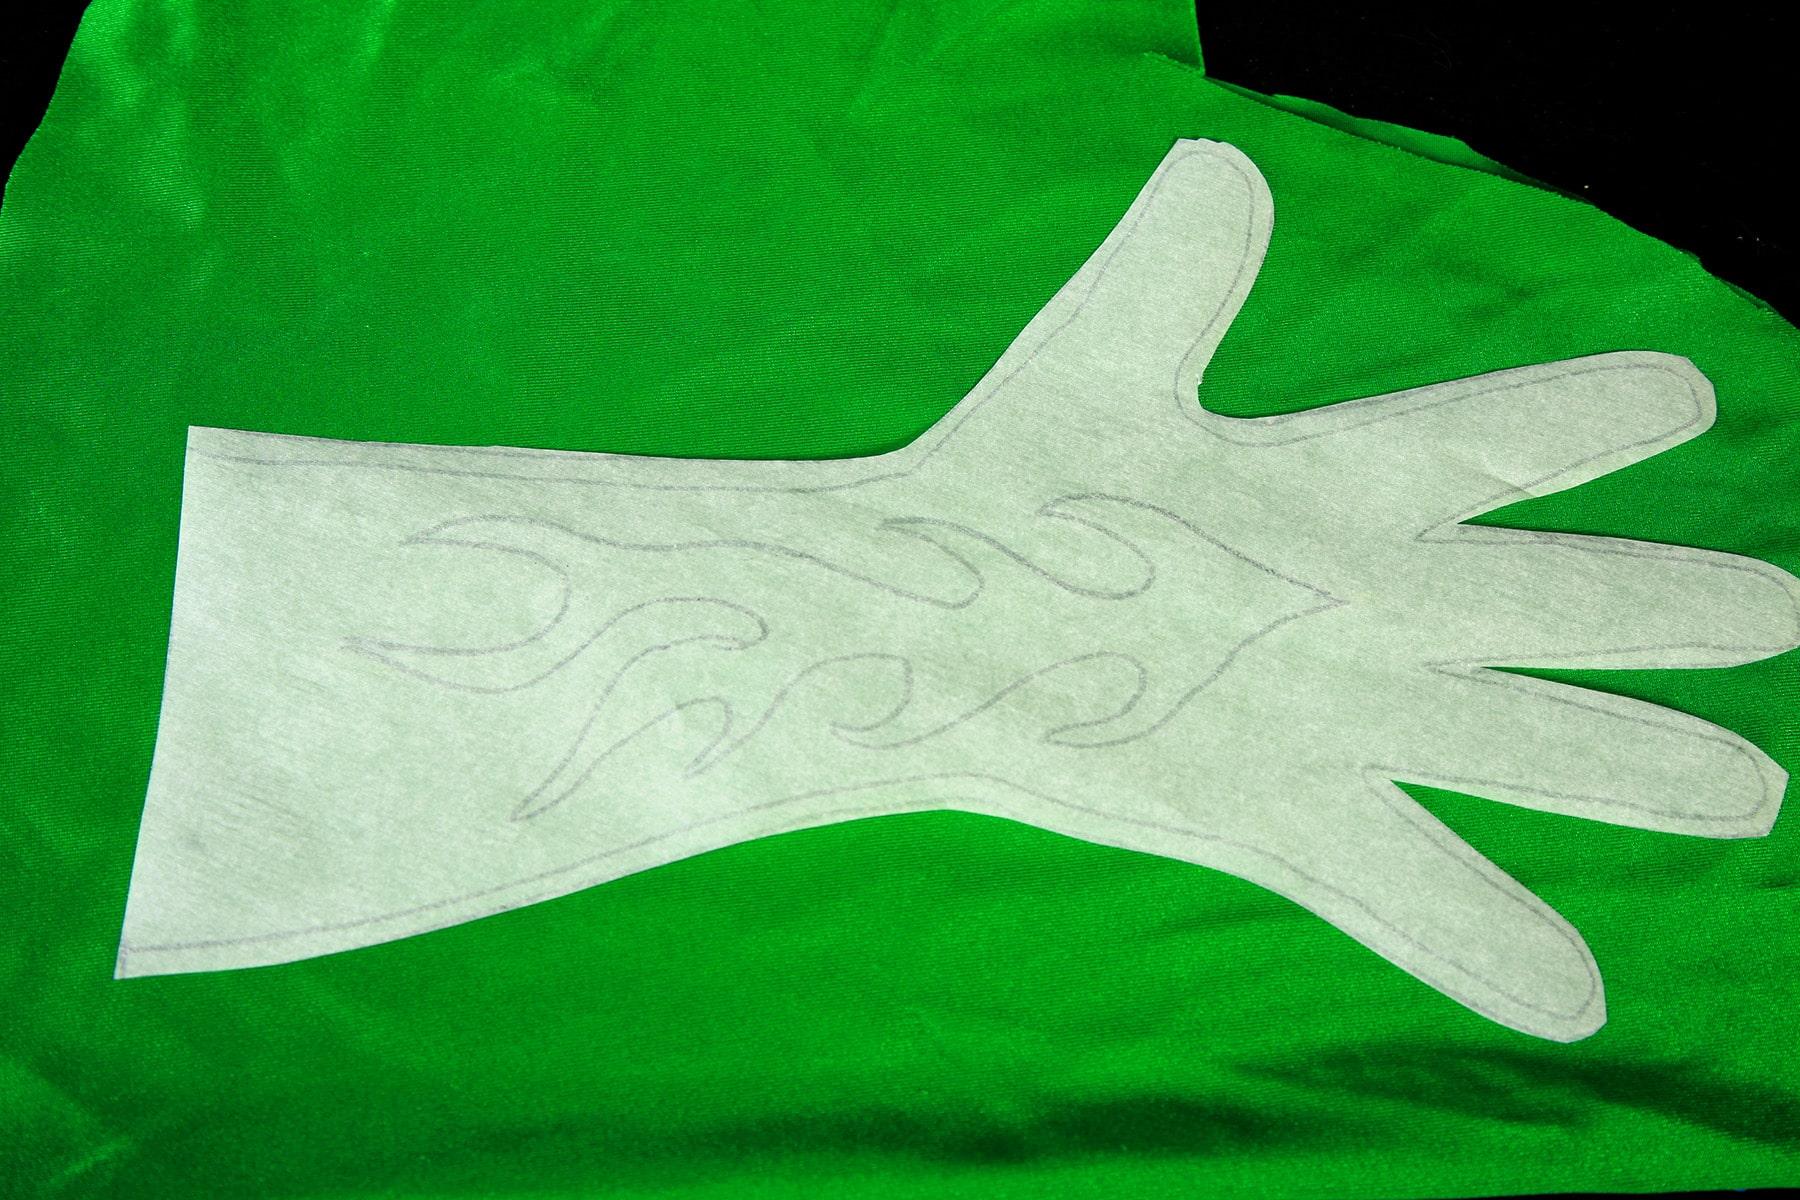
– Finish sewing gloves using the Basic Spandex Gloves techniques.
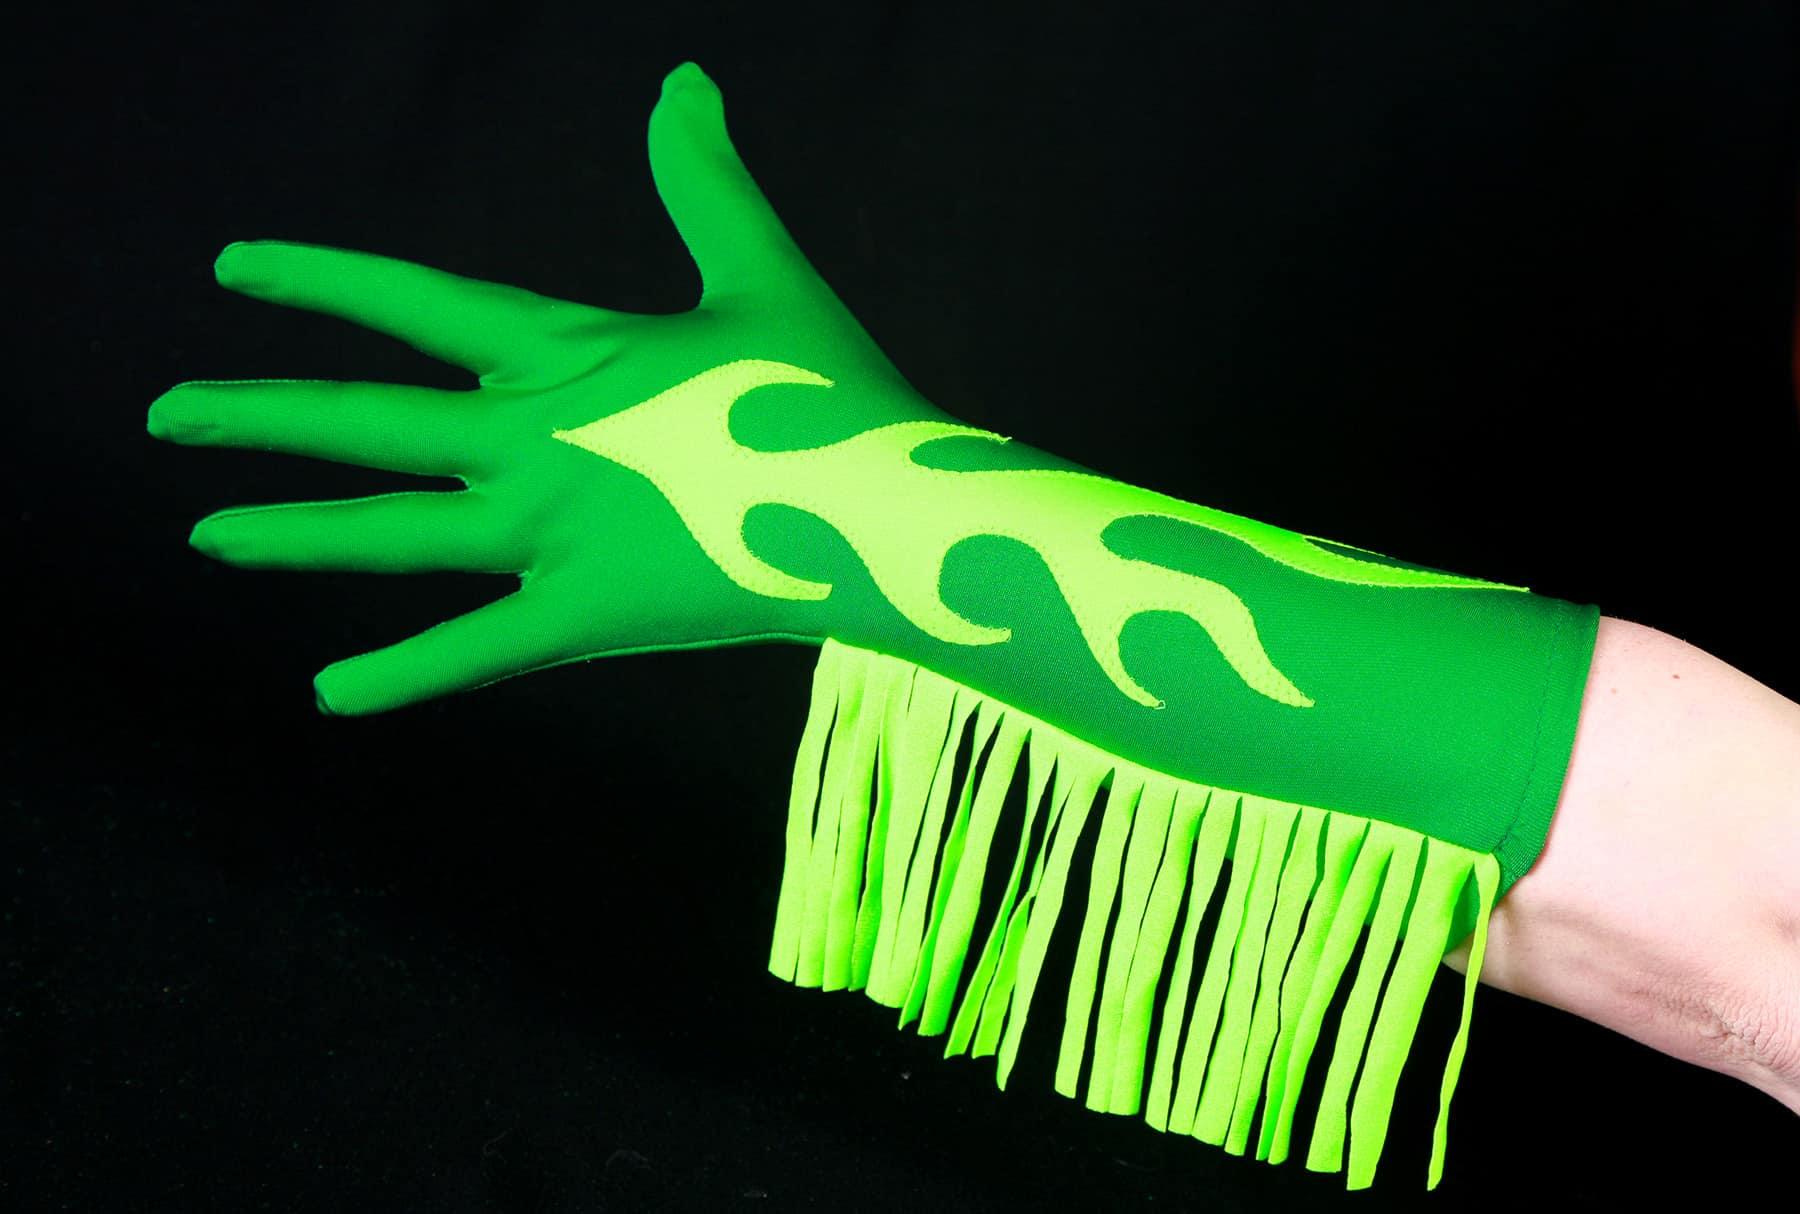
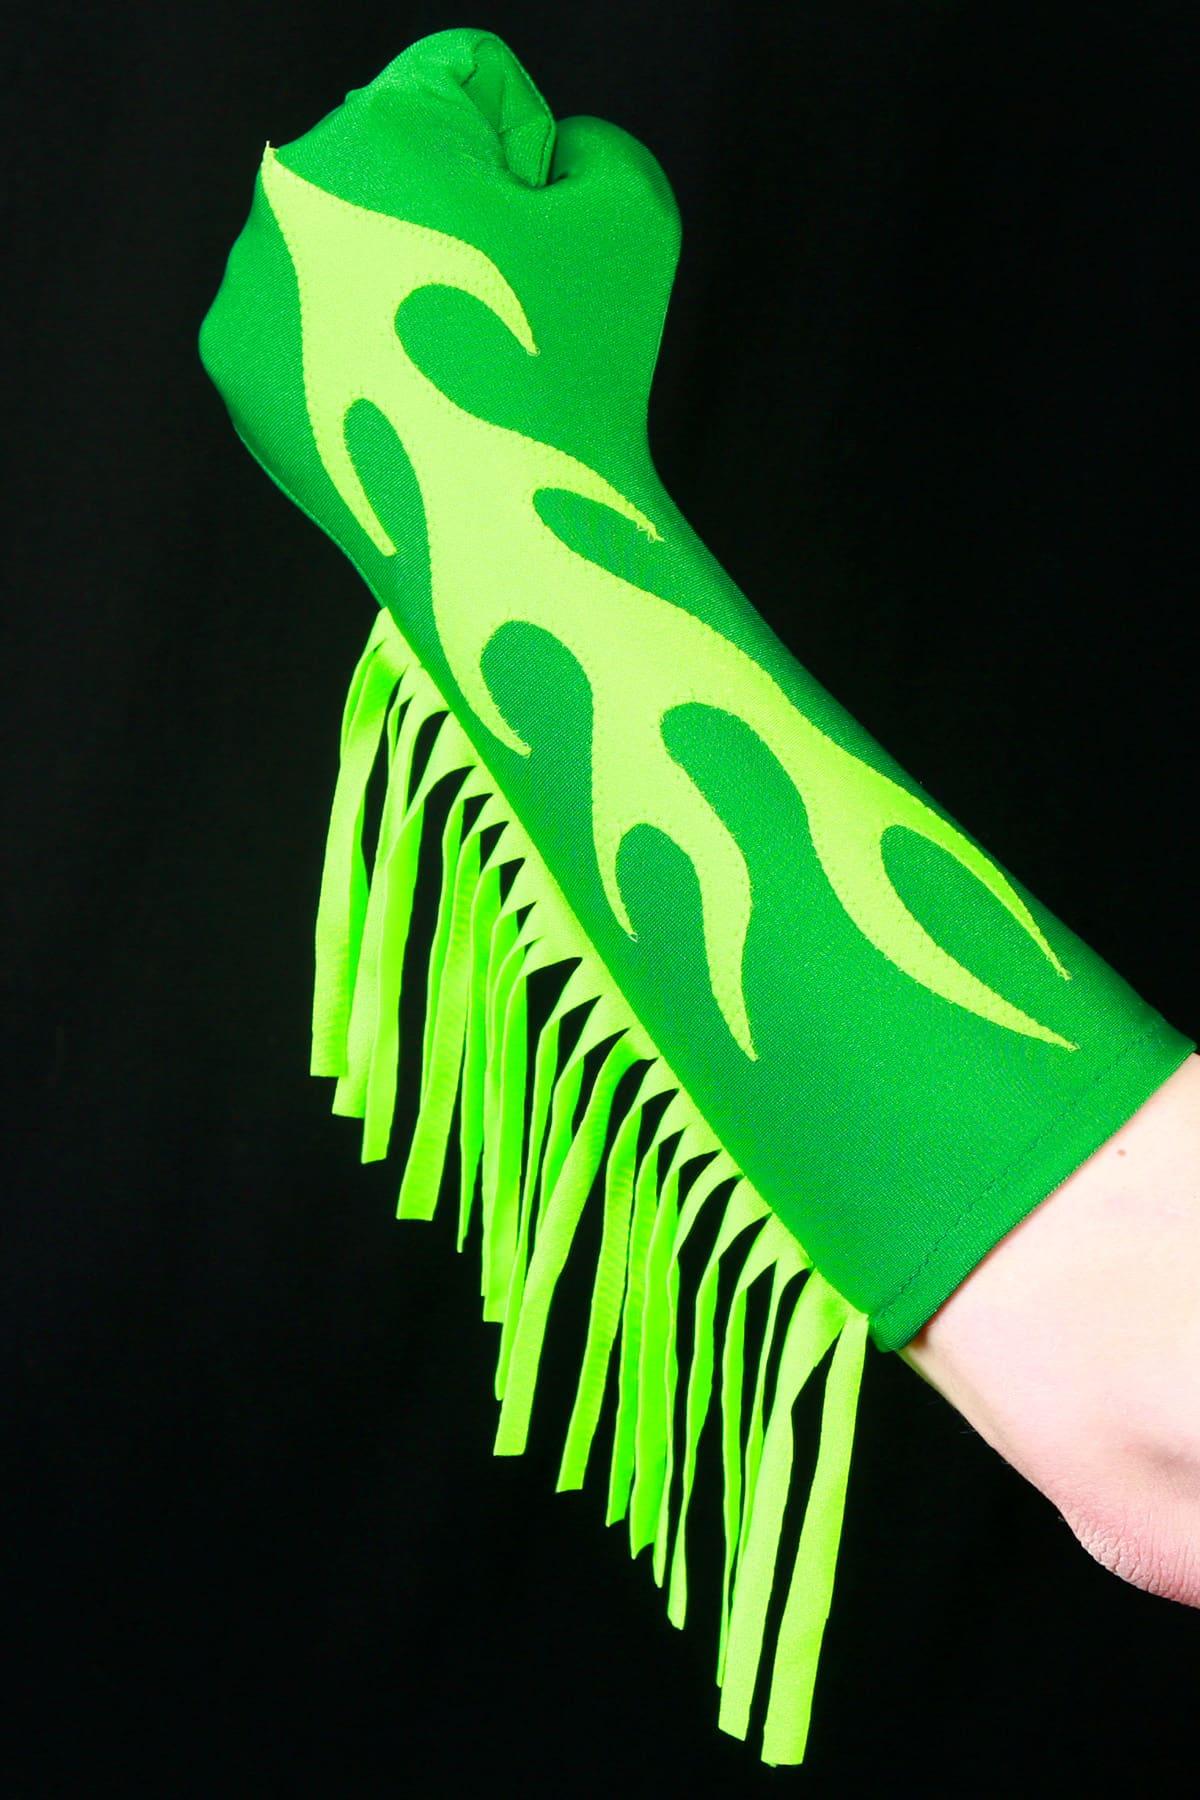
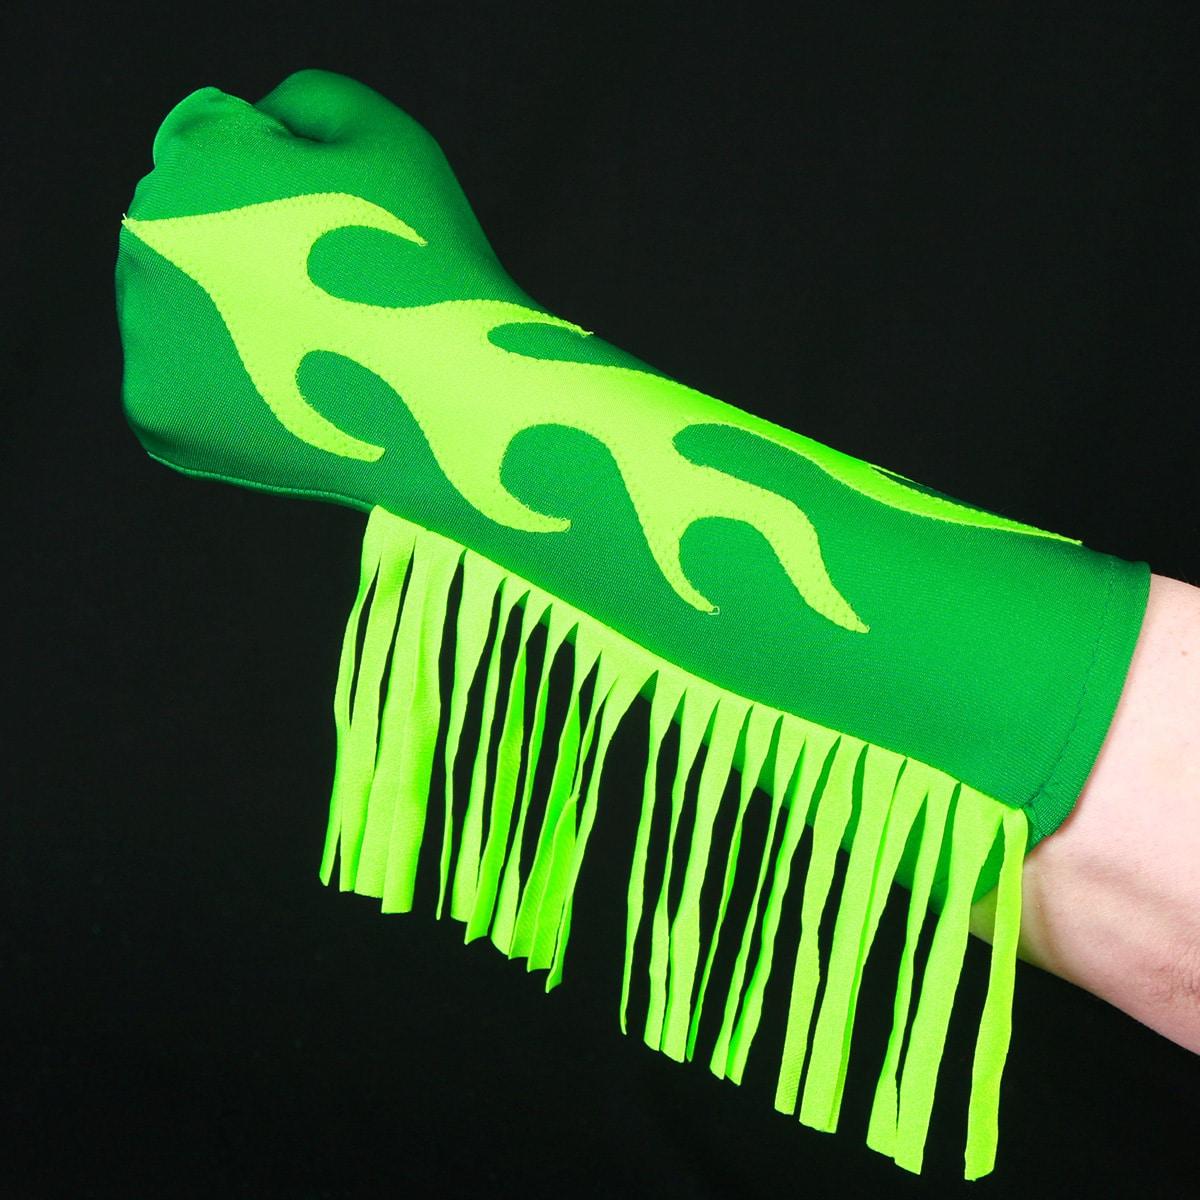
How to Make Spandex Gloves with a Side Fringe
While the “sew and then cut” technique is the quickest and easiest, sometimes it’s not appropriate for the design you are doing.
Sometimes you’ll want to insert fringe or some other design element into the side seams.
When this is the case, here’s how you make the gloves:
– Design and cut out your pattern as described in the Basic Spandex Gloves post, but ADD A ¼” SEAM ALLOWANCE.
– Cut 2 sets of your glove pattern out from spandex, ensuring that the greatest degree of stretch goes across the arm, not up and down the arm.
– Figure out where you want your fridge attached. You can use a store bought fringe, or simple cut some from a matching or contrasting spandex (pictured)
– Pin the fringe in place. If your fringe has a “right side”, you’ll want to pin it face down on what will be the top (back of hand/forearm, not the palm) piece of the glove.
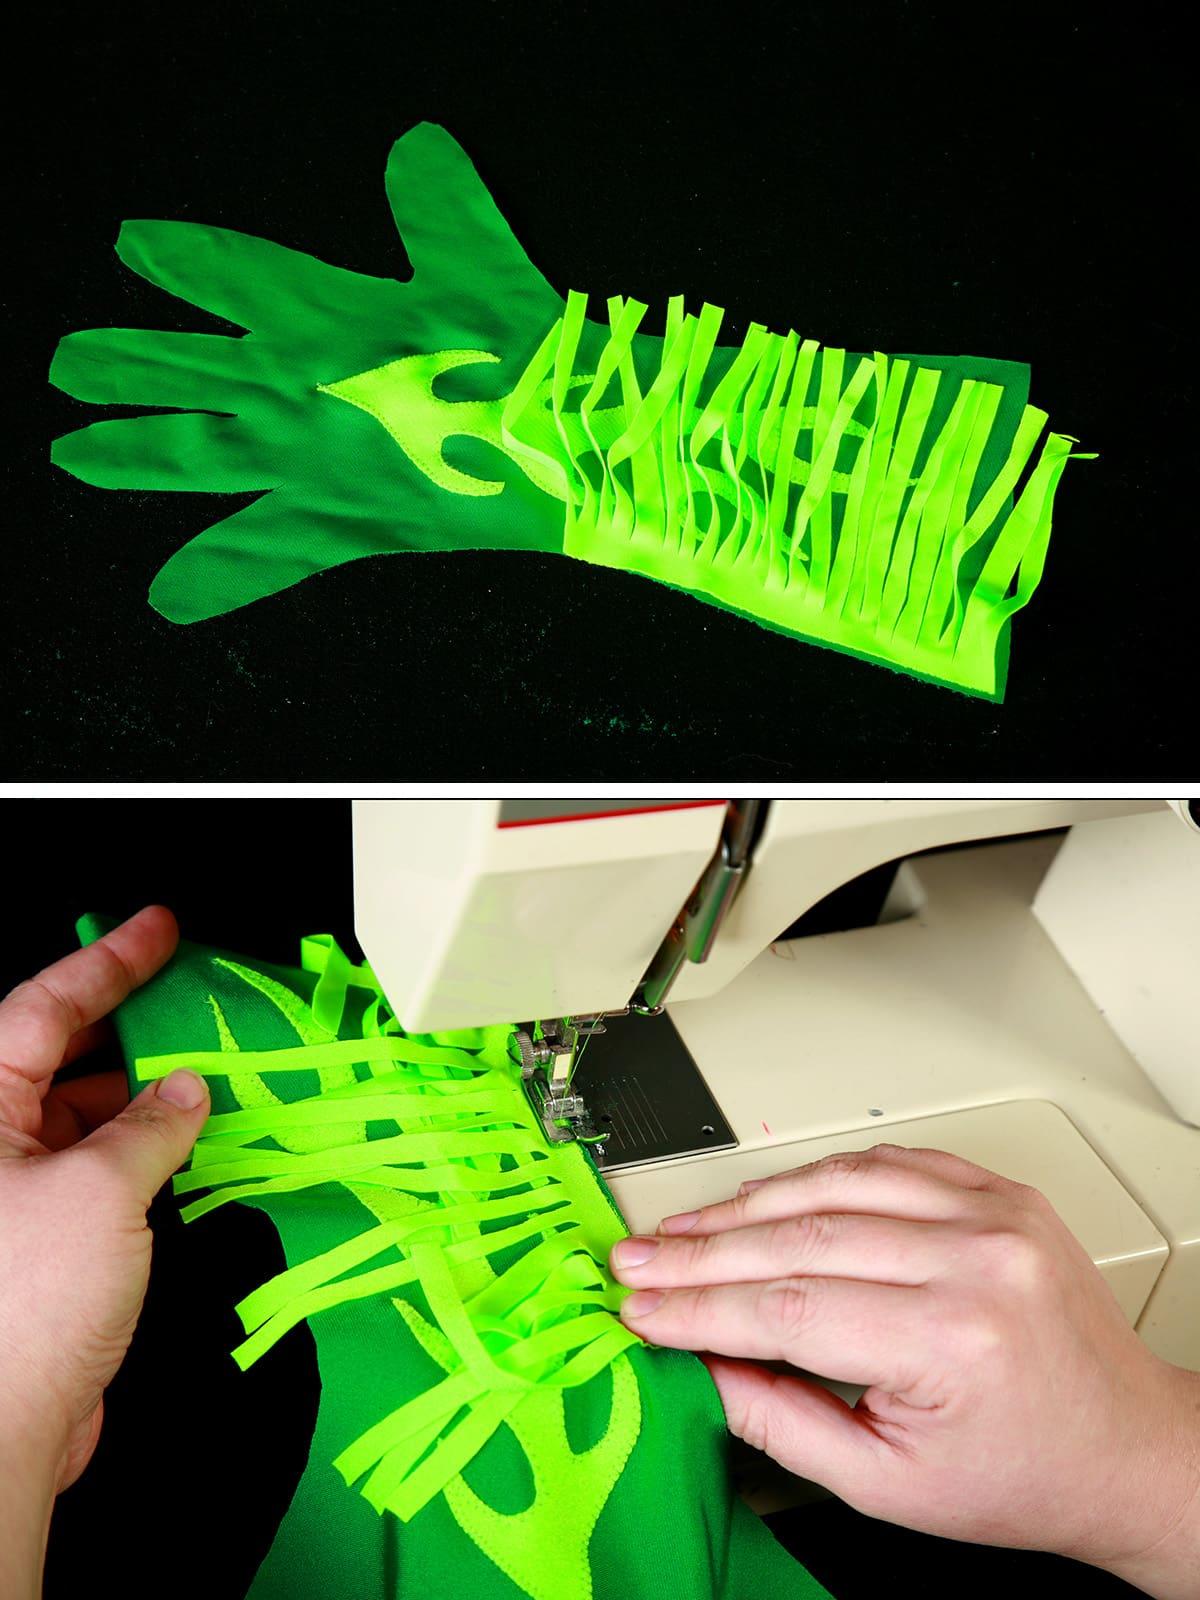
– Starting with the fringed side, sew your glove together. Remember the basic principles of sewing spandex as you do this – stretch and hold! (See my post on How to Sew Spandex with or Without a Serger to get the technique down!)
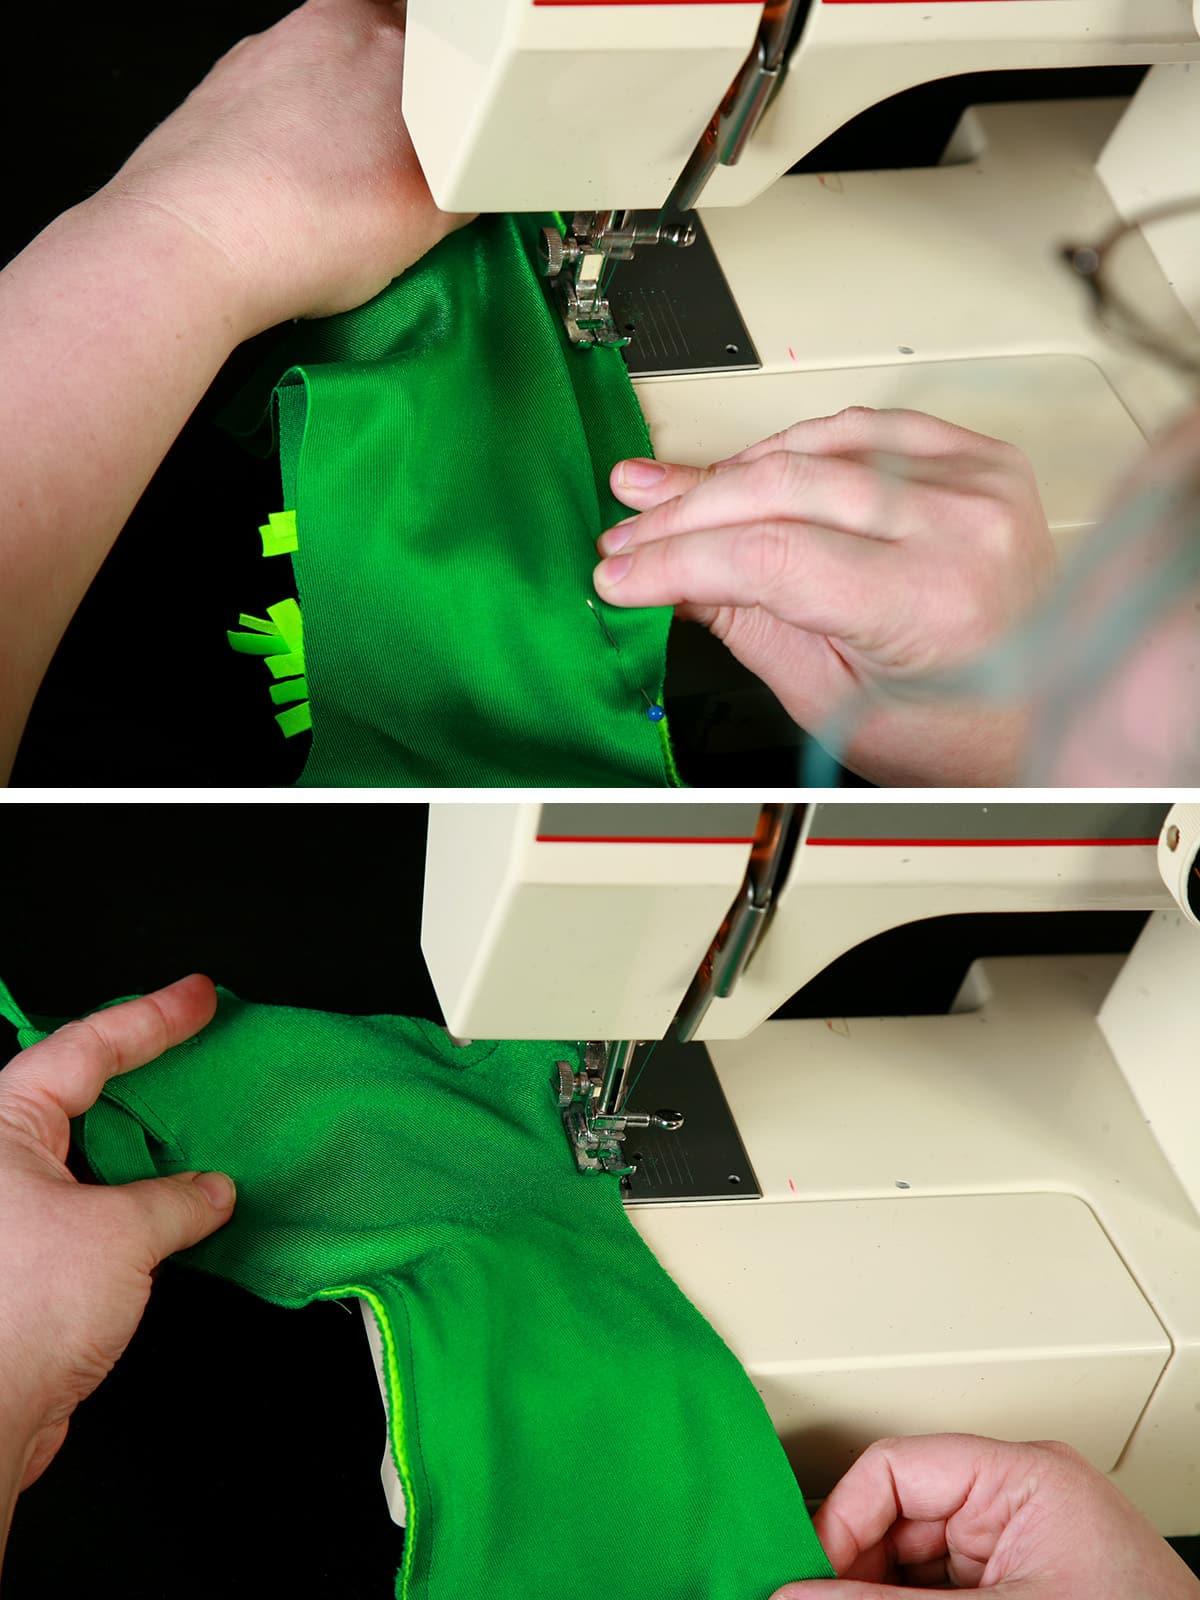
As you come up the other side of the glove, take special care to not catch any of your fringe in the seam.
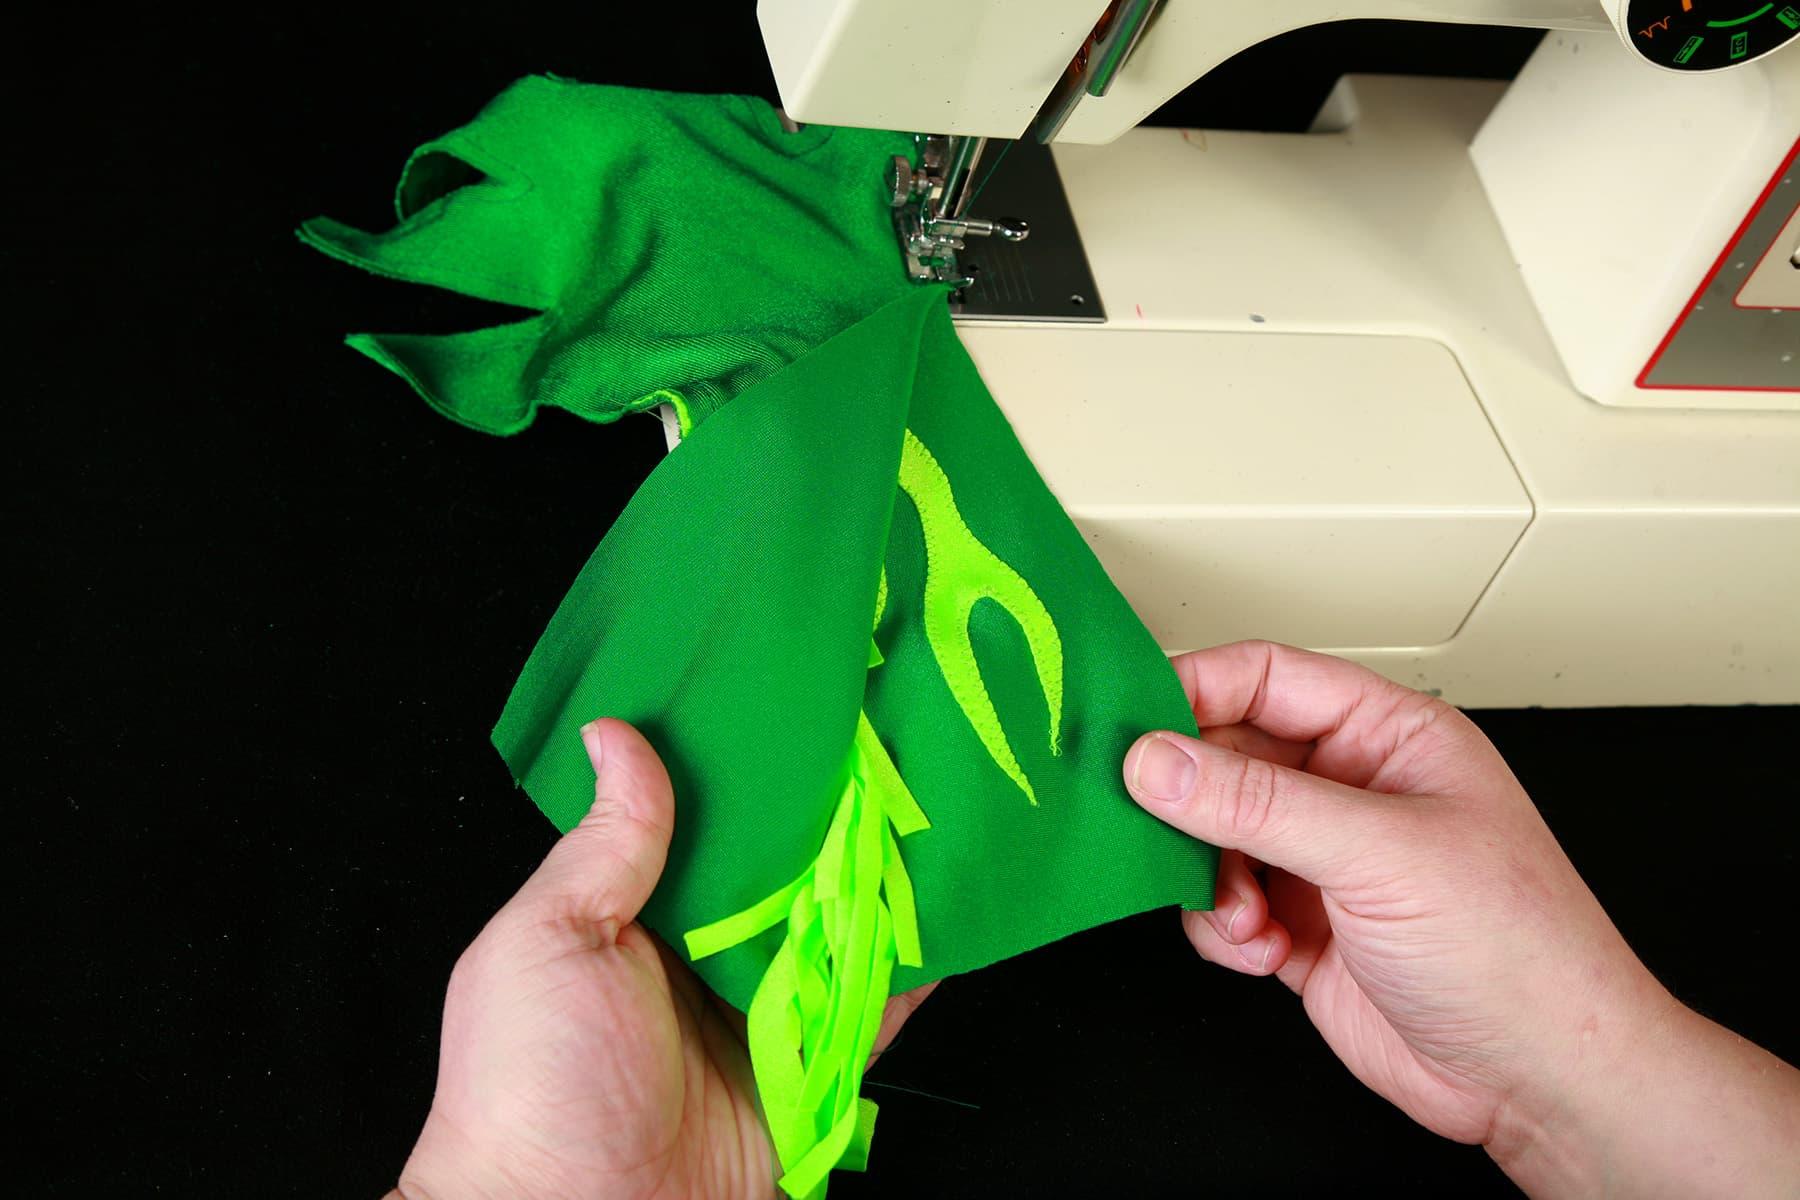
– Finish edge with a zig zag seam.
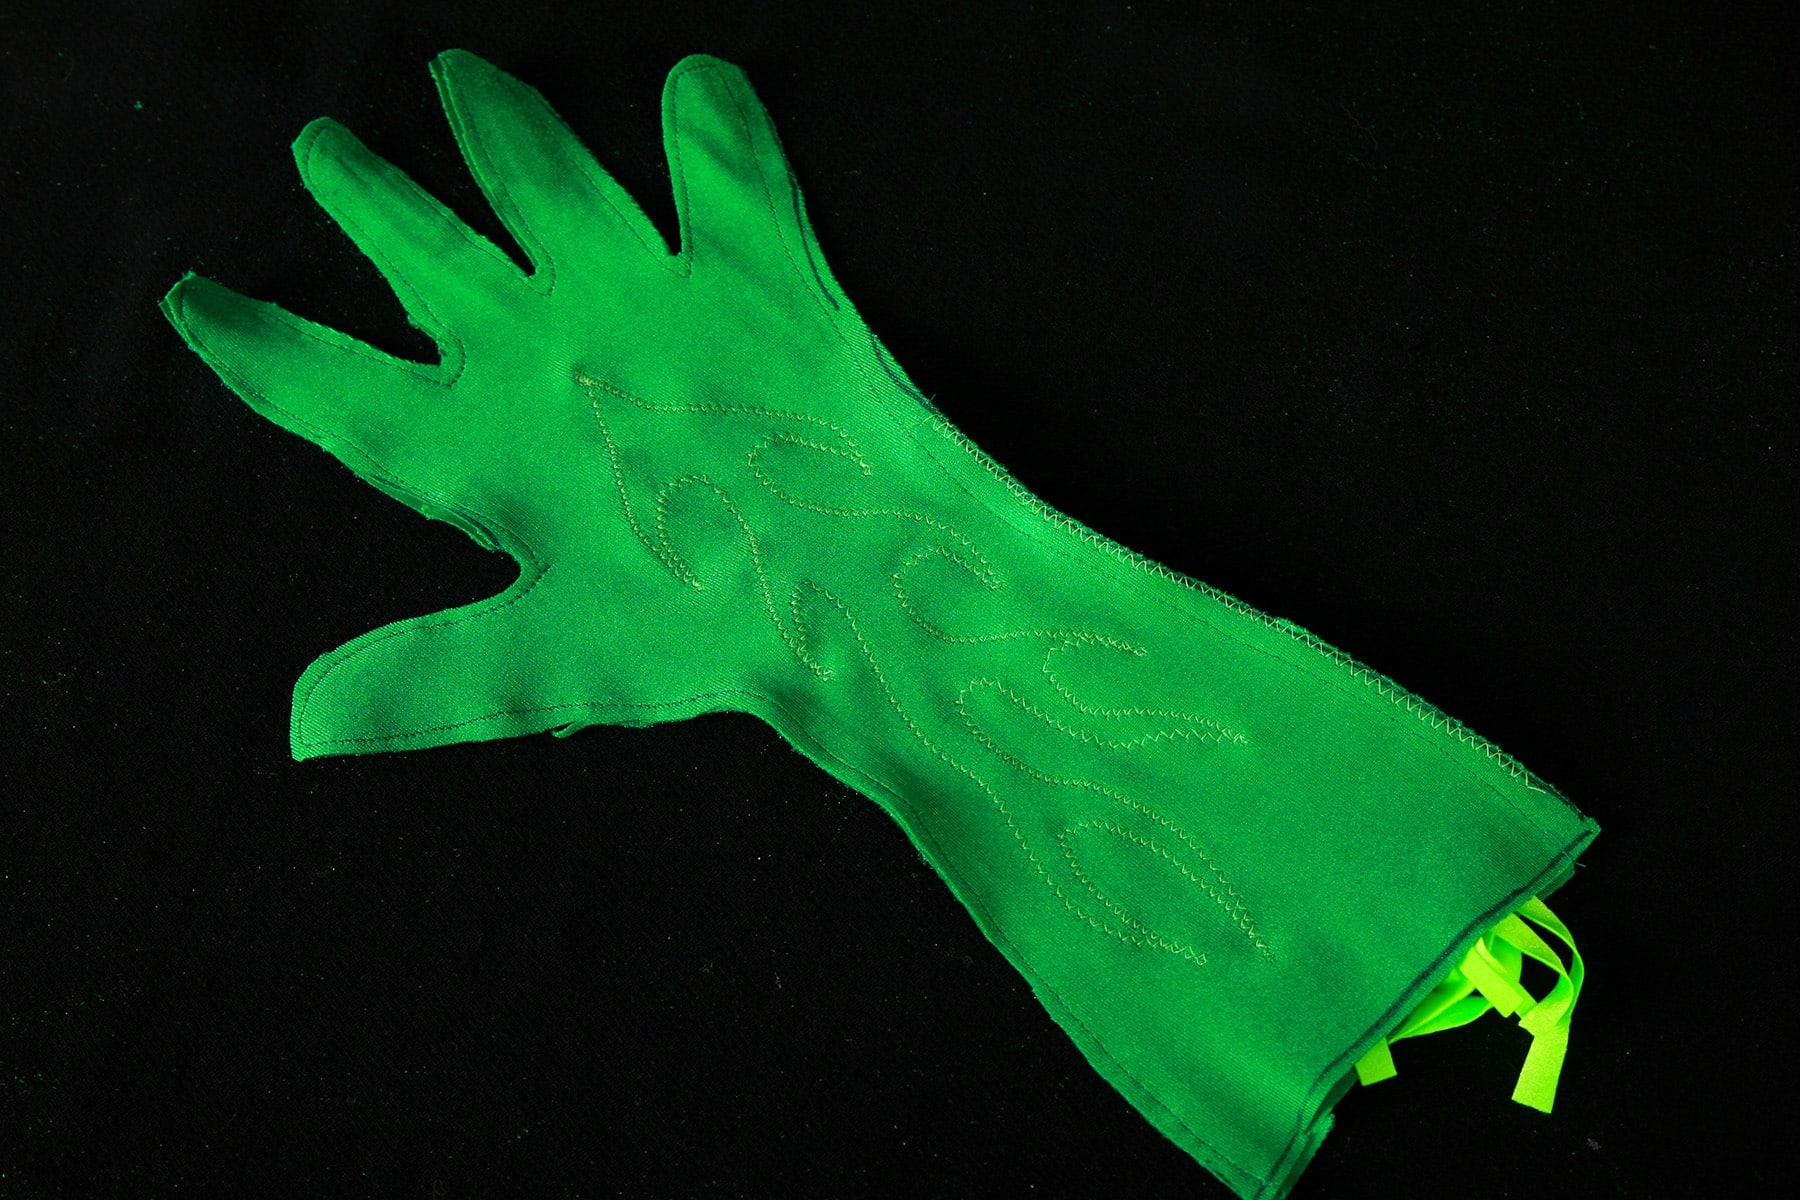
– Turn gloves right side out, finish off with a hem or cuff.

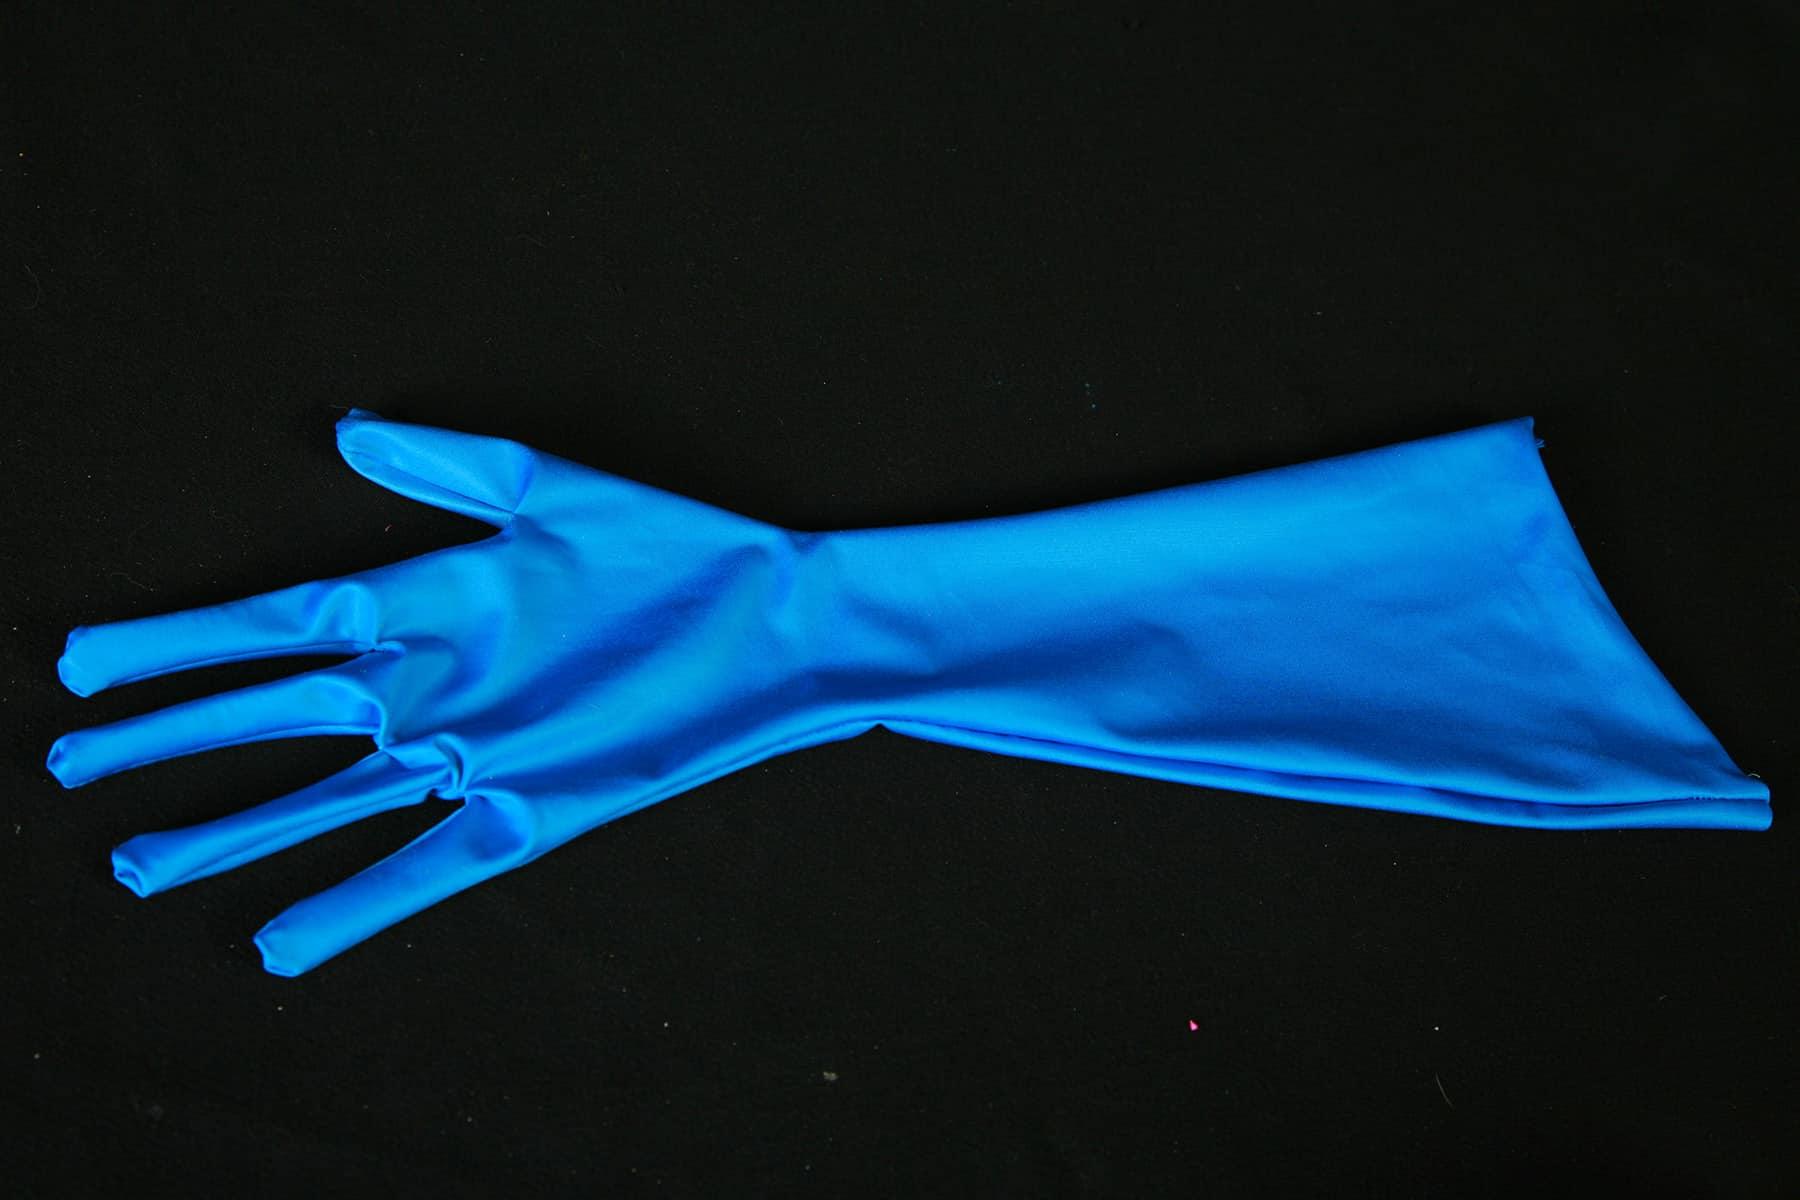
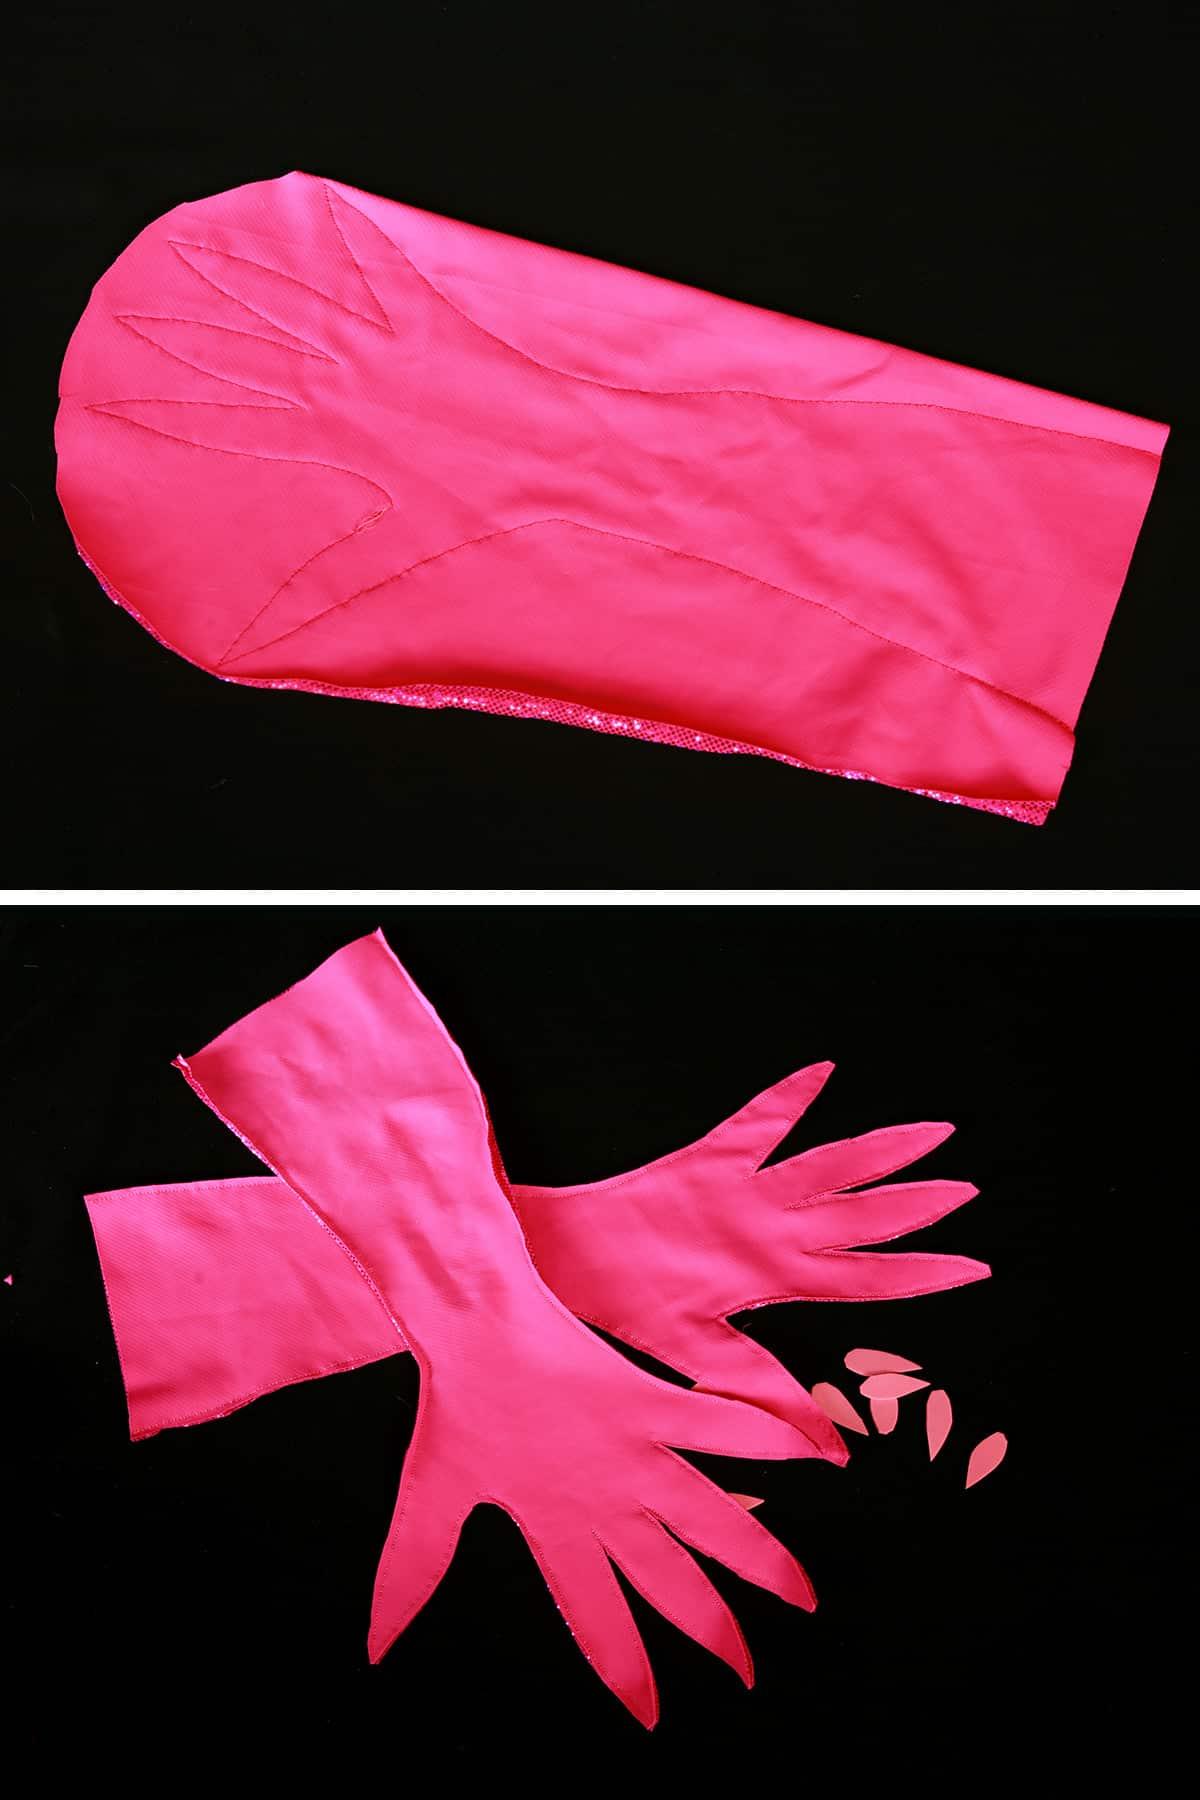
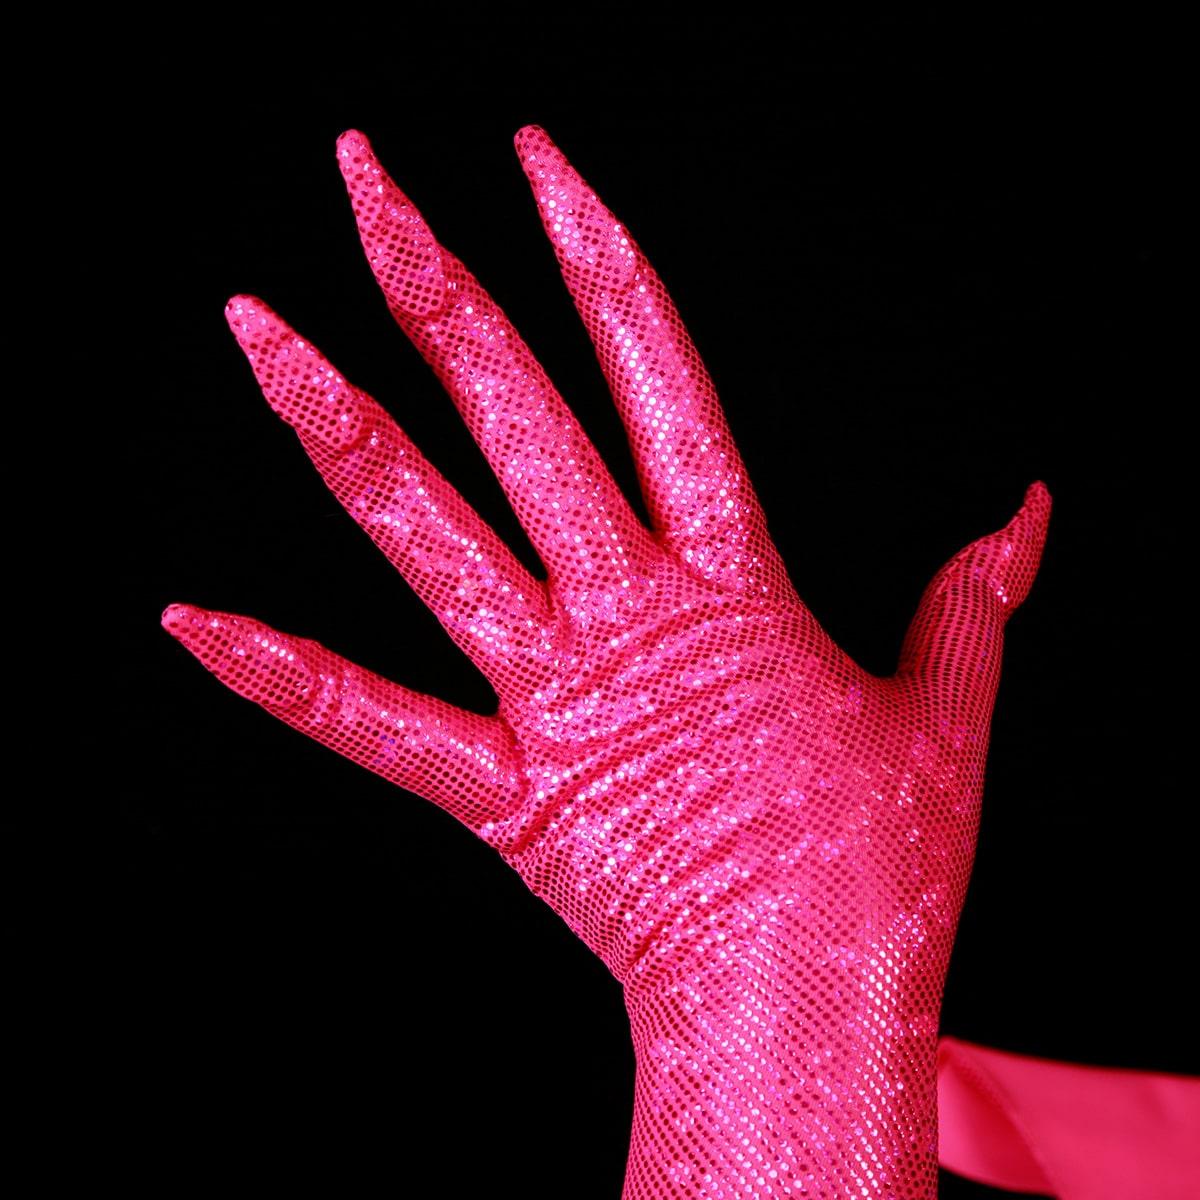
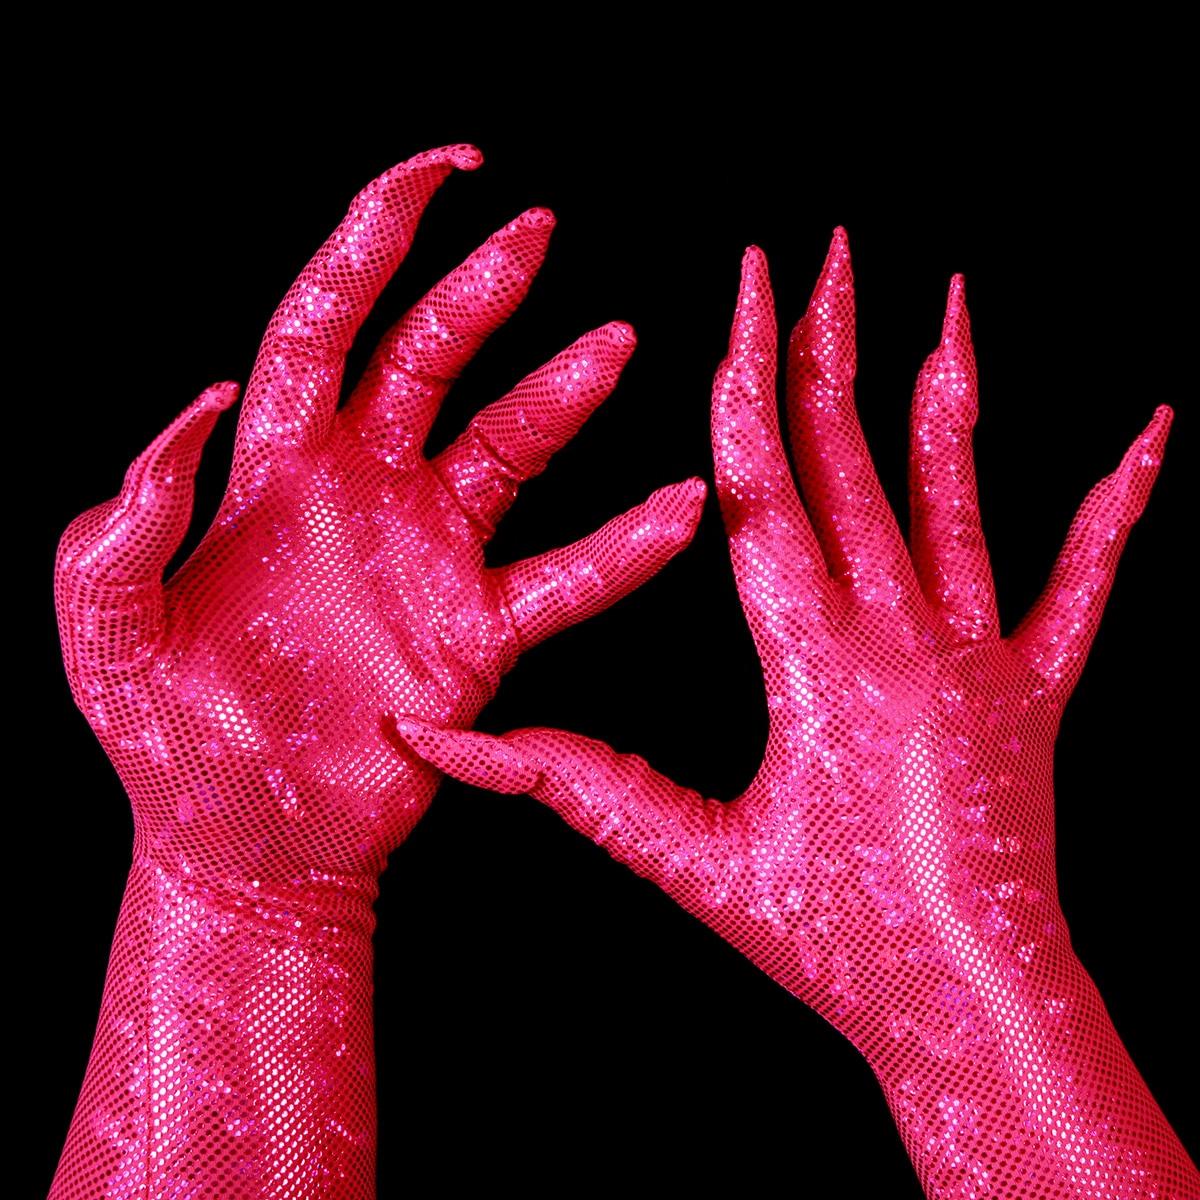
How to Make Spandex Gloves with Built In Nails / Claws
Designing gloves to look like they’re being worn over long (fake!) fingernails or claws is a fun way to personalize your look, without the commitment of actually having such nails. Build them in, and go!
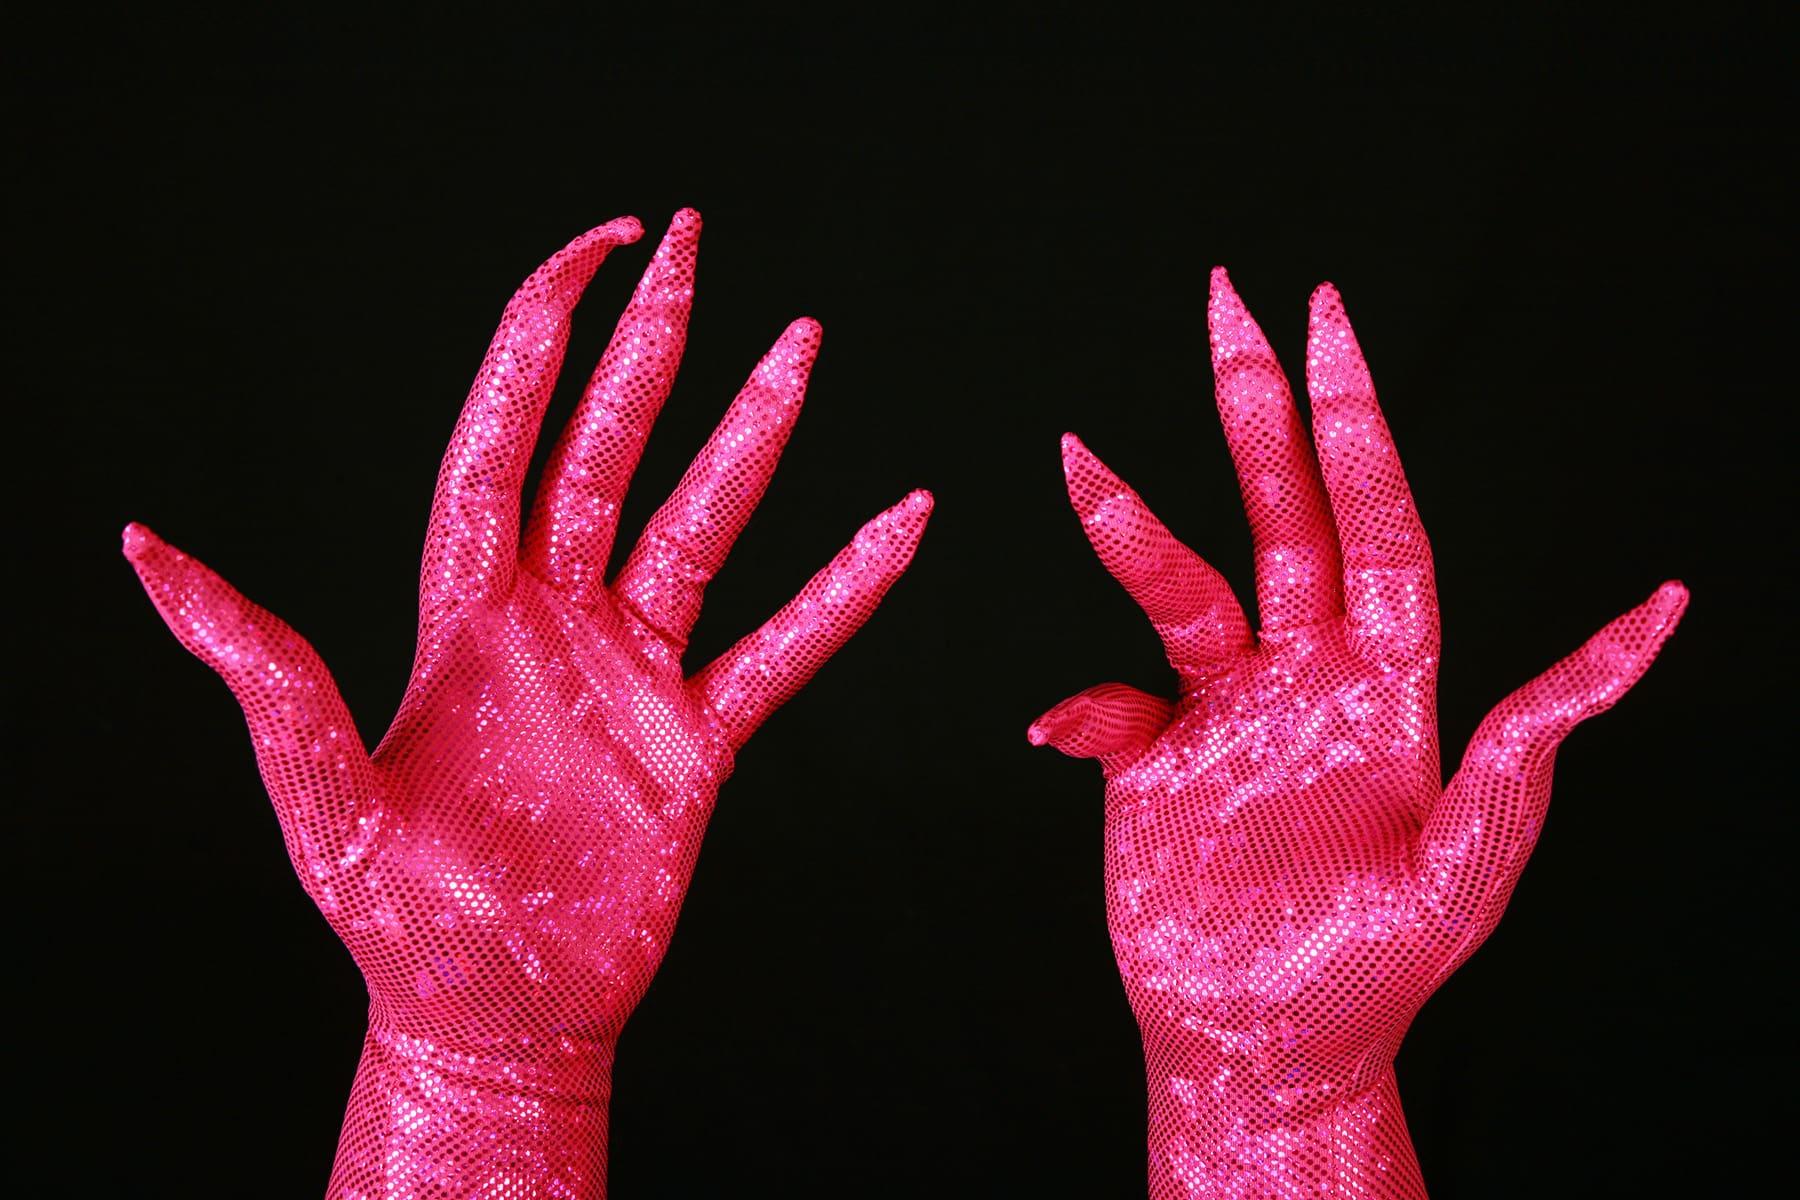
For a realistic use, you CAN use fake fingernails – but this isn’t always the most comfortable option, when wearing. The edges of the nails will rub against your fingers as you move.
For more comfortable nails – and for claws – I recommend cutting the nail/slaw shapes out of craft foam, instead of using plastic nails. MUCH more comfortable to wear!
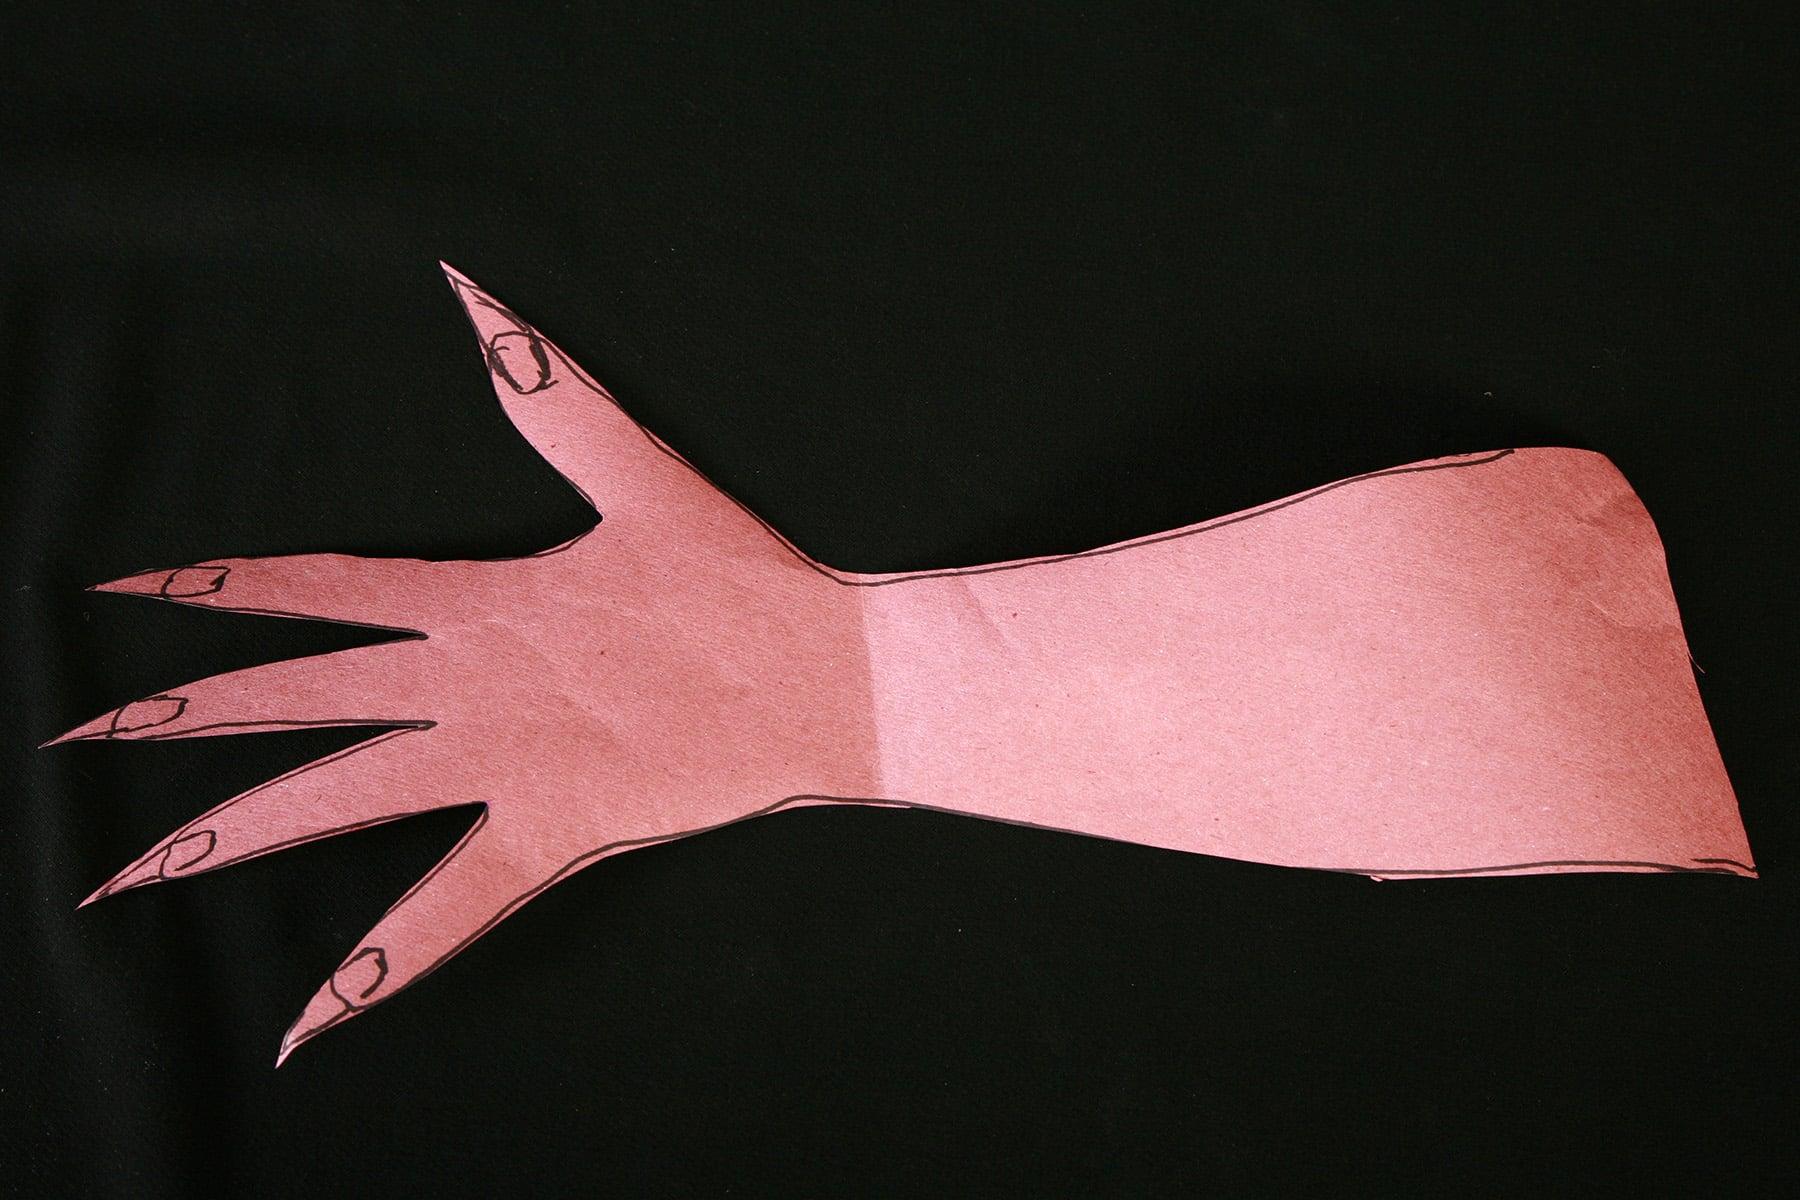
– Design your gloves. In addition to everything in the “Basic” instructions, figure out what it is that you’re adding to the gloves, in terms of nails or claws.
– Trace out your hand/arm as described in the “Basic Gloves” instructions, making any adjustments necessary.
– For each finger, note where your fingernail starts, and the approximate dimensions of each nail. It doesn’t need to be perfect, but if you’re using plastic nails, you’ll want it to be fairly accurate!
– Re-draw the fingertips of your glove pattern, in the shape/length of the nail or claw you will be adding to it. Be sure to allow a very small (¼” or less) seam allowance around the nail design.
– Sew and cut out your gloves as you would for the “basic” style, only following the extended nail design lines. Remember the basic principles of sewing spandex as you do this – stretch and hold! (See my post on How to Sew Spandex with or Without a Serger to get the technique down!)
– Try on your gloves to make sure everything fits, before proceeding.
– Turn gloves inside out, keeping track of which glove is for which hand, and which is the “top” side of each. Lay both gloves out so that the inside of the “top” side of each hand is facing up.
– If you are using foam, cut our your nail or claw pieces and arrange each next to the appropriate finger. If using plastic nails, select nail sizes that work best with your actual hand (not the glove), and arrange each next to the appropriate finger.
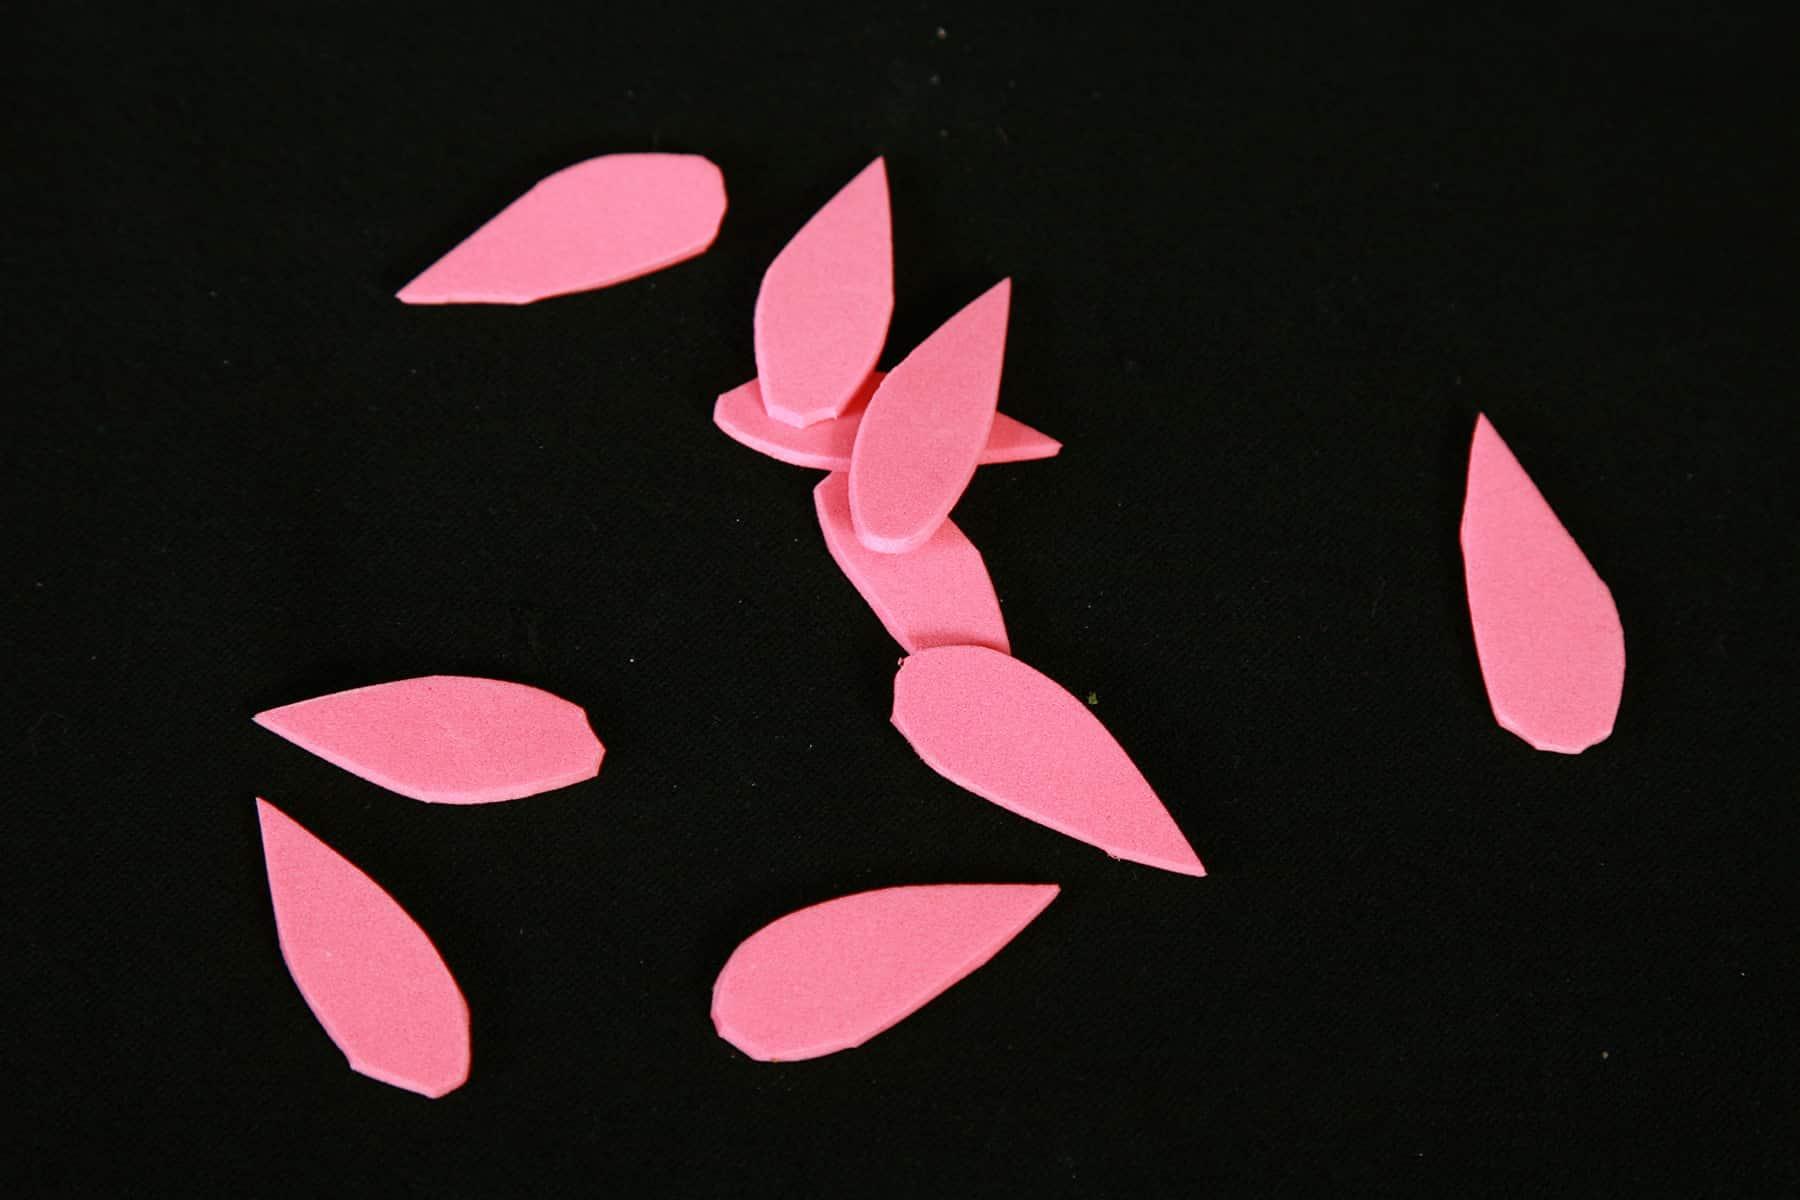
– Glue the nails or claws down to the gloves, “top” side down (if applicable). Use a glue that will NOT soak through to the right side of the fabric – I like to use Super 77 spray for this. Allow to dry fully before proceeding.
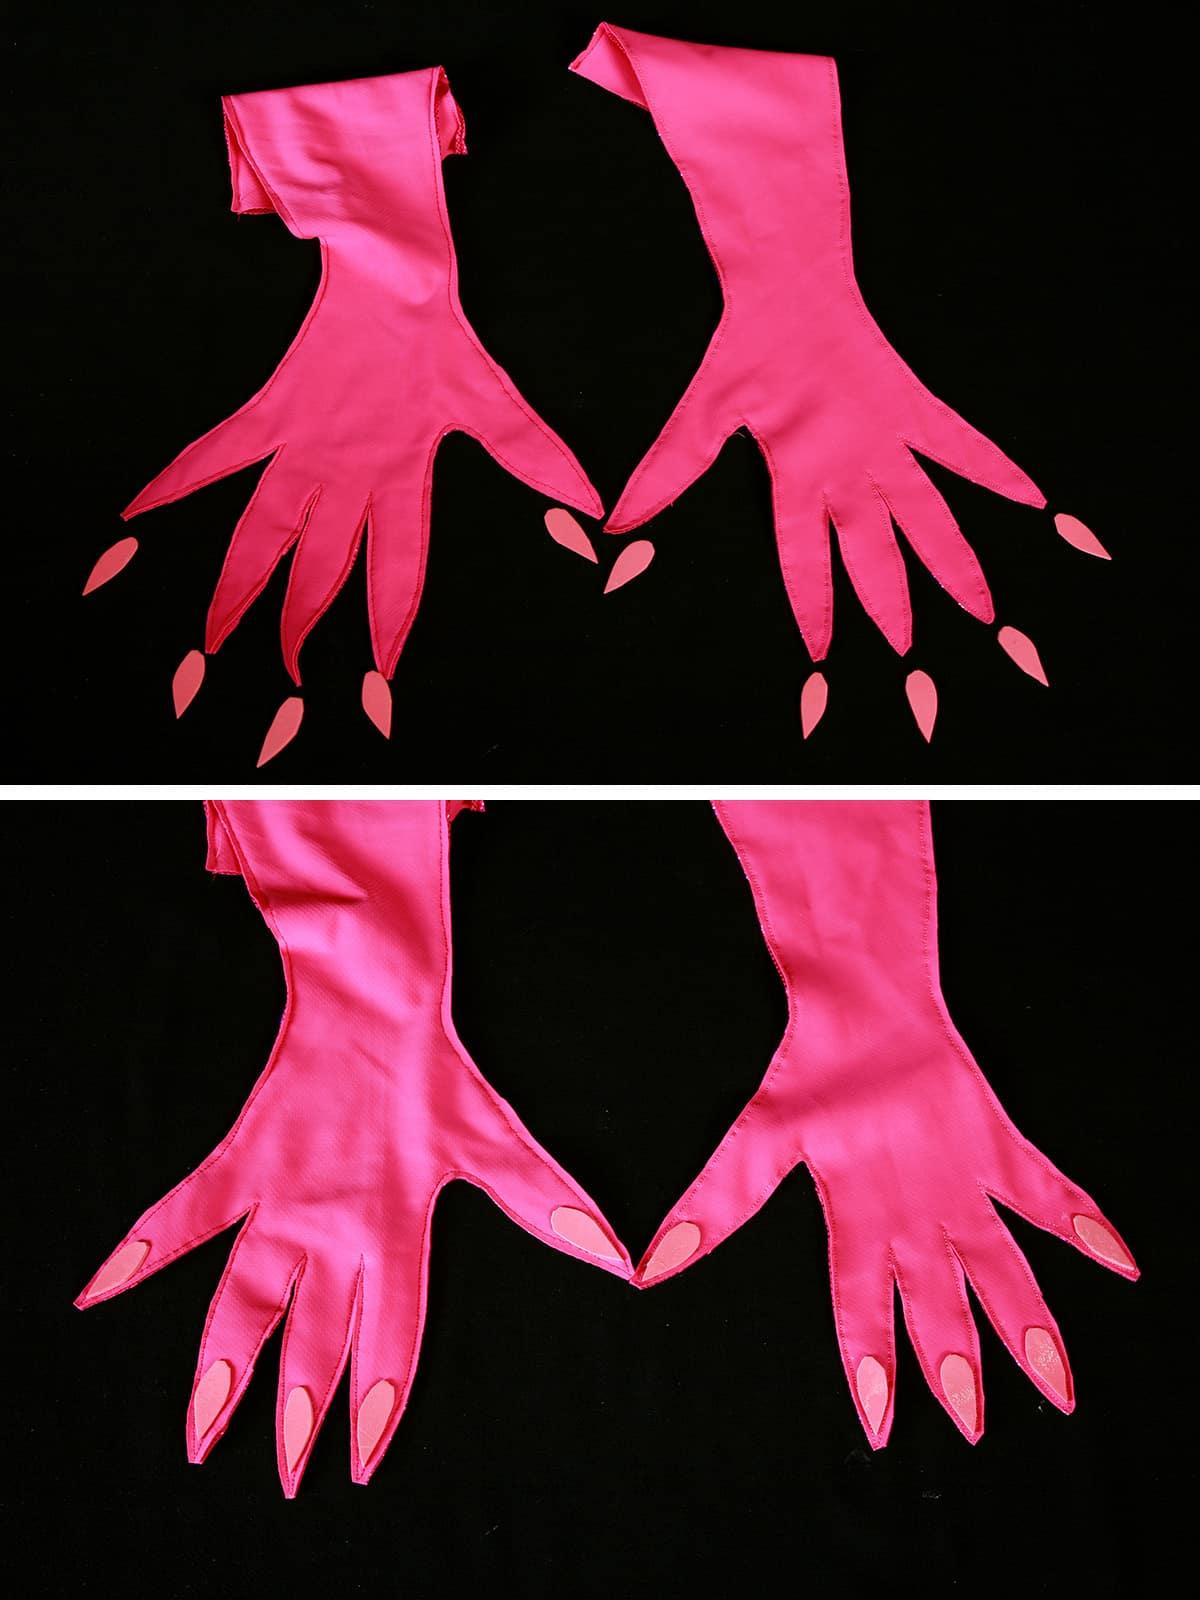
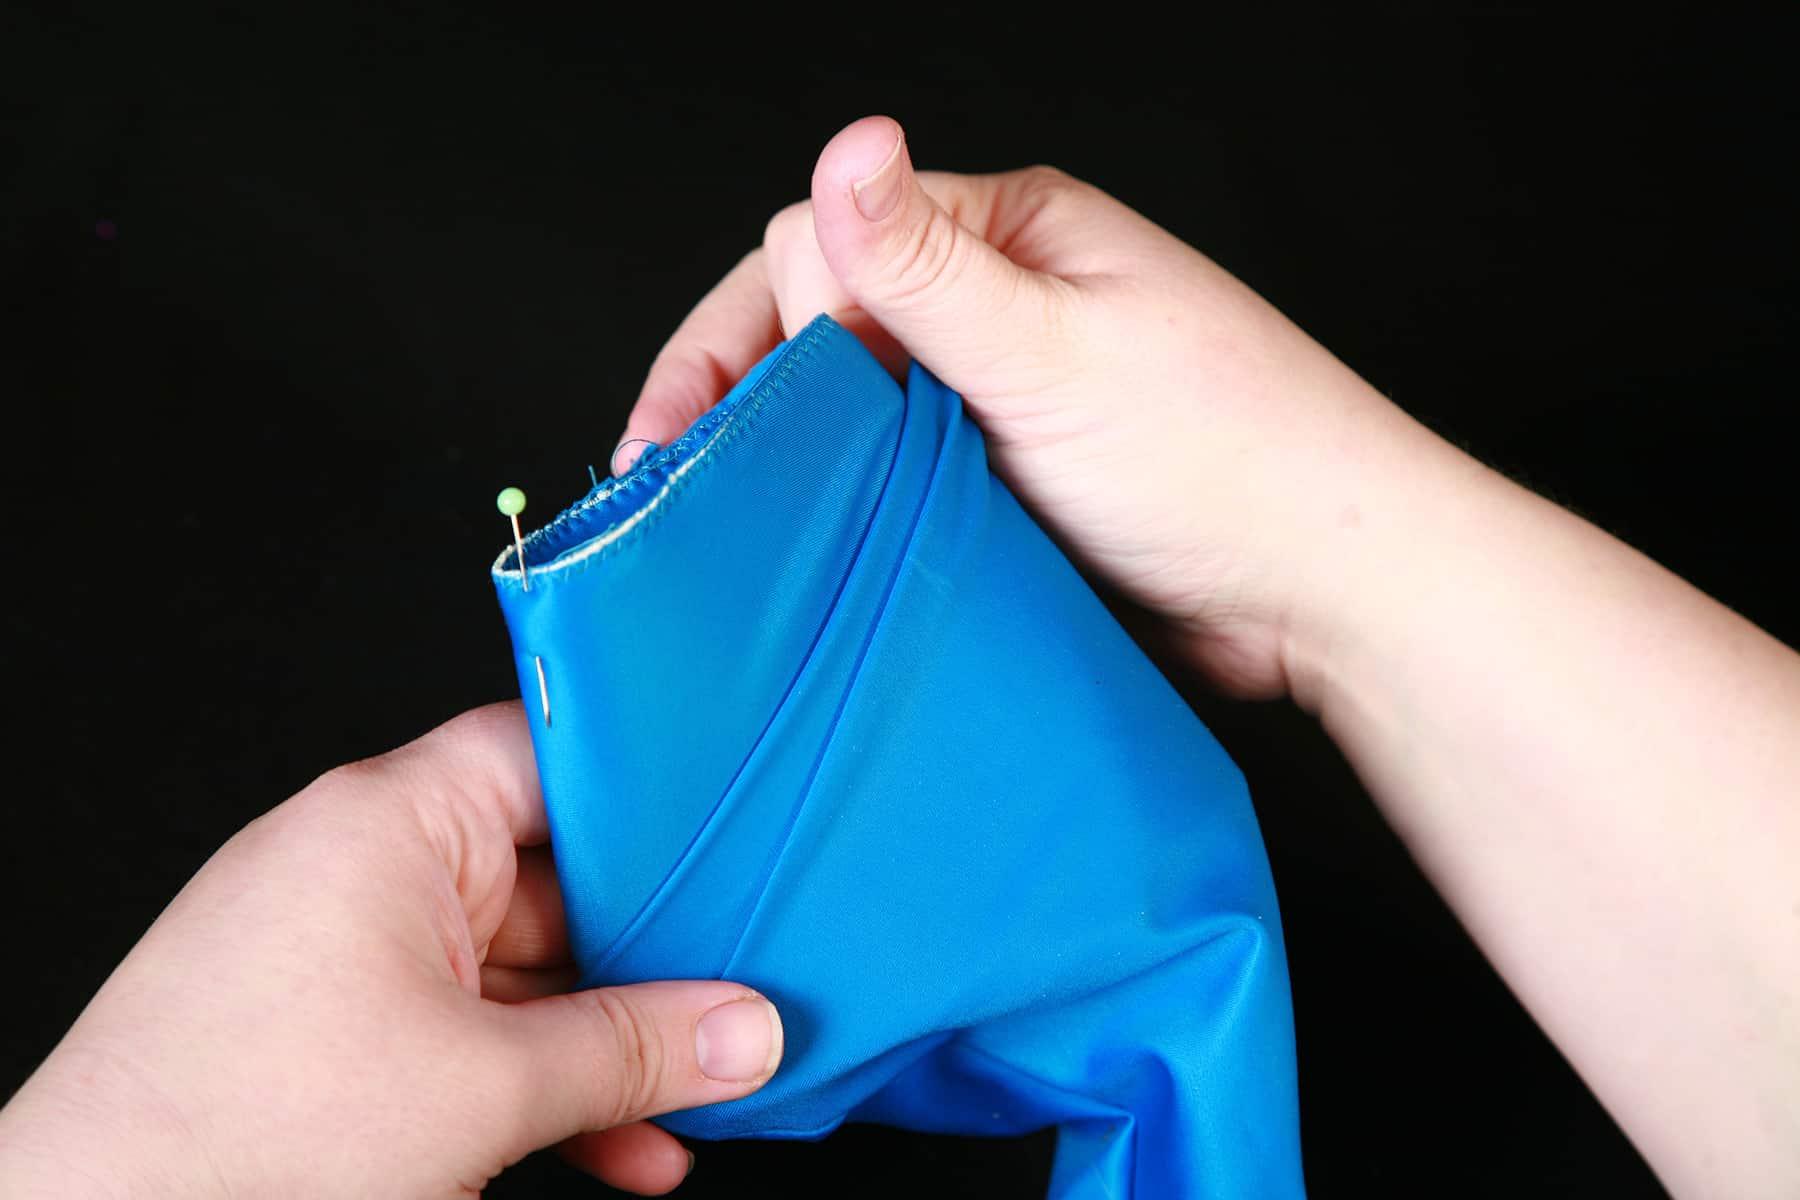
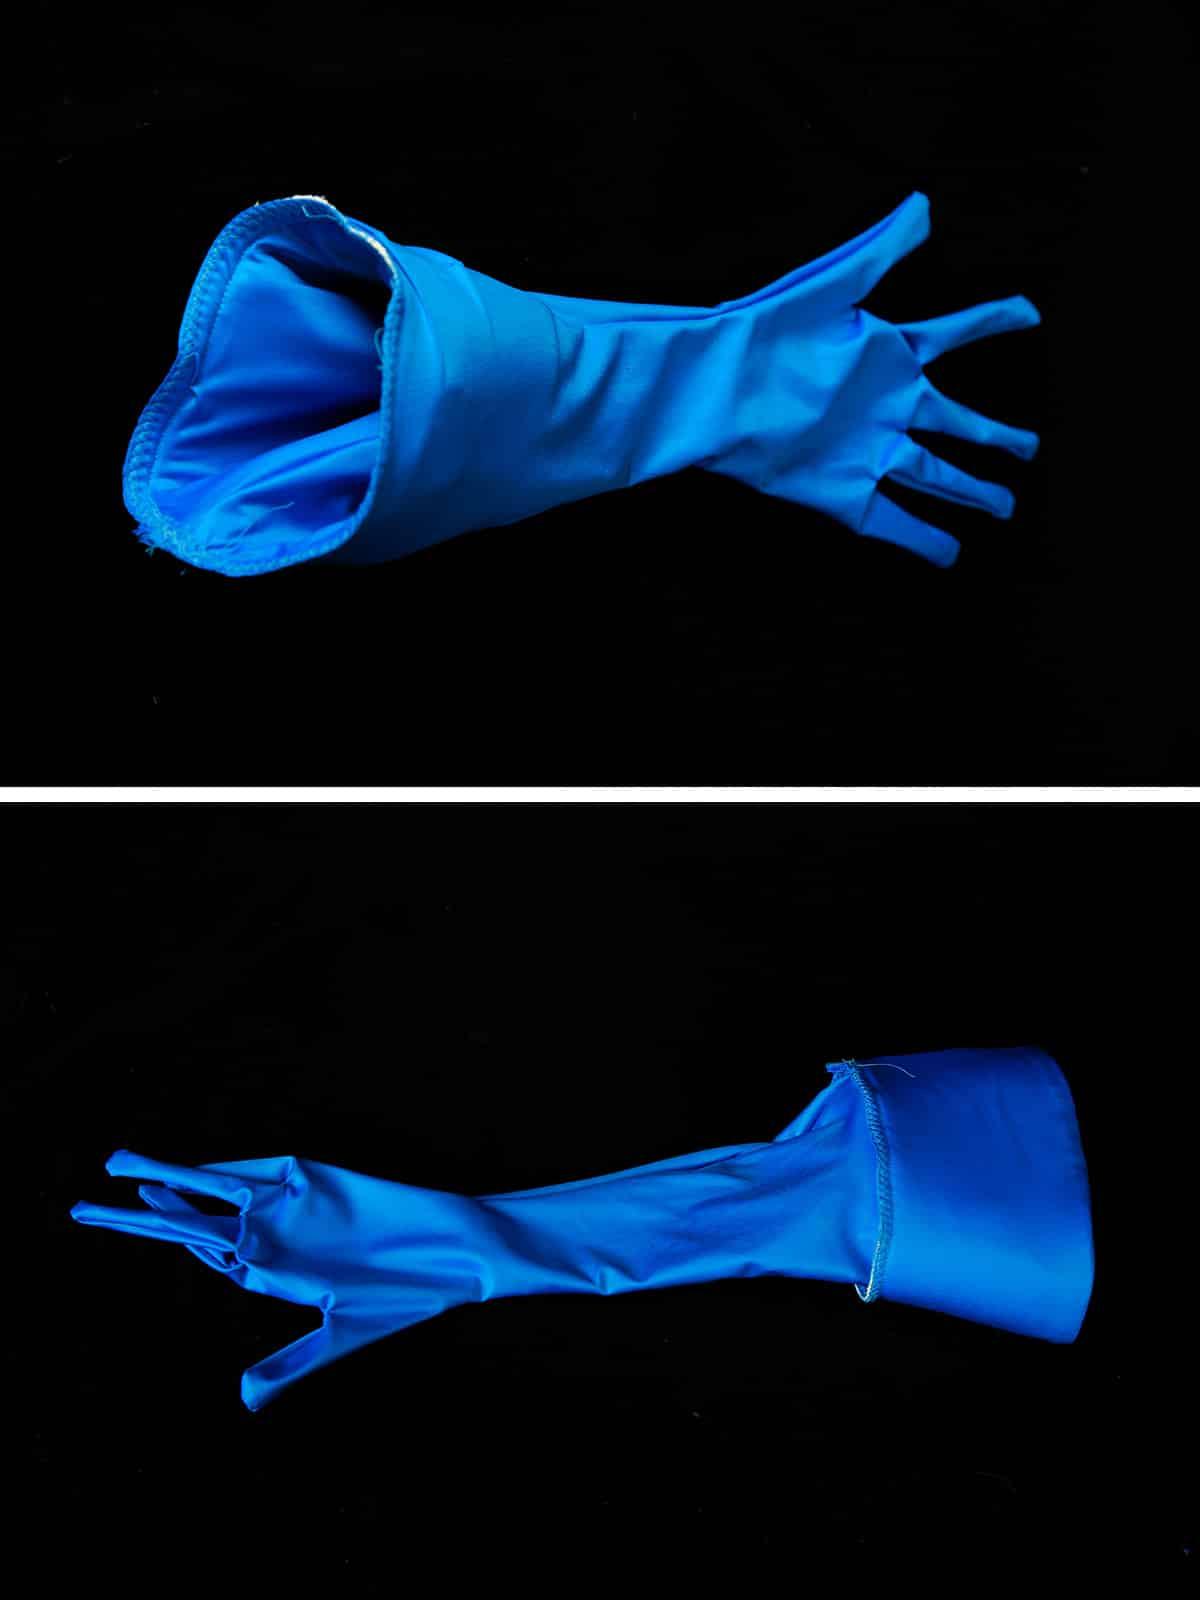
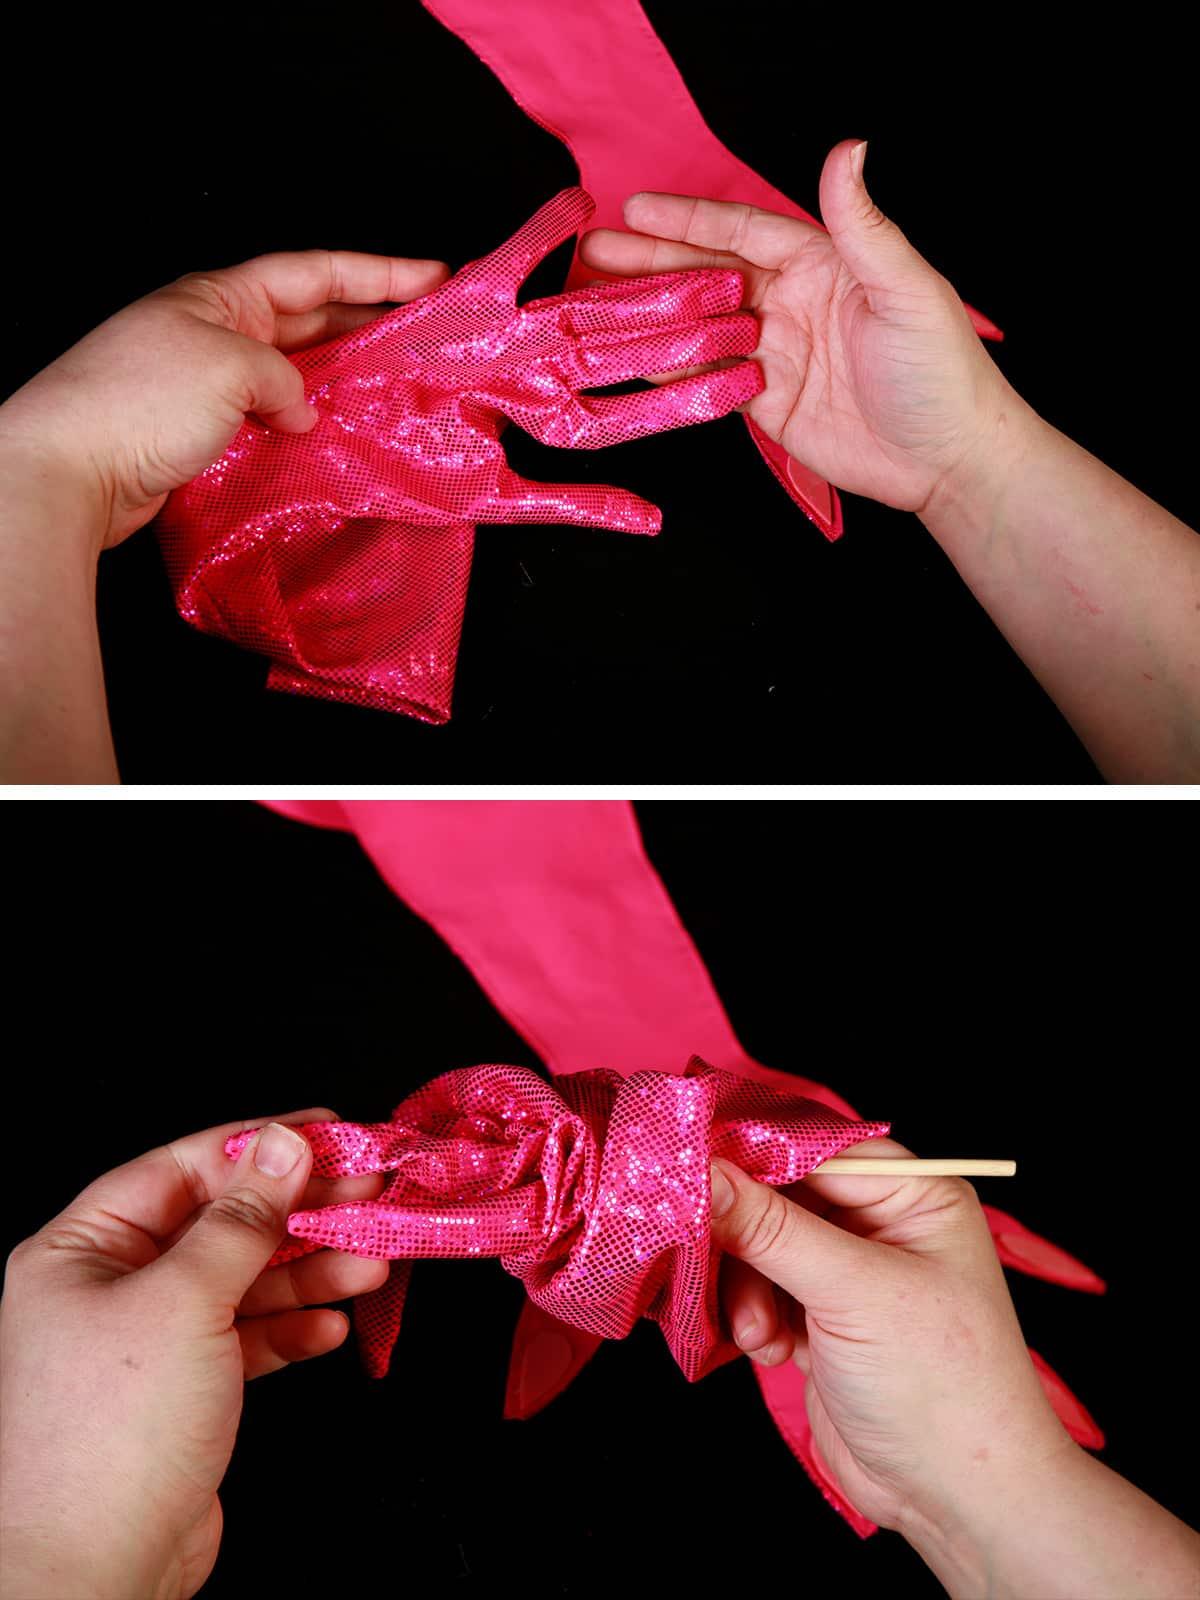
Turn glove right side out.
When doing pointy nails or claws, I like to use the pointy end of a chop stick to help fully turn out each nail:
Finish the top edge of your glove as desired – hem, elastic, etc.
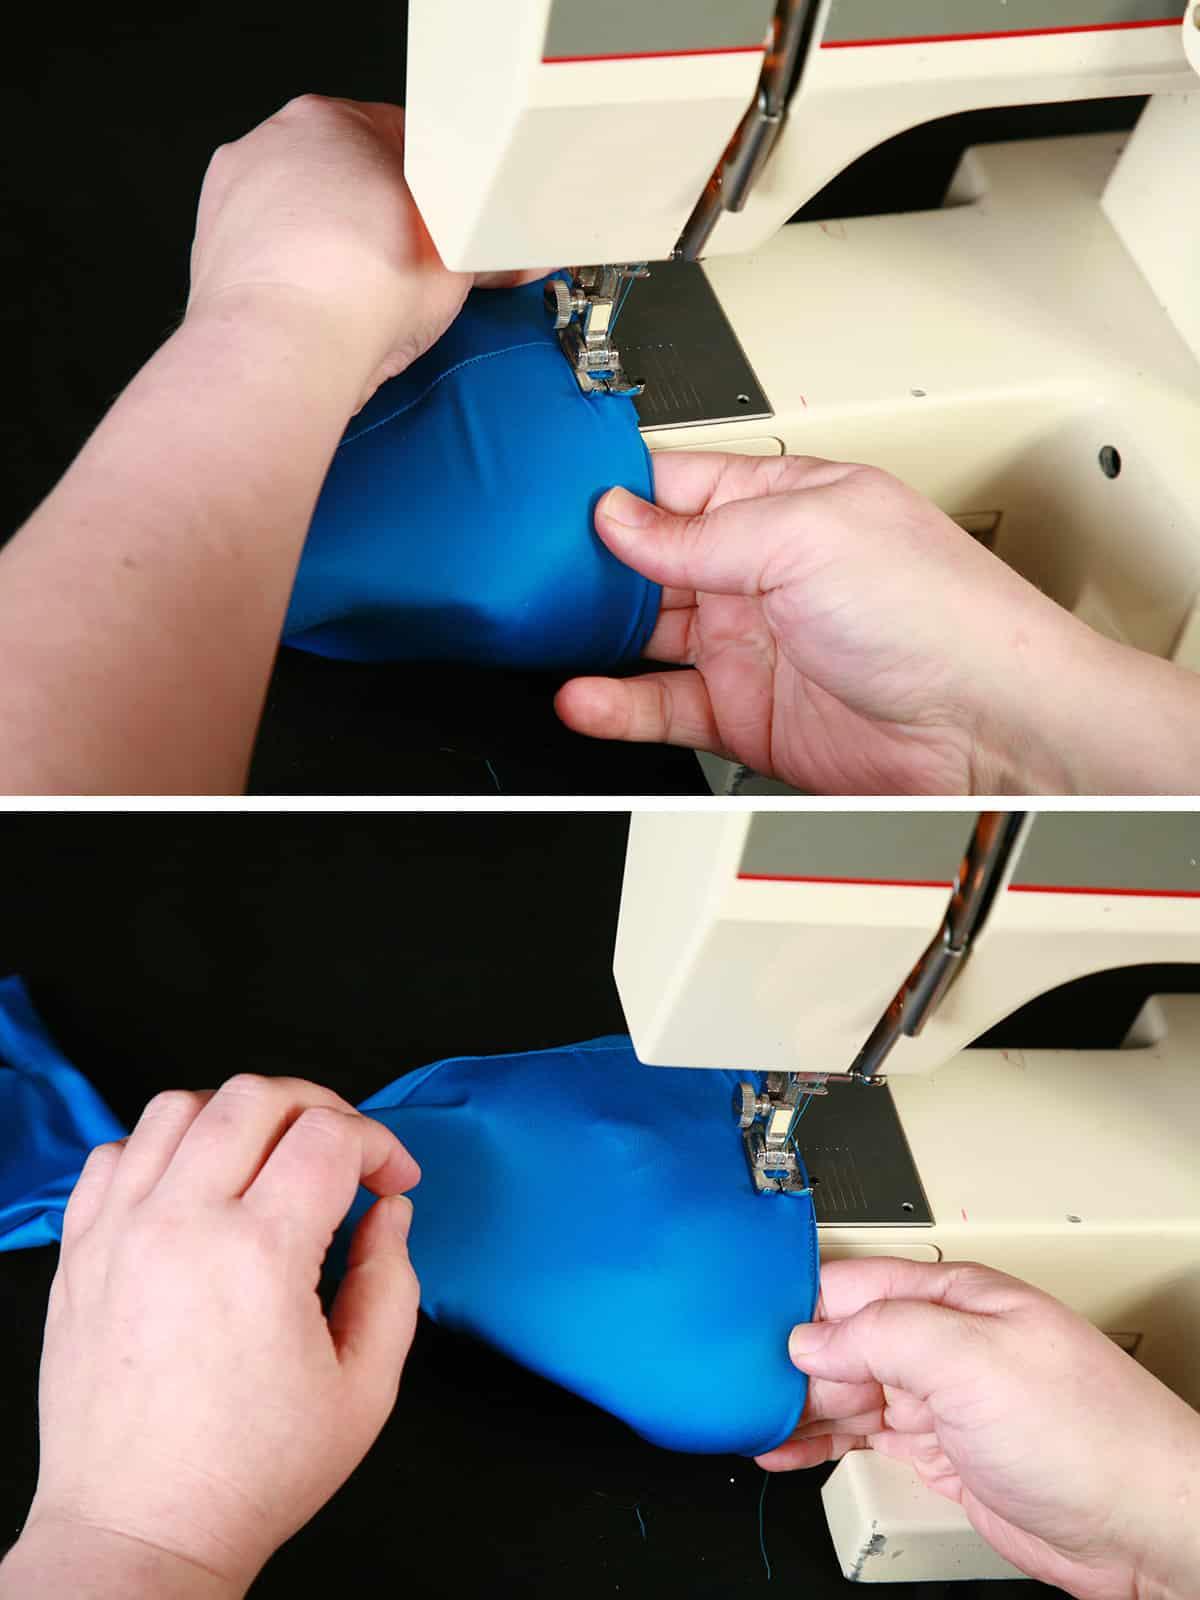
For a More Defined “Nail”
This is optional, and can be done as you turn the gloves inside out. Be careful and take your time – as the glue can get everywhere.
– Place a bit of glue at the end of one of the nail tips. You can cover almost as much space as would extend past your actual finger tip, I like to go slightly less to allow for some wiggle room.
Carefully turn the very tip of the glove right side out, pinching to glue the underside of the fabric to the underside of the nail or claw.
I like to use a clothespin or paperclip to hold this in place until it dries. Repeat for all remaining finger nails / claws.
Embellishing Spandex Cosplay Gloves
Going to add painting, glitter, or crystals to your gloves?
Use your original pattern piece to cut out a “stretcher” from corrugated cardboard!
Stretch the glove over your new stretcher, before embellishing.
Source: https://t-tees.com
Category: HOW