

At the end of last year I noticed that @ute_ig and @sanaeishida on Instagram were hosting their 4th #2017sve – a wonderful secret Valentine exchange opportunity where you submit your details over to them and they secretly let you have the details of someone to make a handmade item for. I have never taken part in this before but as soon as I saw it I was all over it!
You are viewing: How To Make Oven Gloves Uk
When you receive details of your Valentine swap, it is up to you to try to do a bit of detective work to tailor your gift to their taste. I noticed that my partner enjoyed recipe writing, so decided to make her something that she could use in the kitchen.
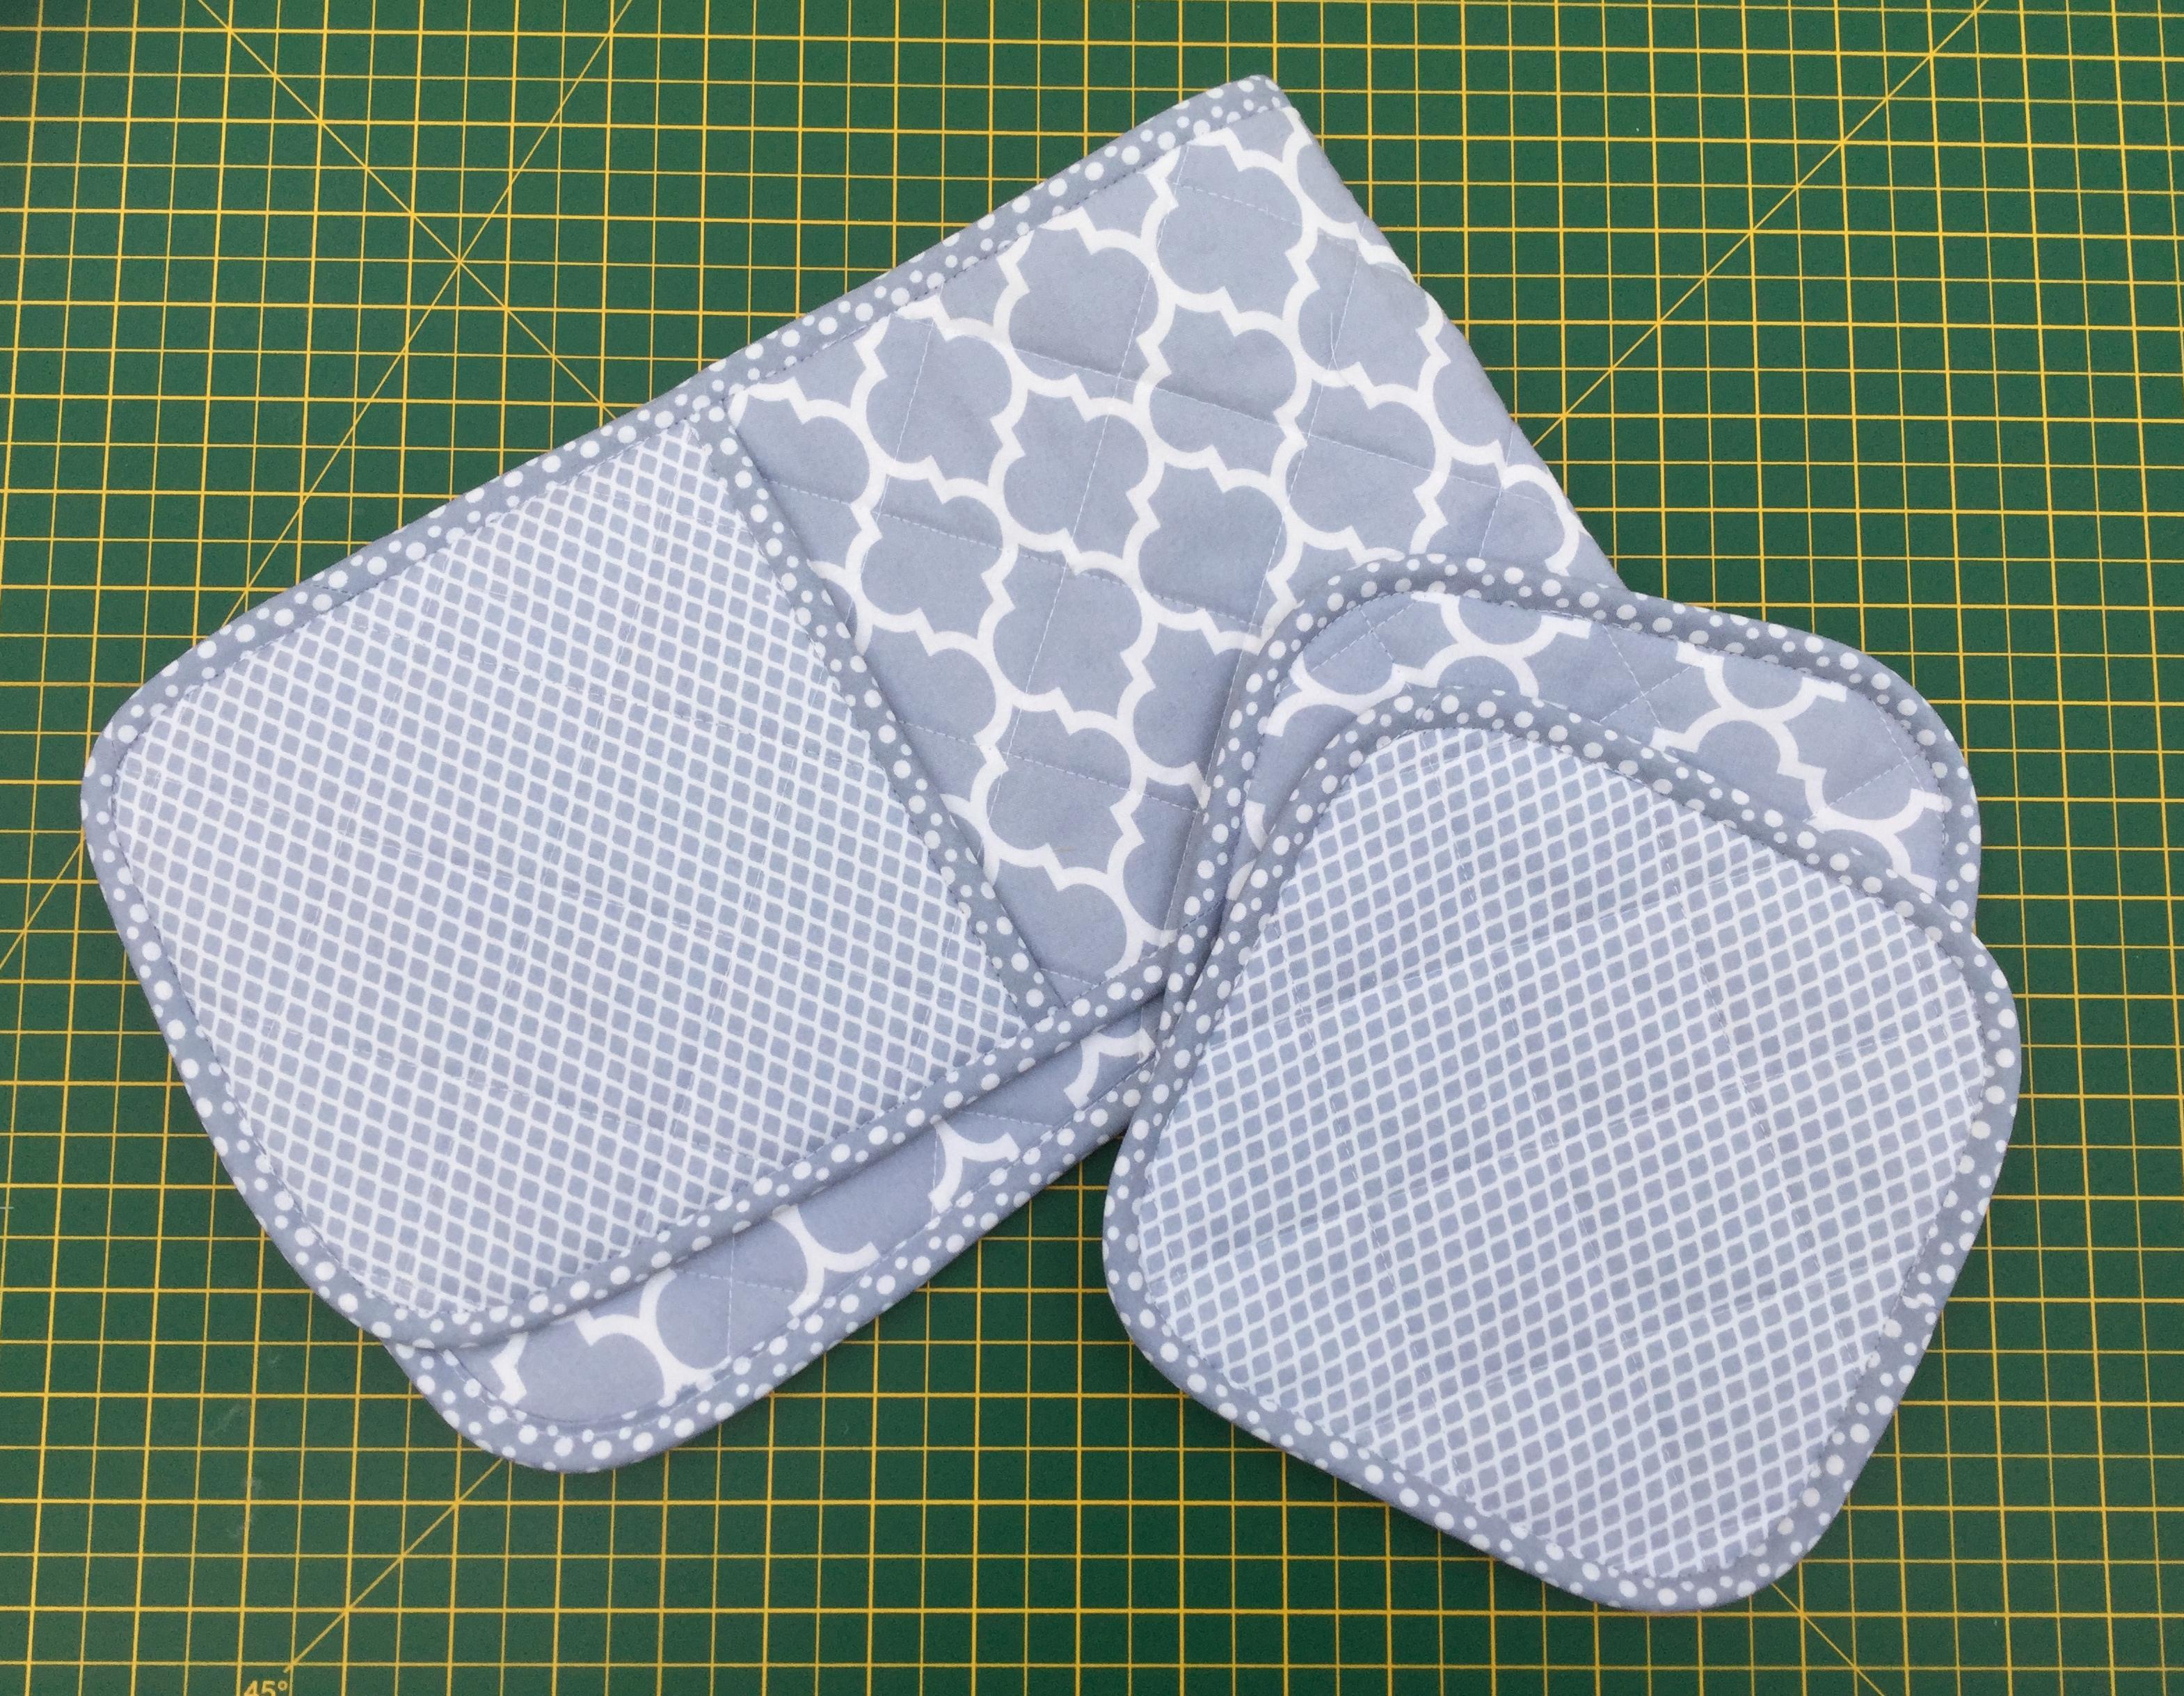
The oven glove and pot holders were fairly simple to make, and I was pleased with the outcome. My partner had divulged that she liked blues and grey and simple geometric shapes so although the idea of this swap is that you use fabric and items that you already own, I popped to the local fabric shop as I didn’t really have any fabric at home which met her criteria. I chose 3 coordinating pieces of Gutermann fabric from their ‘ring a roses’ range. I pre-washed these fabrics before sewing as I didn’t want any shrinkage after they were made. You will also need some heat resistant wadding for this project rather than regular wadding.
Before I started, I used one of the fabrics to make my own hand made bias binding. I have written a tutorial on how I did this here
The measurements for this project came from me simply measuring my existing oven glove and pot holders. You can of course adjust the sizes as you wish, but I was happy with the size that I was already using.
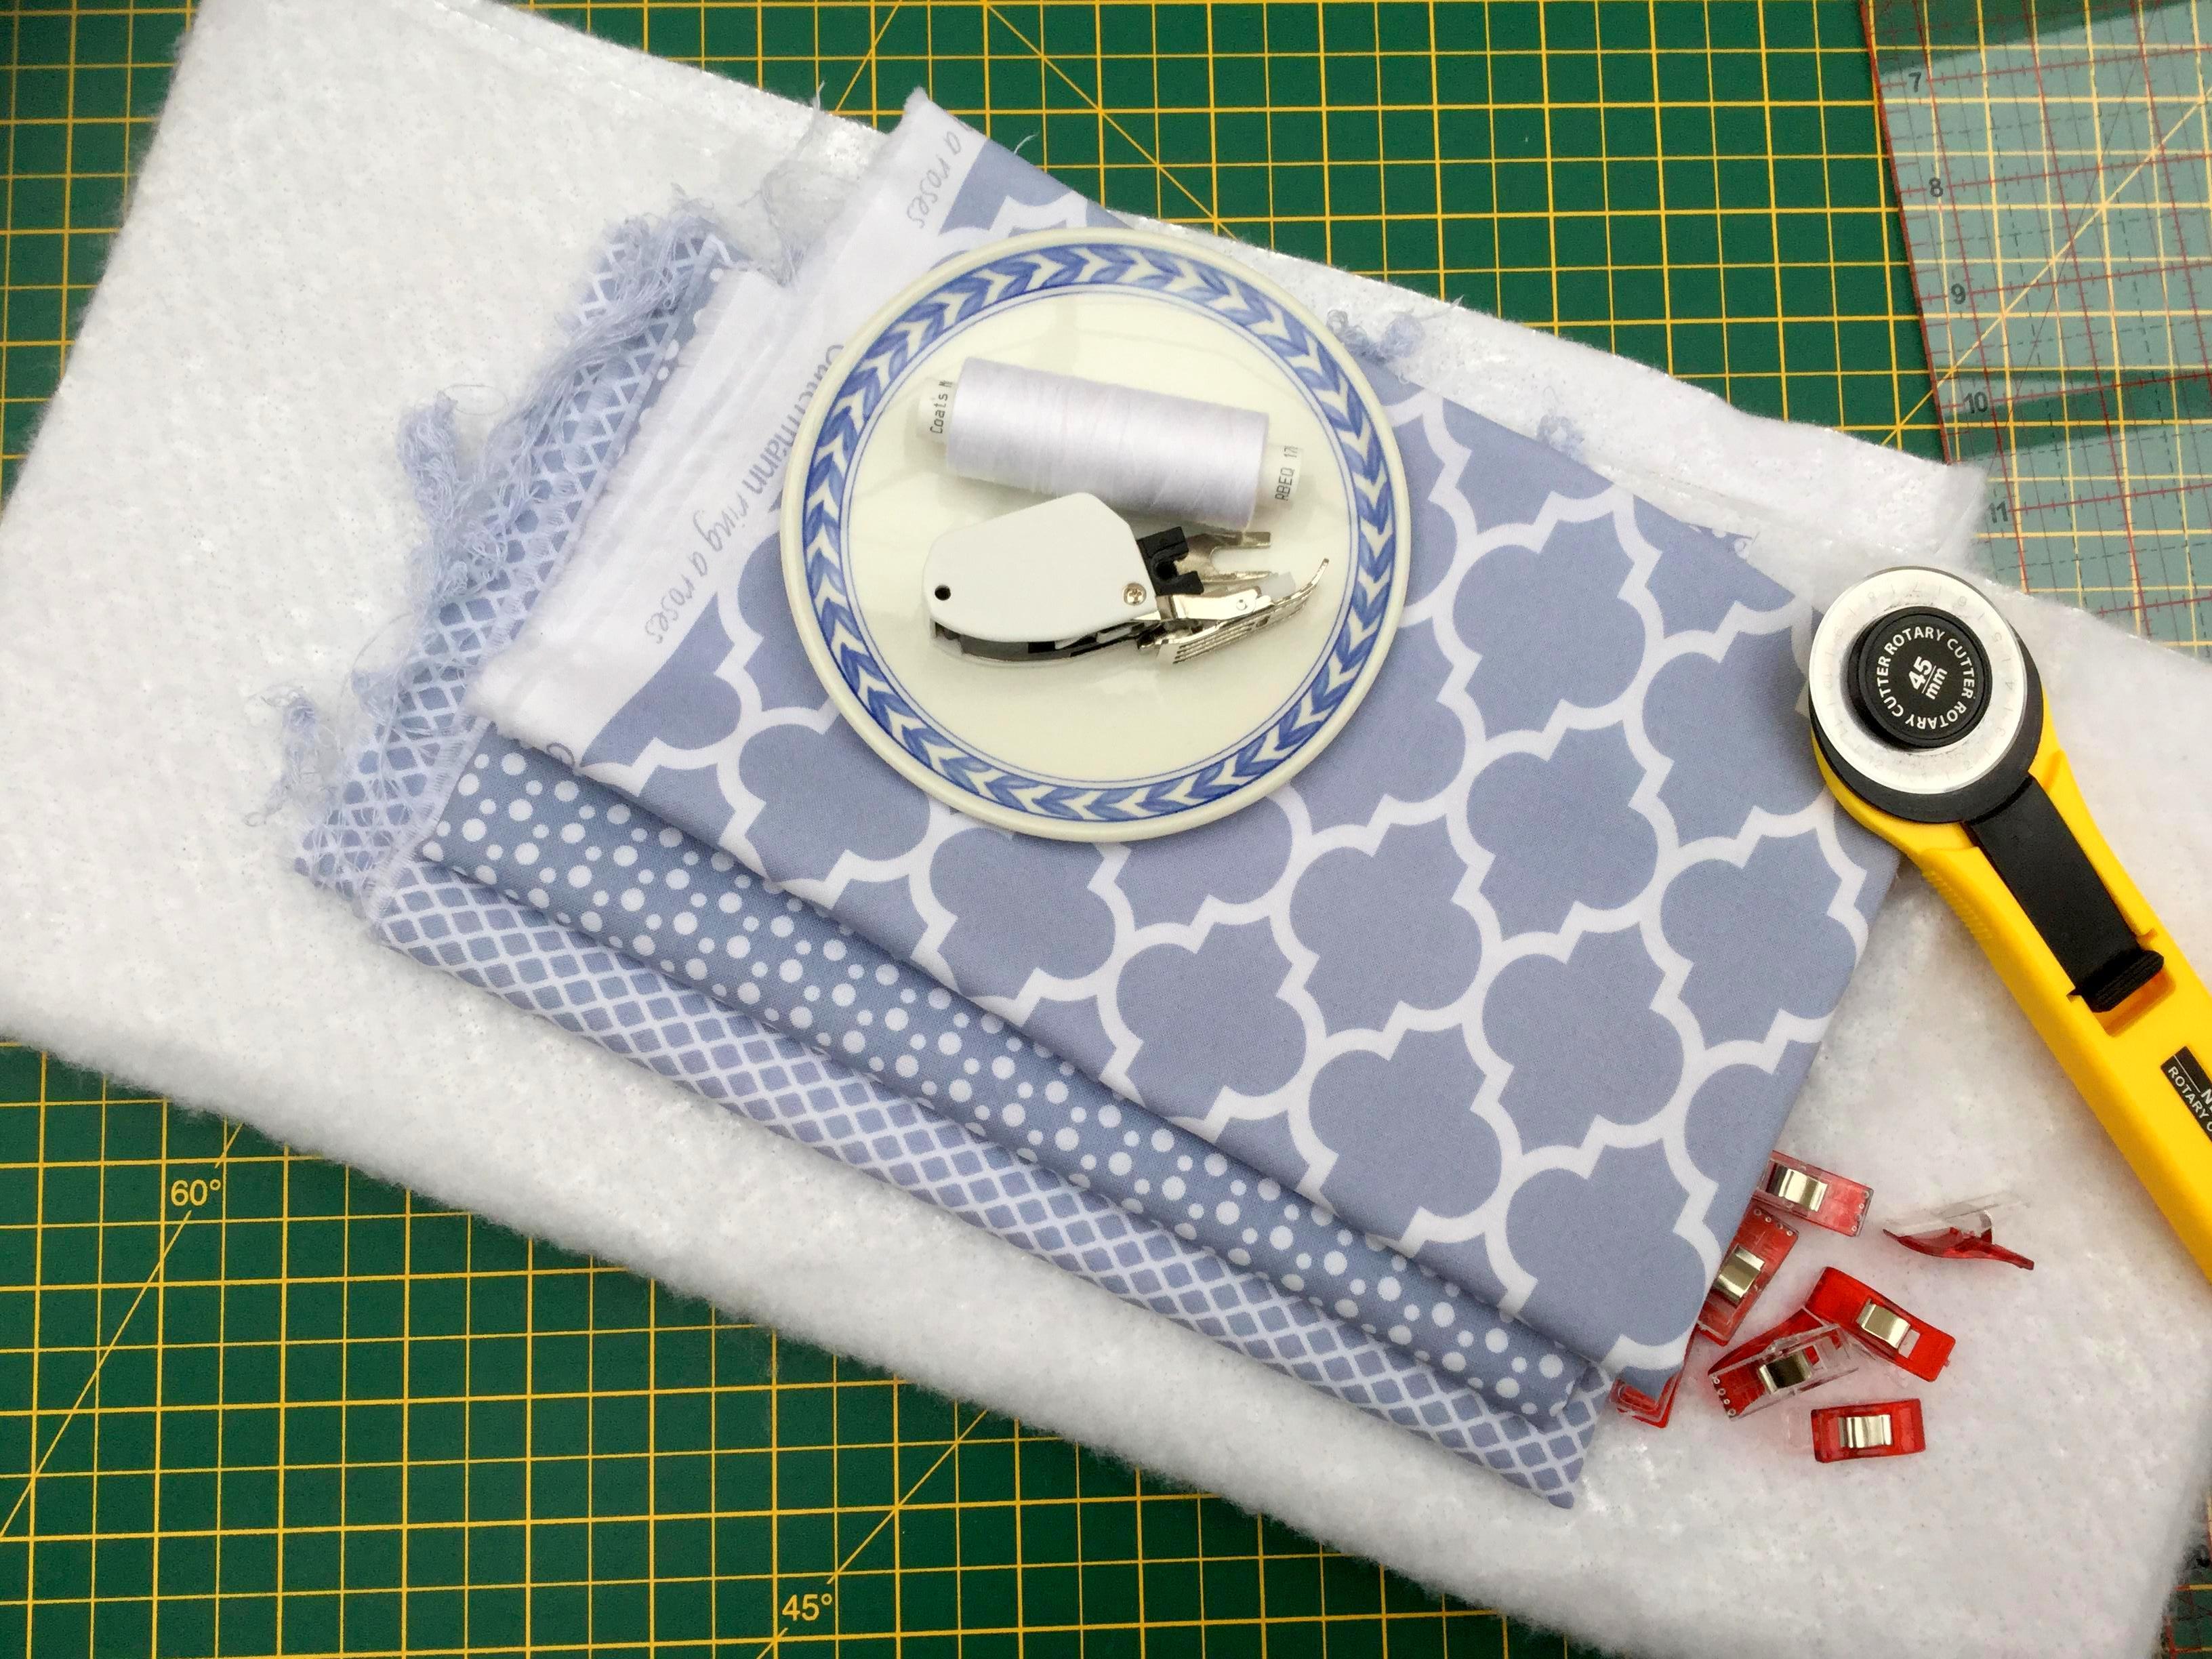
To make the Oven Gloves you will need:
- 2 rectangles of pretty fabric measuring 75cm x 20cm
- 1 rectangle of heat resistant wadding measuring 75cm x 20cm. I used a brand called Insul-bright
- 4 squares of contrasting pretty fabric each measuring 20cm x 20cm
- 2 squares of heat resistant wadding measuring 20cm x 20cm.
- bias binding – approx 3 metres
- rotary cutter and mat or fabric scissors
- small plate or something similar
- Clover Wonder Clips or pins
- sewing machine and matching thread
- a walking foot for your machine is useful due to the thickness of this project
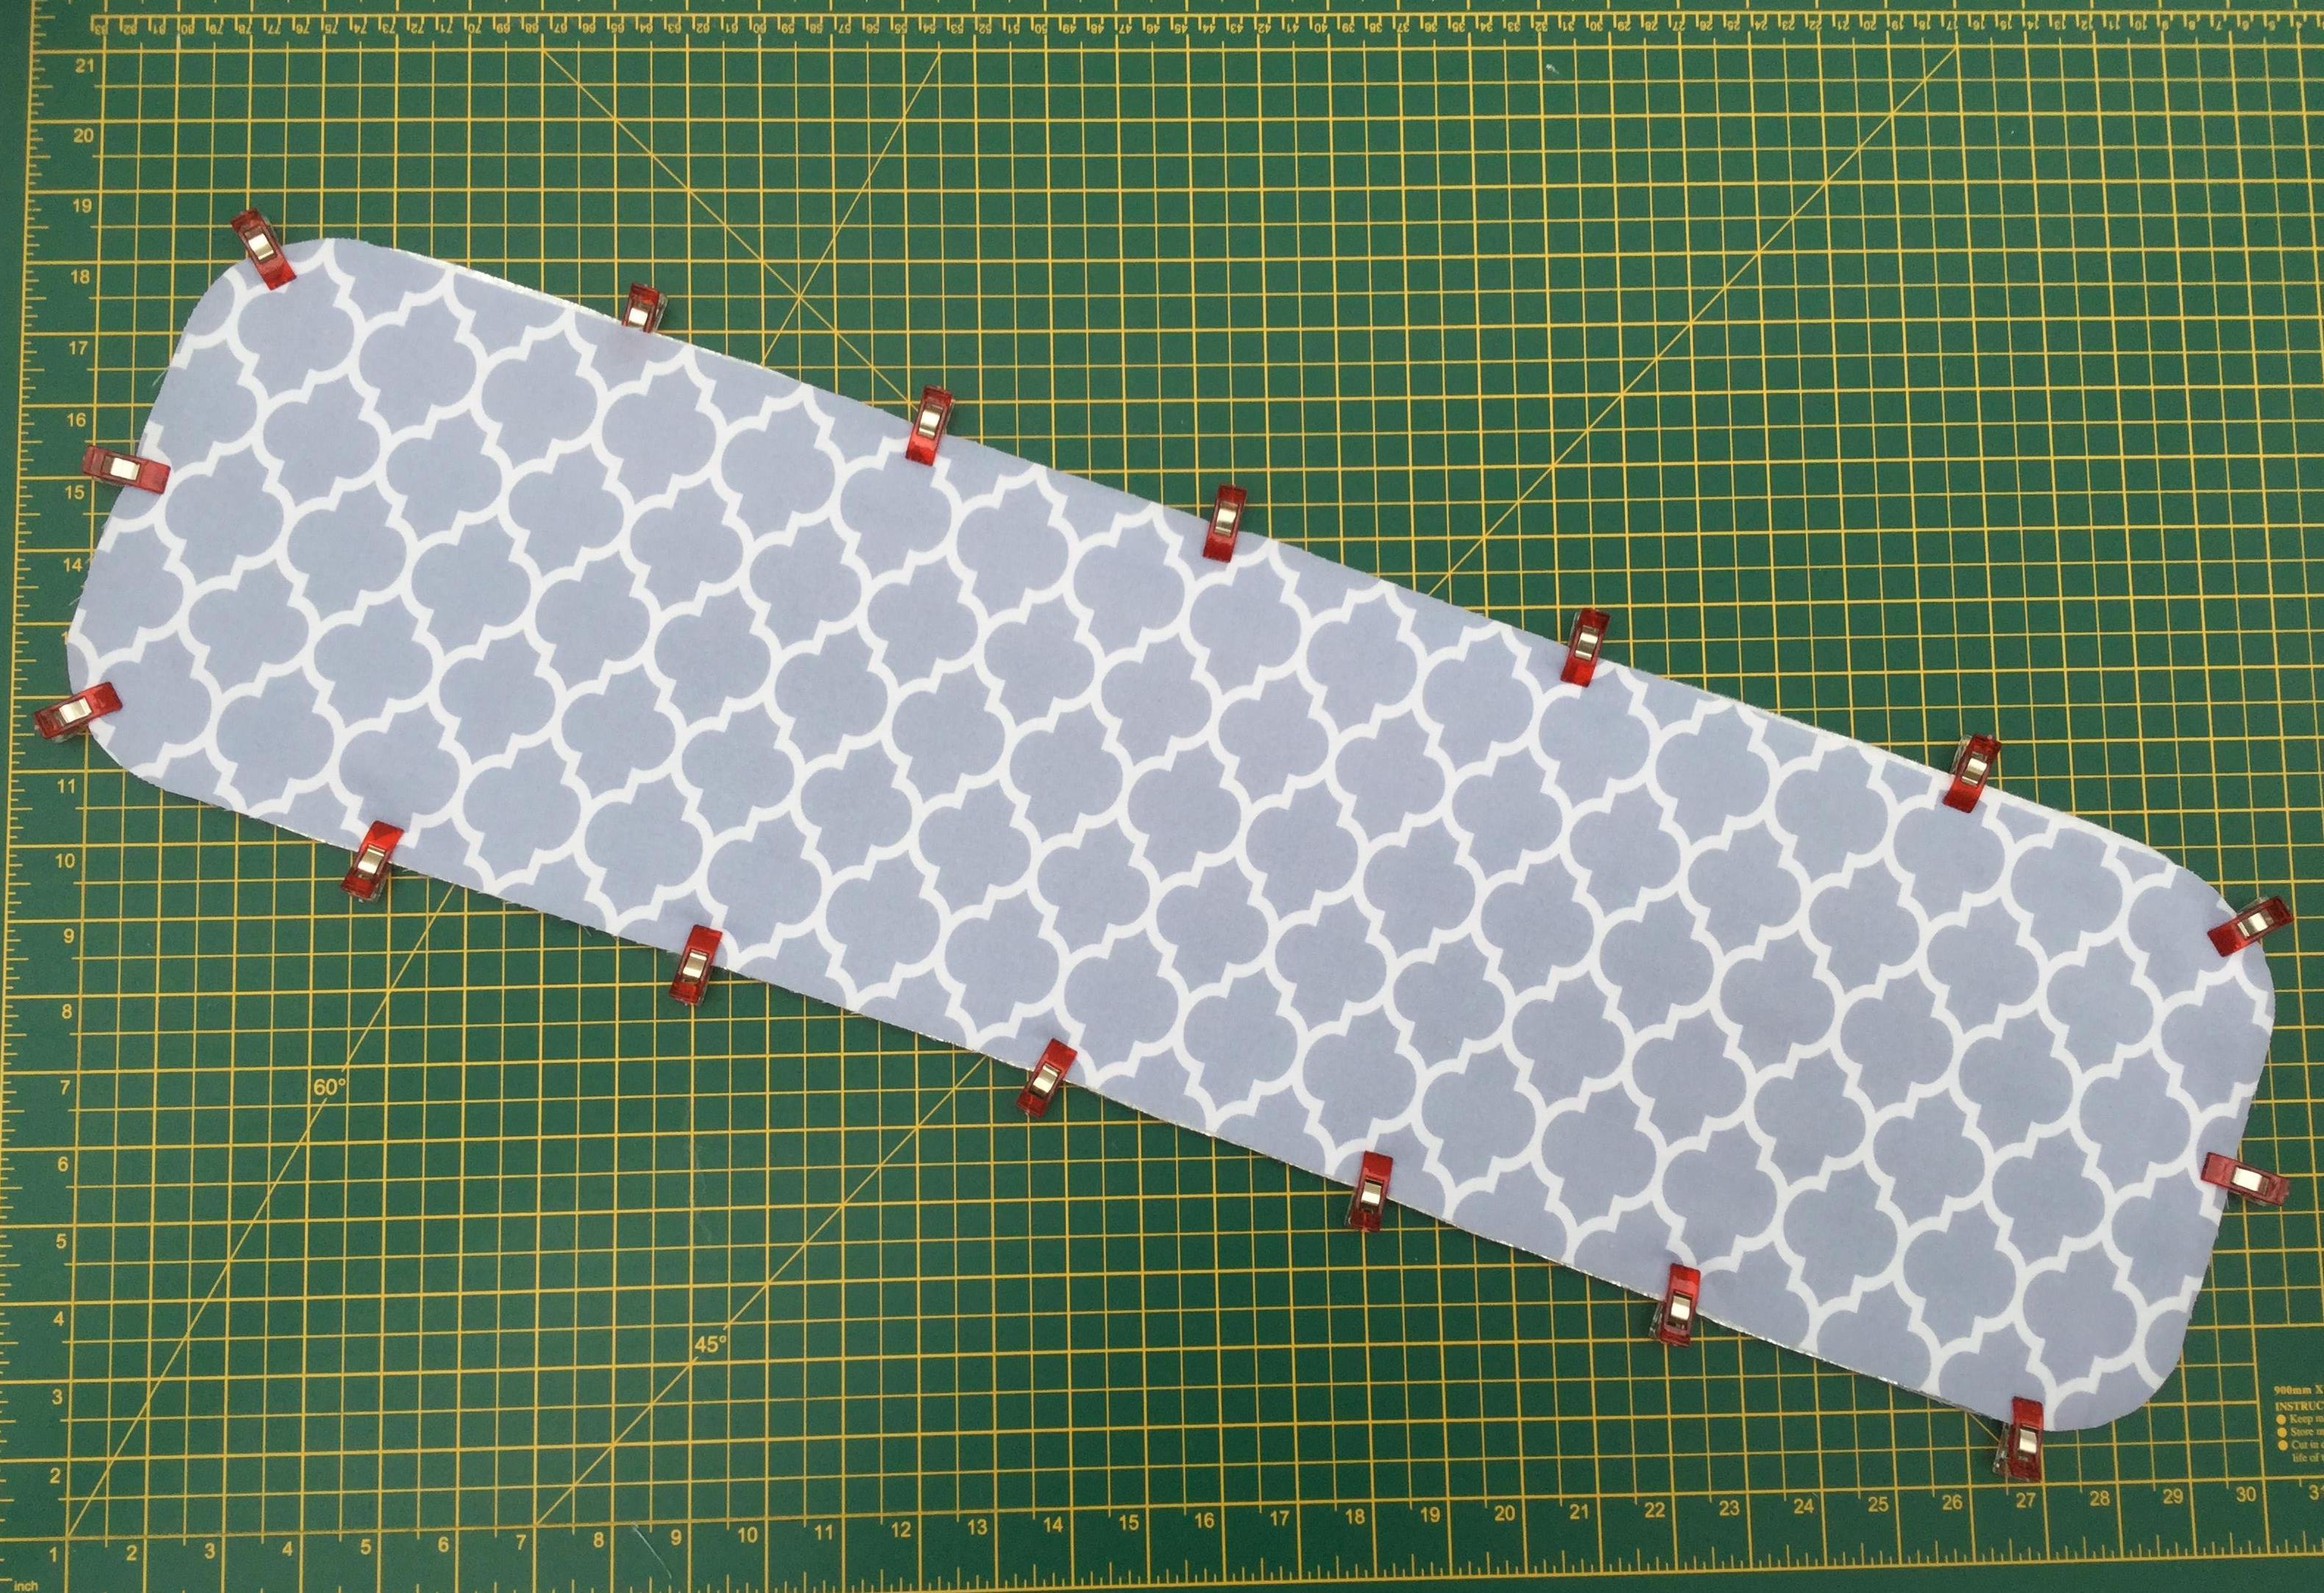
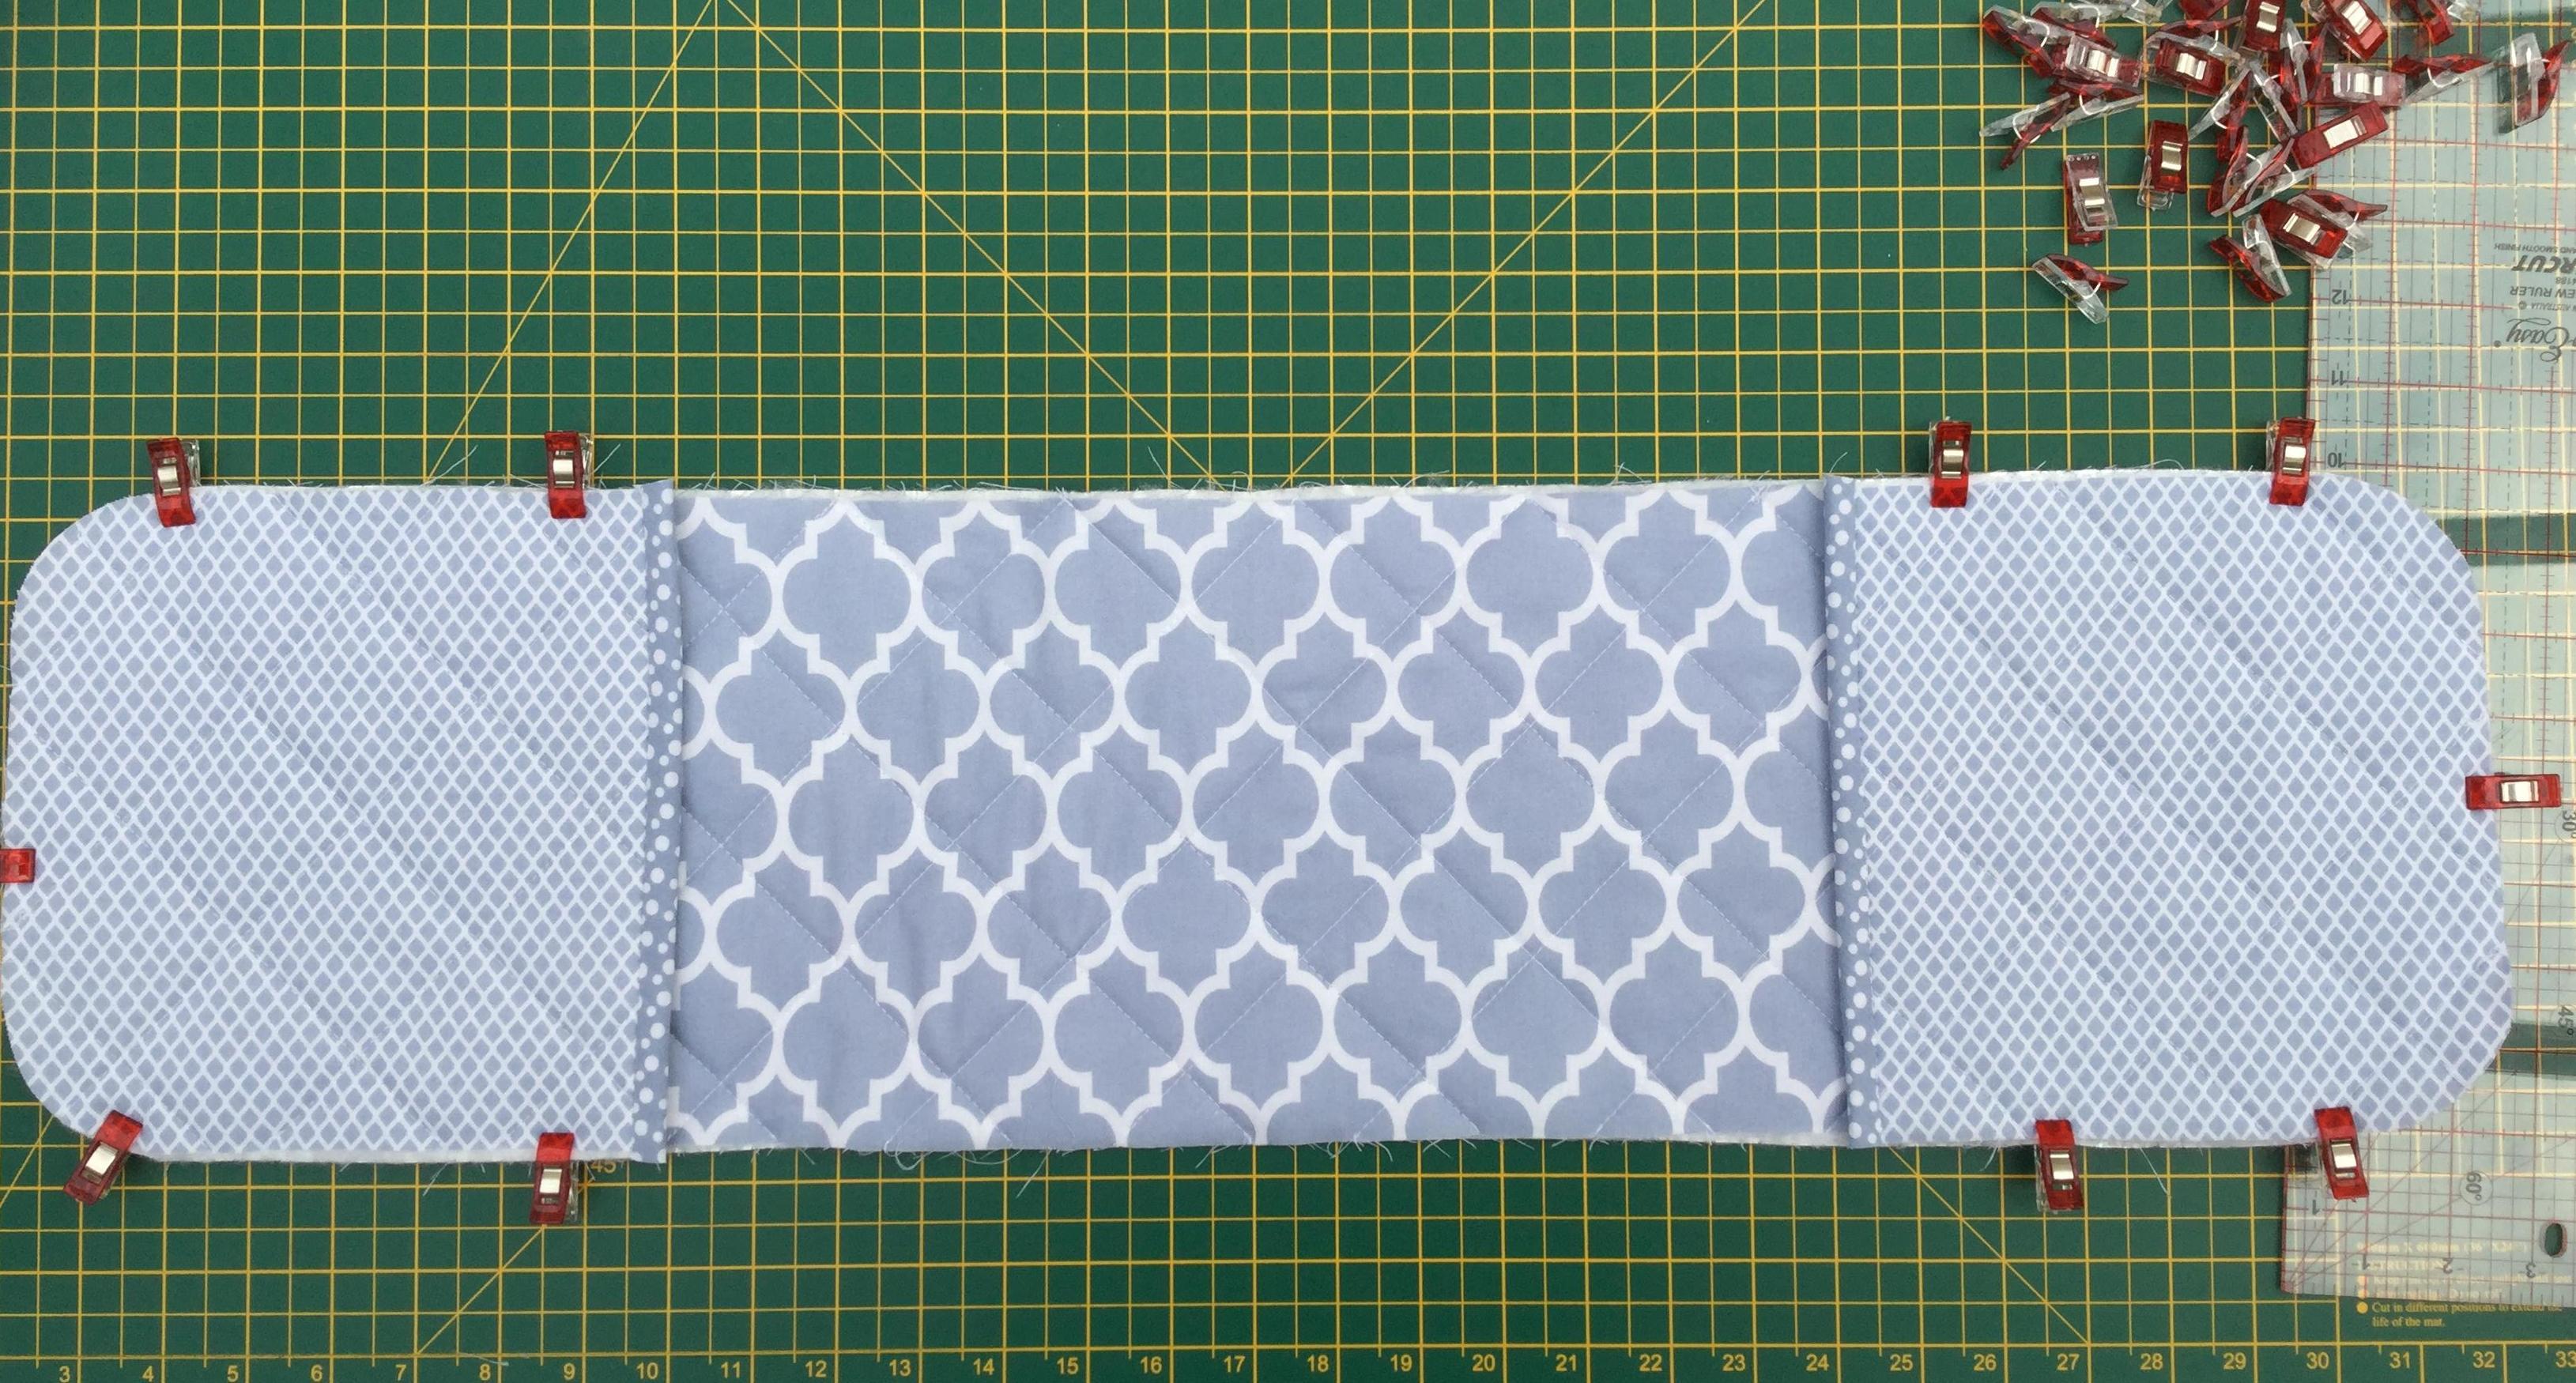
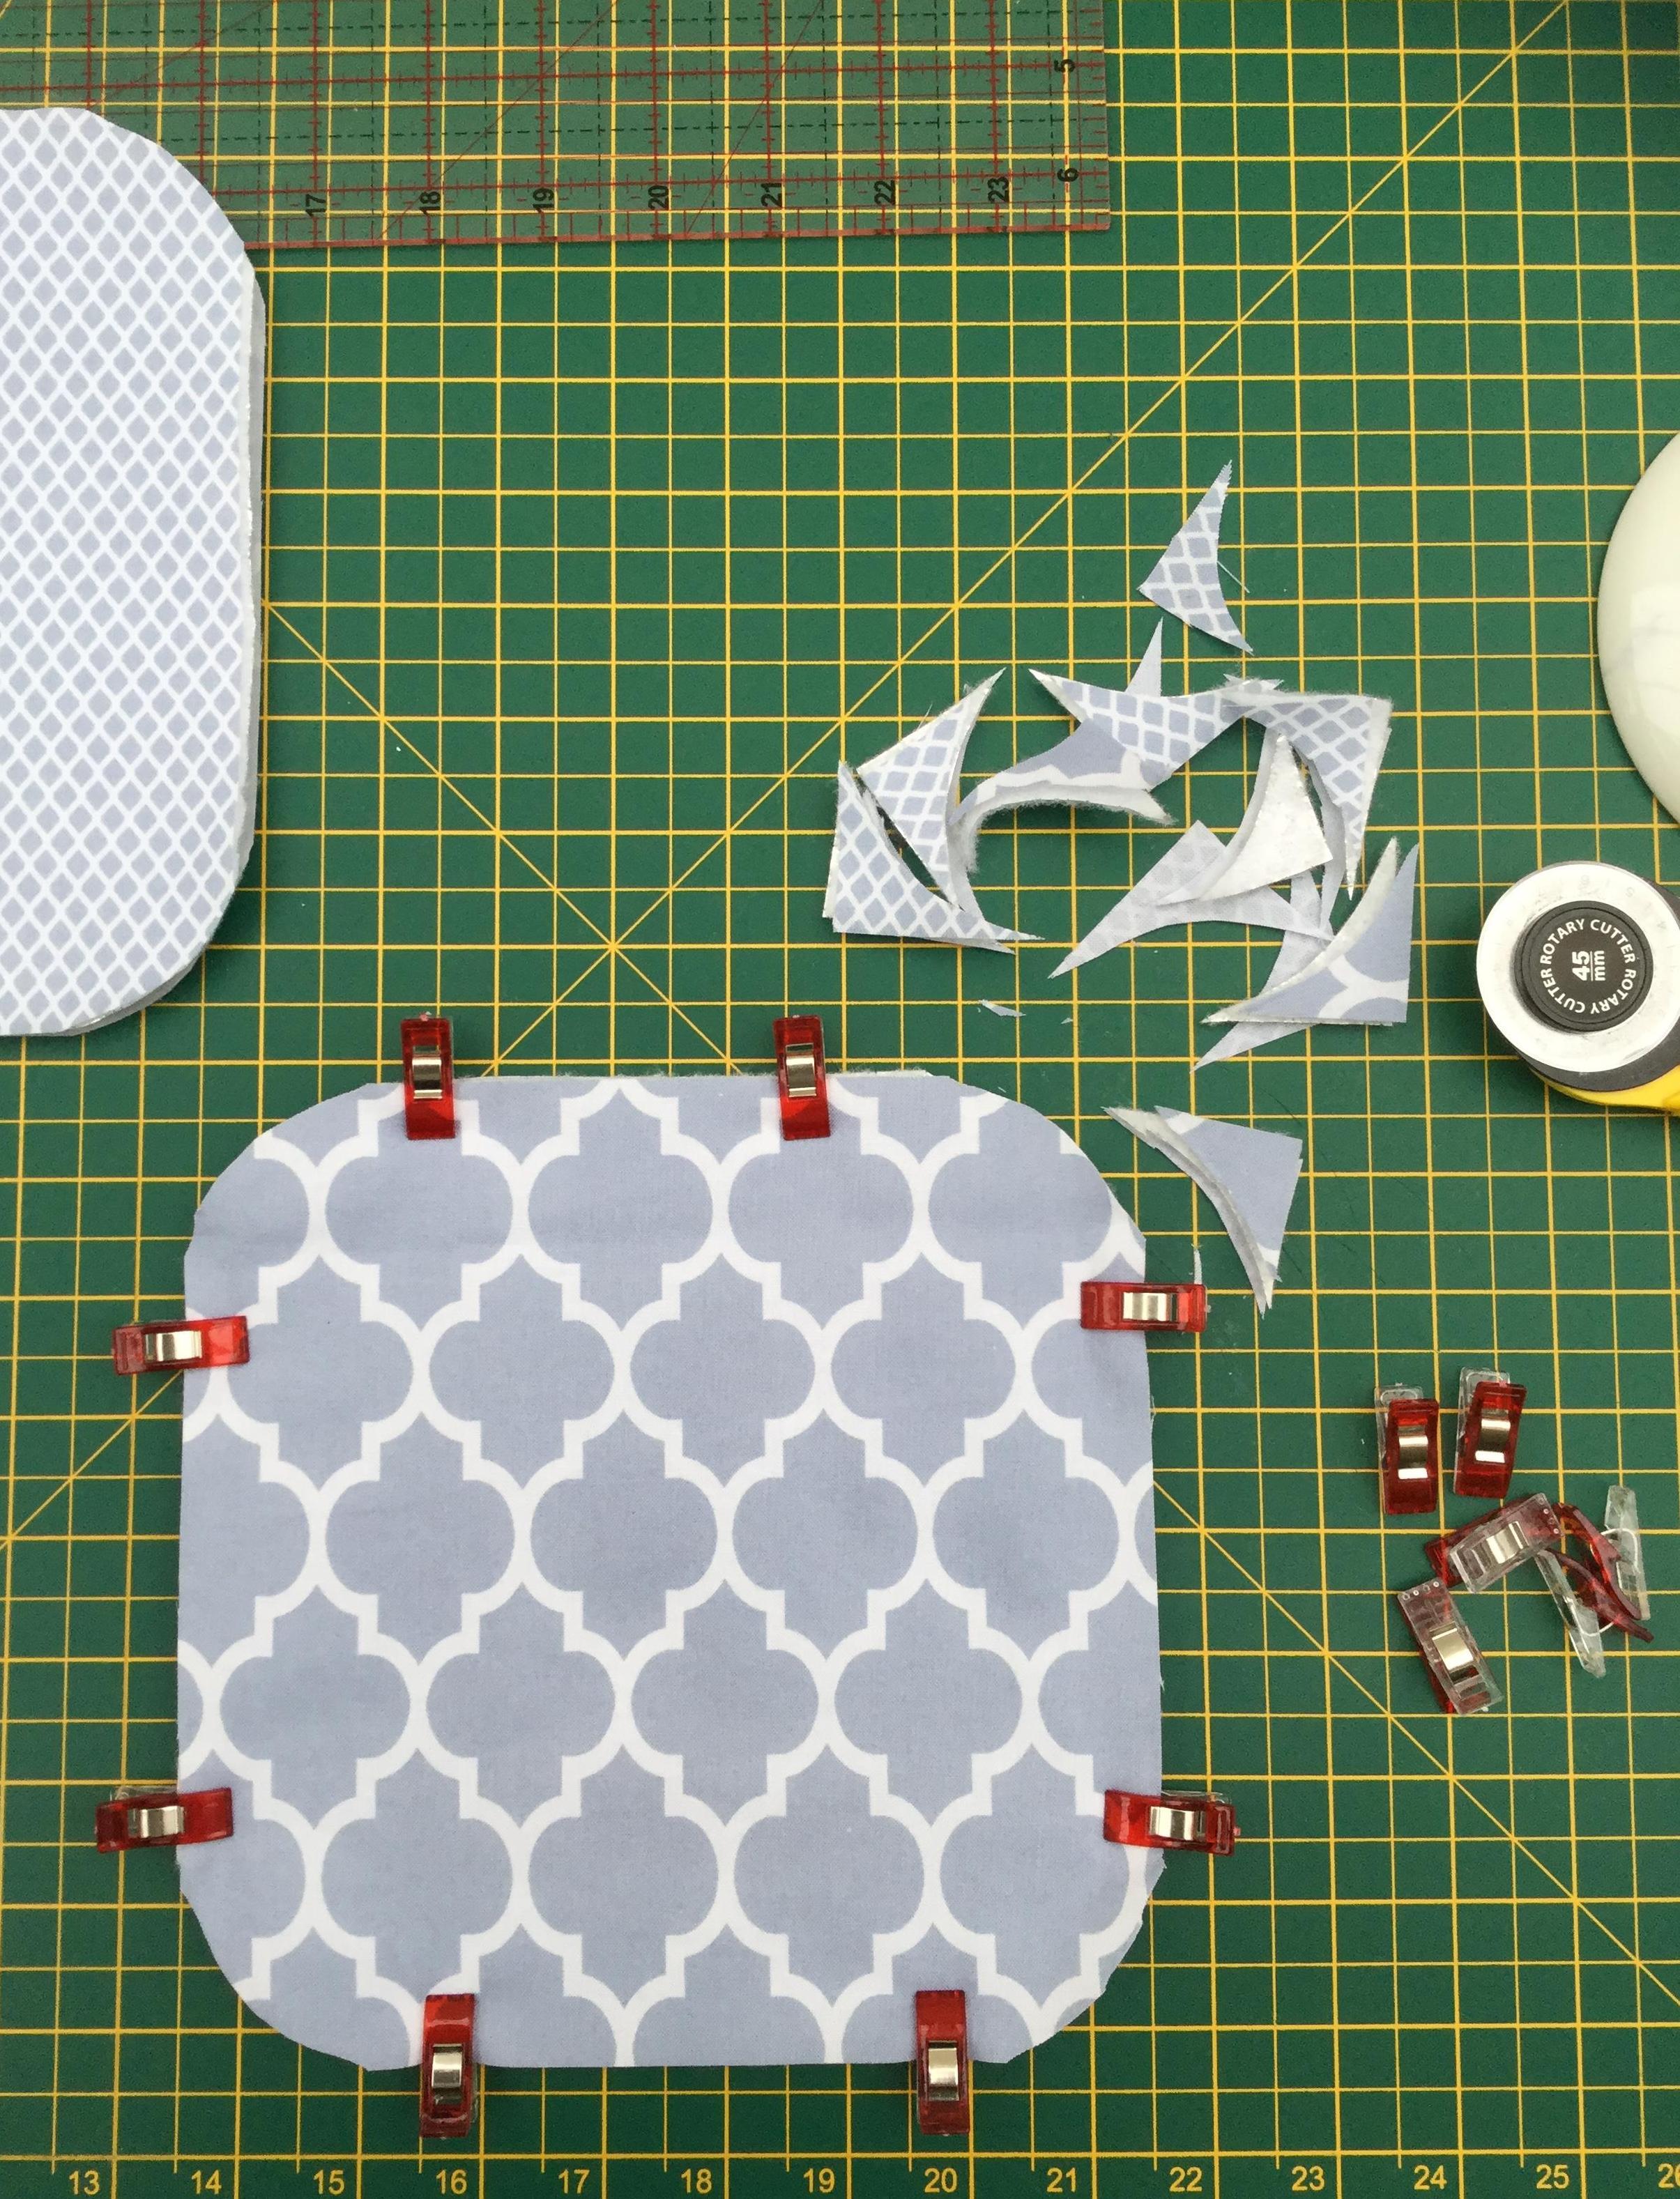
I started with the rectangles first. You will need to ’round off’ the corner points of each of your rectangular fabric pieces and your rectangular wadding piece. To do this simply place a small plate or saucer on each corner and mark the curve and cut to shape! Place one of the rectangular fabric pieces right side down on the table, then place the rectangular wadding on top of that. Finally place the other rectangular fabric piece of the top, right side up. Clip in place using your Clover clips or regular pins.
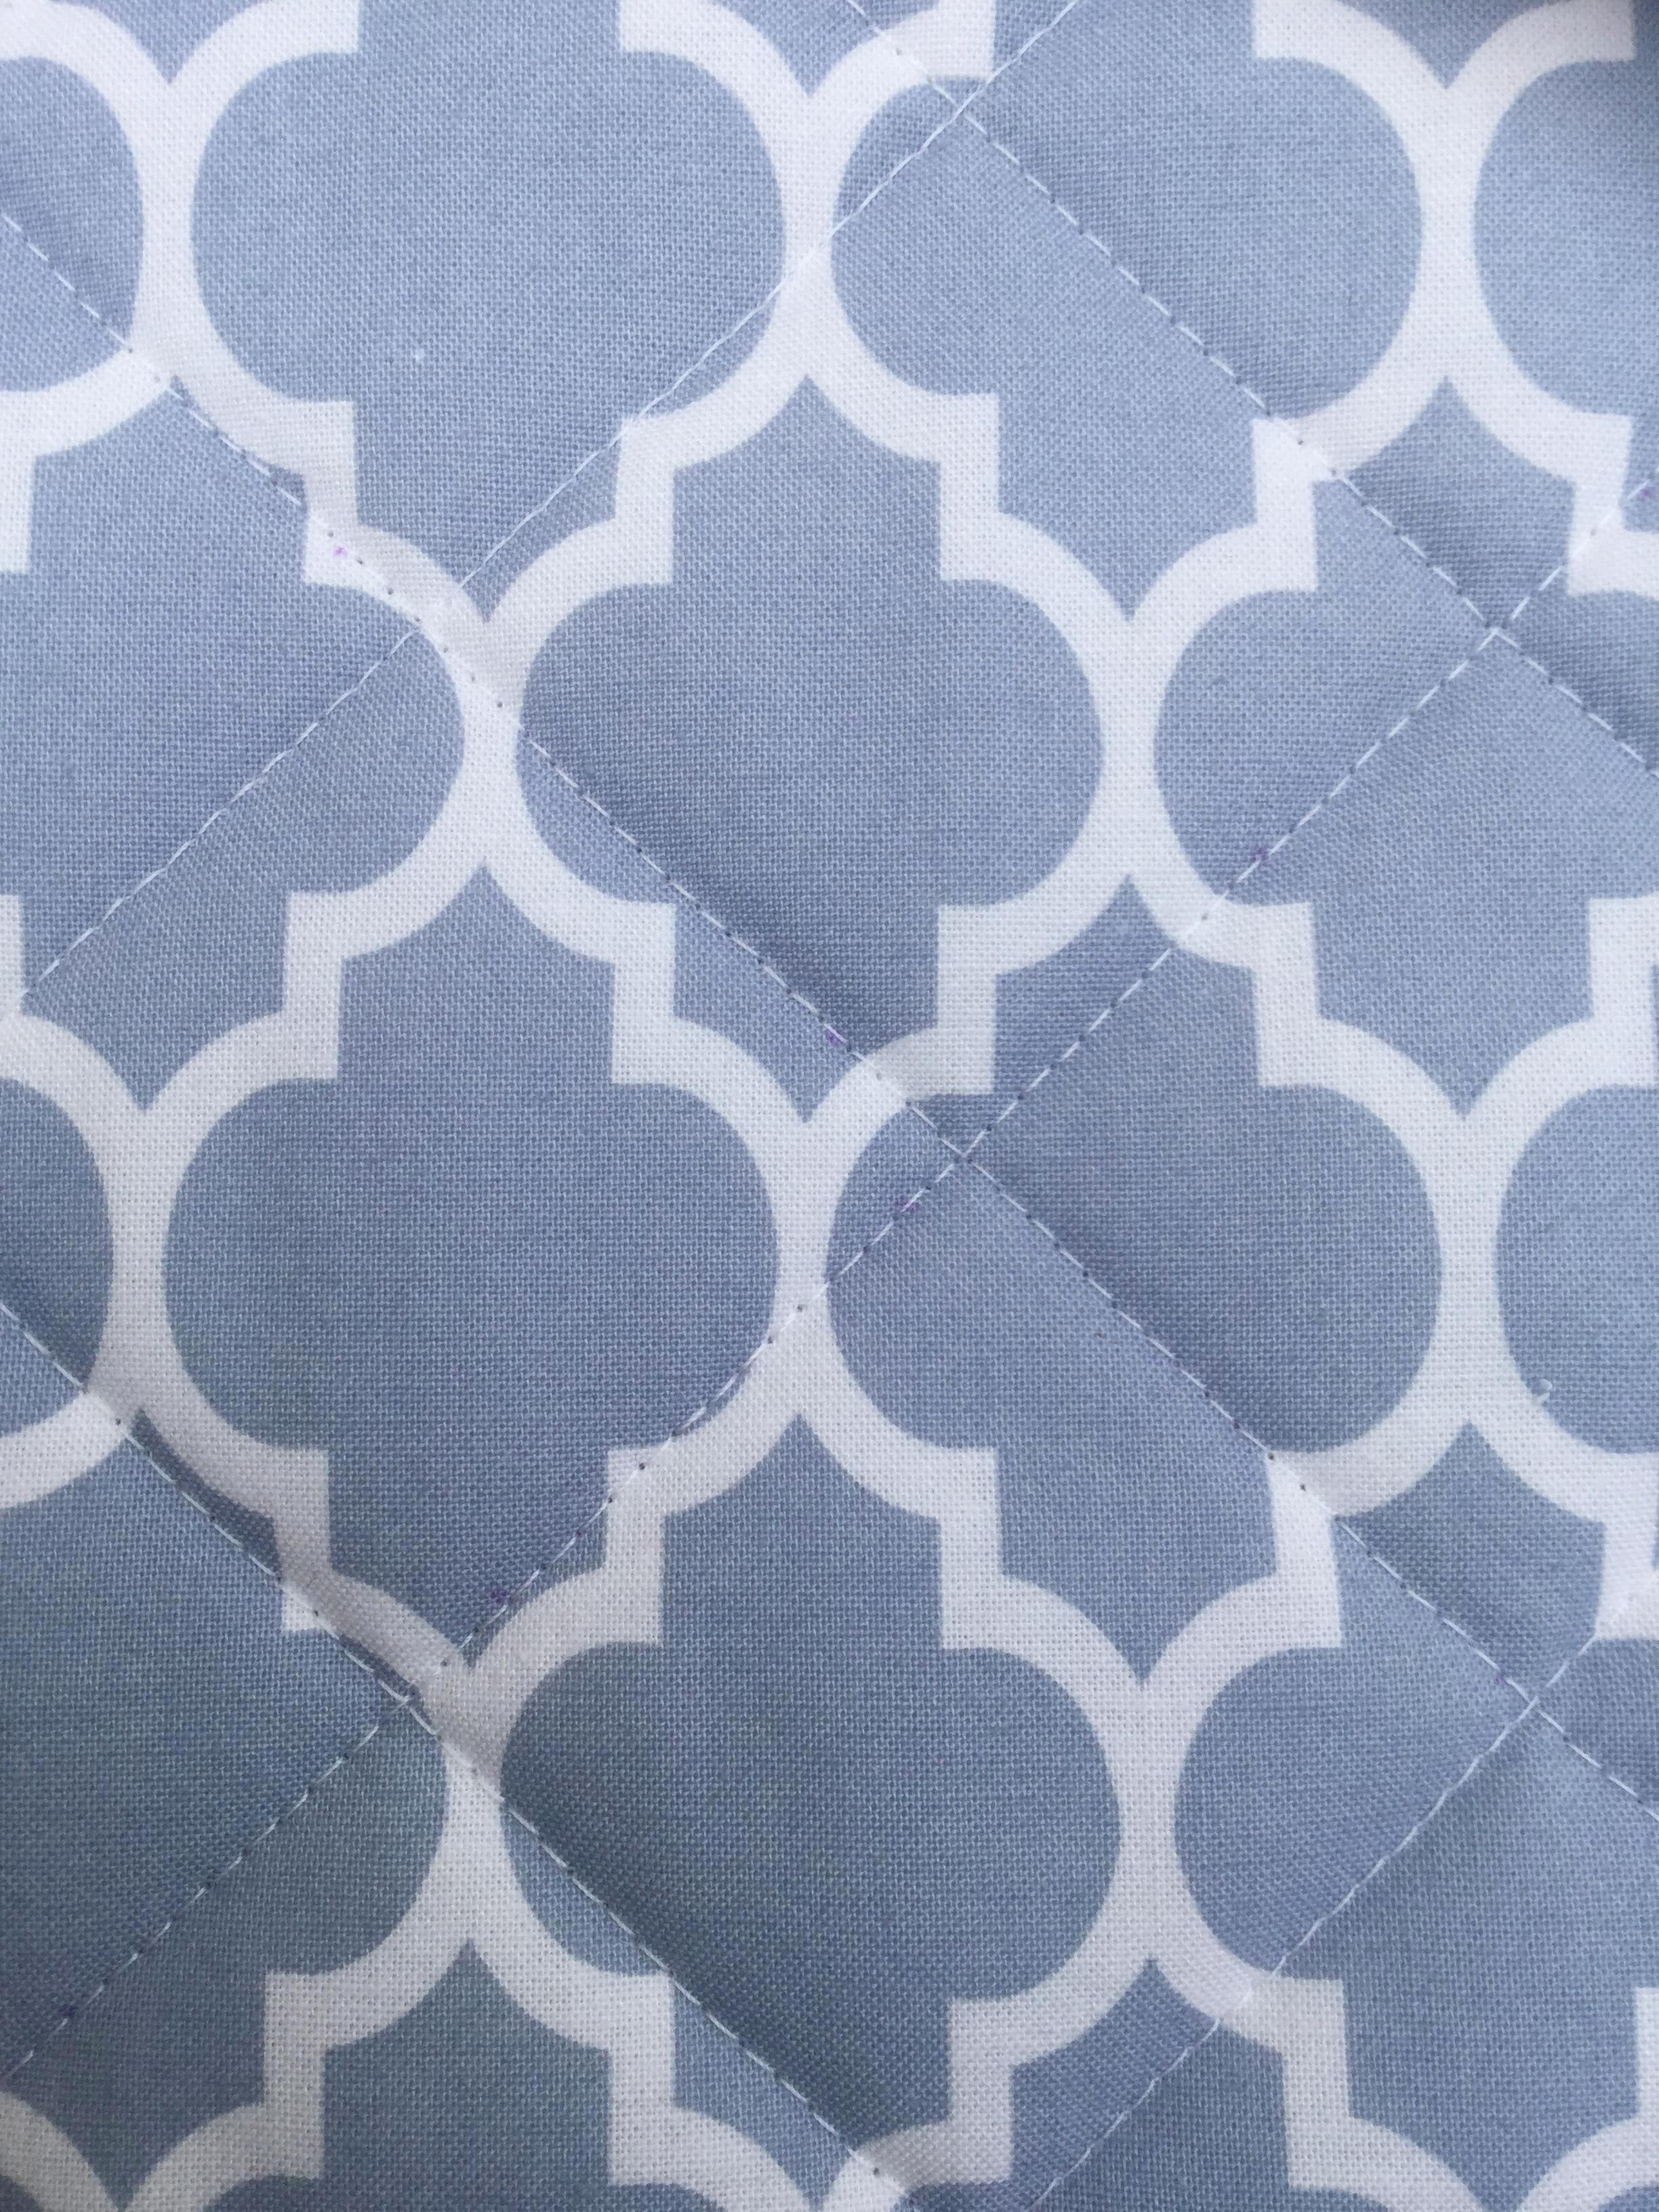
You will need to machine quilt these layers together. I wanted to keep this simple and just wanted a nice grid of criss cross diamond shapes (there is probably a word for this design in the quilting world that I don’t know about)! So I marked one 45 degree line in the centre of the rectangle in one direction and one 45 degree line in the centre of the rectangle in the other direction. I simply sewed these lines in place on my sewing machine using my walking foot. I then used the L shaped bar attachment that comes with the walking foot as a guide to make sure all my other lines of stitching were equally spaced and parallel. I also think it is a good idea to start in the centre of your project and work outwards.
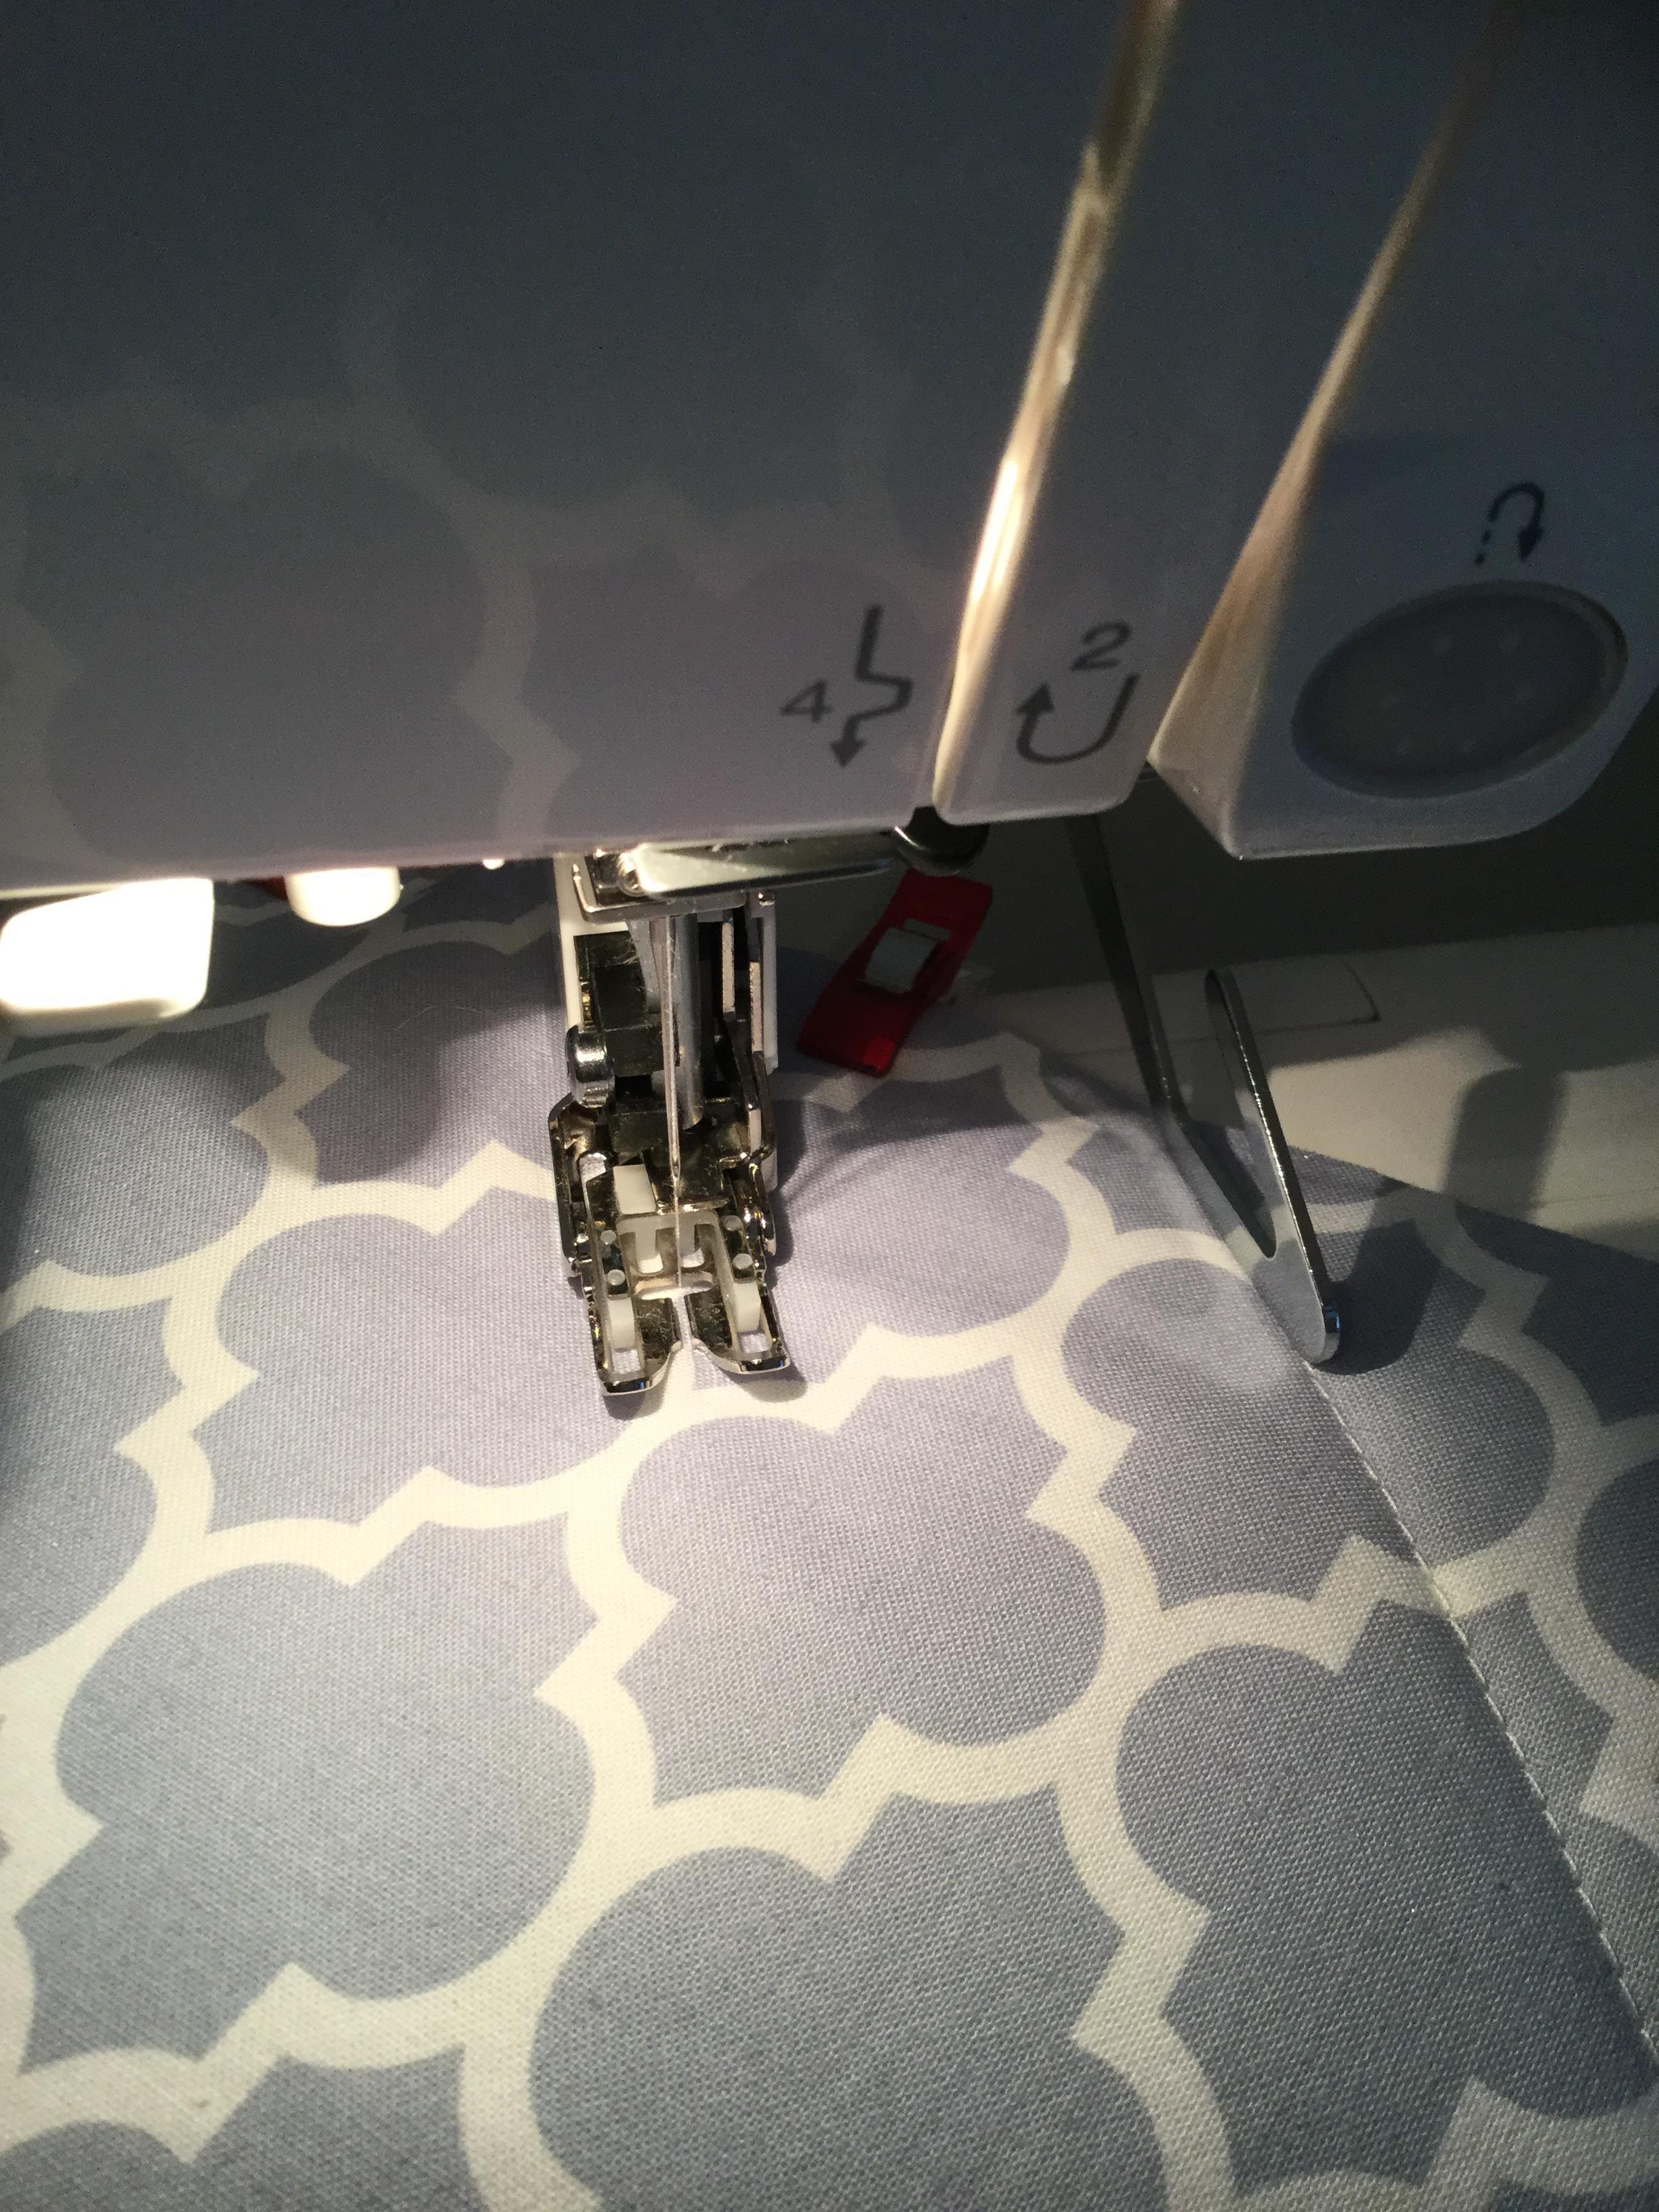
This was probably the most time consuming part of the whole project, but very rewarding when you are finished and left with beautiful neat rows of stitching.
Read more : How Do You Make Your Baseball Glove Stiffer
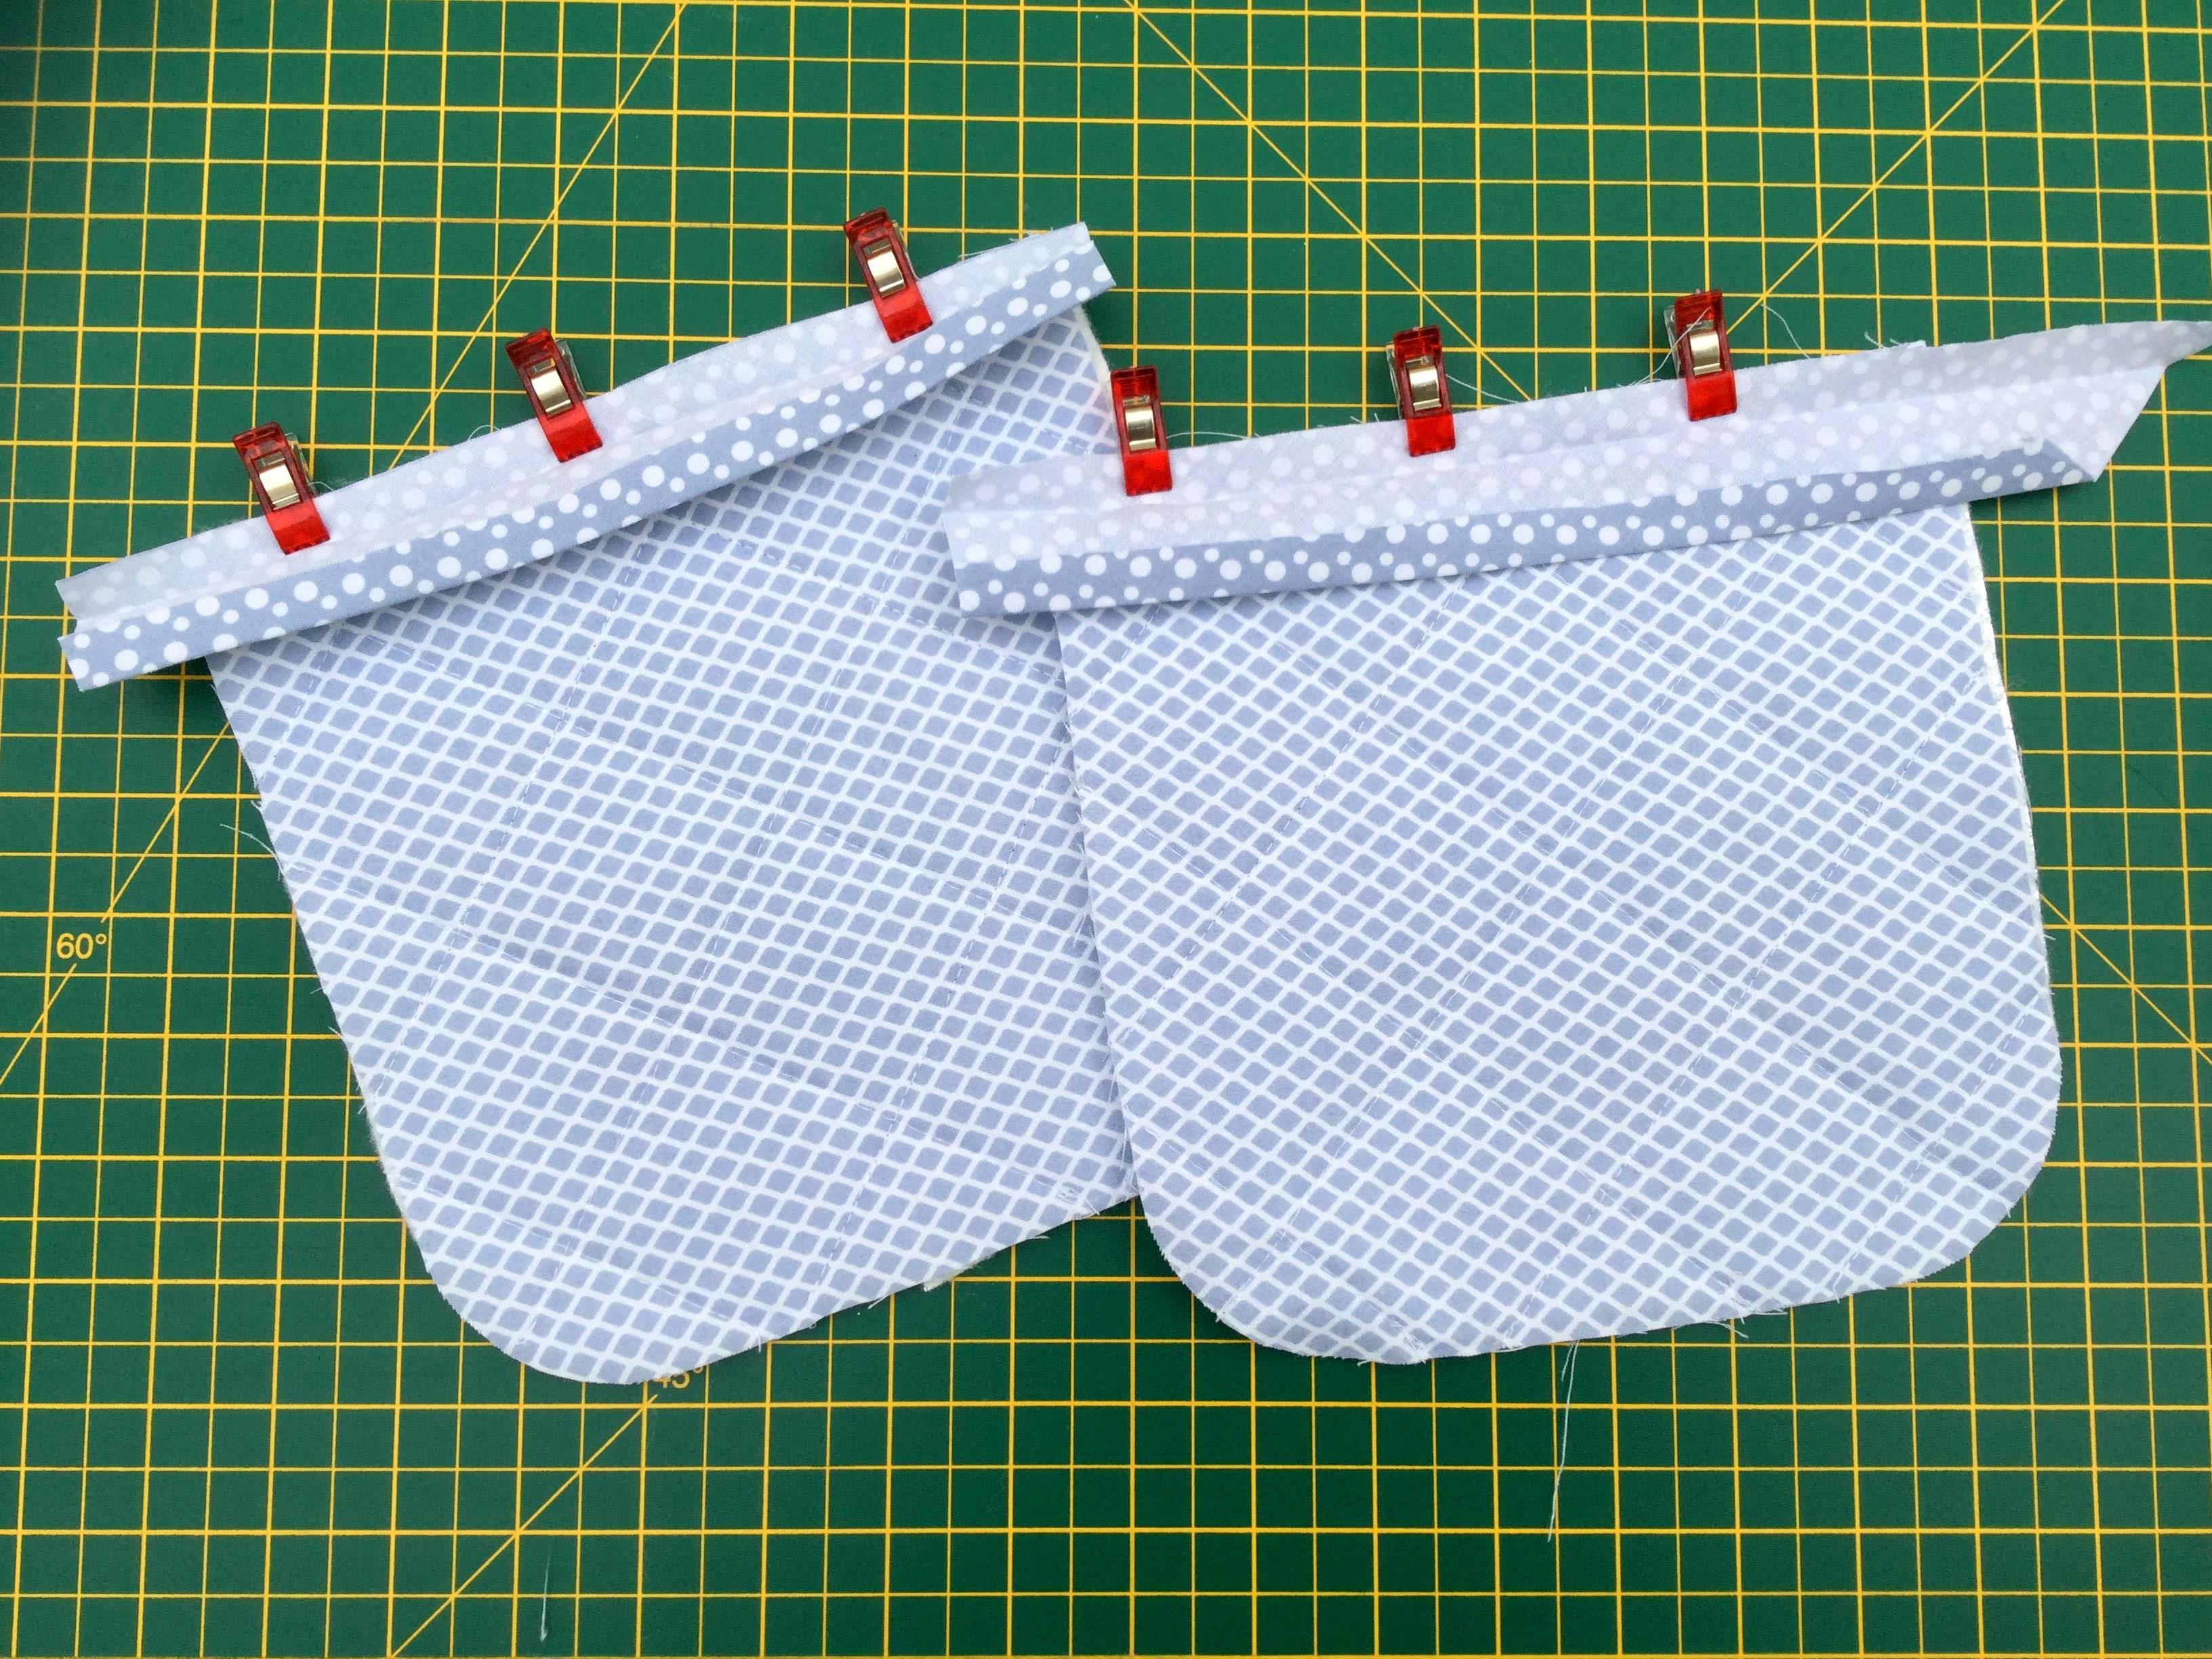
Next we need to repeat what we have just done with our square pieces of fabric. These will ultimately be the ‘gloves’ of the oven glove. Layer up the squares in the same way as you did for the rectangles. You will have 2 separate squares to quilt this time. Clip or pin them together and use the same plate or saucer to trim 2 of the corners from each square this time – do not round off all 4 corners on these pieces! – just 2 on each square.
Take your square pieces and take them to the sewing machine. Machine quilt in the same way as you did for your rectangular piece.
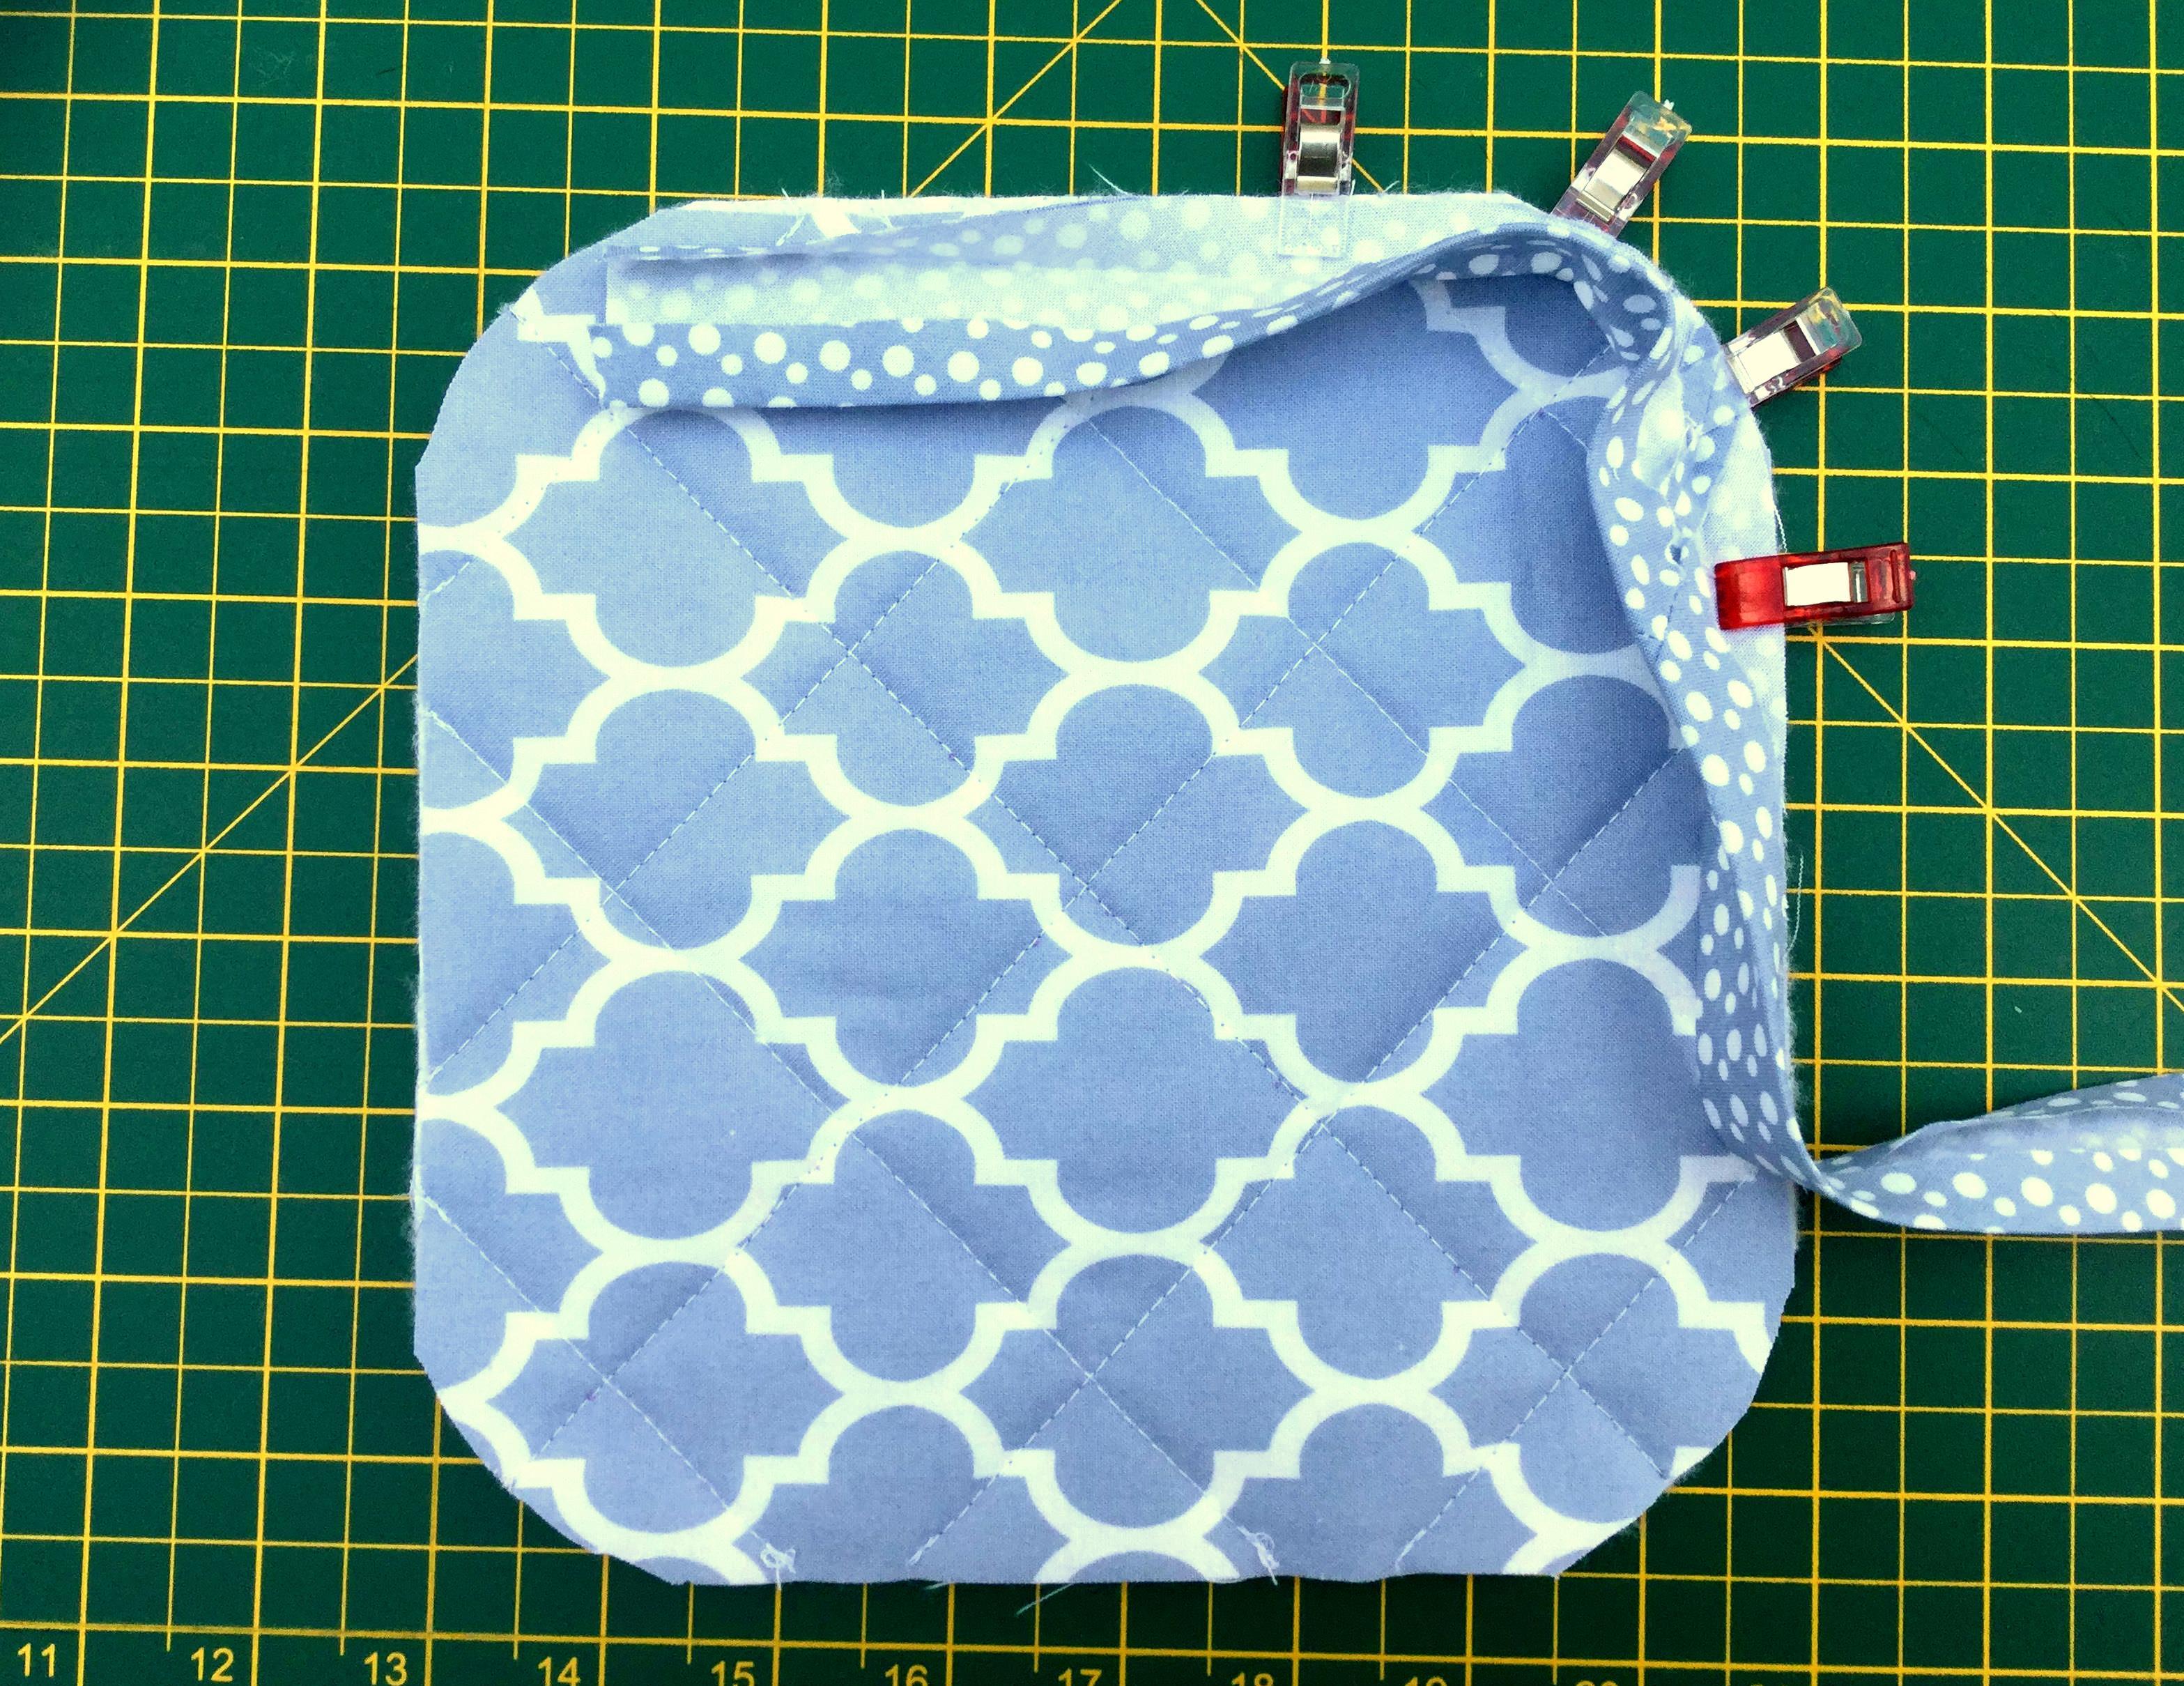
Next we want to add bias binding to your square pieces along each of the straight edges – i.e the edge between the corner points that you didn’t round off. See pic below for reference. This will be the opening edge of the ‘glove’ of the oven glove that your hand slips through each time you put on your glove.
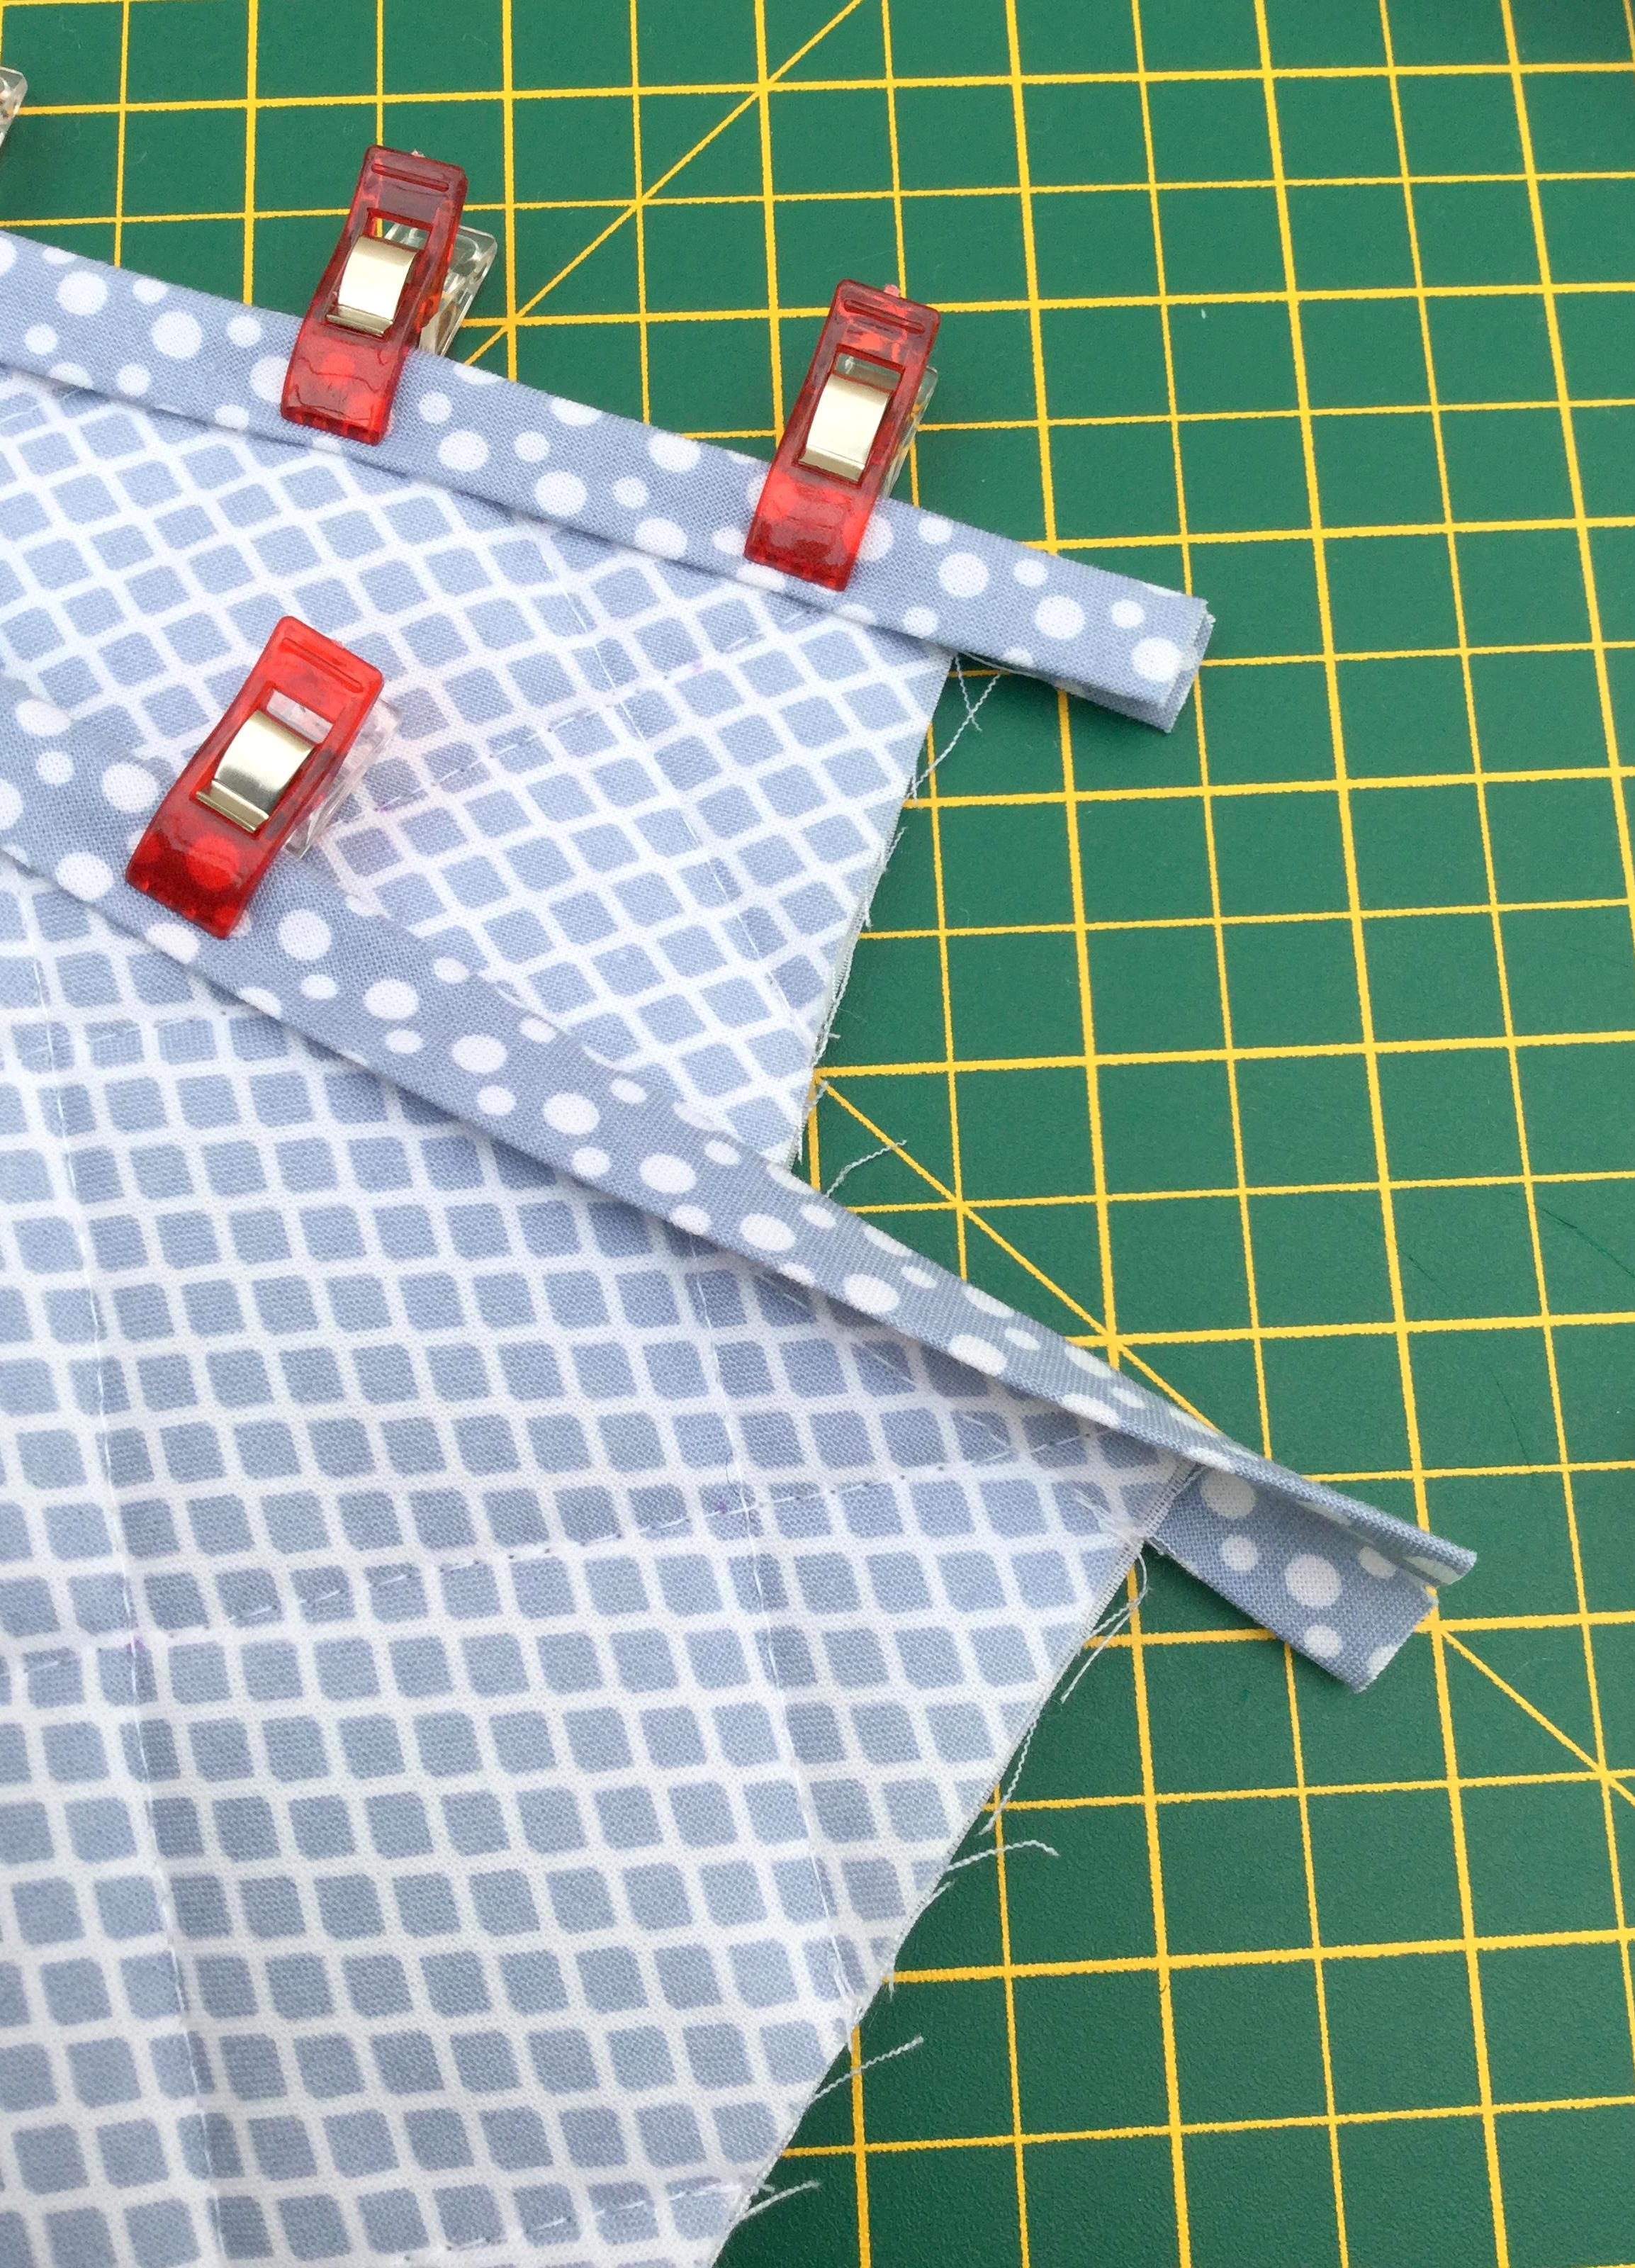
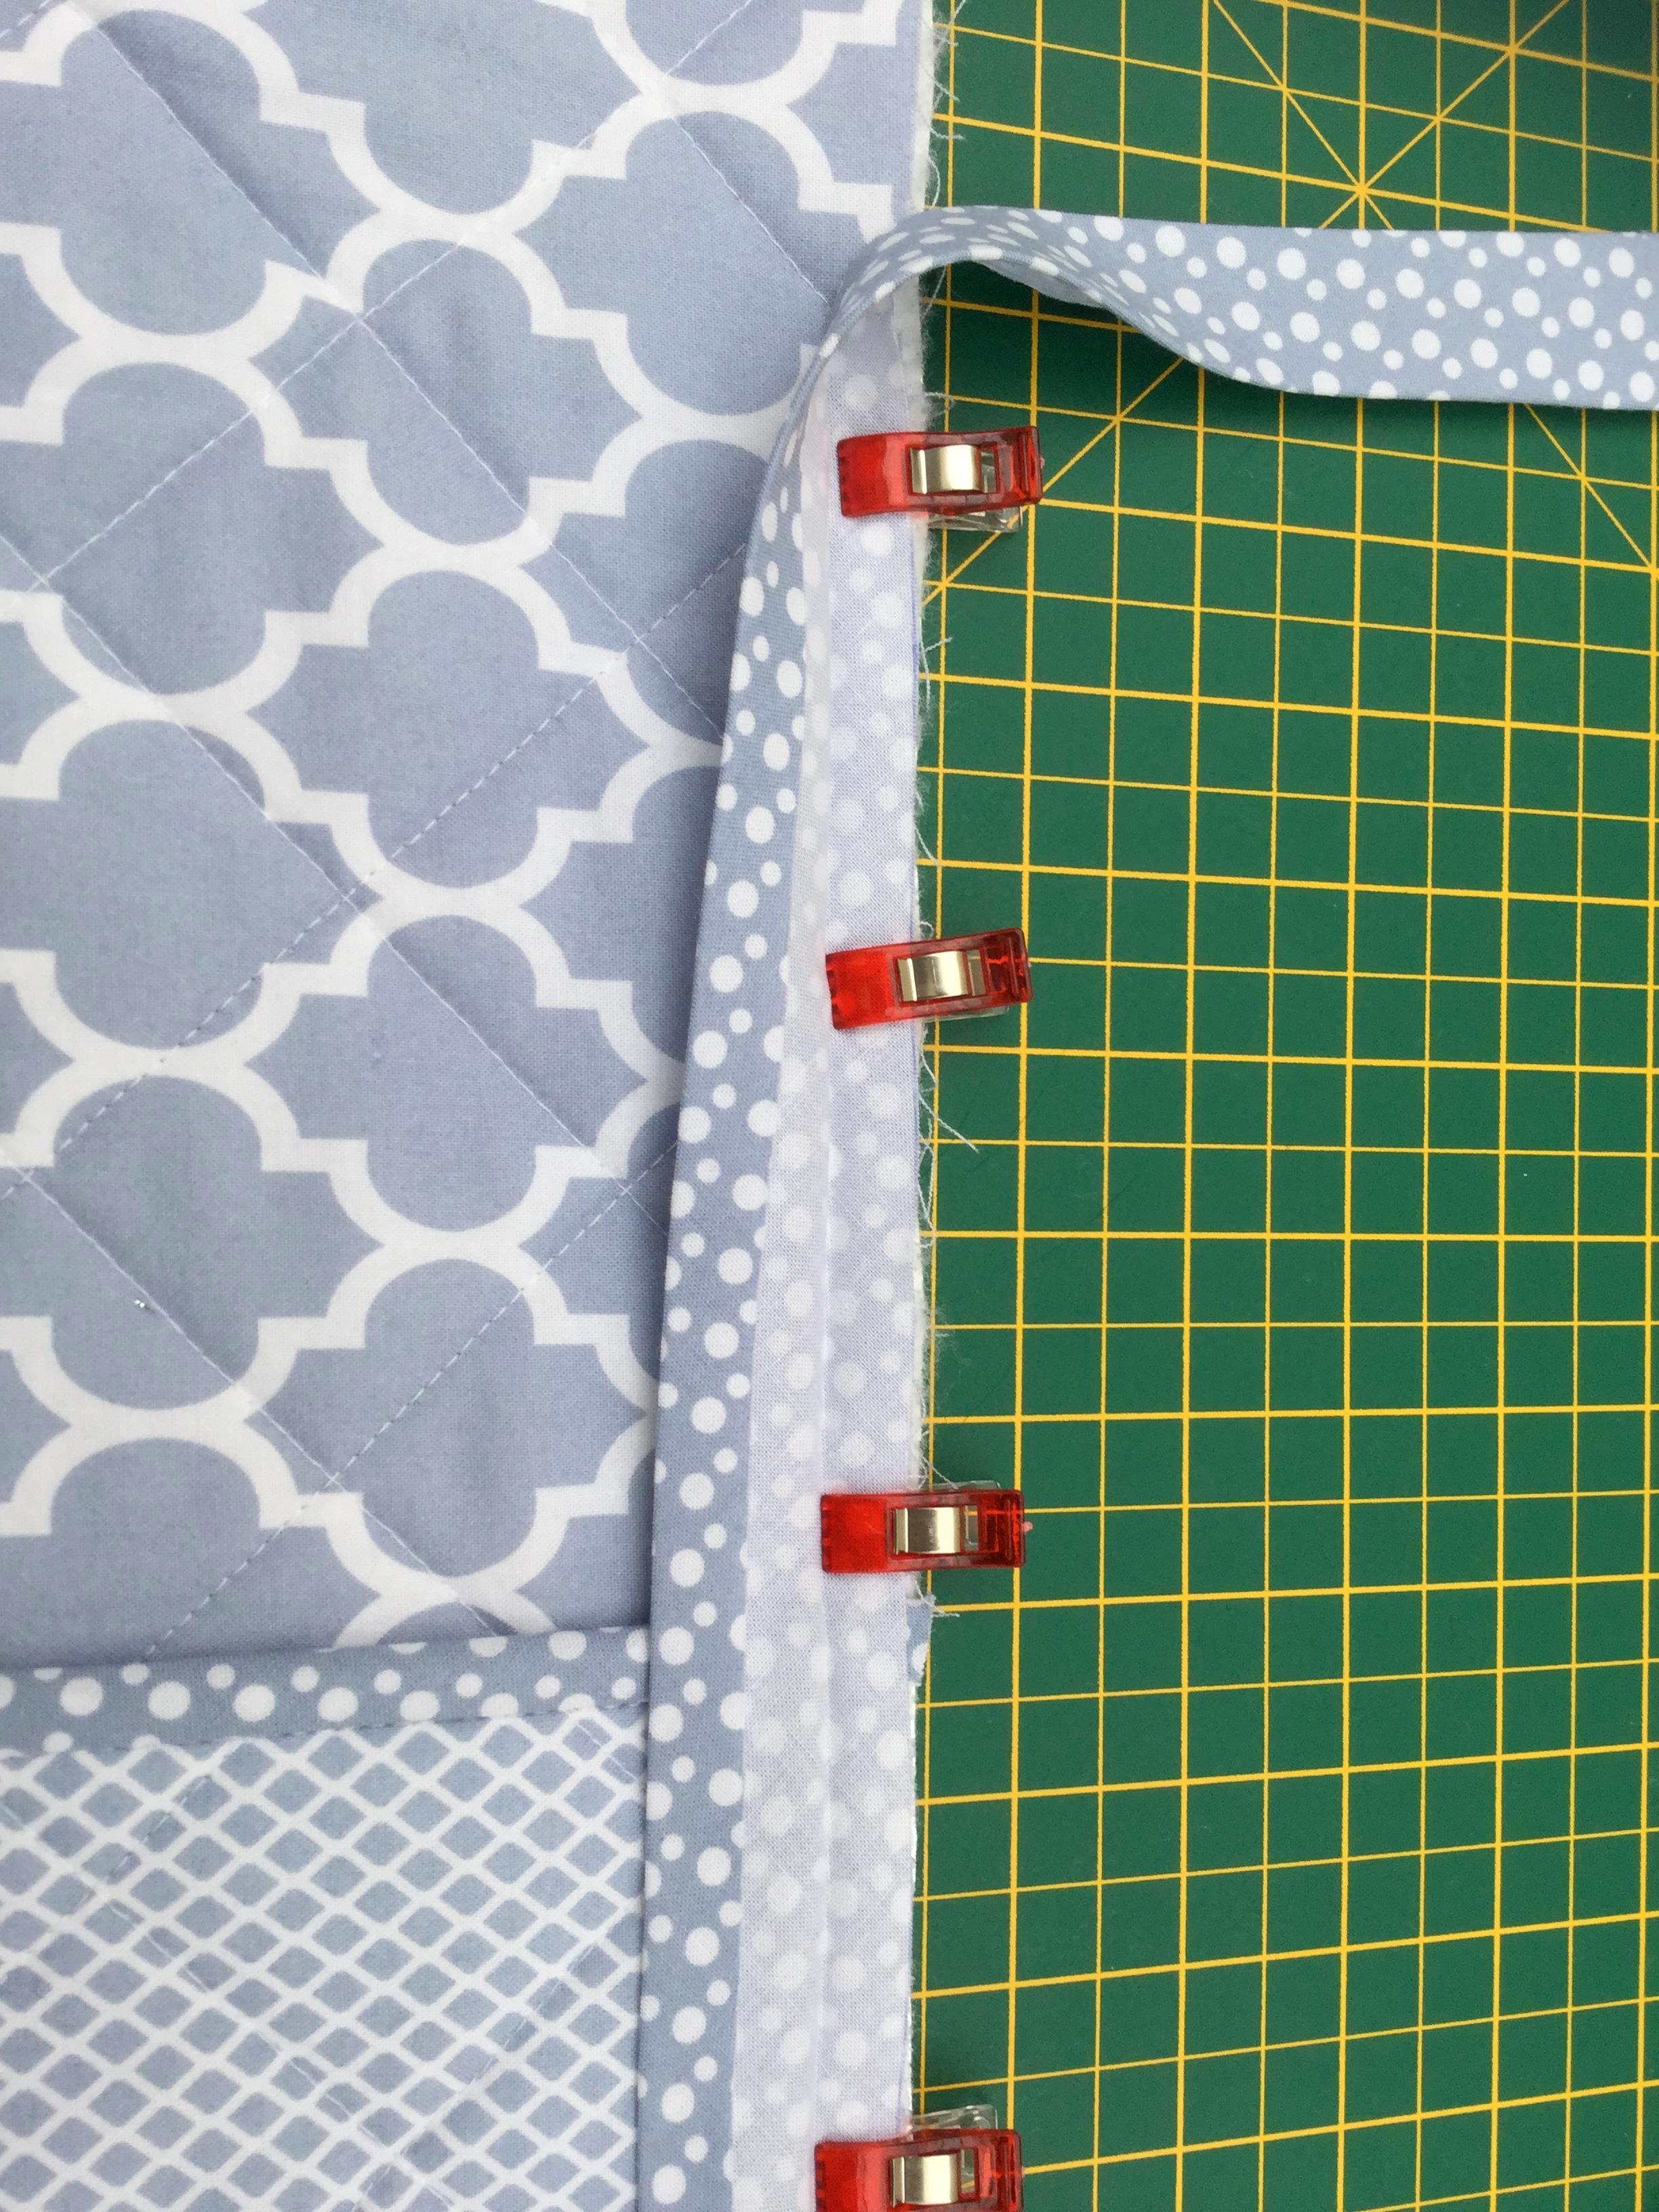
Open out your bias binding and place the edge of the bias against the edge of the glove piece, right sides together. Pin or clip in place and sew along the crease of the binding.
Fold the bias binding right over to the other side – you may need to trim your seam allowance a little, and clip/pin in place making sure that the edge of the bias binding covers the line of stitching that you have just sewn.
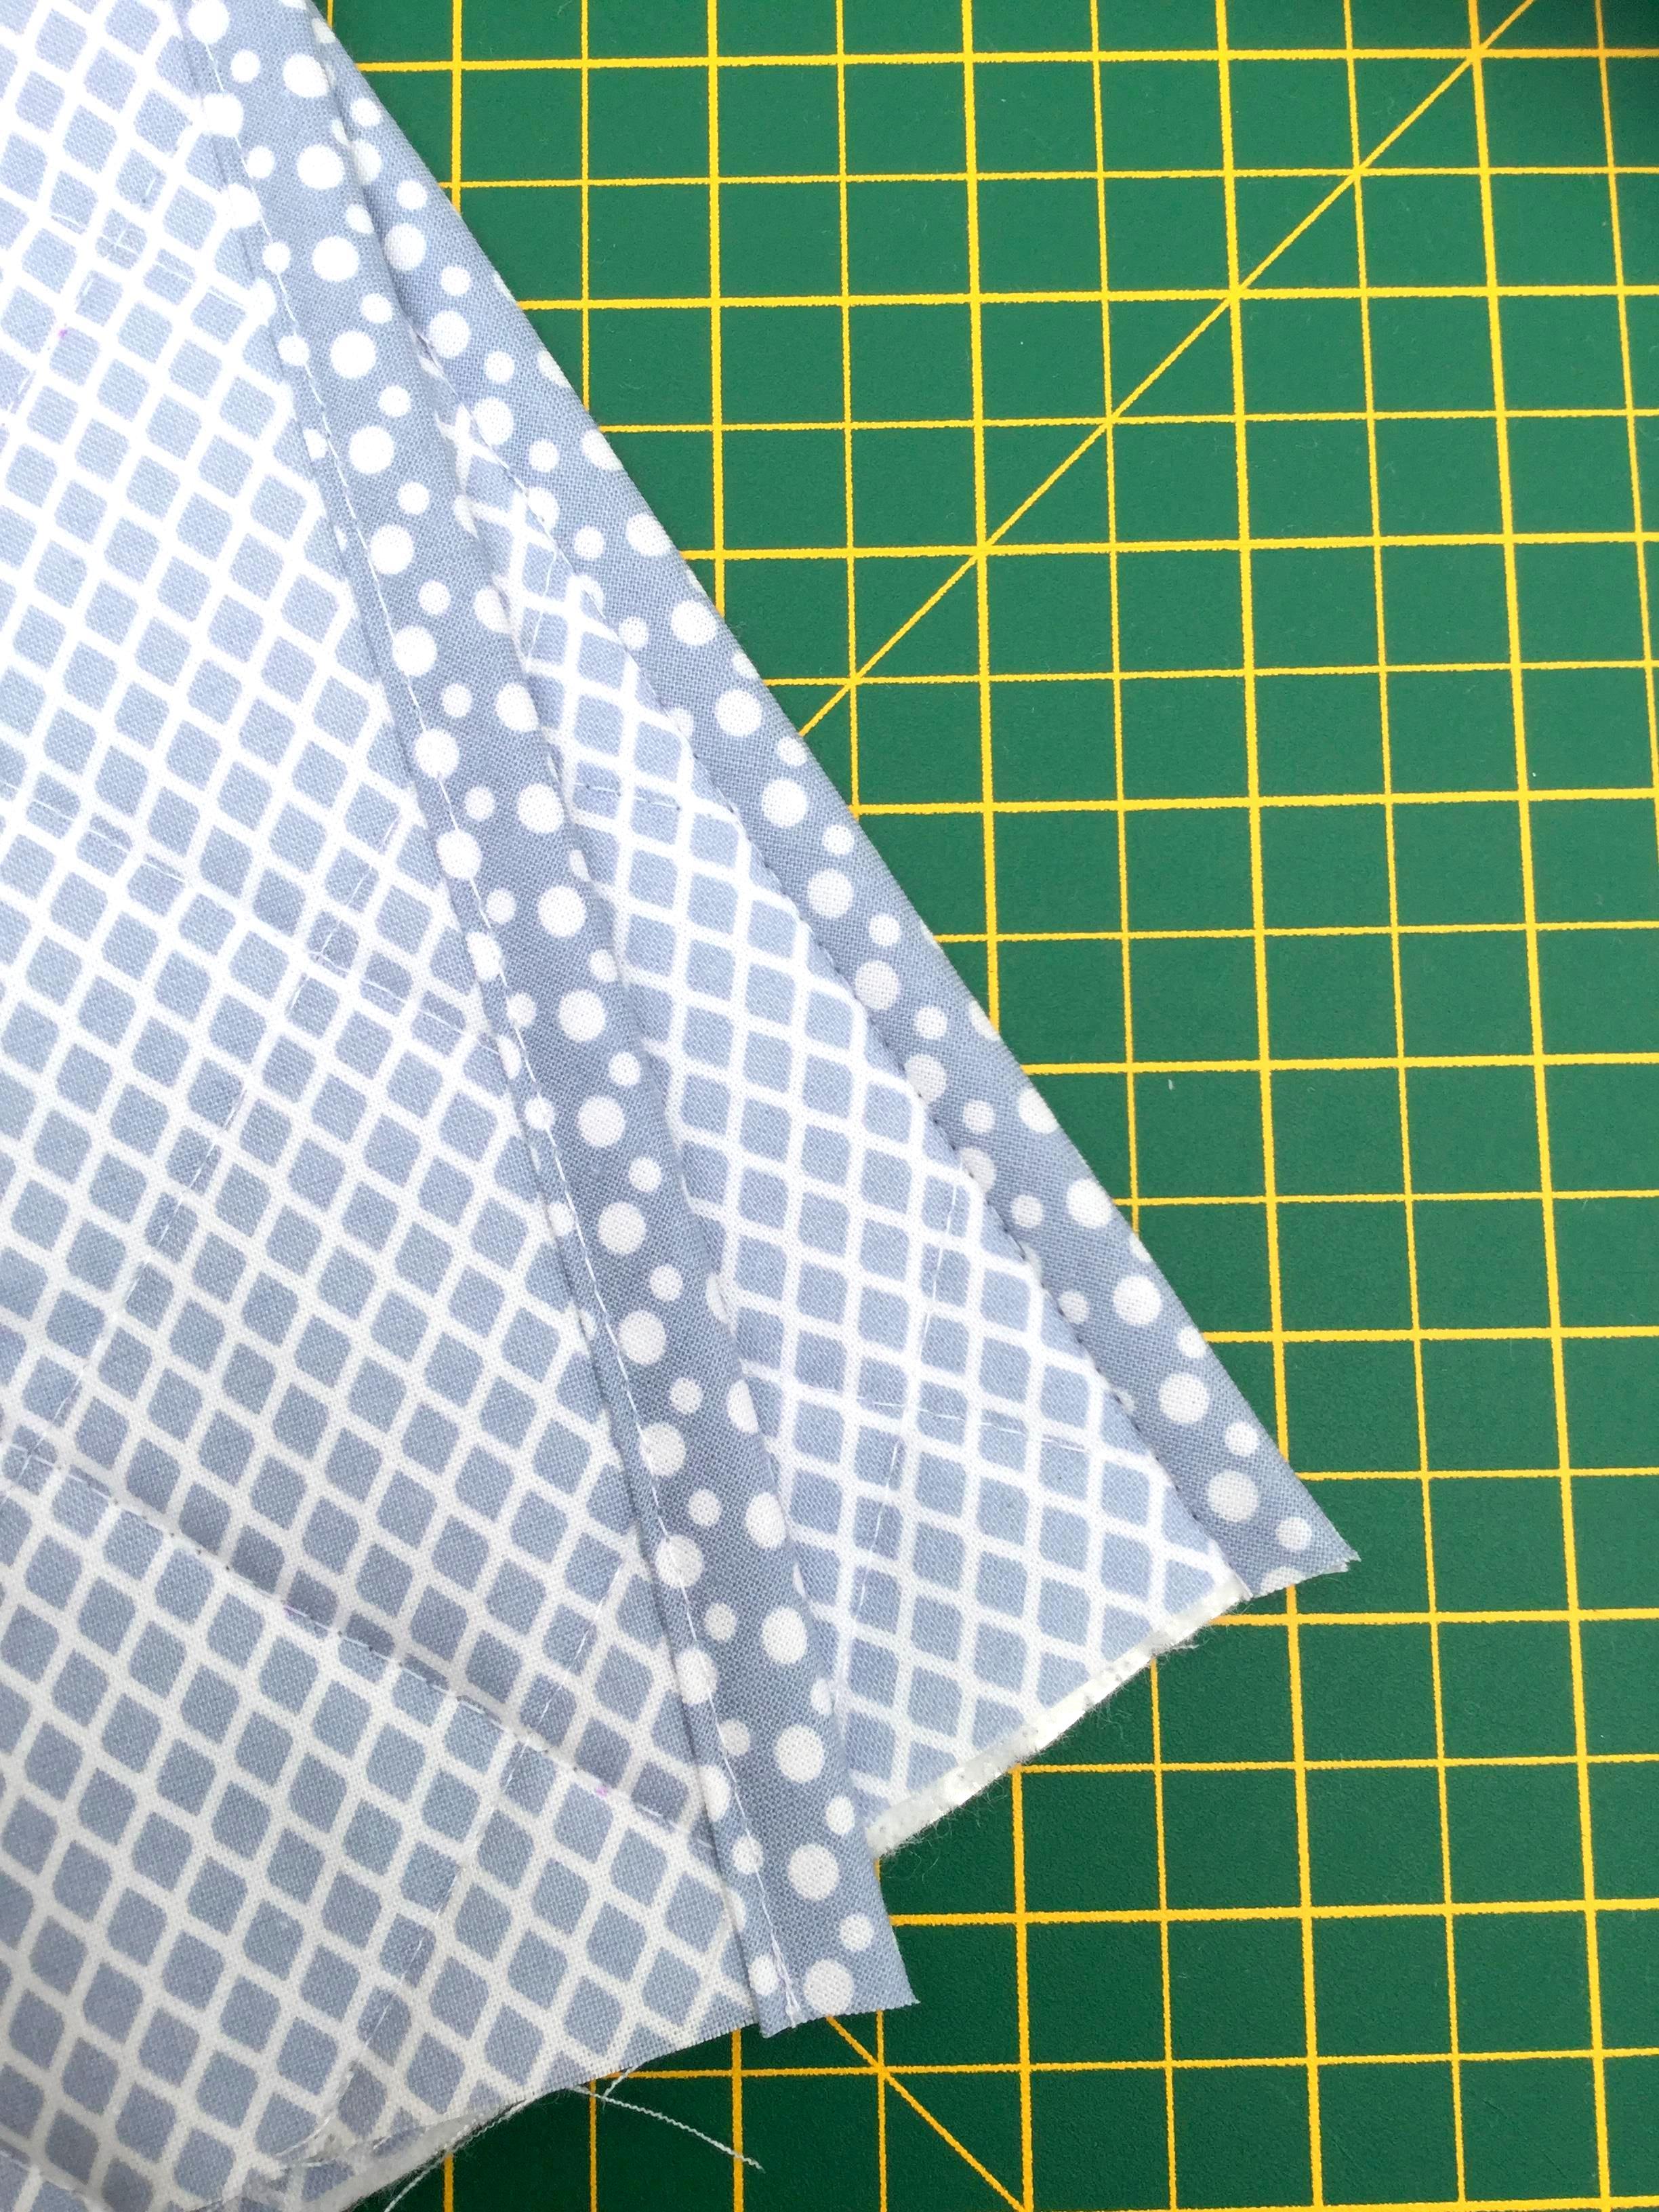
Take them back to the machine and ‘stitch in the ditch’ along the seam you have just sewn. You will be left with a neat line of stitches on the back of the binding. Pictured below you can see the front and back of the bias after stitching. Trim the ends of the bias binding neatly in line with the edge of the glove.
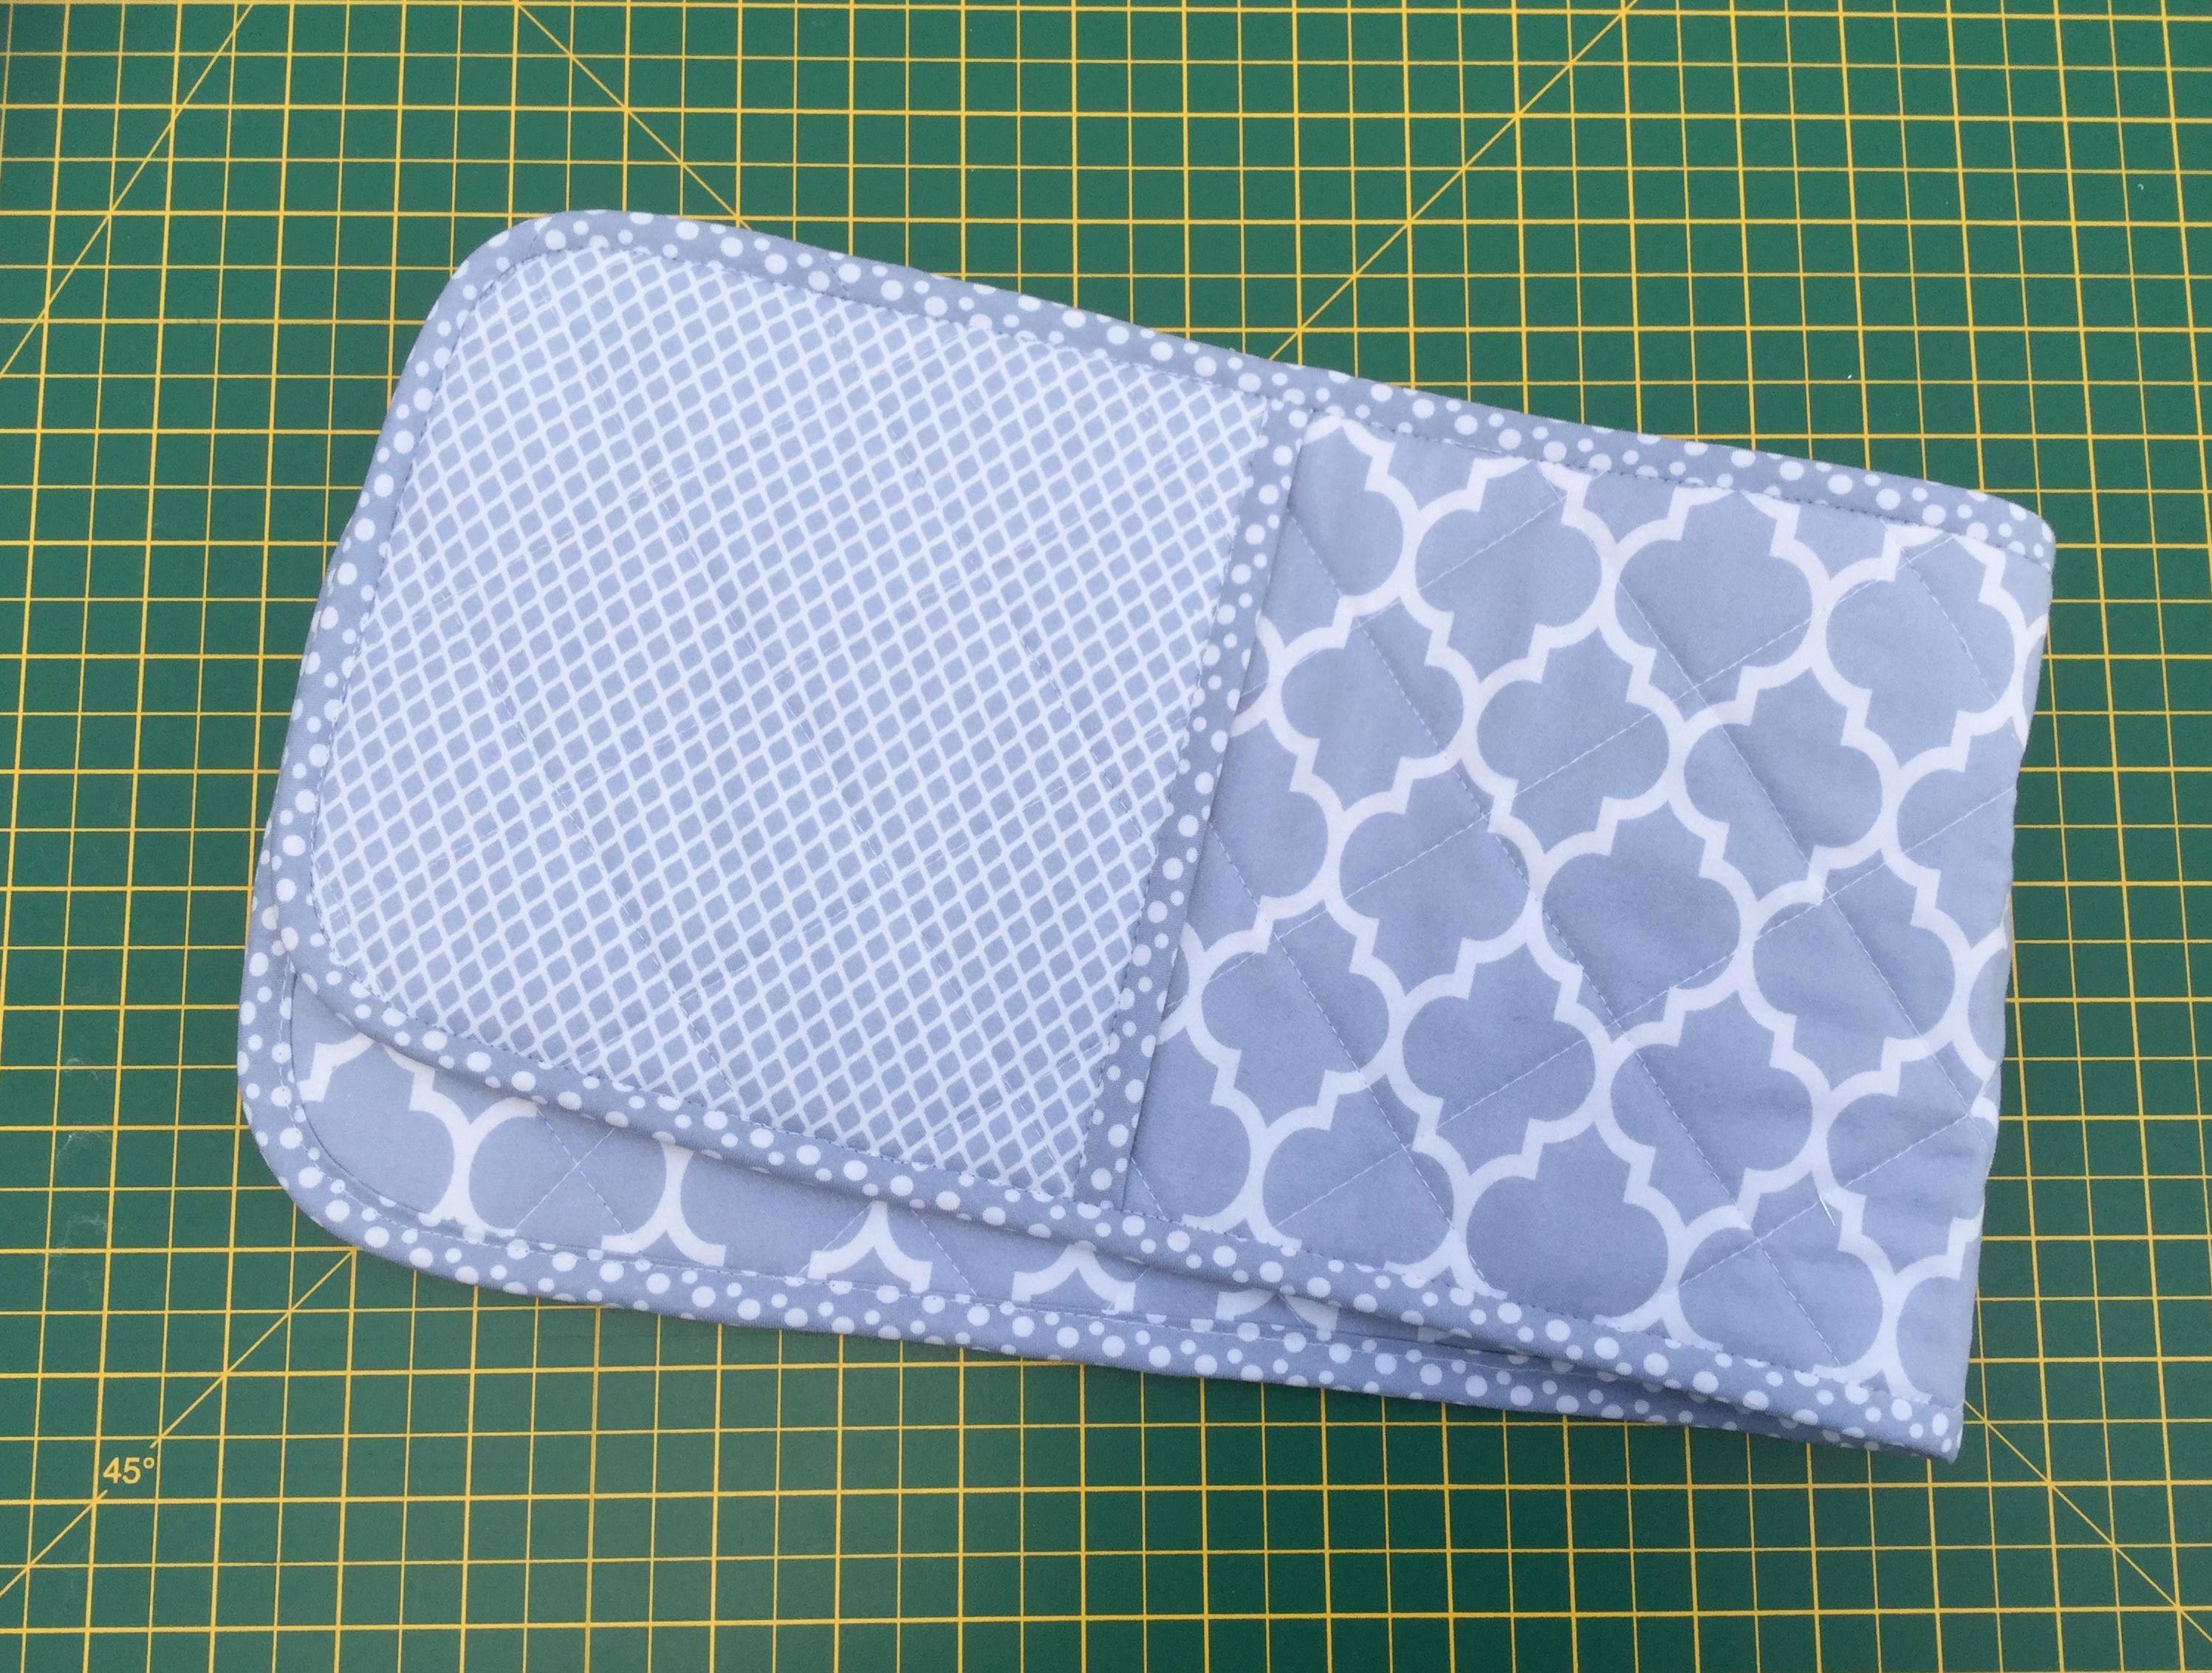
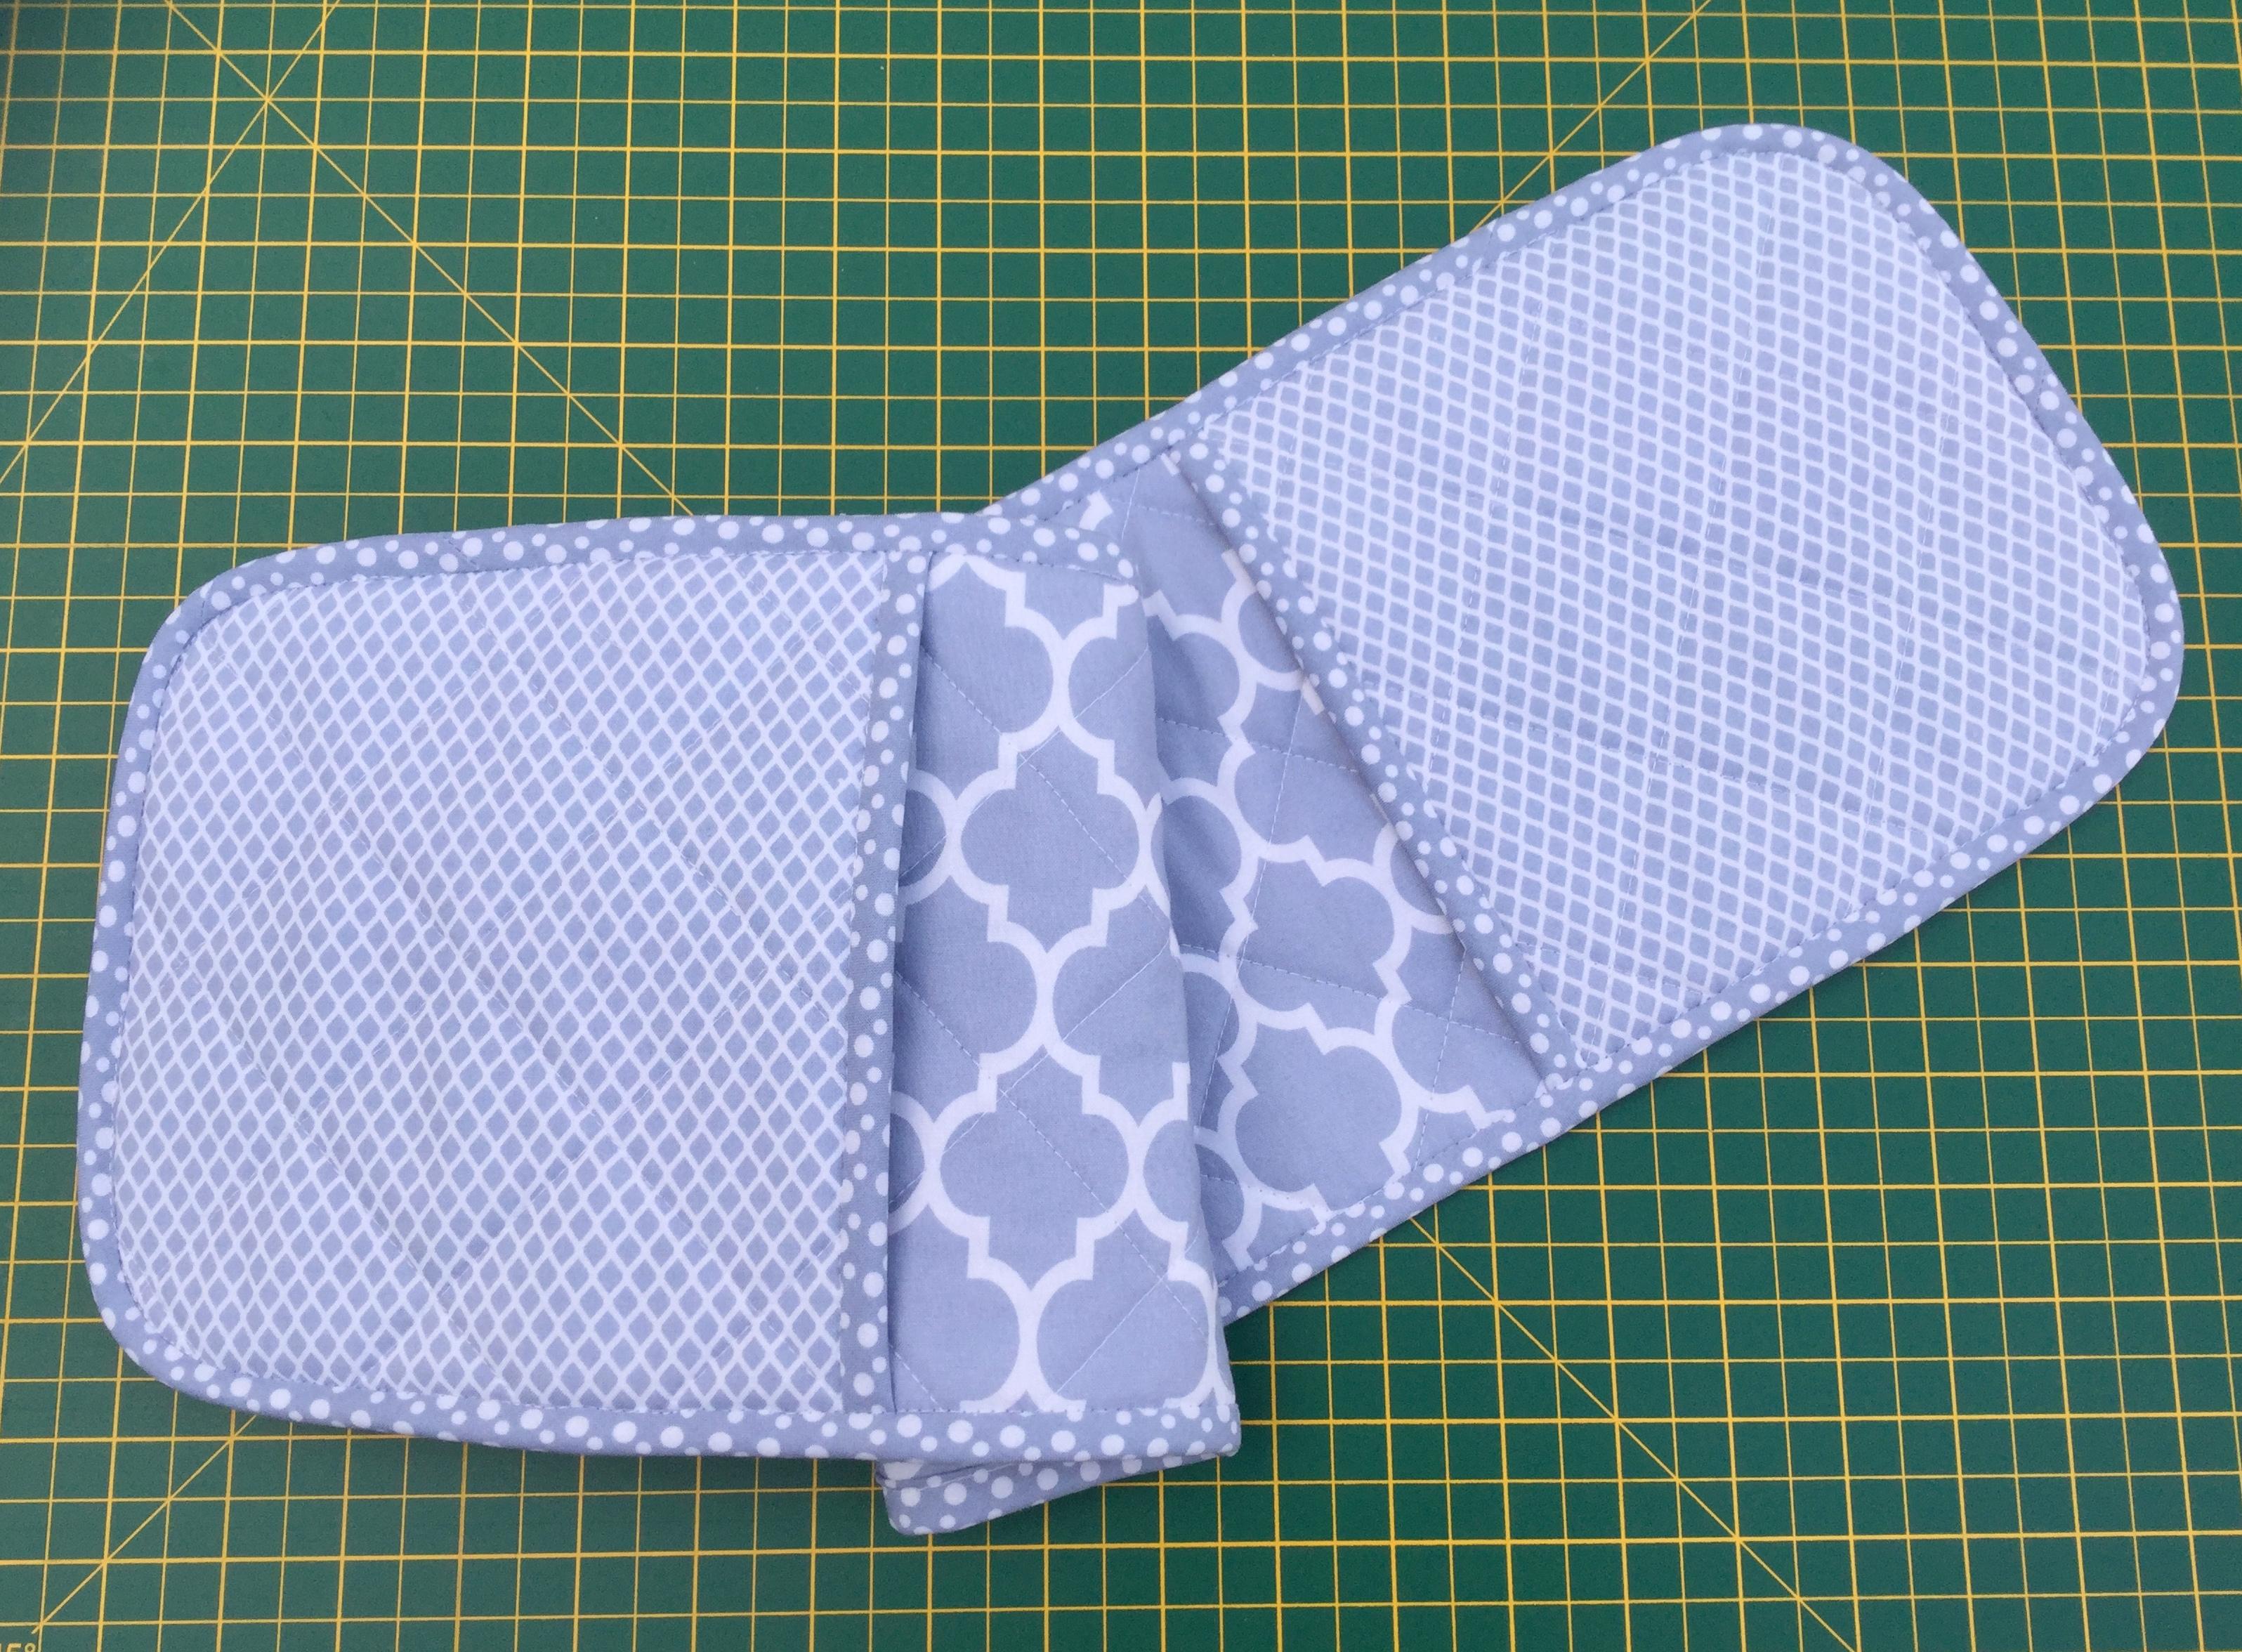
Nearly done now! Place one ‘glove’ piece at each end of the long rectangular piece and pin/clip in place. To make extra sure these stay in place and do not slip it is a good idea to stitch them in place around the edge using a teeny tiny seam allowance.
Finally we need to run the bias binding all around the long edge to ‘seal in’ the remaining raw edges and give it a really lovely professional finish. Attach the bias binding to the edge in exactly the same way as you did before and sew in the crease of the binding all the way around the long edge. Start/finish your stitching on a straight edge rather than at a corner. Don’t worry about the corners, the binding will easily stretch around these curves. Fold it over as you did before and ‘stitch in the ditch’ to secure and you are done! Easy!
To make 2 pot holders you will need:
- 4 squares of pretty fabric each measuring 20cm x 20cm
- 2 squares of heat-resistant wadding each measuring 20cm x 20cm. I used a brand called Insul-bright
- Bias binding – approx 2.5 metres
- Rotary cutter and mat or fabric scissors
- Small plate, saucer or something similar
- Clover Wonder Clips or pins
- Sewing machine and matching thread
- A walking foot is useful for your machine due to the thickness of the layers of this project
As mentioned in the oven glove tutorial it is important to pre-wash your fabrics. Also if you are making your own bias binding you may like to do this first. I have a tutorial showing how to make your own continuous bias binding here
Read more : How Do You Win The Golden Glove
Firstly you will need to layer up your 2 pot holders. Each piece should have 1 square of pretty fabric at the bottom with the right side facing down, then on top of that goes the heat resistant wadding, finally on the top the other piece of pretty fabric with the right side facing upwards.
Again just as for the main piece of the oven glove you will need to clip or pin these and round off all four corners using your saucer/plate as a guide. Do this with both pot holders.
Again we will machine quilt this by marking one 45 degree angle in one direction and another 45 degree angle in the opposite direction. Sew along these lines using the walking foot on your machine if you have one and use the L shaped bar attachment that comes with the foot to make sure all further rows are perfectly parallel. It is easier to start in the middle of the squares and work outwards.

After this you are nearly there! If you want to you can stitch around the entire edge of the squares to keep your edges stable. If you choose to do this use the smallest teeny tiny seam allowance as you don’t want your stitches to show after you have edged with the bias tape.
To edge your pot holders with bias binding tape, simply open up the bias tape and place the edge of the tape against the edge of the pot holder with the right sides facing. Pin or clip in place, and simply stitch all the way around keeping in the crease of the bias tape. It is easy to start/finish along a straight edge. Don’t worry about the curved edges, the bias stretch of the tape will easily accommodate these curves.
When you are done, simply fold the bias tape all the way over to the other side – you may want to trim your seam allowances to enable it to lay flat, and pin/clip the bias tape on the other side making sure it covers the row of stitching that you have just sewn.
‘Stitch in the ditch’ all the way around, and there you have it! Couldn’t be easier!
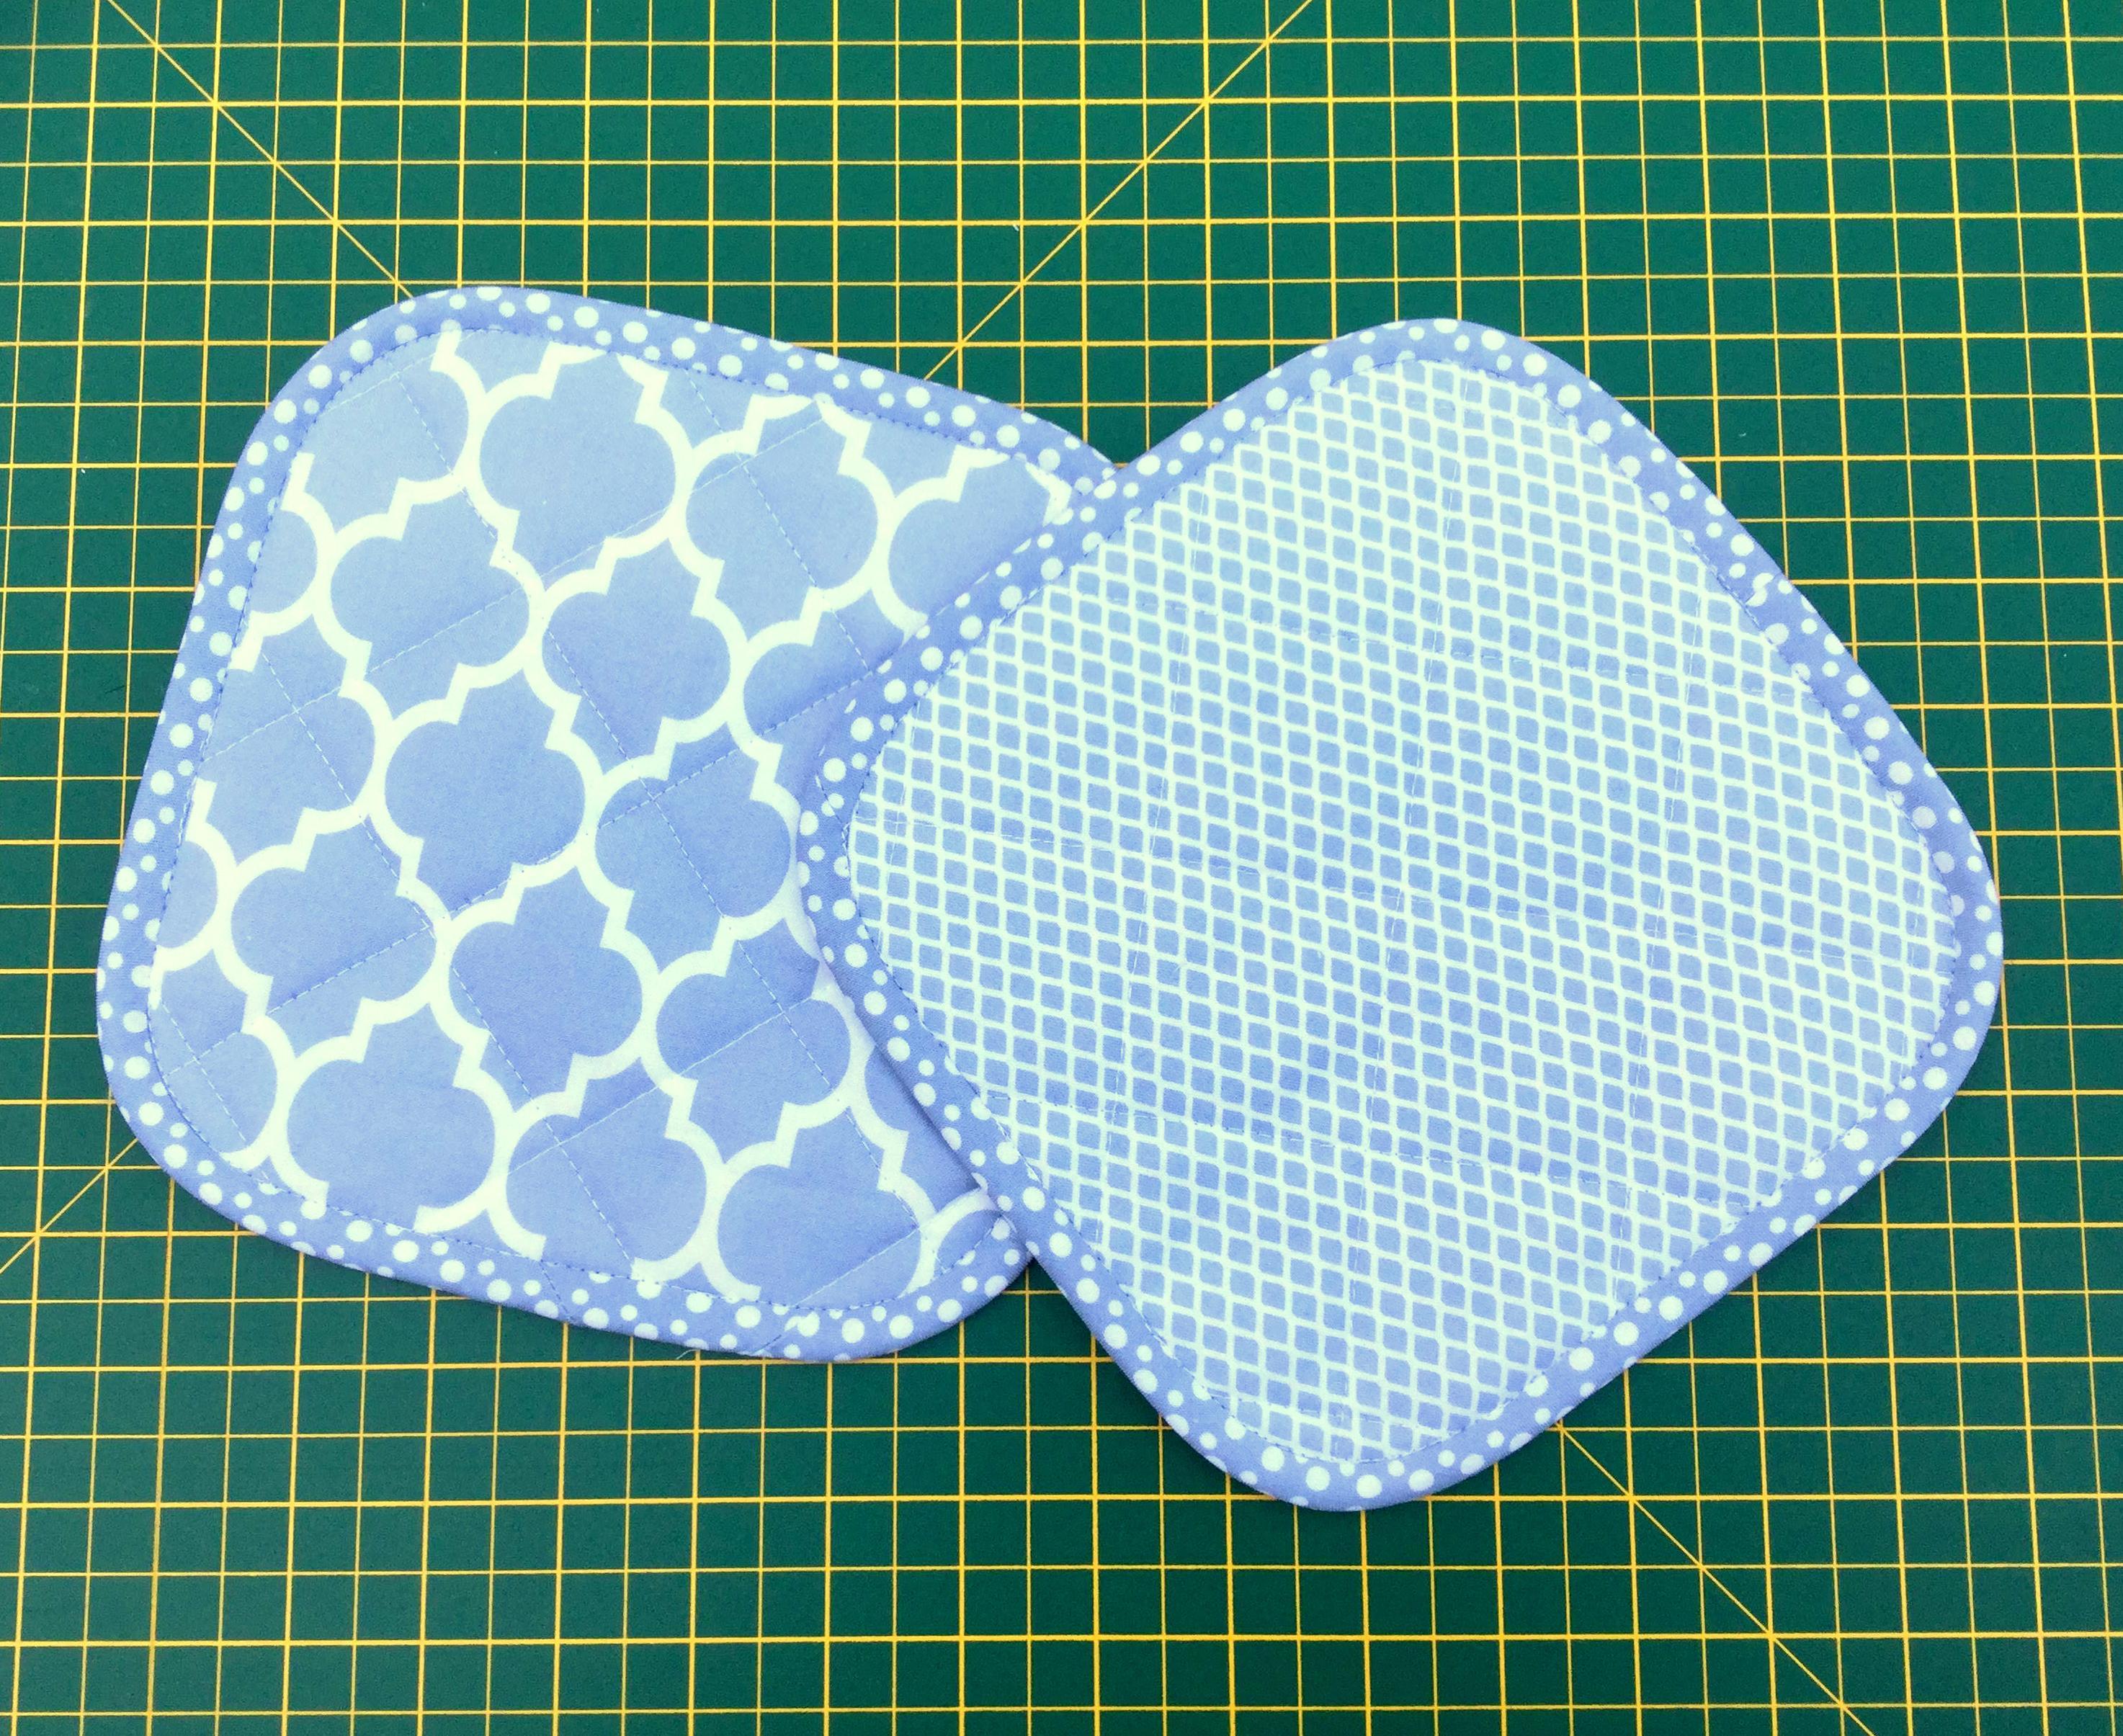
I thoroughly enjoyed making these items for my #2017sve recipient. I do hope that this may have inspired you to have a go too. They are a fairly simple rewarding make and a great gift idea for all sorts of occasions as well as a treat to yourself.
I think you may like to see the beautiful gift that I received as part of this exchange. This pretty bag which has a super practical waterproof lining was made for me by Ann at http://www.sewwatts.wordpress.com and I love it! Isn’t the floral fabric the cutest? Thank you Ann, you have me down to a tee!
Let me know how you get on, and if you are going to make these!
Take care and I’ll be back soon,
Kathy x
Source: https://t-tees.com
Category: HOW