

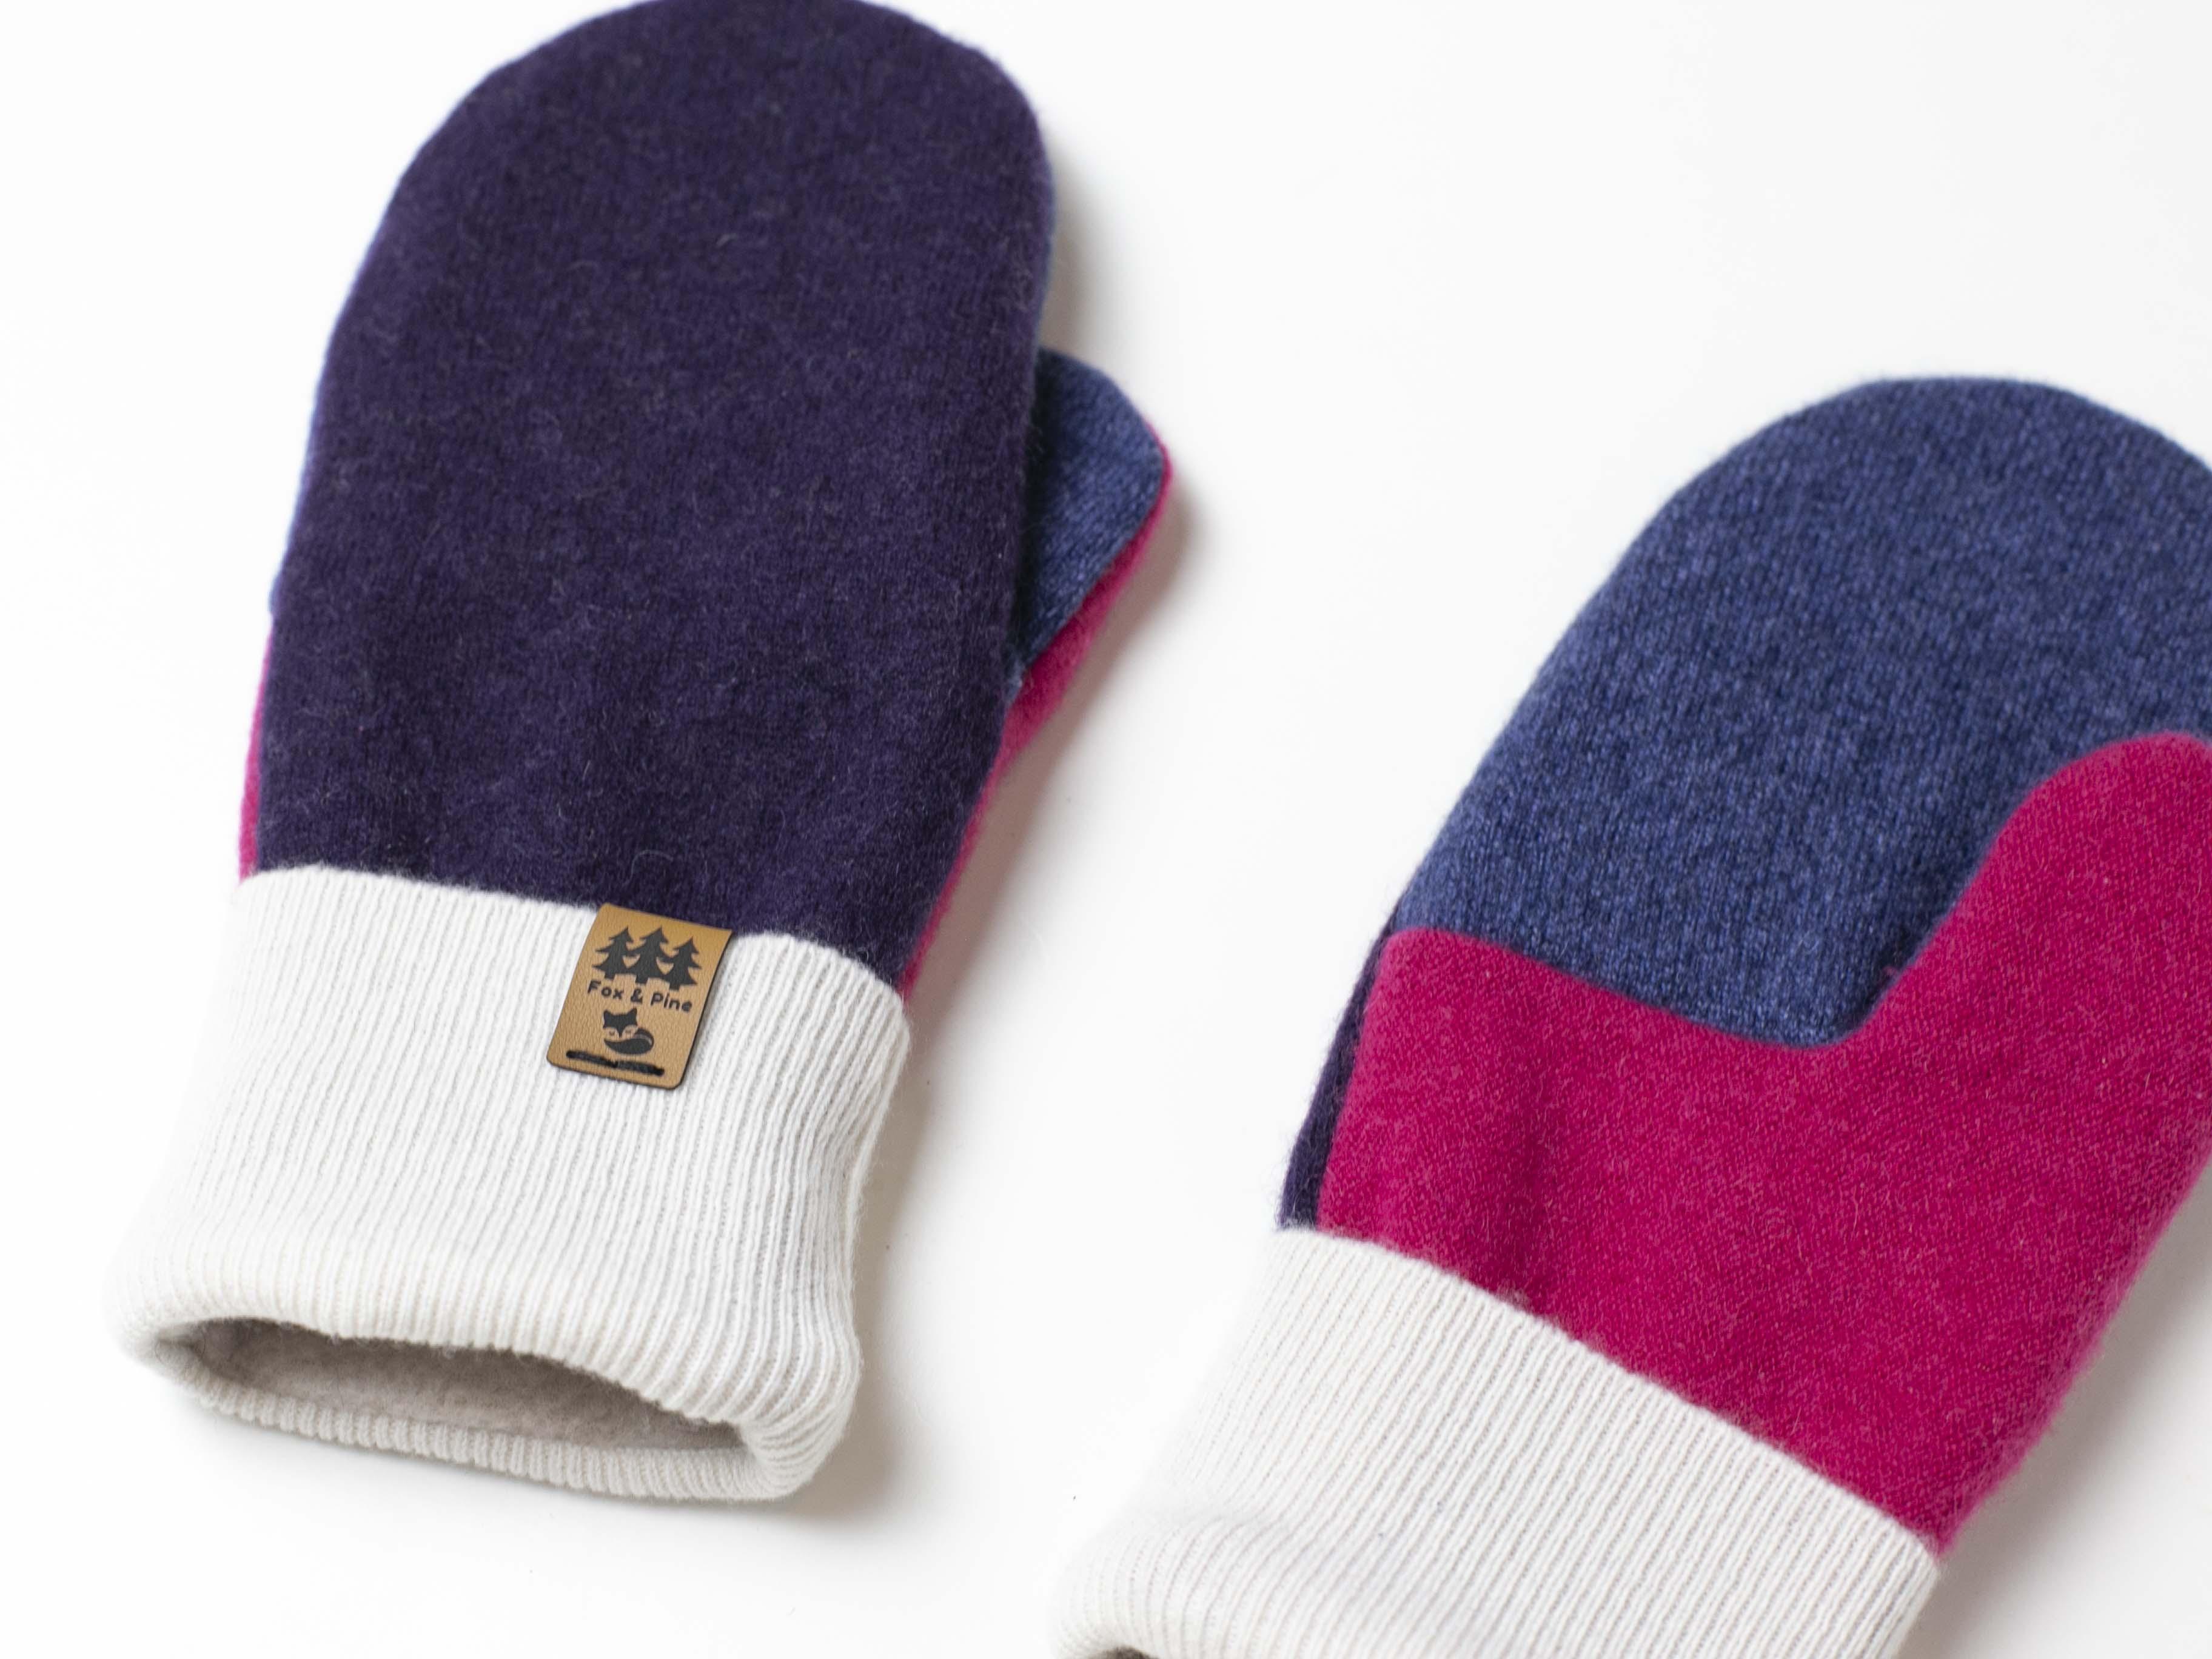
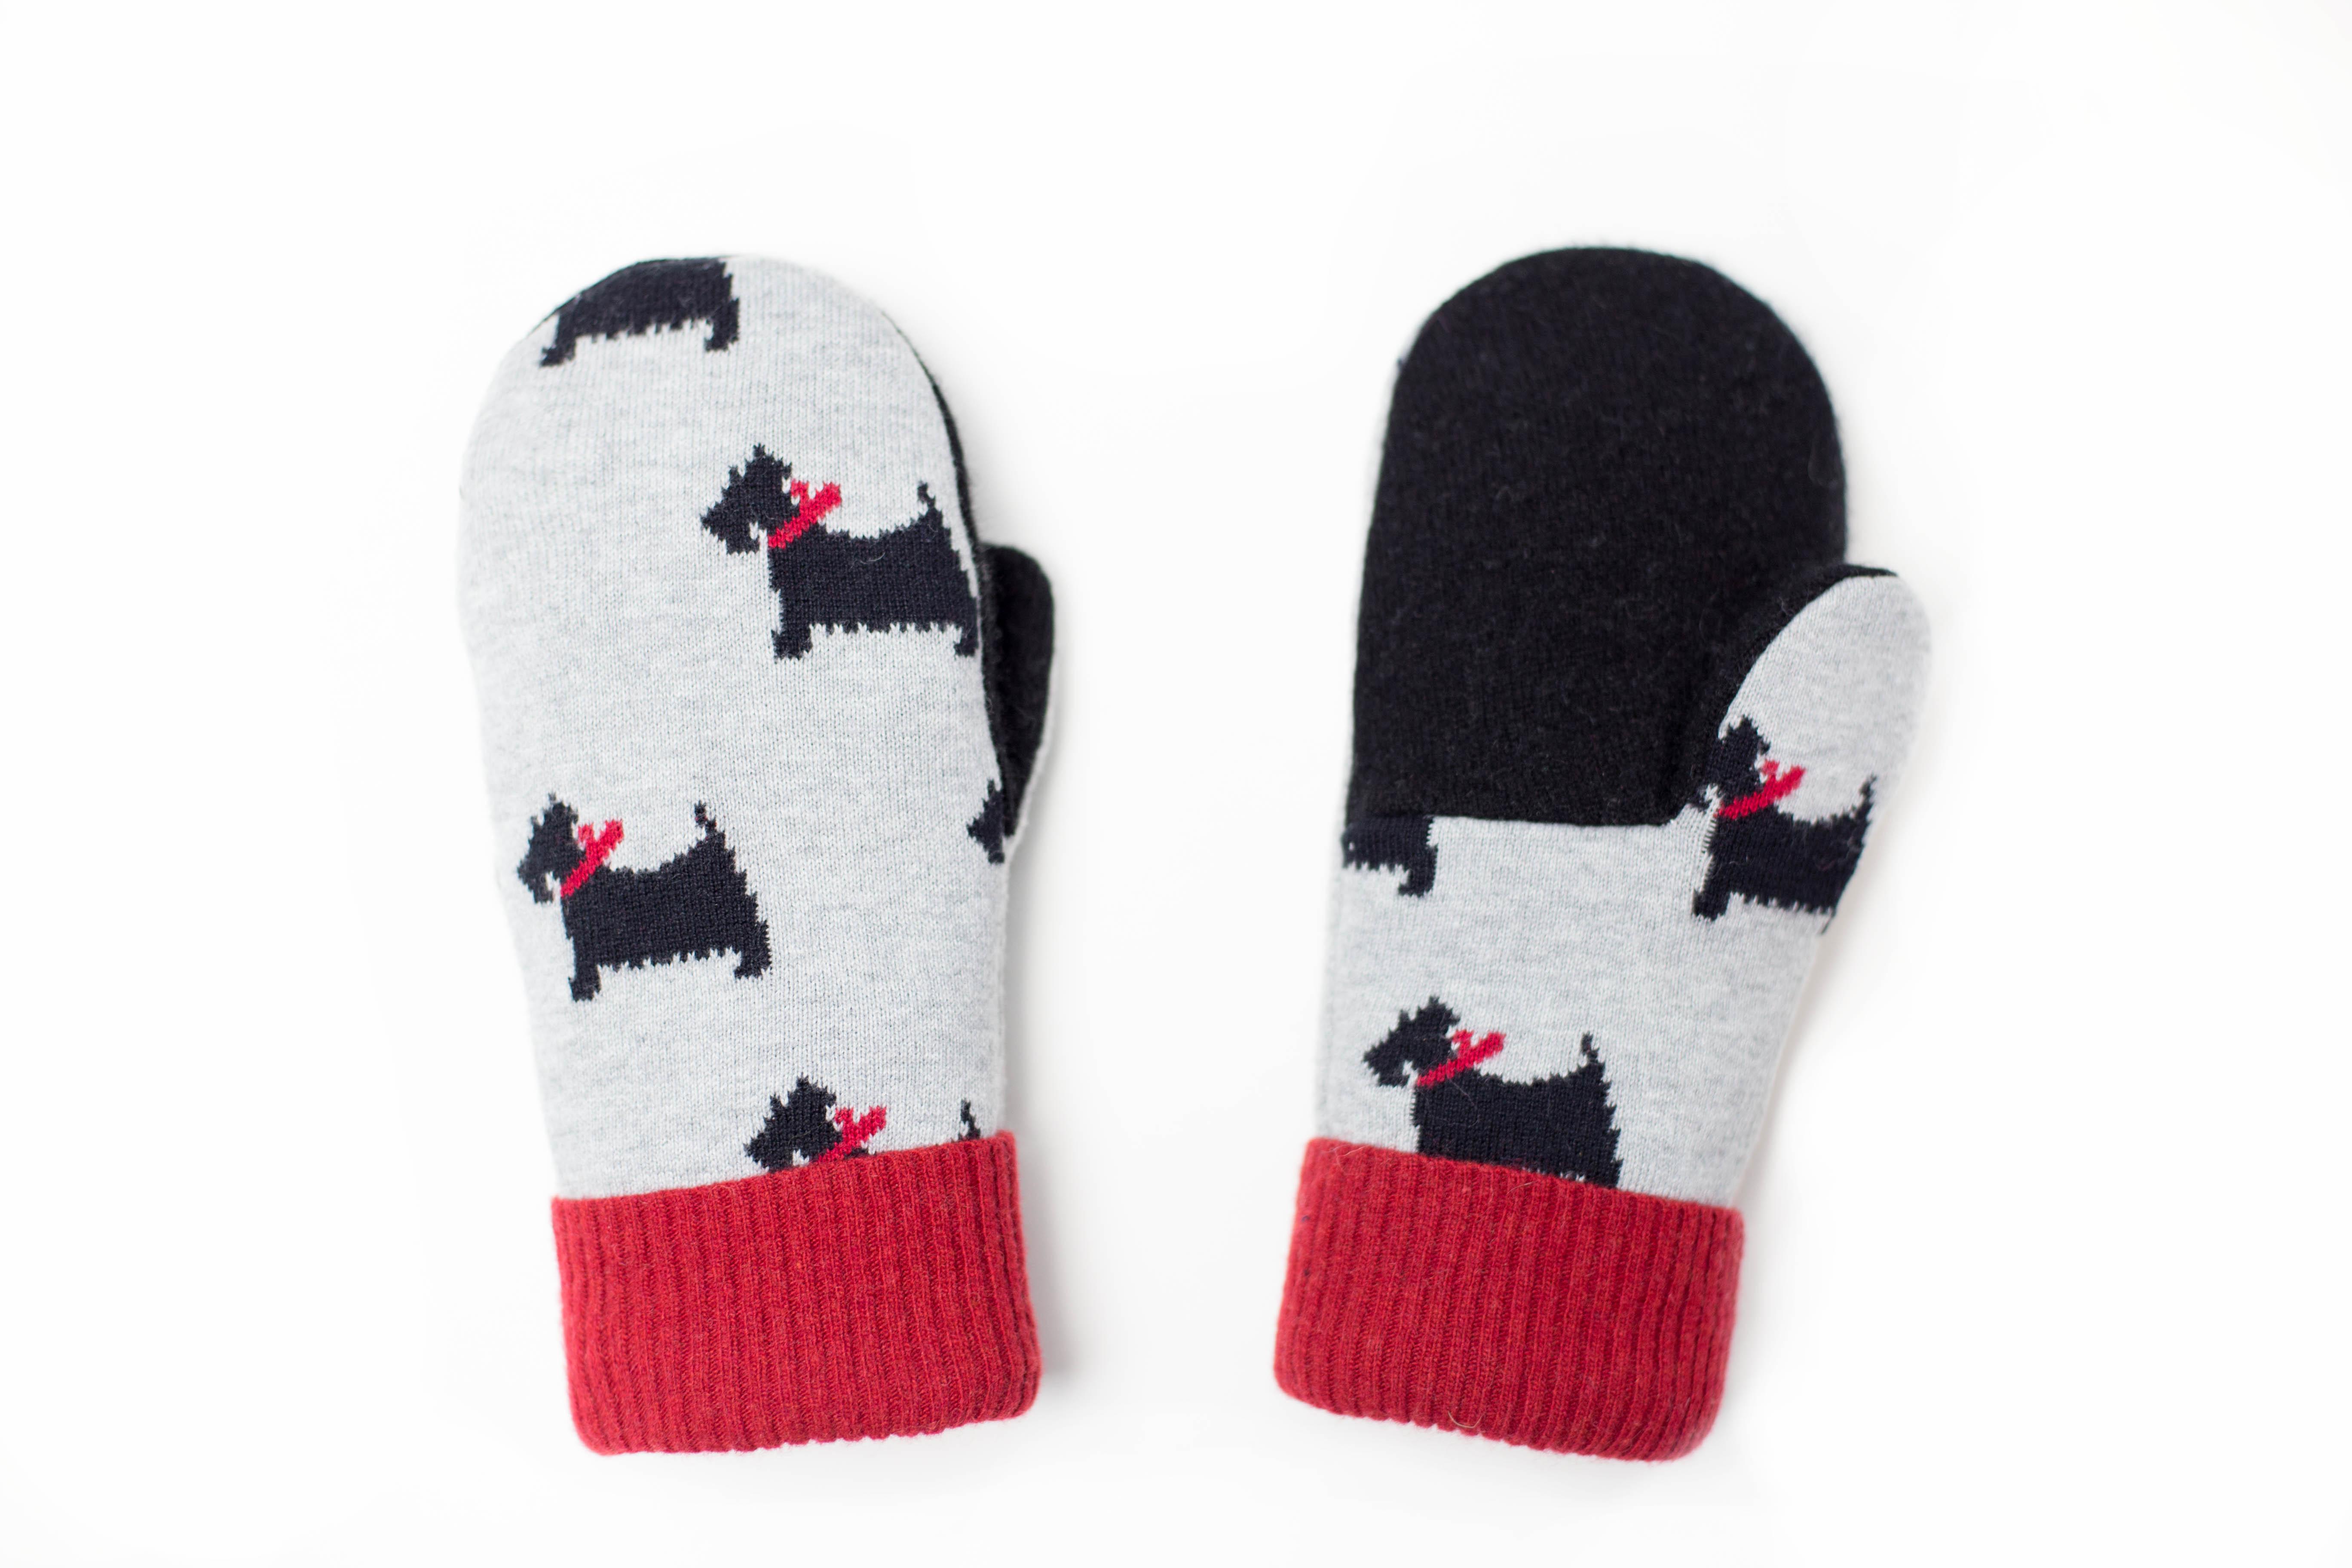
Sweater mittens are a popular trend in the handmade world. They are made from upcycled wool sweaters. They are the perfect DIY Christmas gift and a hot seller for makers on Etsy and craft fairs.
You are viewing: How To Make Sweater Gloves

Sweater mittens have been around for several years, but boy did they ever take off after Bernie Sanders was photographed wearing them at the 2021 Inauguration. The memes that have come out from this photo are hilarious. Have a look at the hashtag #berniemittens if you have no clue what I’m talking about.
I have been making and selling sweater mittens for a few years and they are always very popular in the fall and winter, especially those shopping for Christmas gifts. Last year I create a tutorial/pattern to make the sweater mittens and you’ve been loving it! I wanted to share some of it here for those who are interested in trying to make sweater mittens.

The templates for the pattern are available here. I currently have Women’s and Men’s sizes, and two Children’s sizes available.

* Disclosure: This post may contain affiliate links, which means I may receive a small commission, at no cost to you, if you make a purchase through a link.
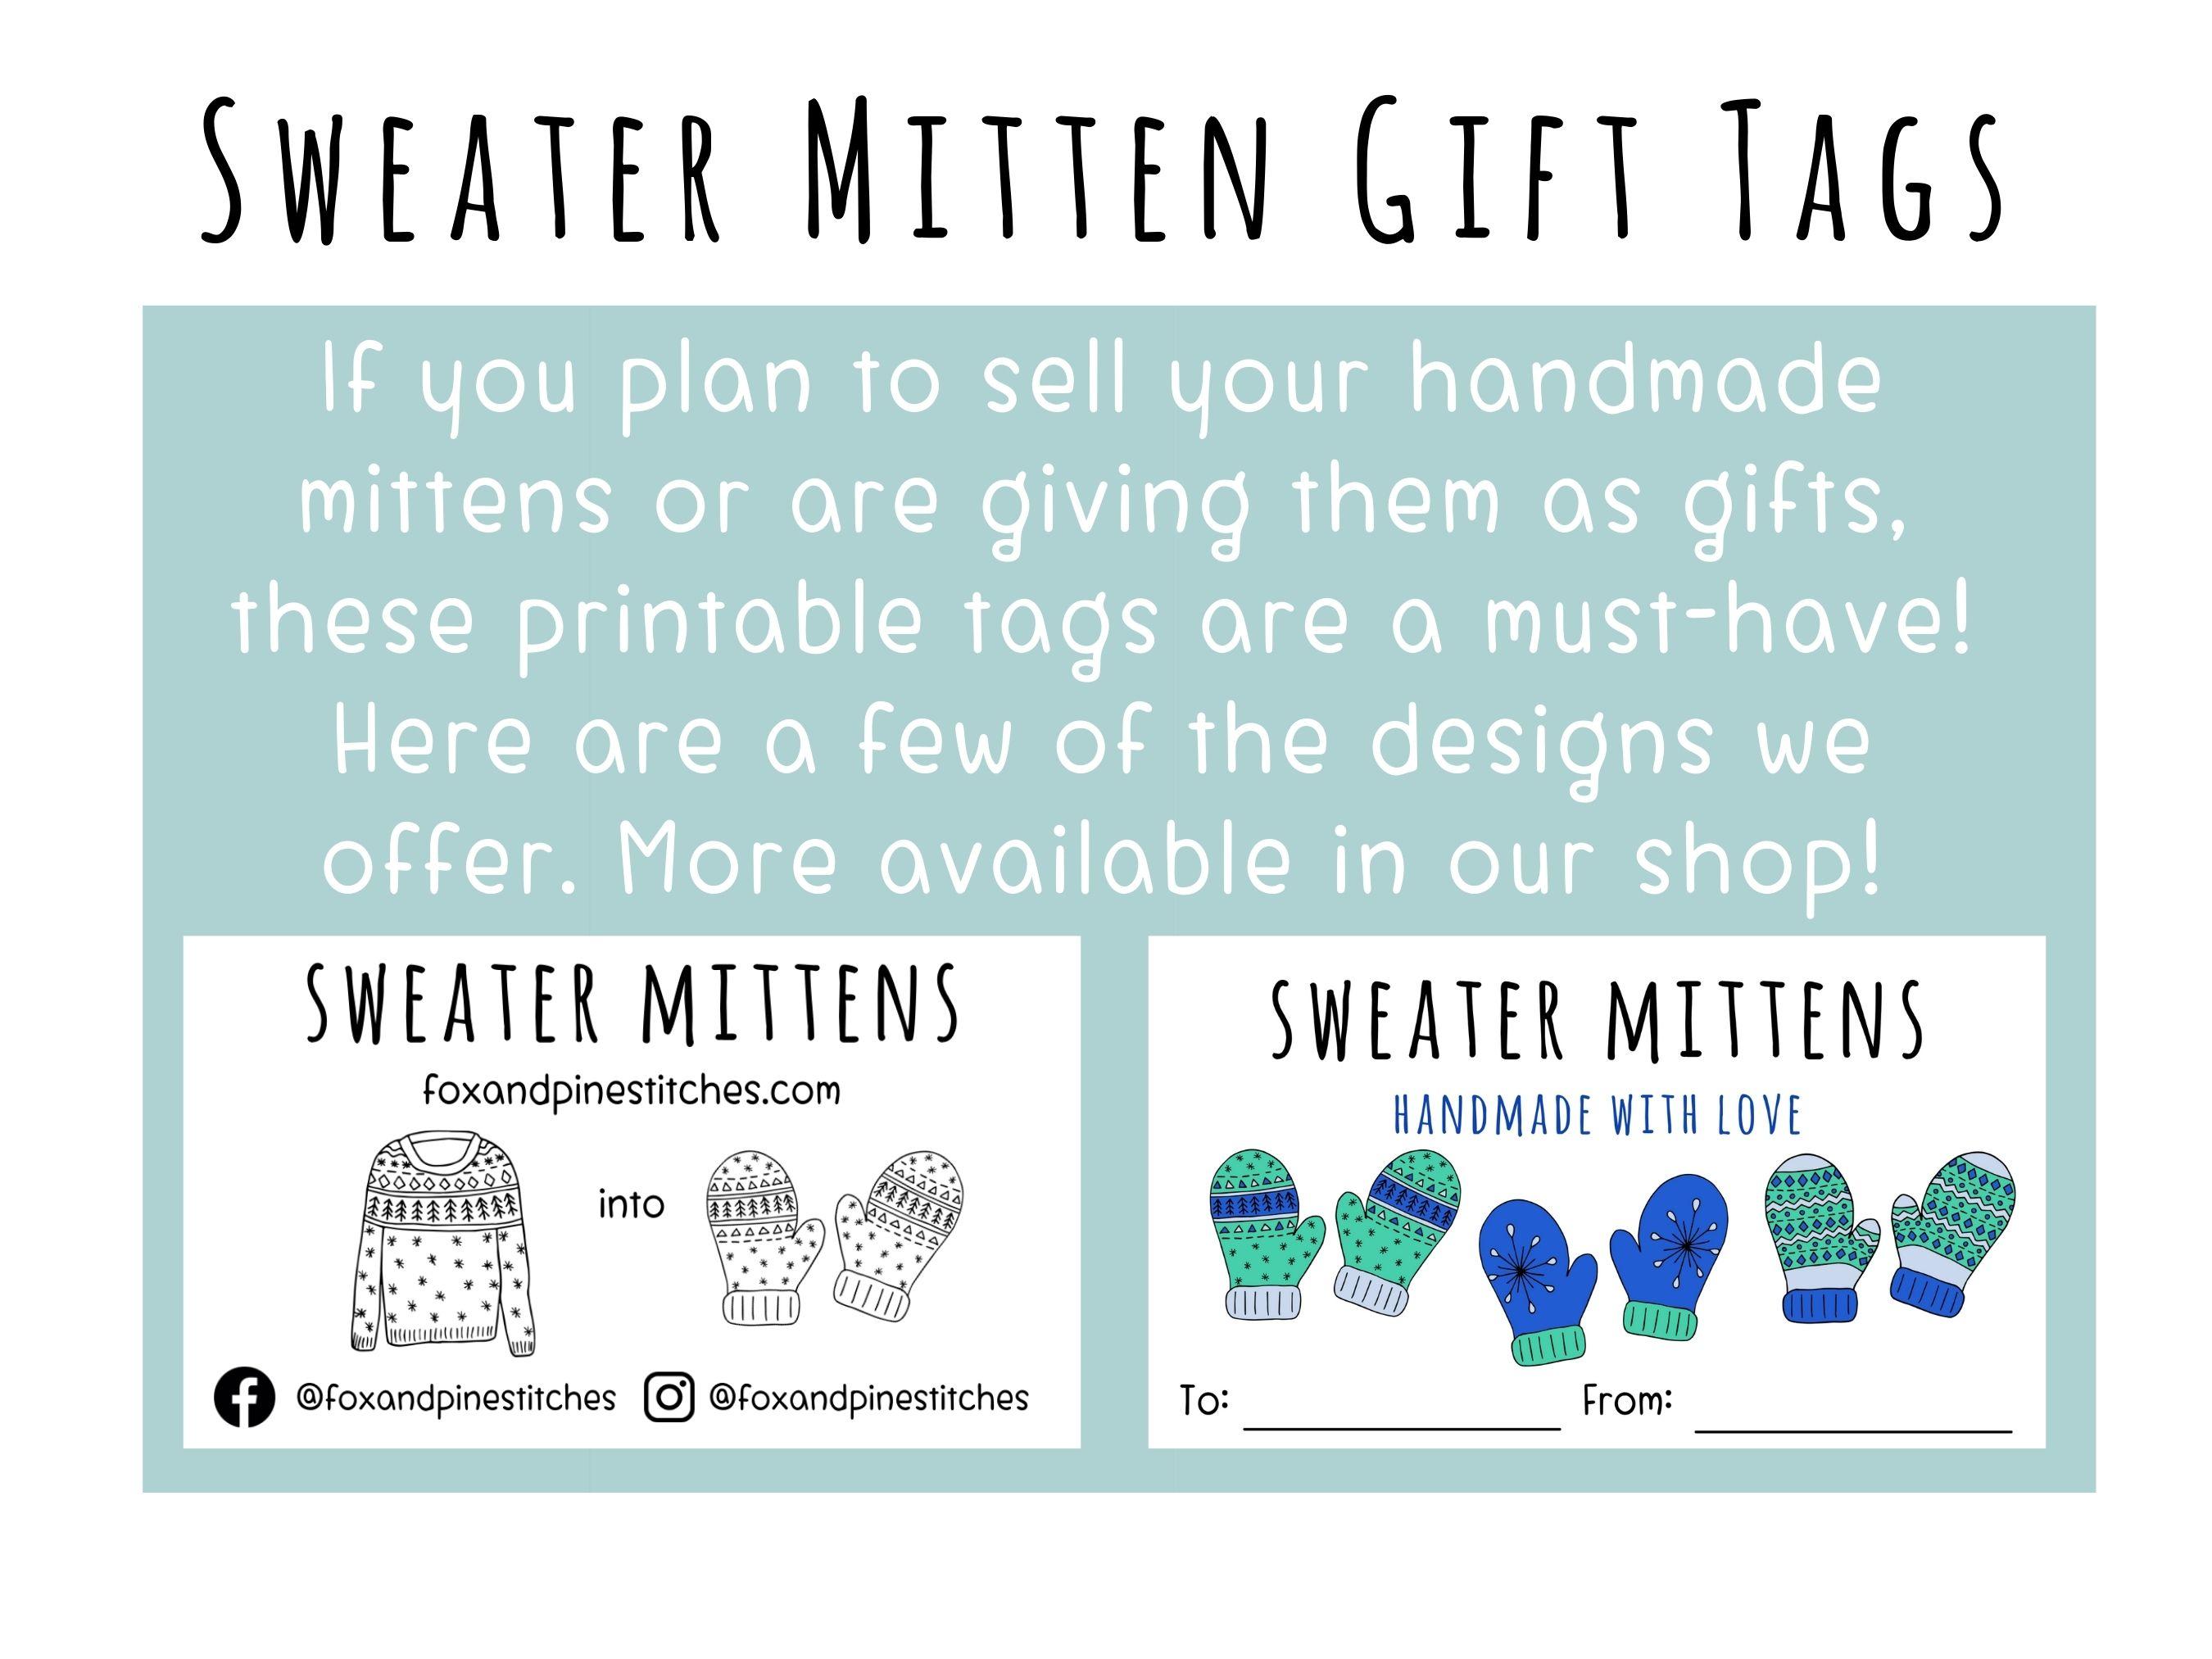
We are also excited about our new sweater mittens printable gift tags! These are digital PDF files you download and print at home. To see all of our design options, click here.
Where to find your sweaters
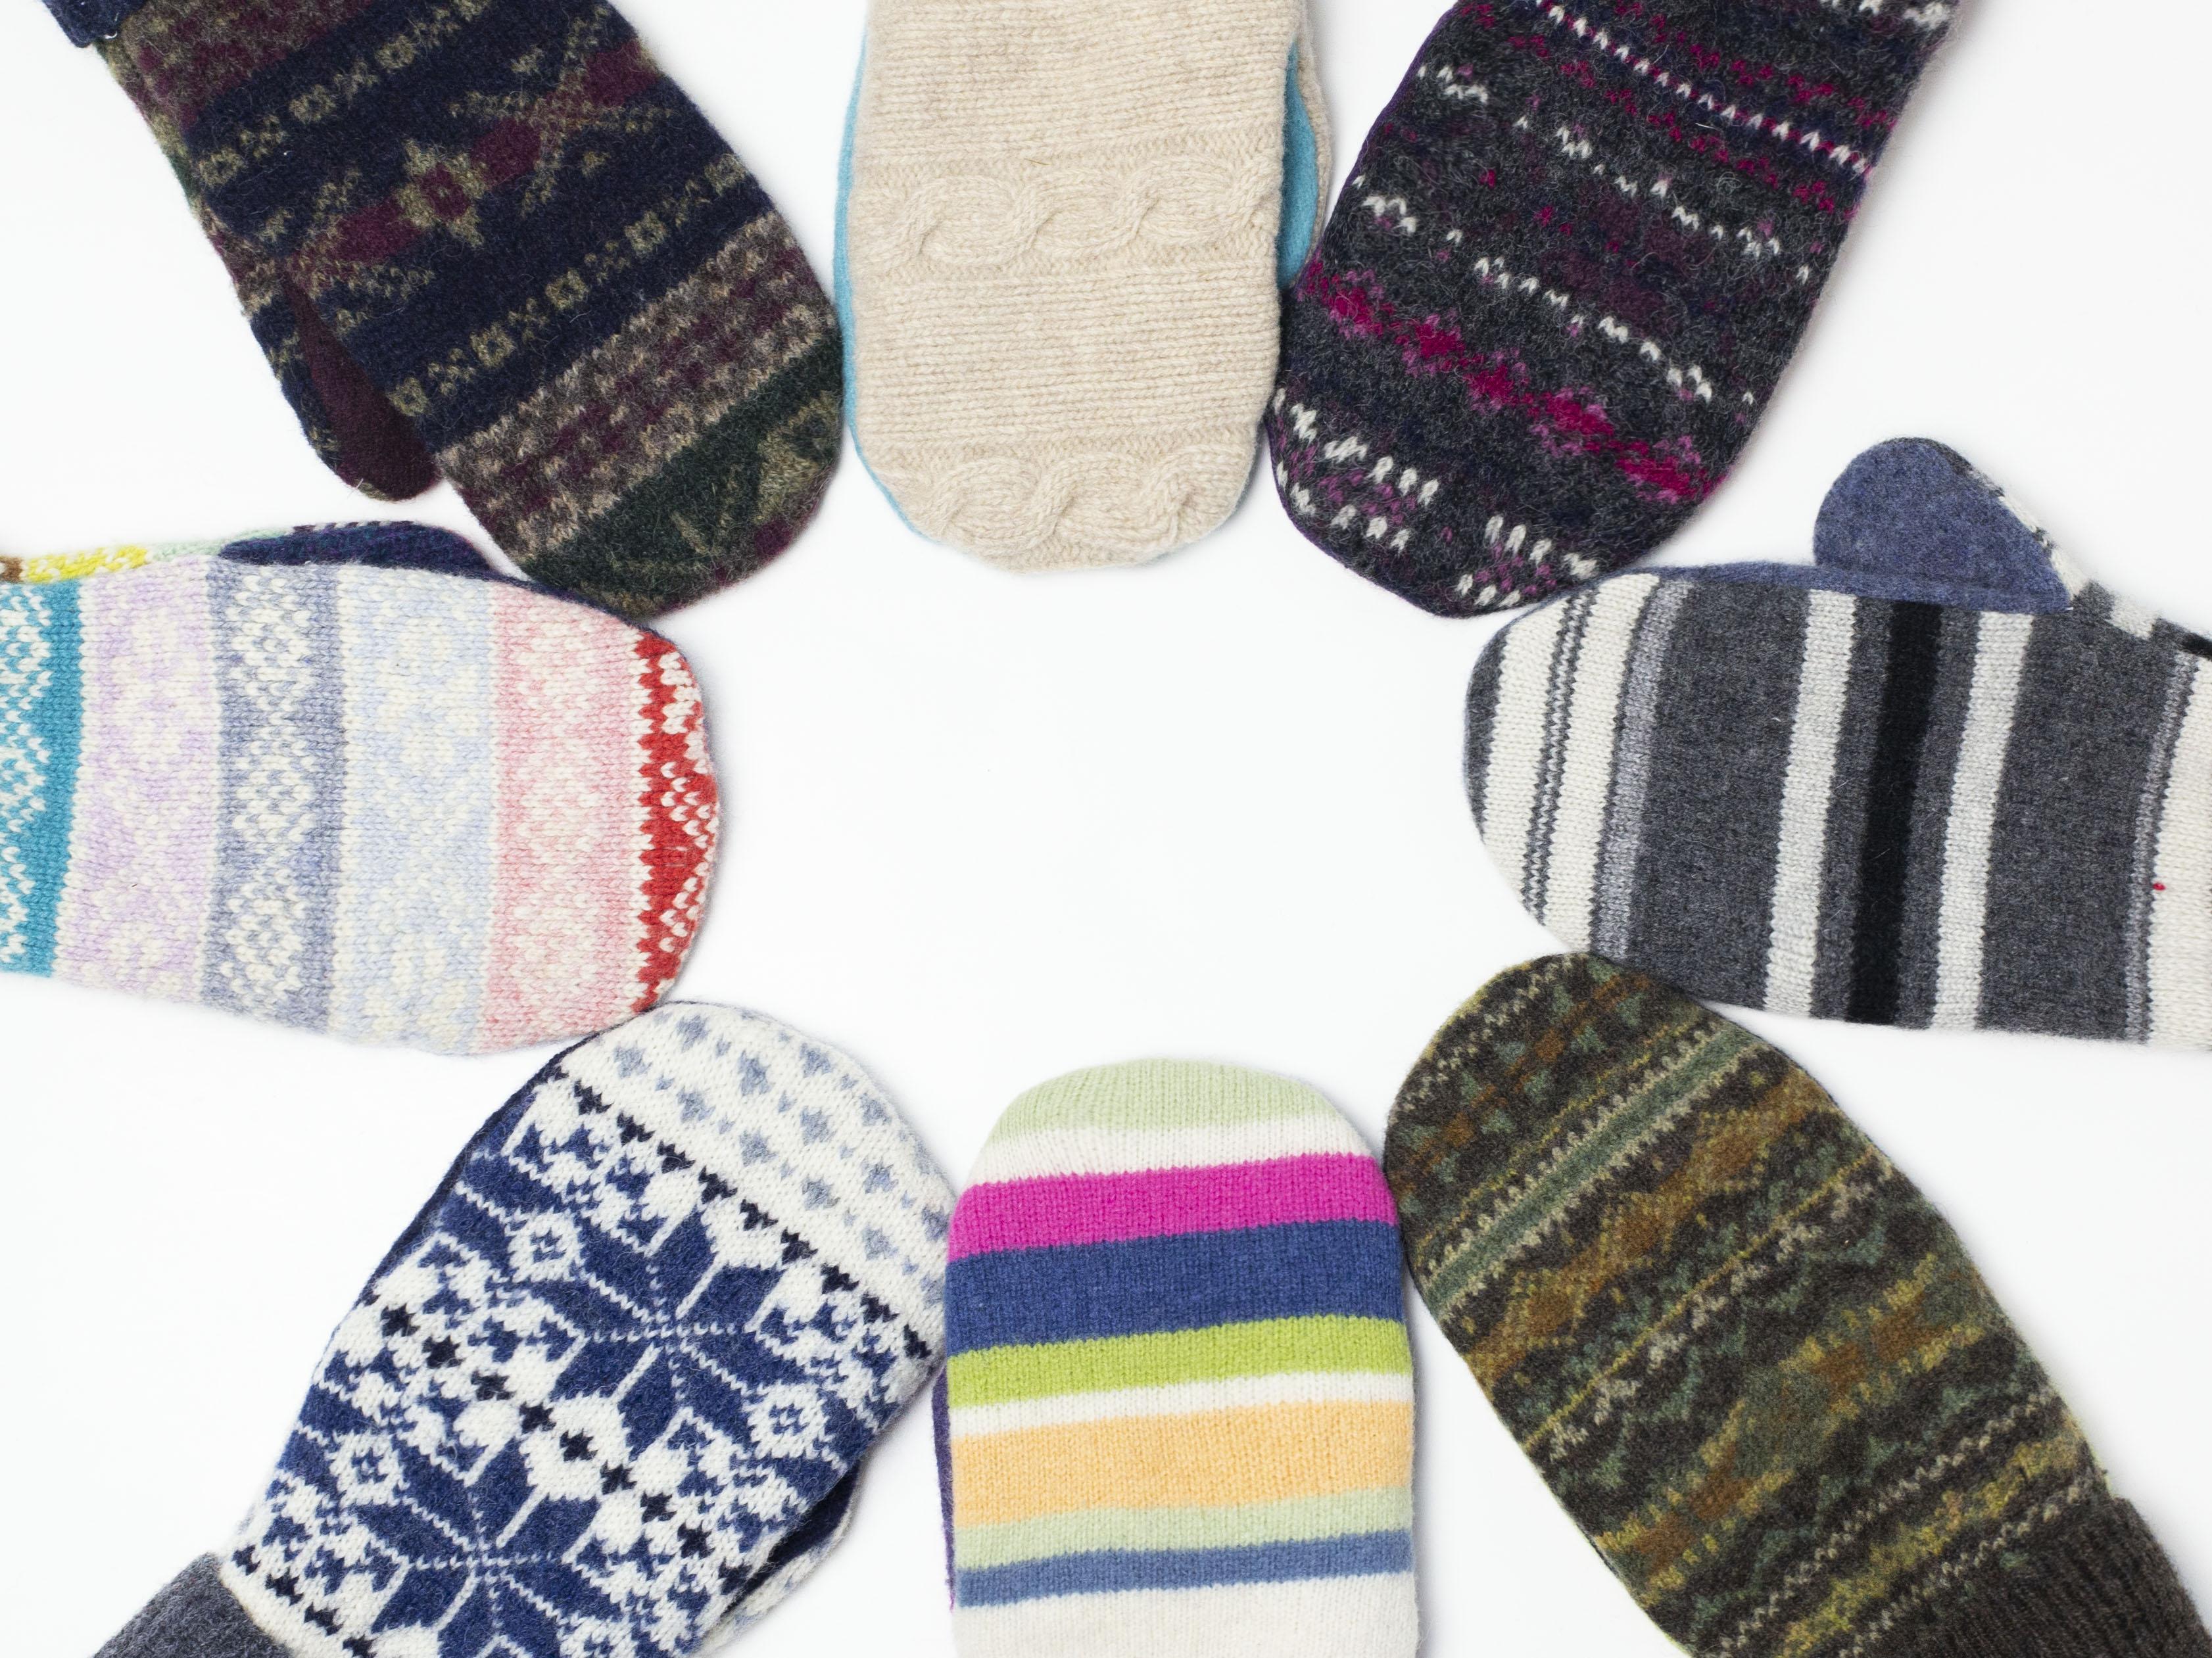
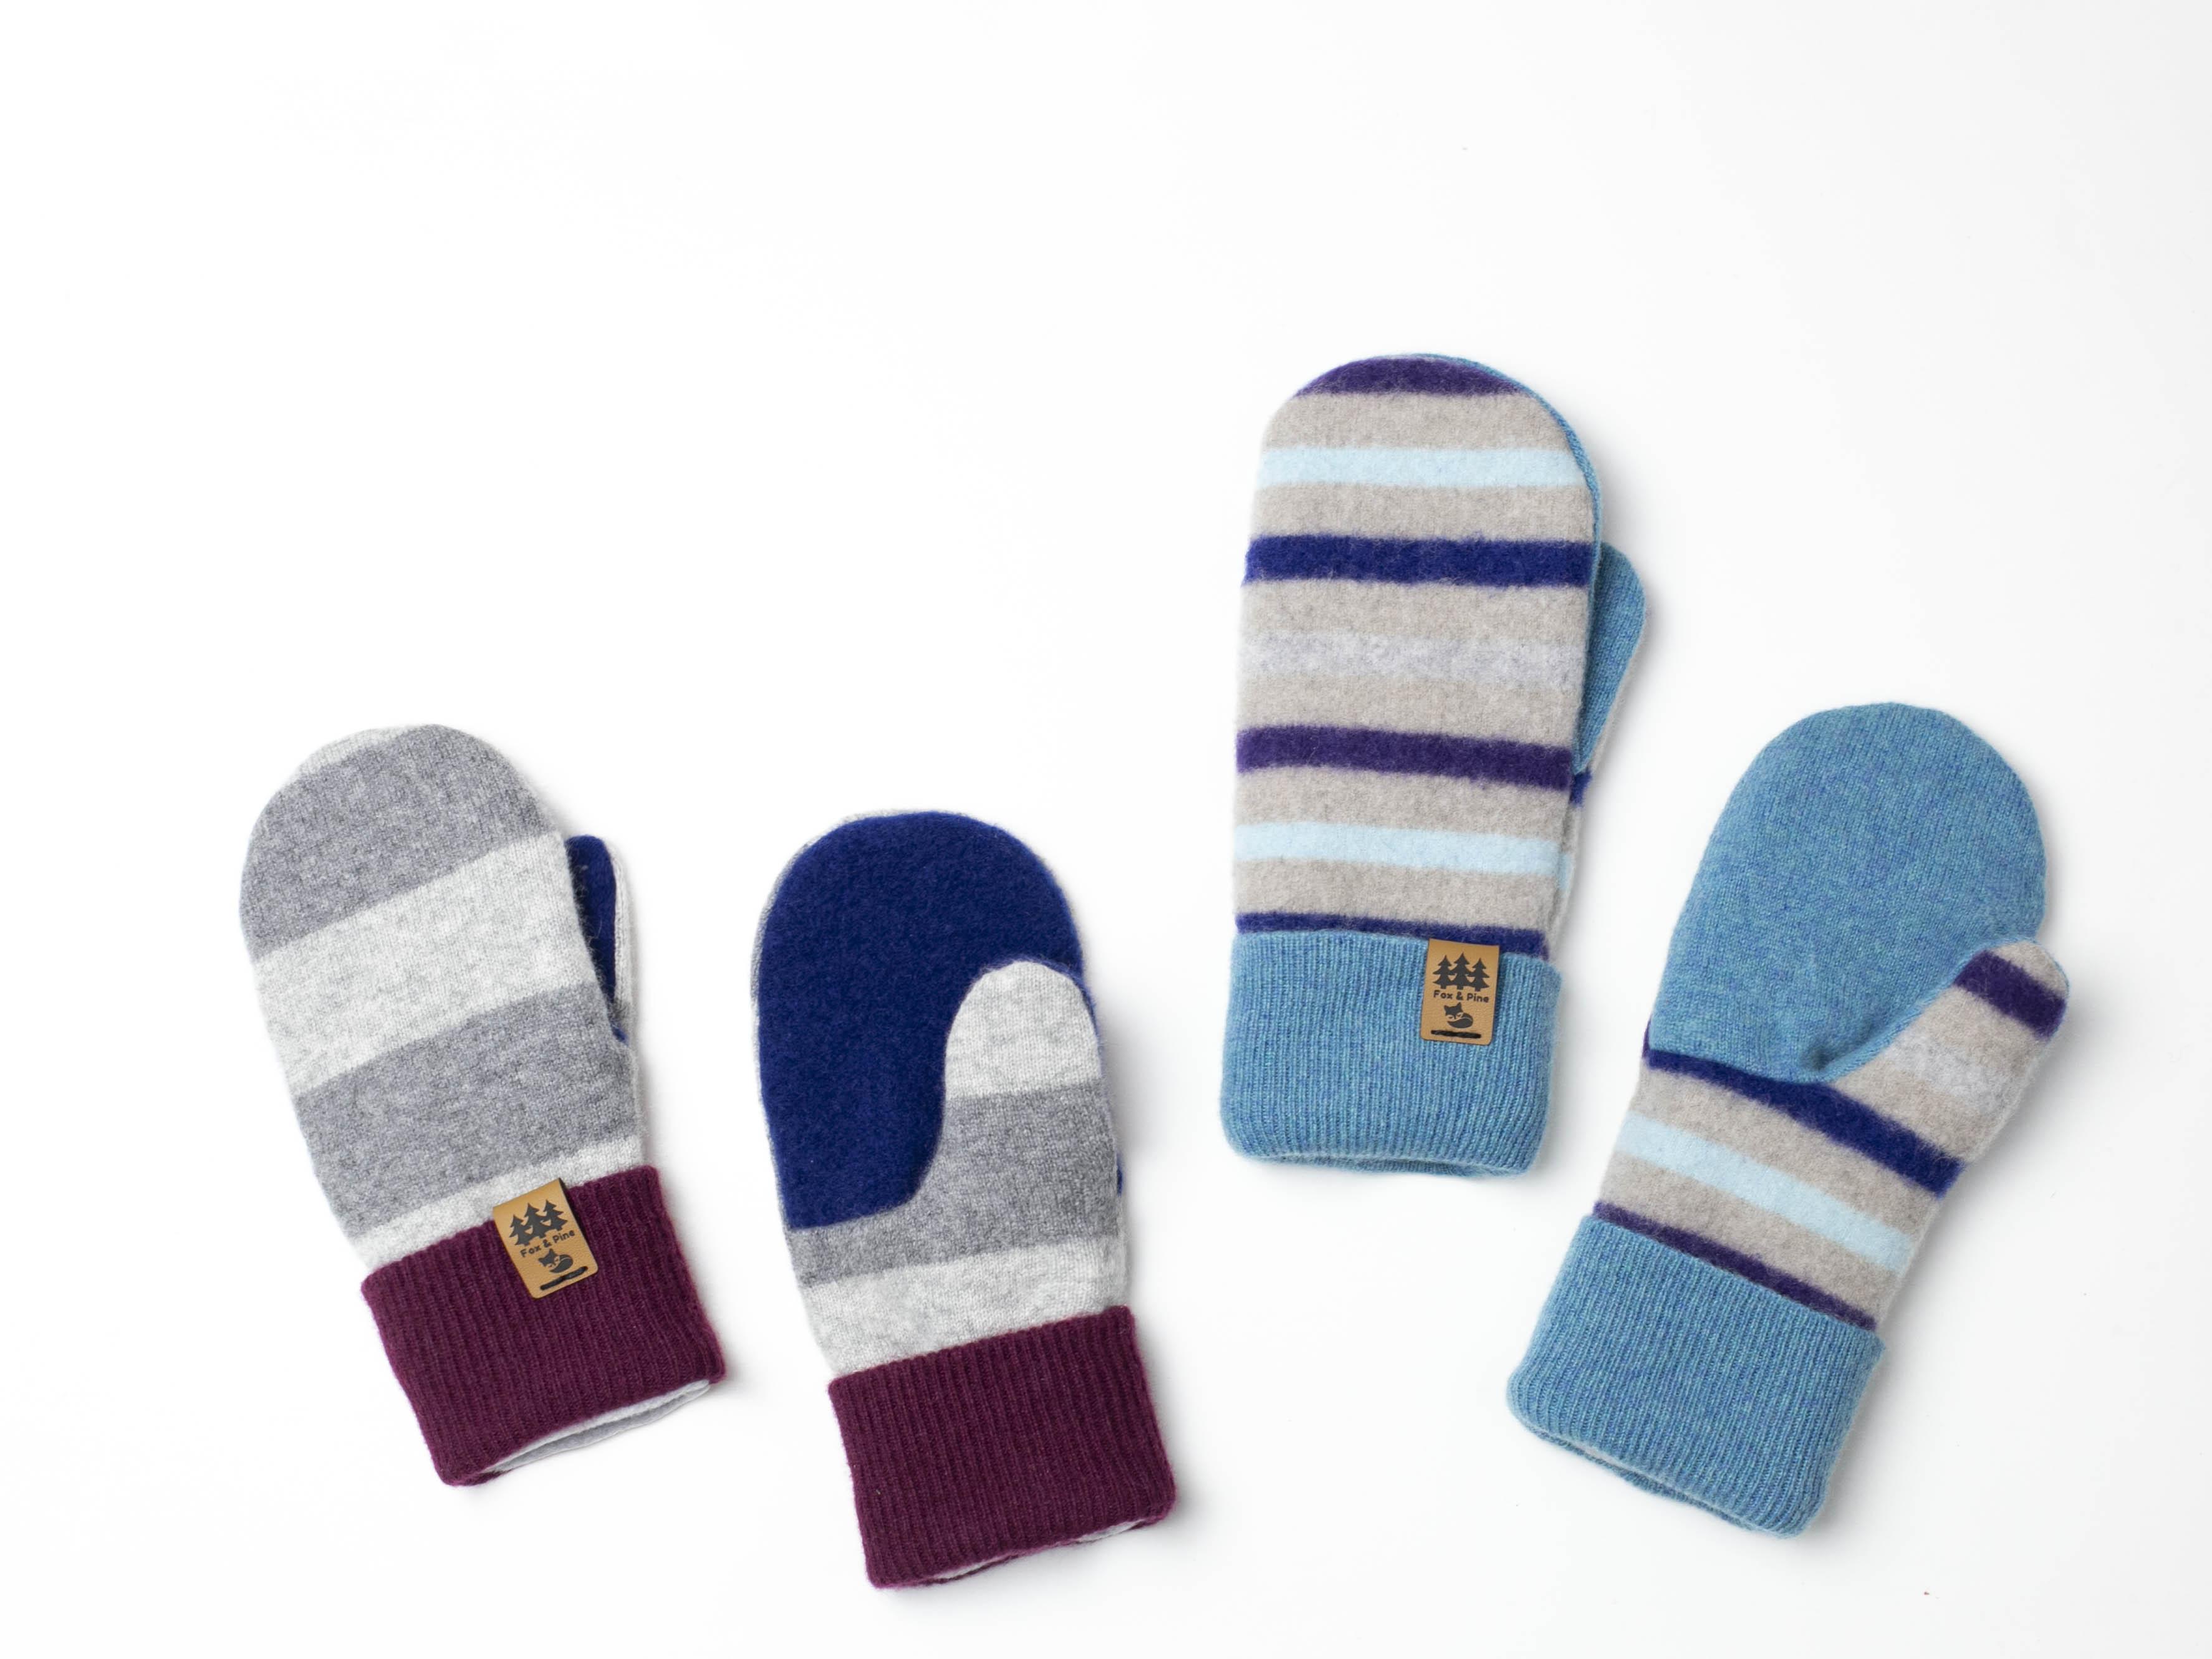
There are a variety of places where you can find sweaters to use for your mittens. The easiest place is your local thrift store. You will find wonderful fair isle, striped, floral and other one of a kind designs. Don’t forget to look in your own closet for sweaters you have been planning to donate. I have had several requests to make mittens using sweaters from a loved one to pass on to other members of the family. This is such a special keepsake.
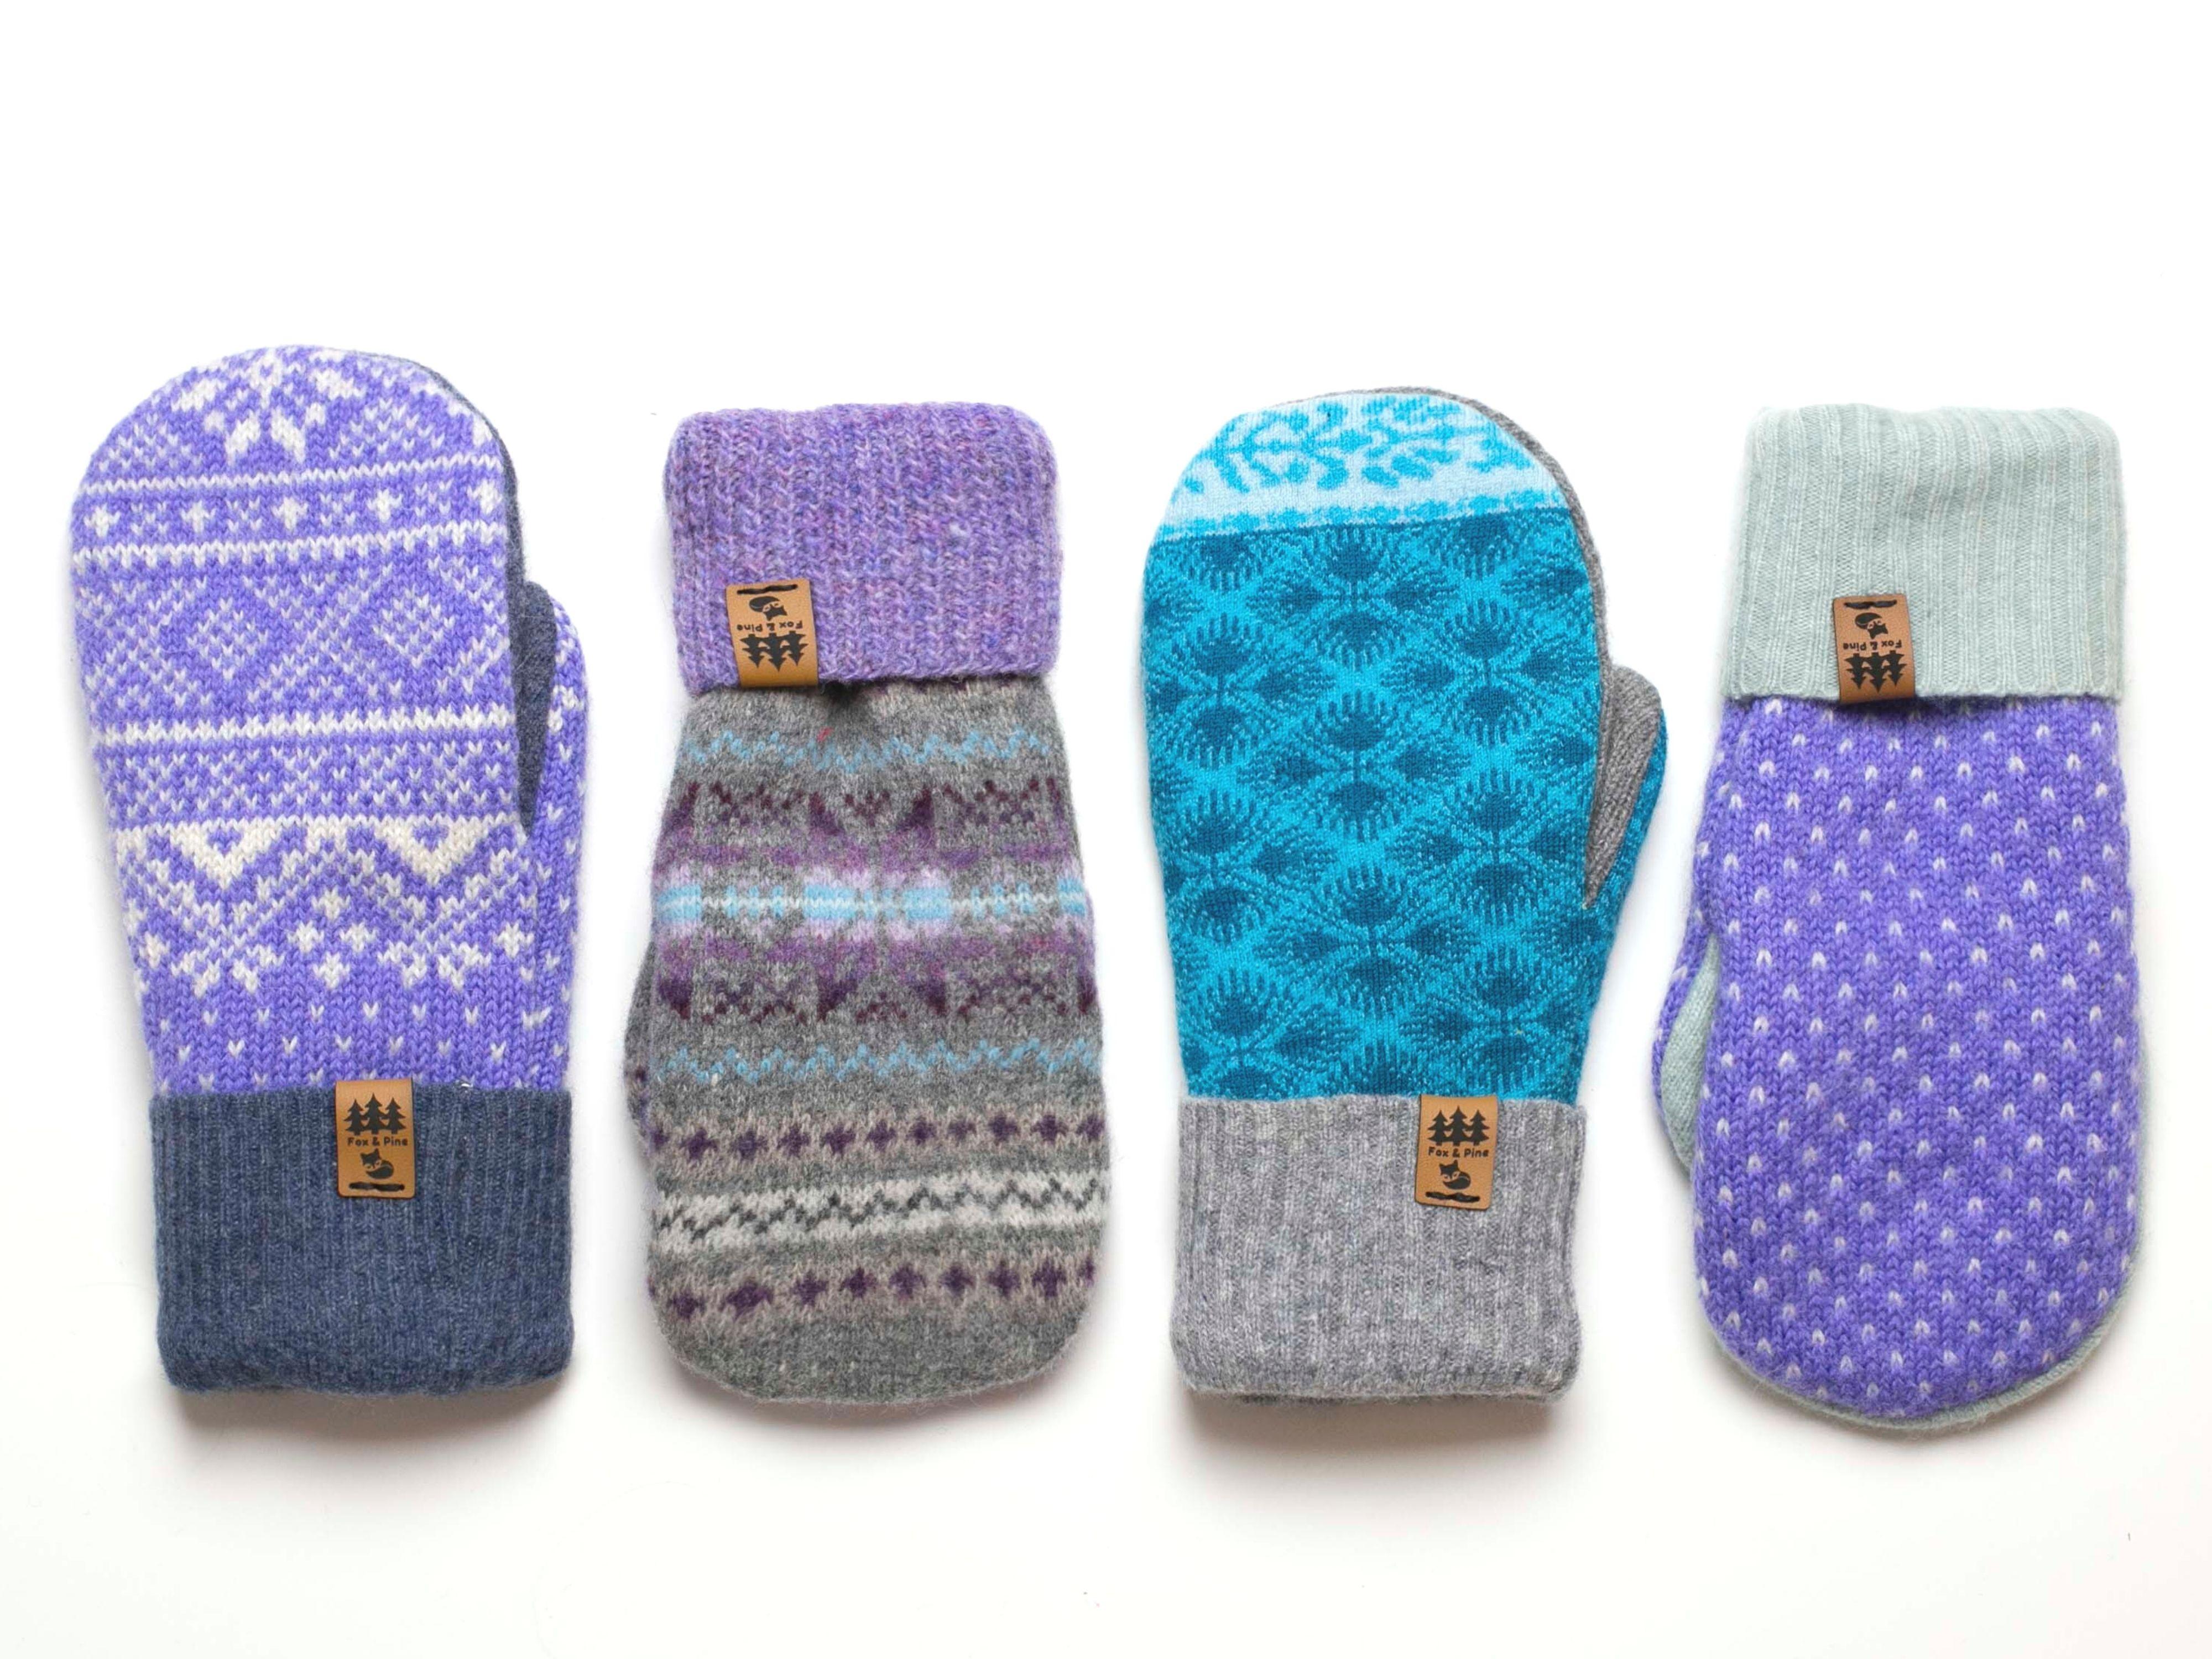
I like to use a combination of 2-3 sweaters, mixing solids and designs in colors that coordinate. Stripes, solids, floral prints, cable knit and fair isle designs are all perfect for this project. 
Types of fabric
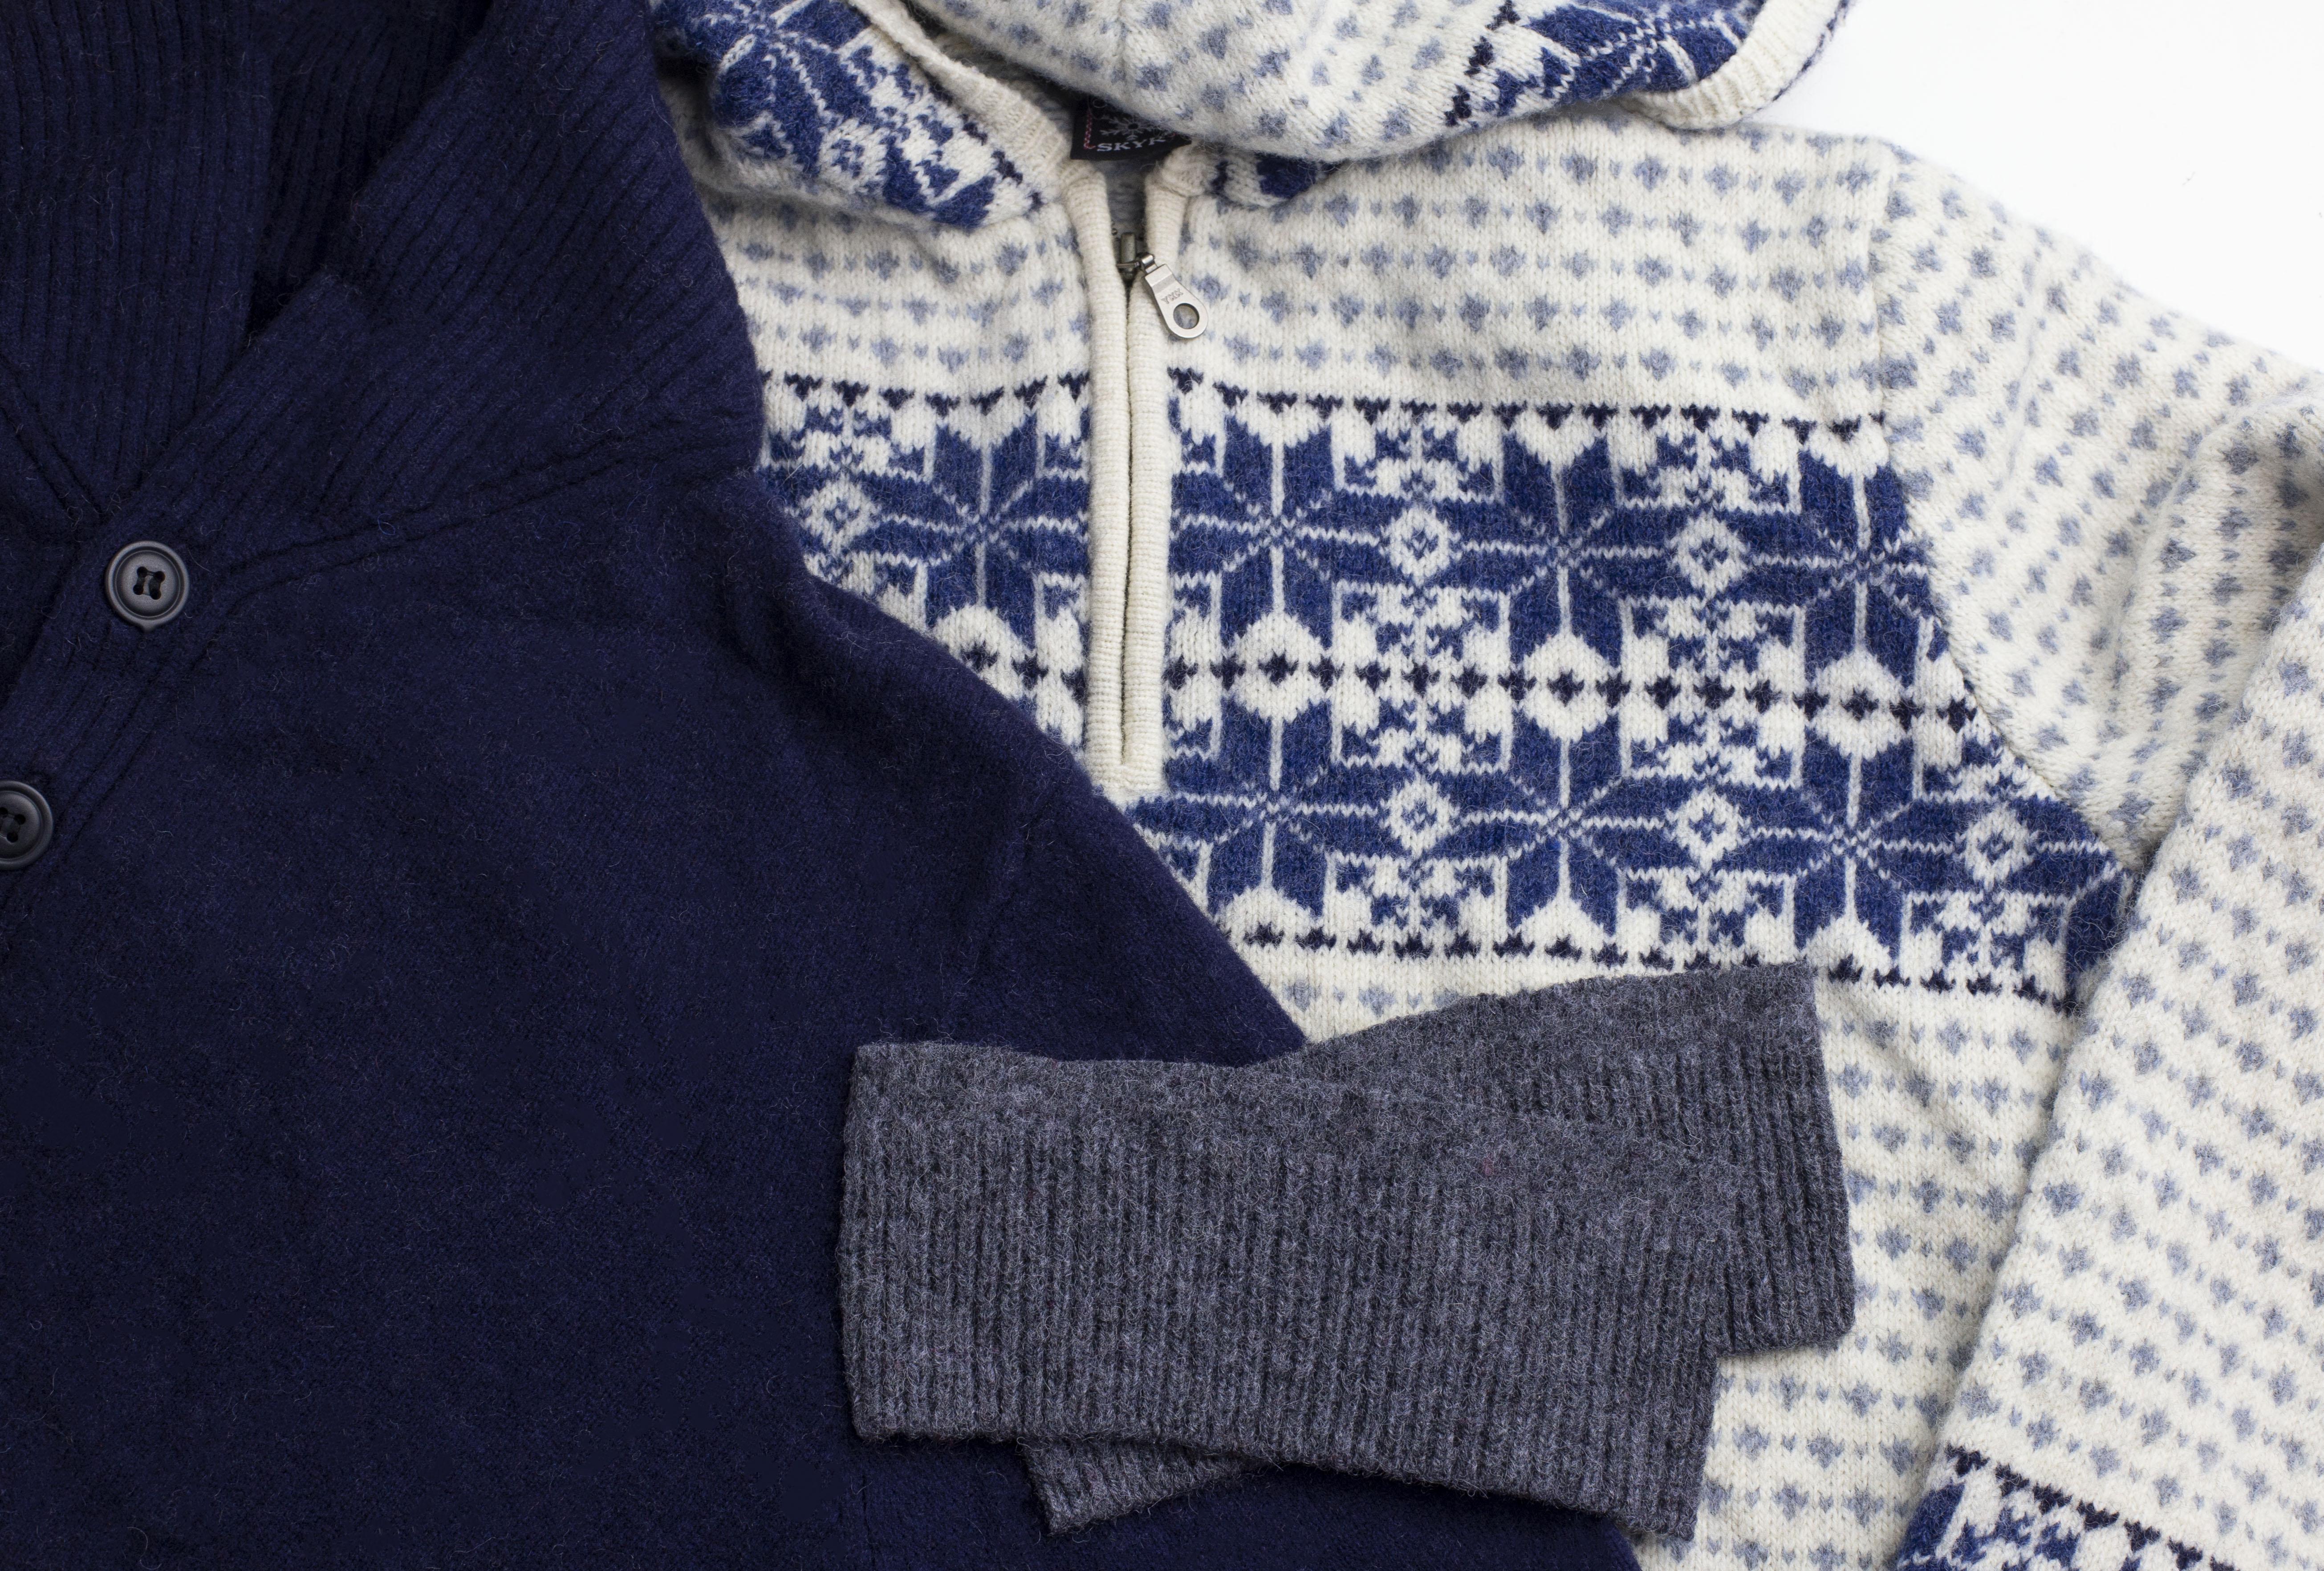
The most popular fabric is 80-100% wool sweaters. They are the warmest and thickest. Cashmere also makes very soft and cozy mittens. The fabric does not shrink/felt up as thick as wool does, which makes it slightly thinner than the 100% wool fabric. Both wool and cashmere are wonderful options. The mittens below are made of 100% cashmere.

From time to time I have found sweaters that are not wool, but the prints are hard to pass up. These turned out great despite not shrinking/felting when washed.
You will also need fleece to line the mittens. This can be purchased at your local fabric store or you can use a repurposed fleece blanket you no longer use.
Preparing your sweaters
Before cutting your sweaters wash and dry them in your washing machine (hot water) and dryer. This will shrink the wool to make your mittens thicker and warmer. If you are using cashmere wash and dry them as well. They won’t shrink up as much but it does make them fluffy and soft. Do not wash the sweaters with other clothing as it will leave a lot of lint on the other clothing.
Notes and tips
~ Use a ¼” seam allowance.
~ Always back stitch when starting and finishing each seam.
~ These mittens are Women’s (or Men’s) one size fits most. Of the hundreds of pairs of mittens I have sold, only one buyer said they were too big and one said they were too small. If you are concerned about the fit you can always increase or decrease the seam allowance slightly.
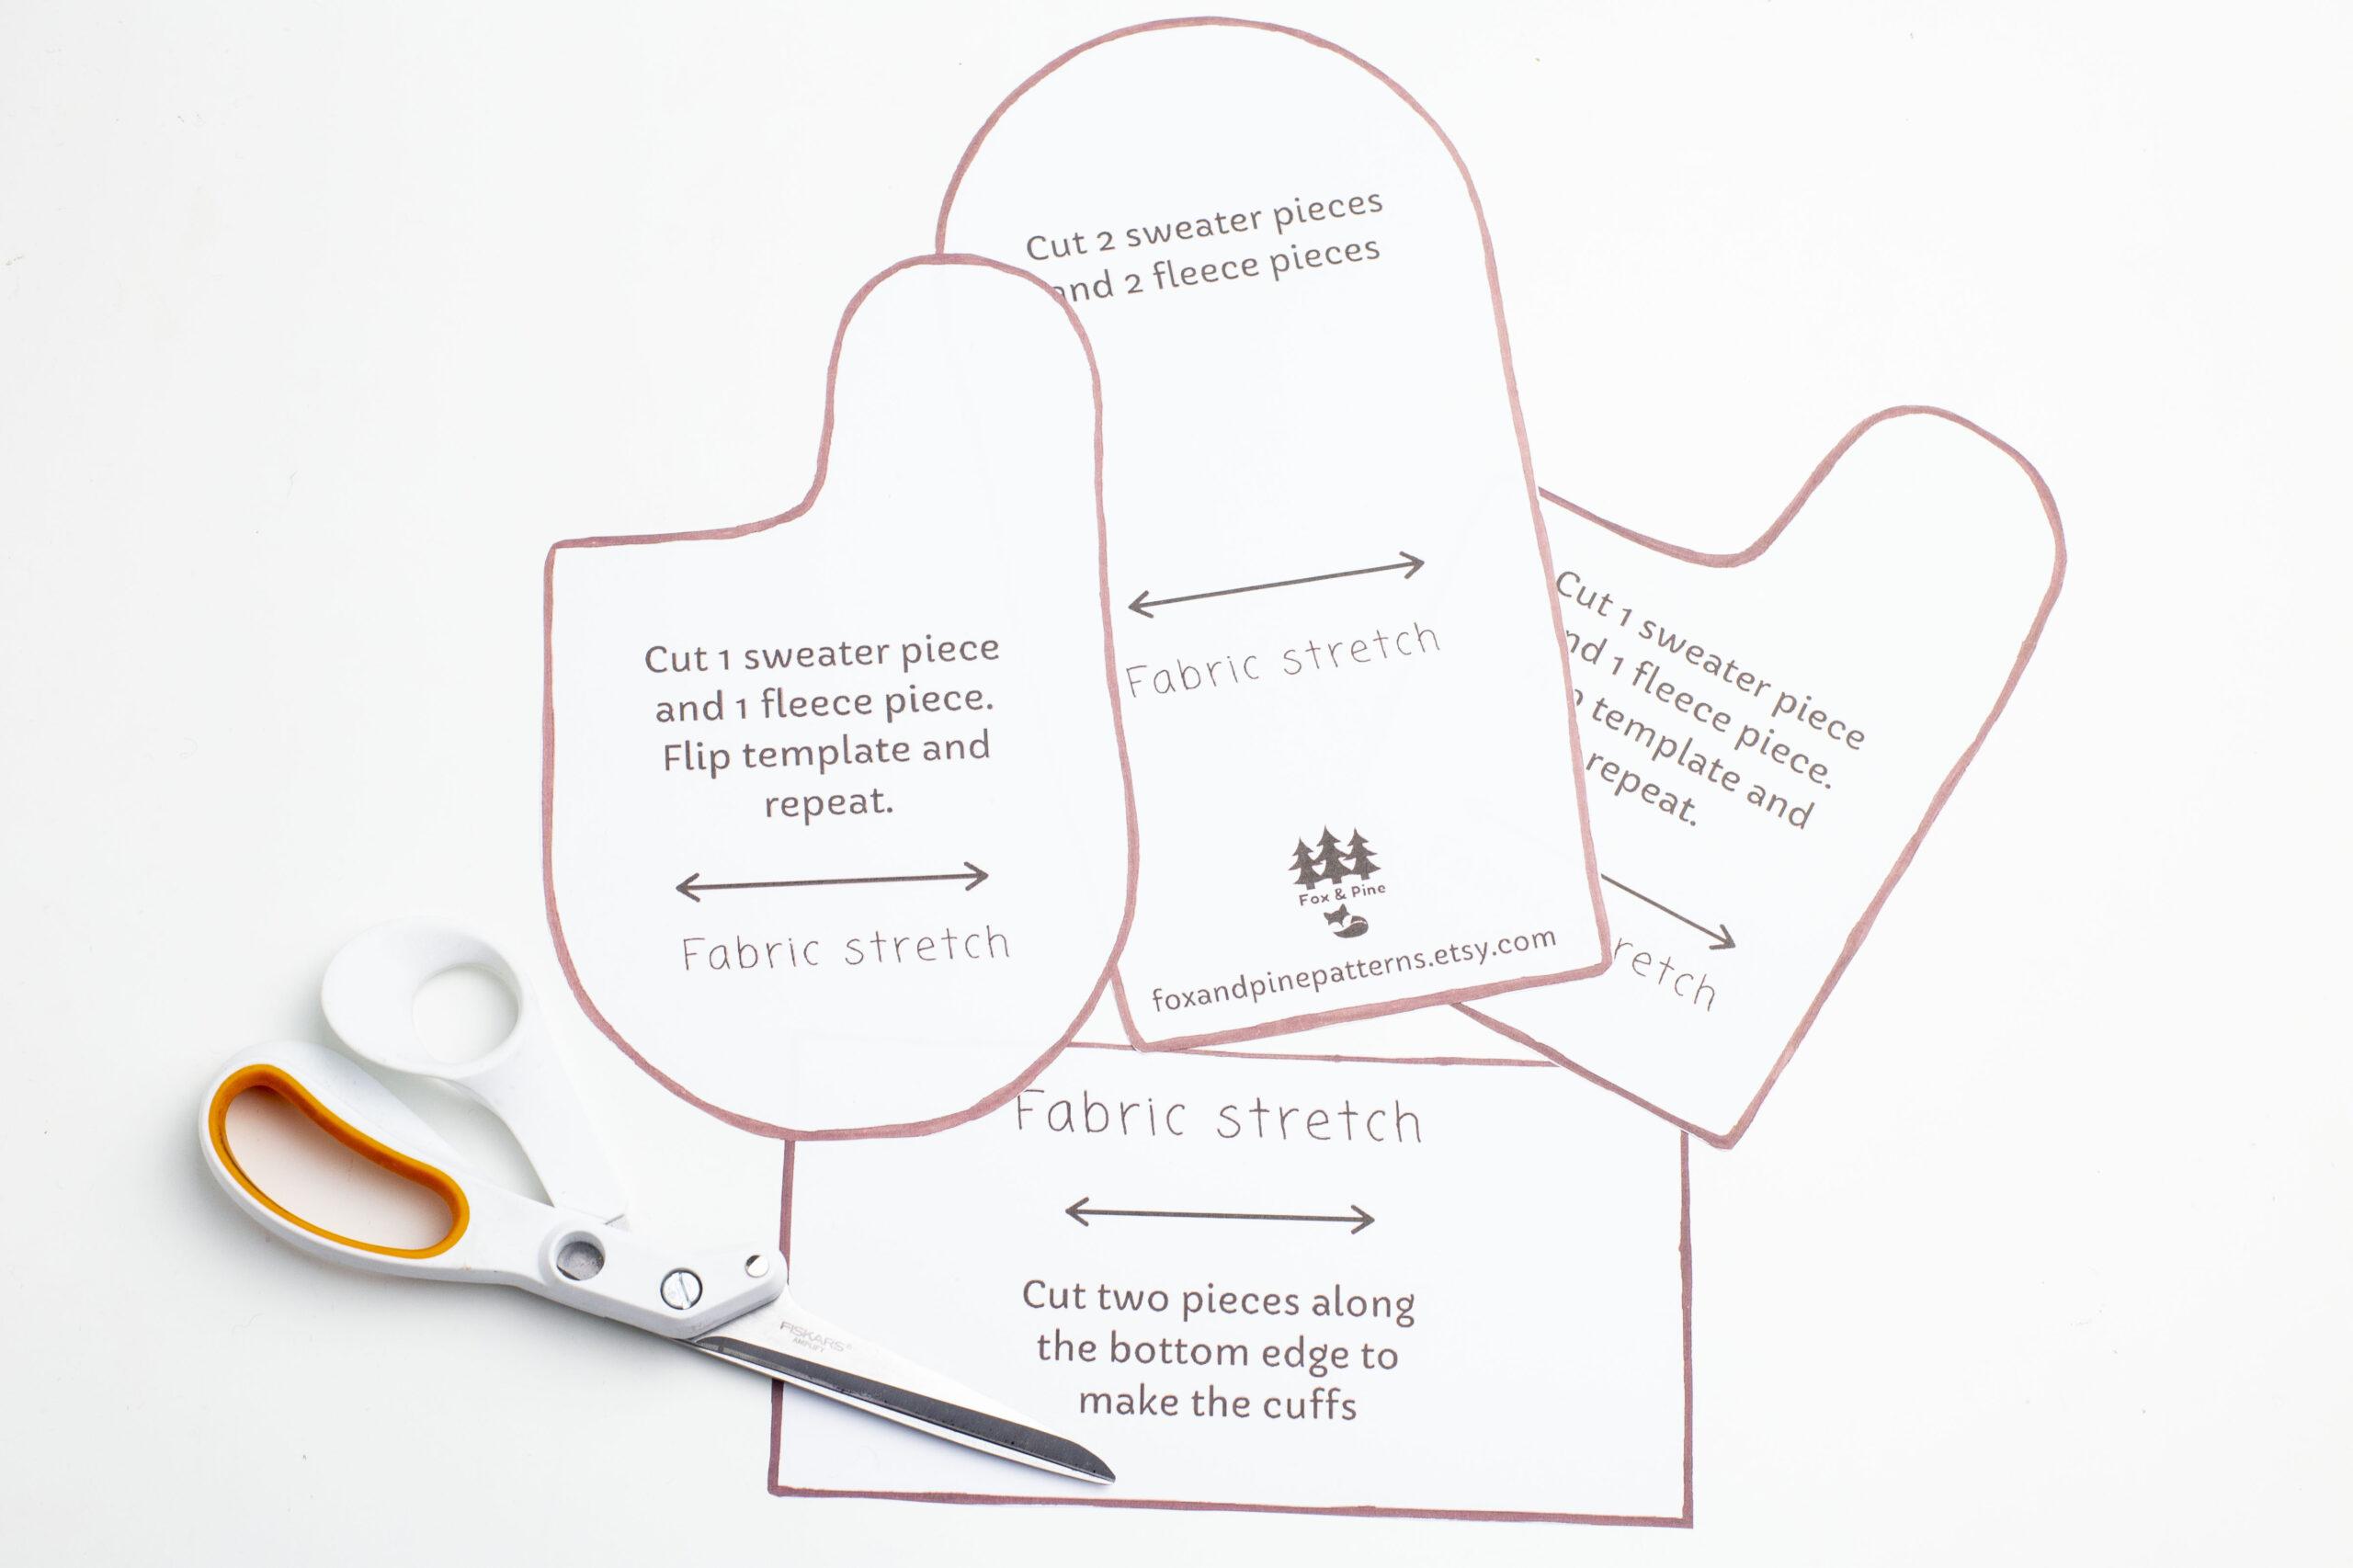
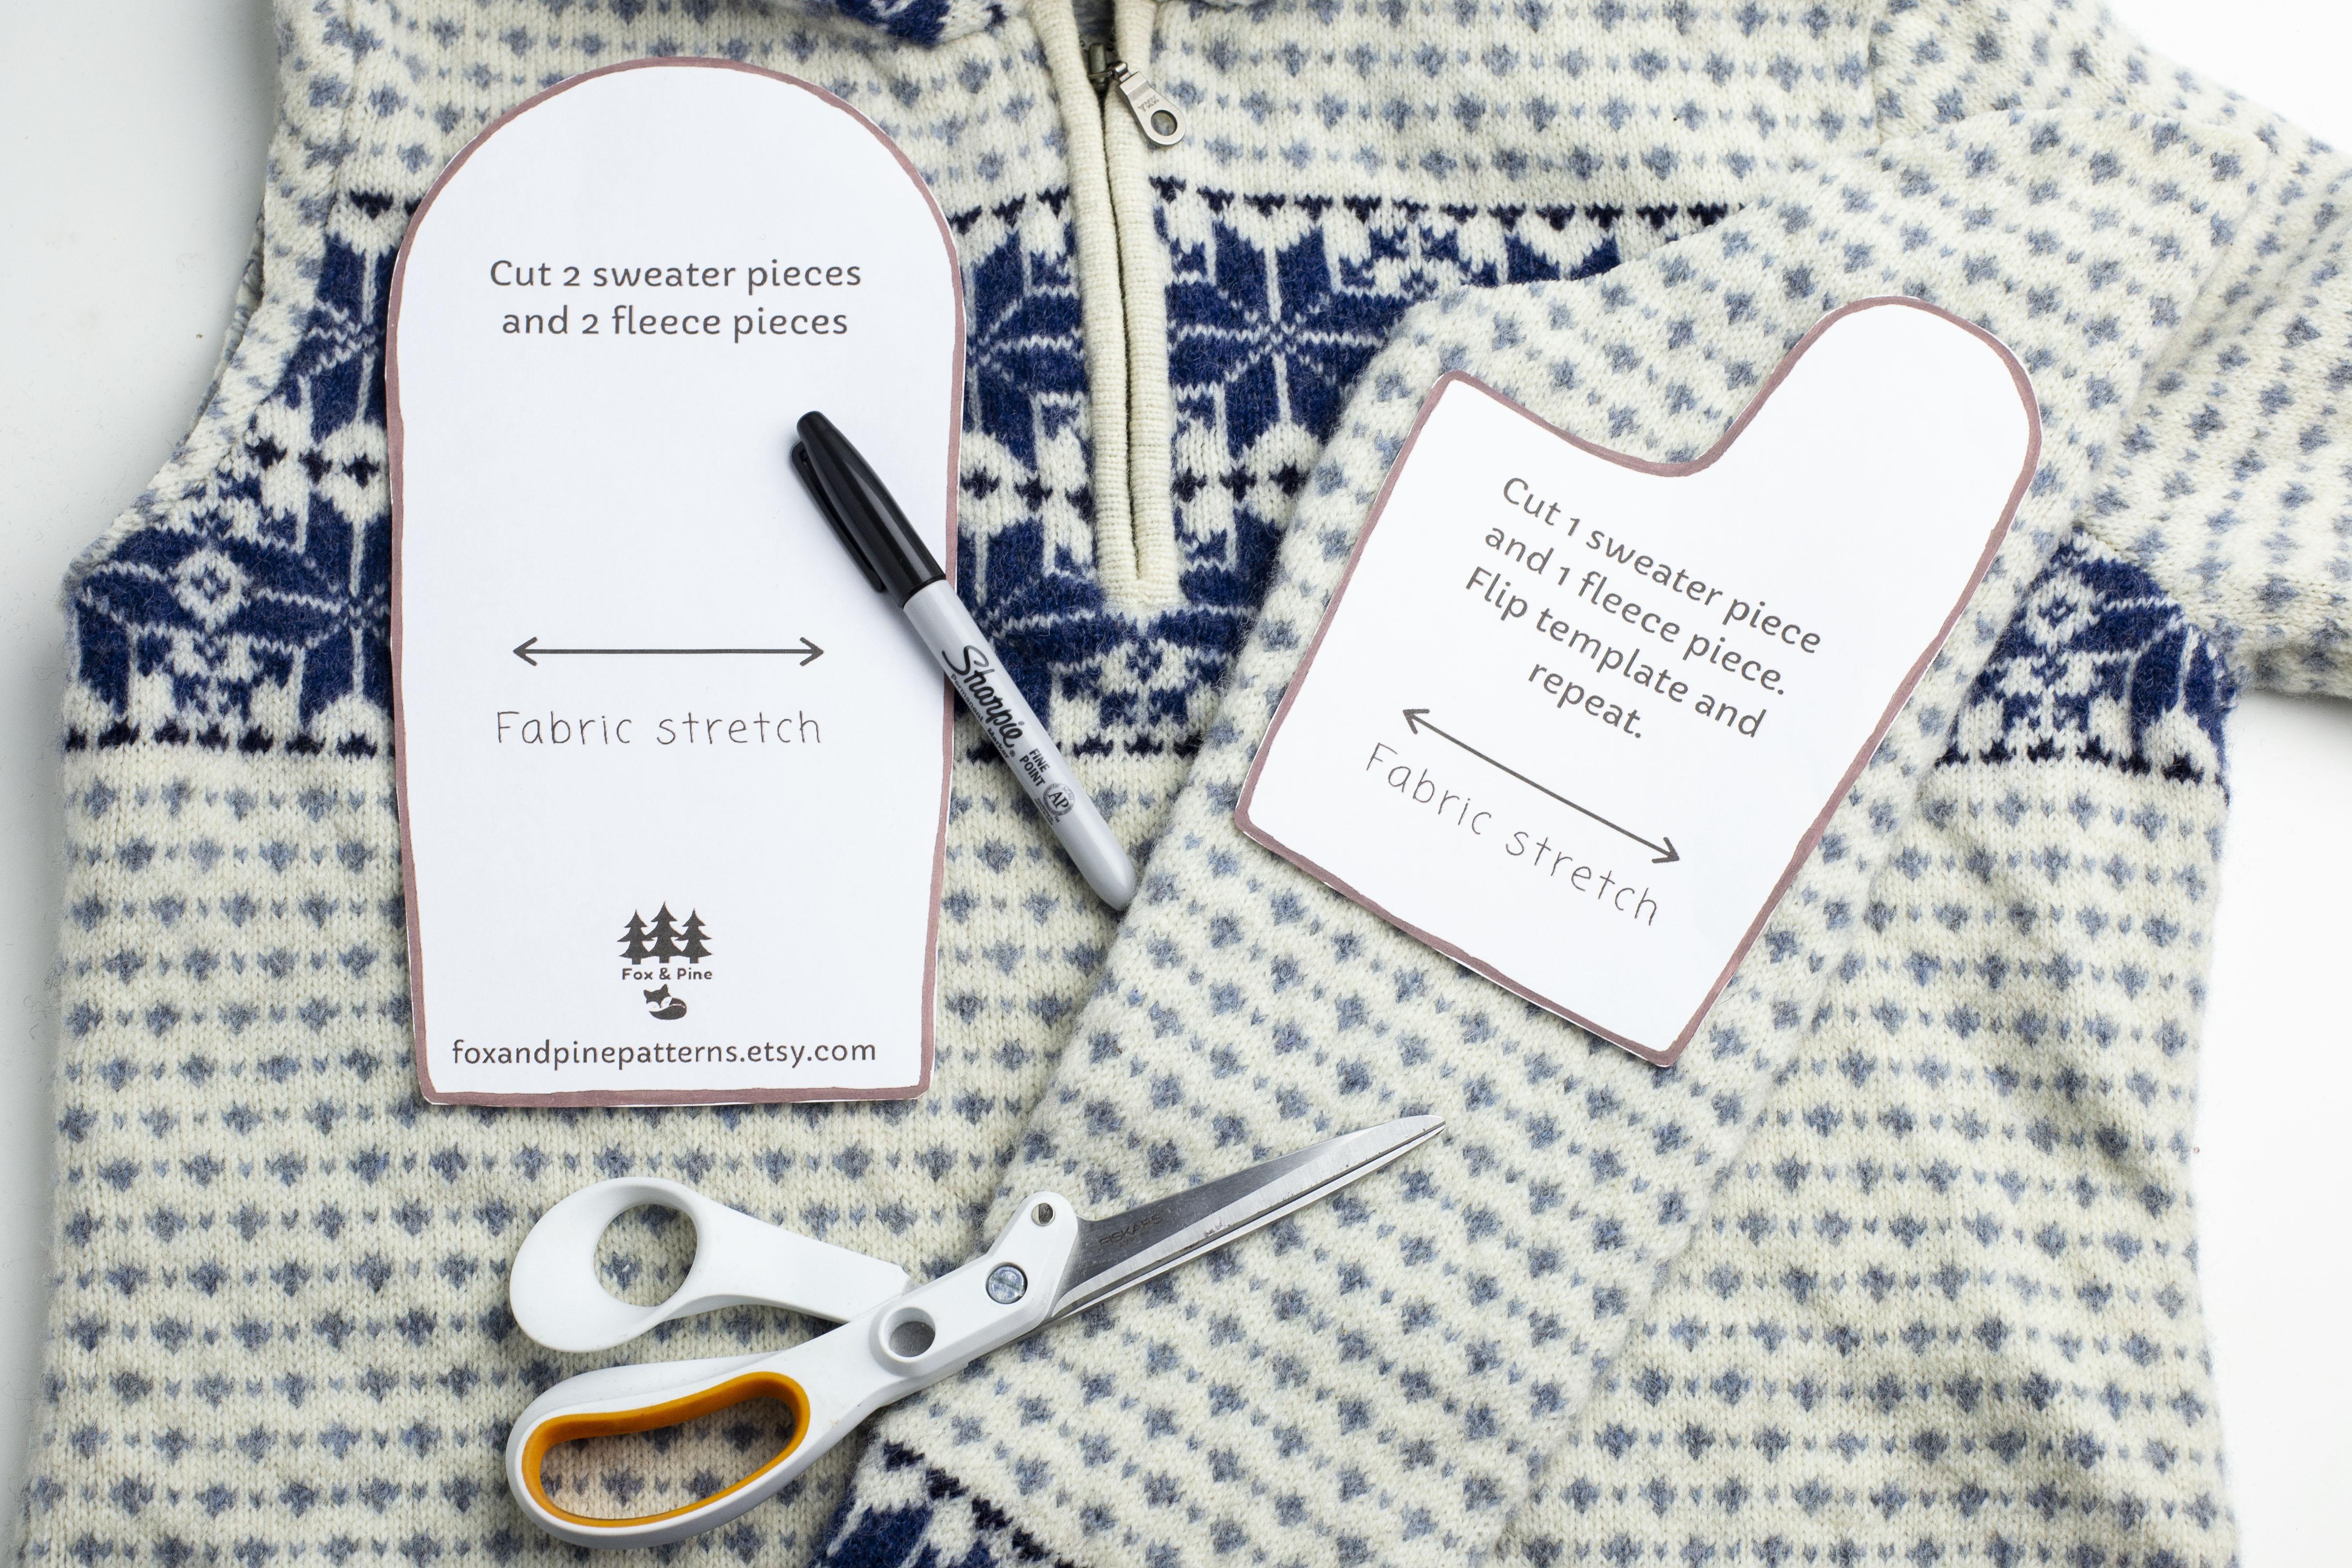
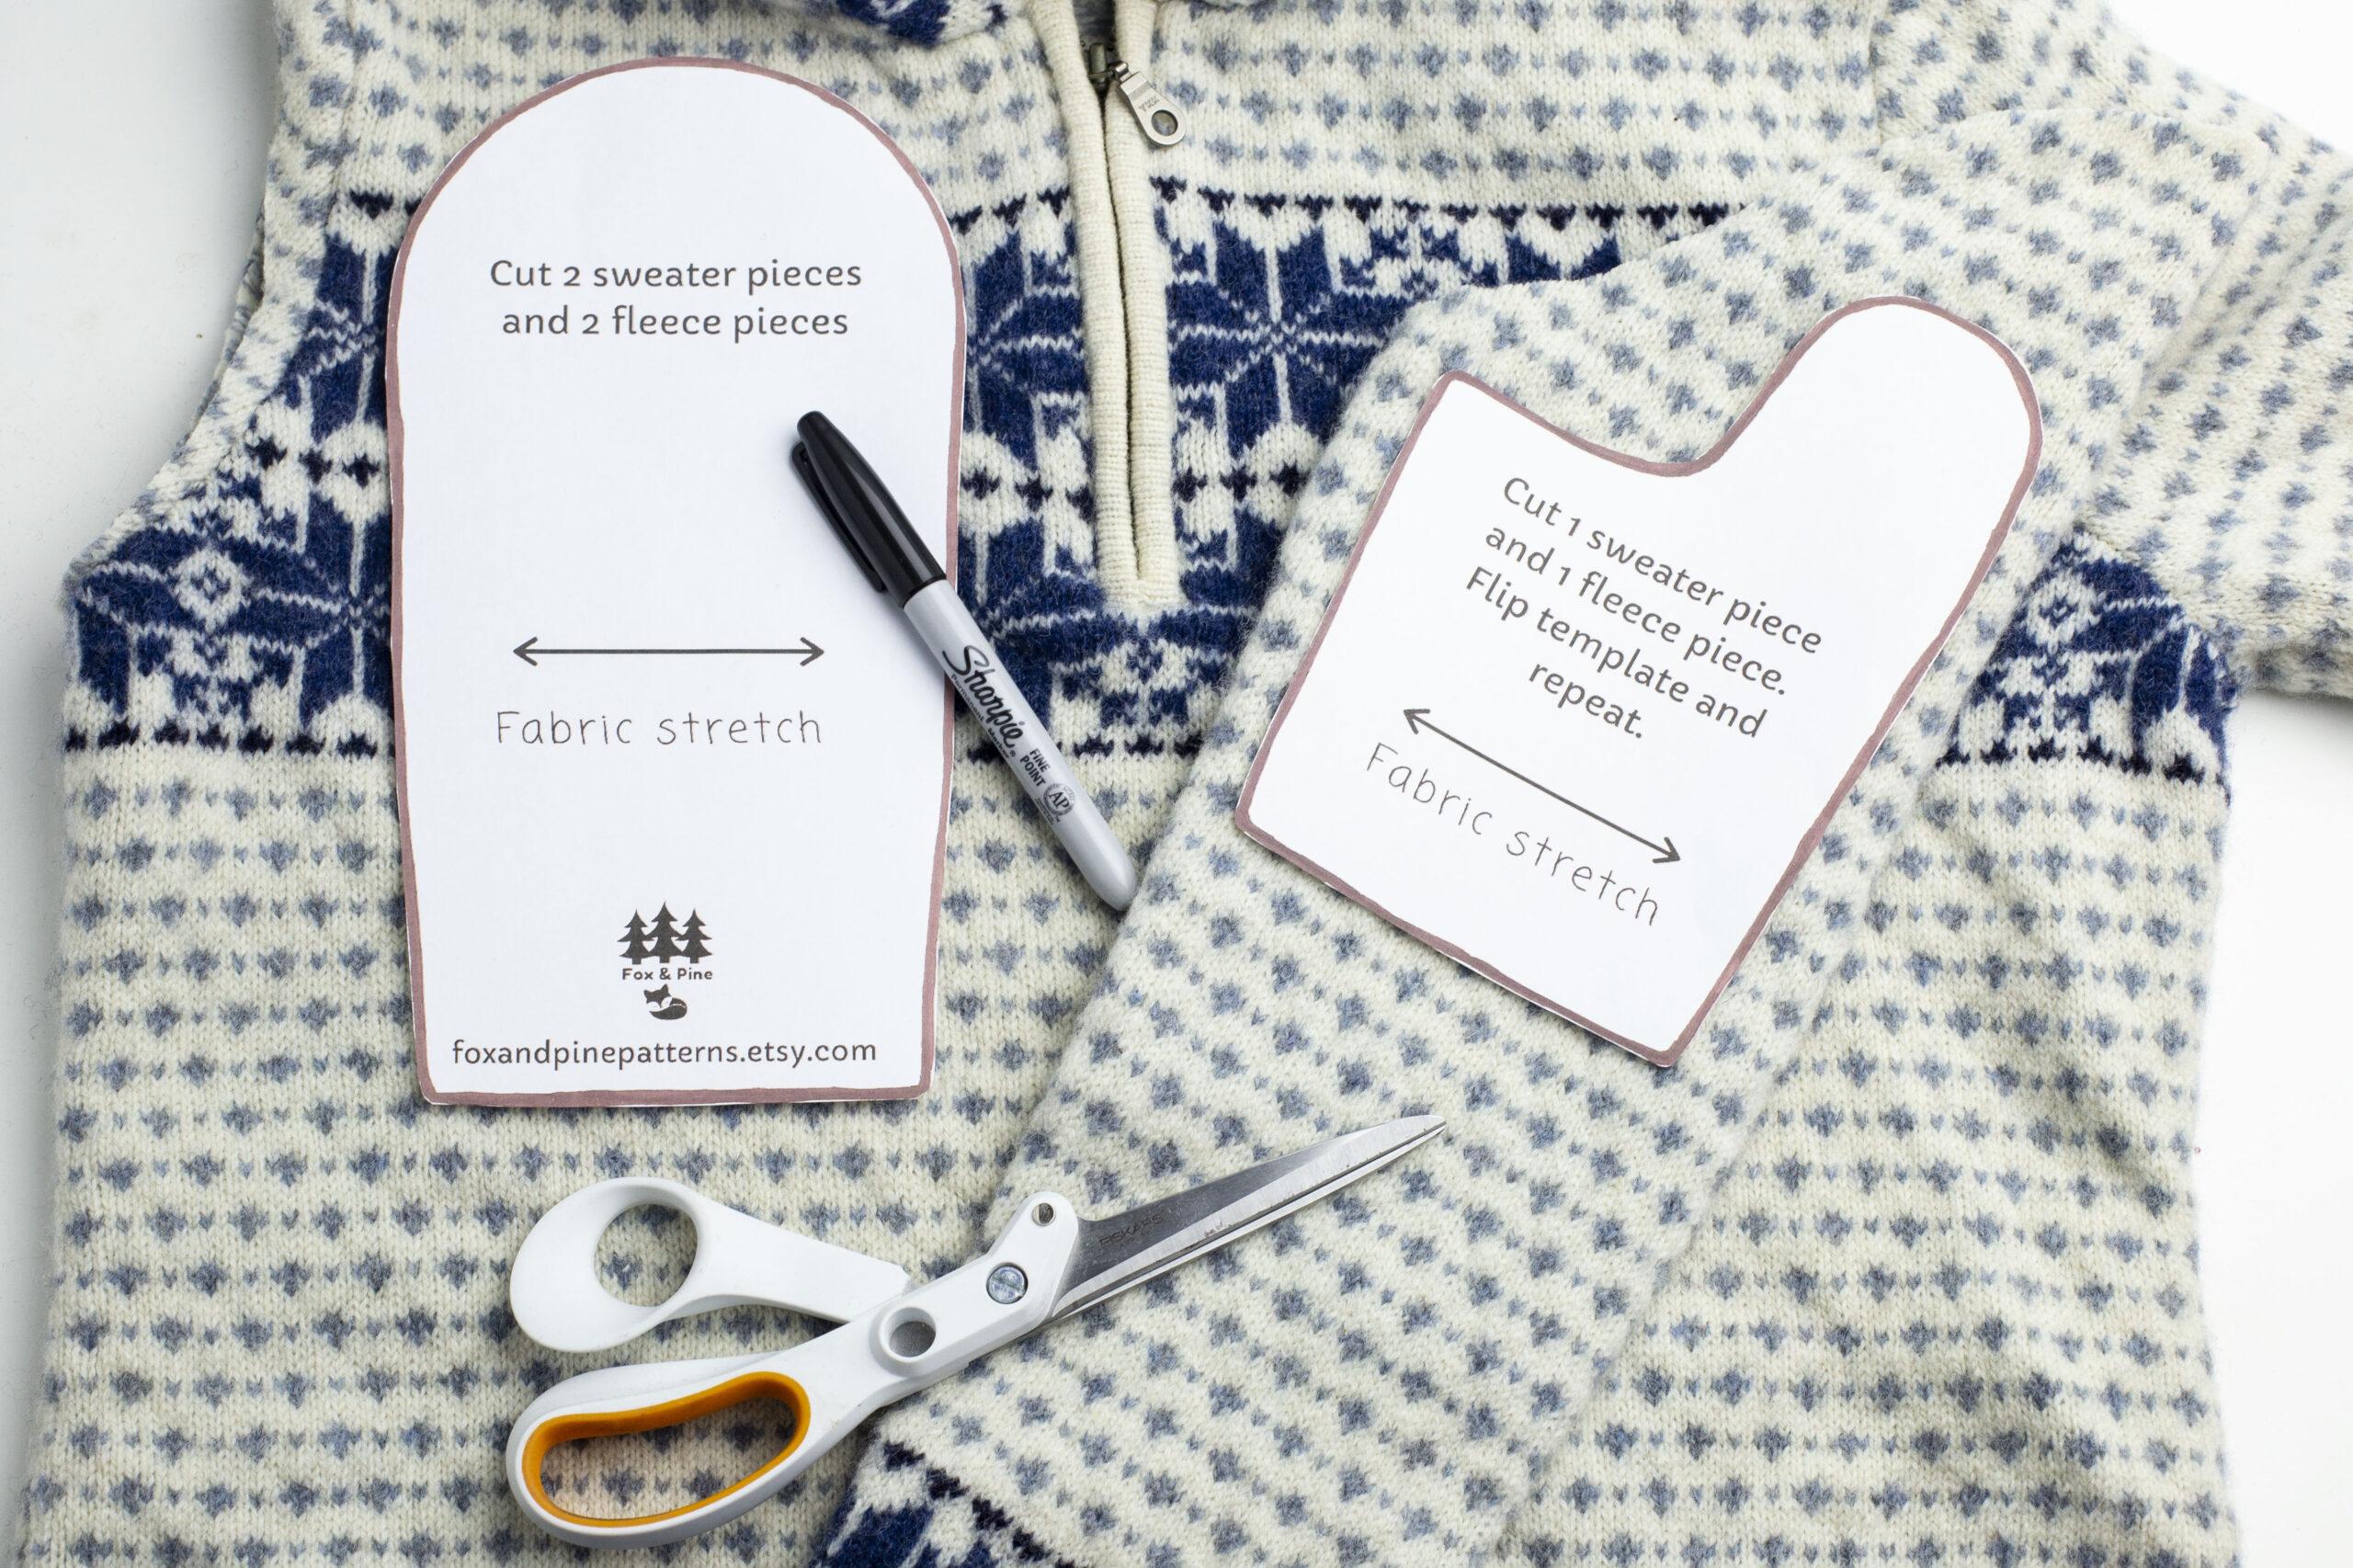
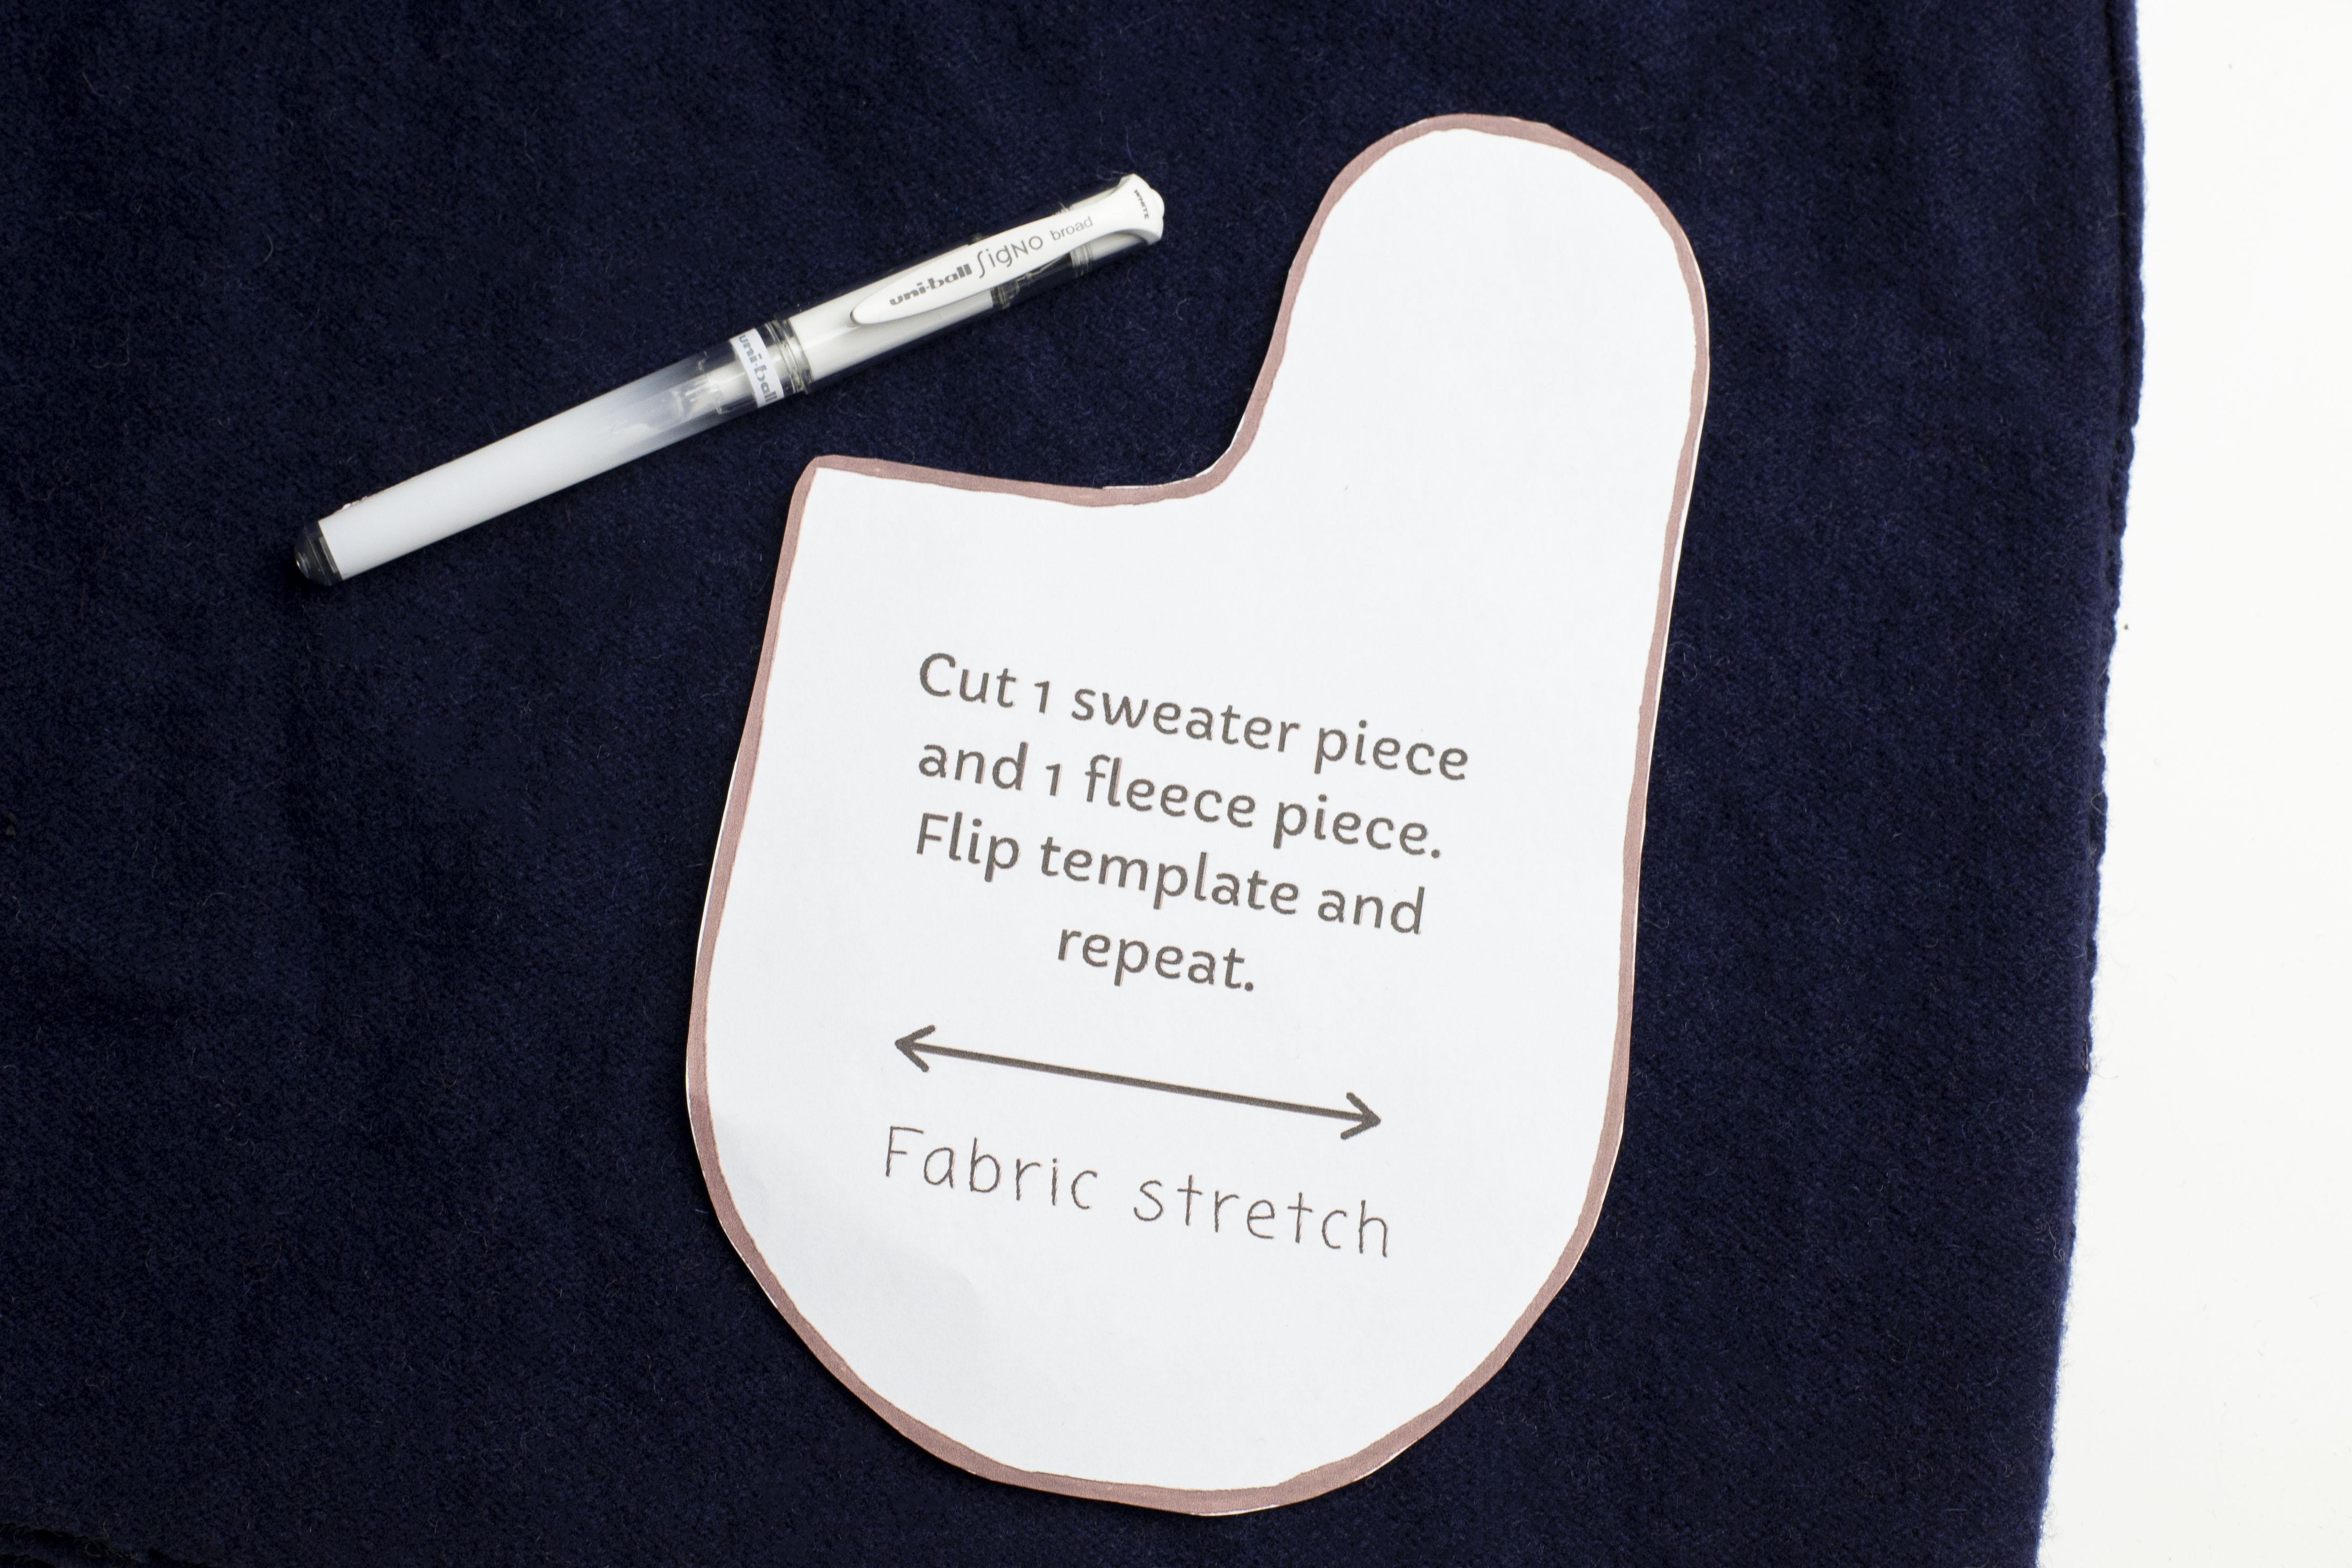
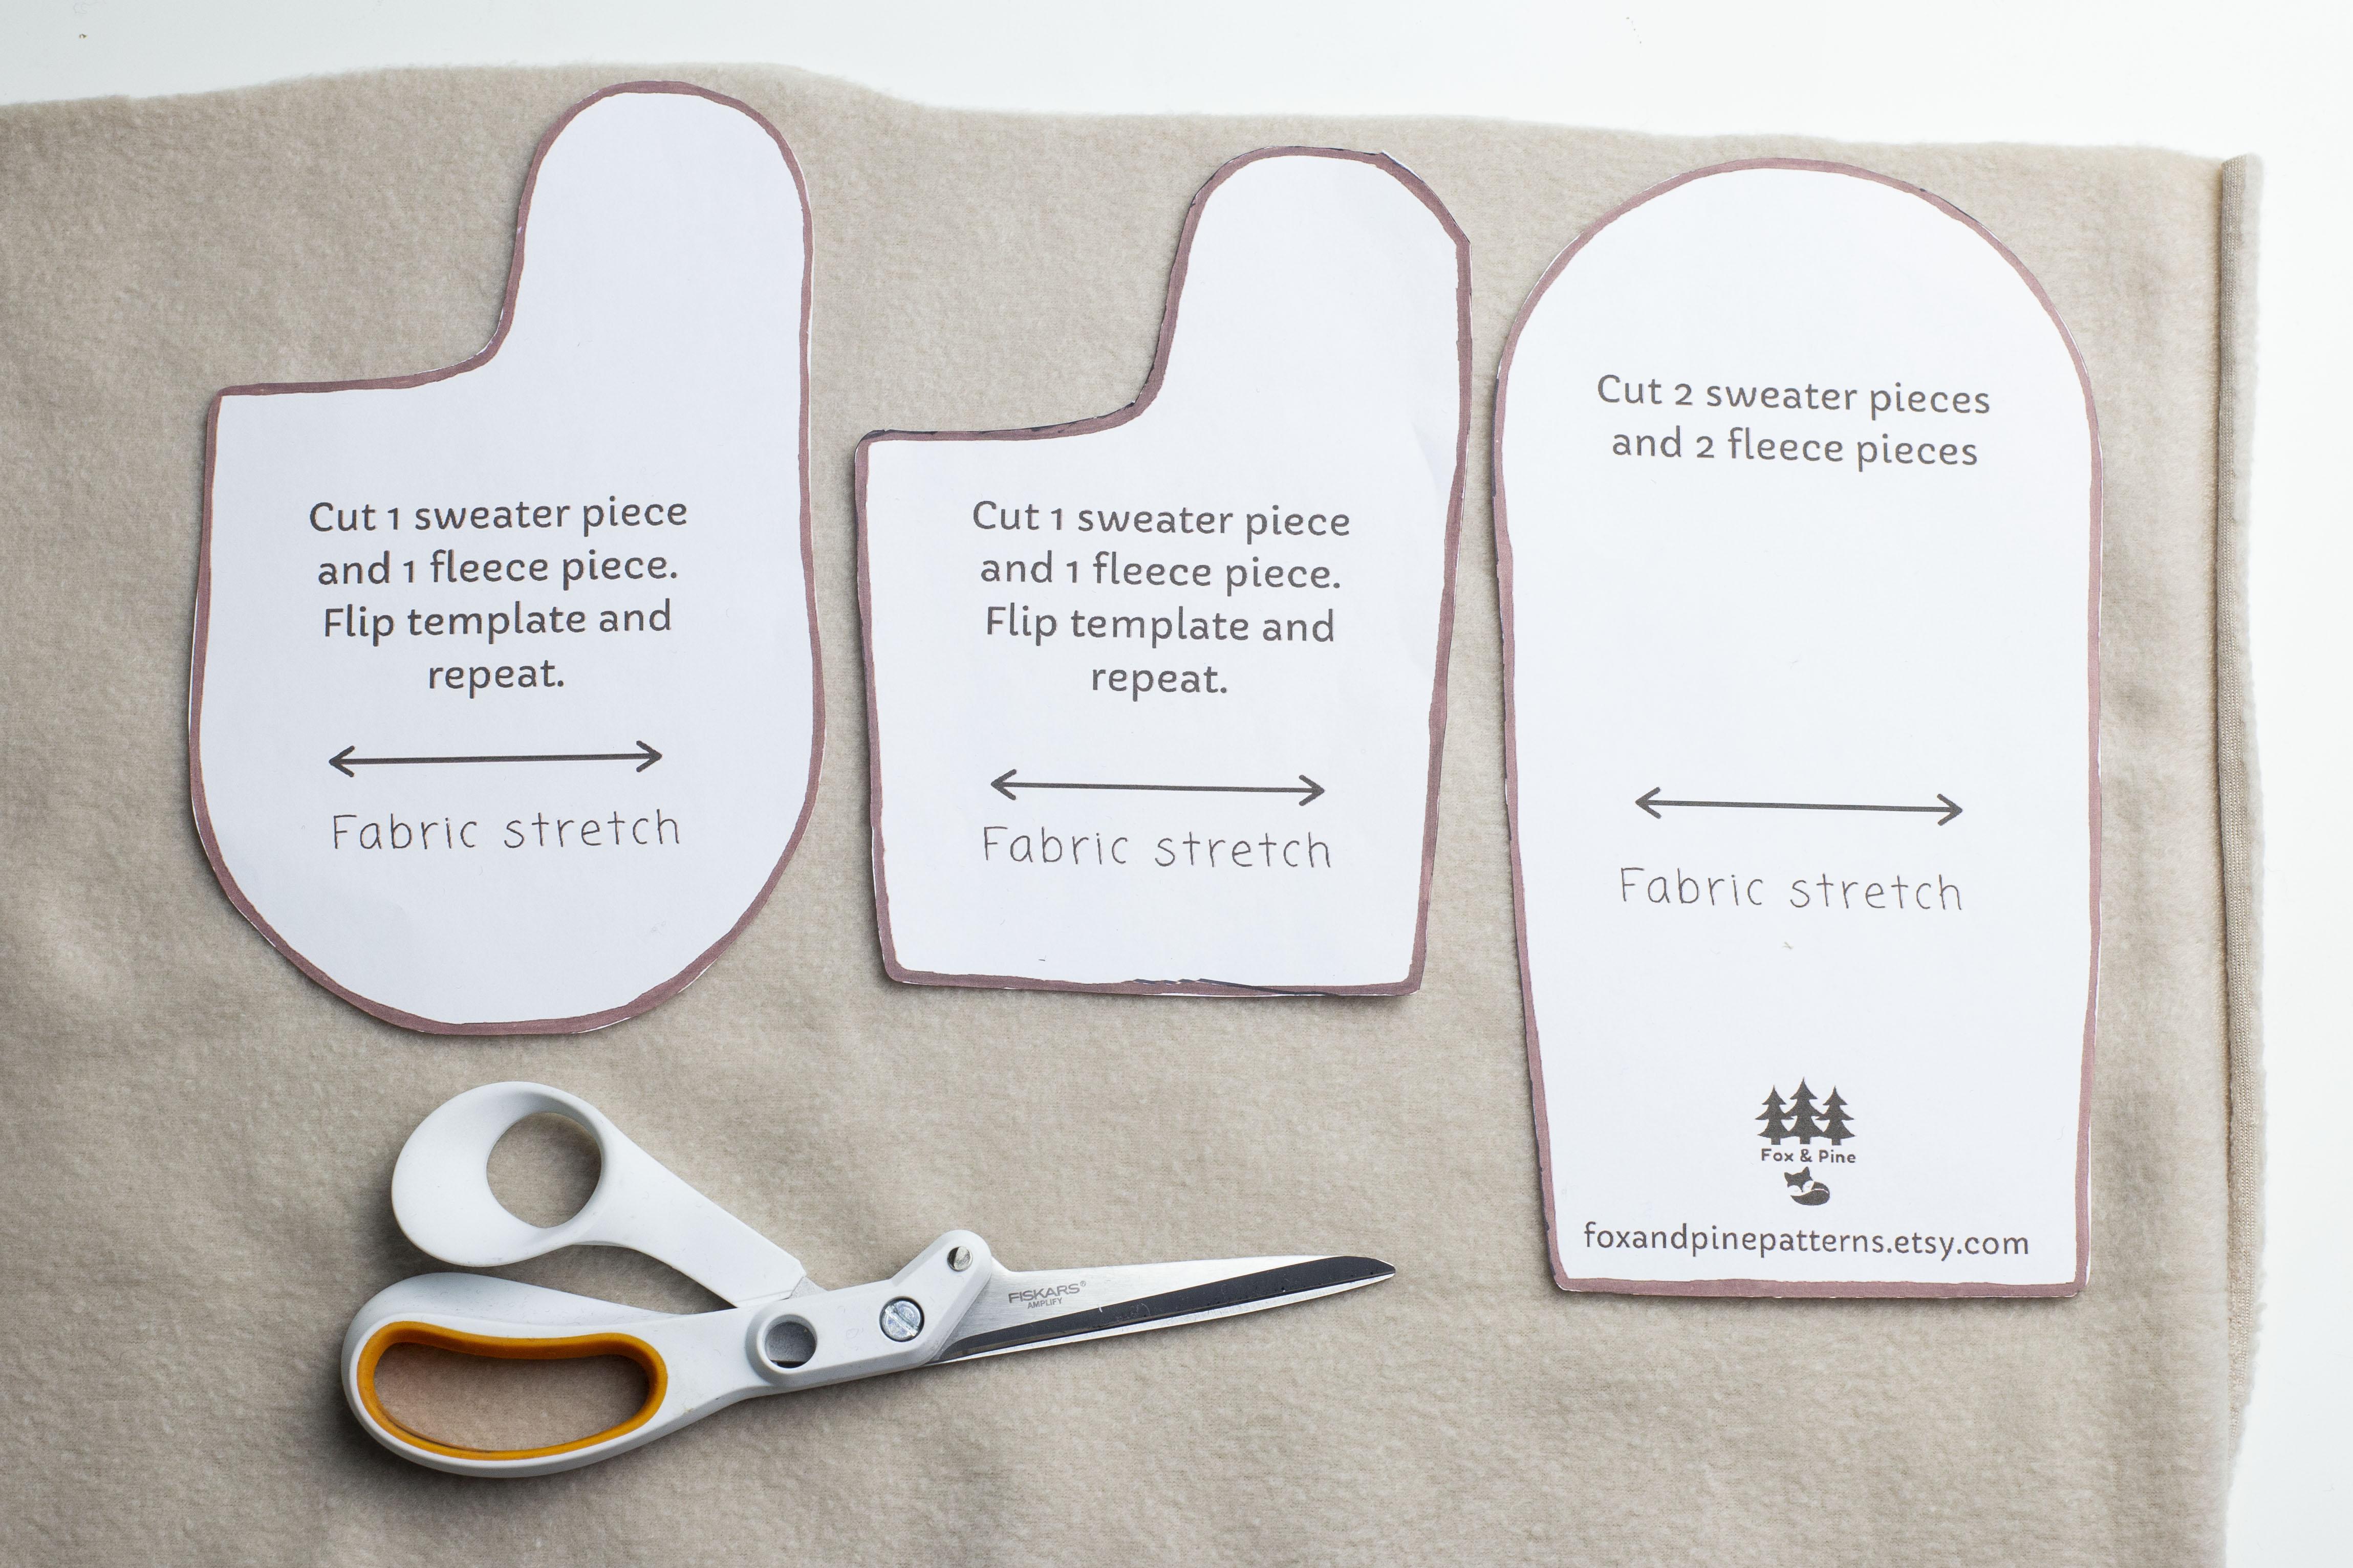
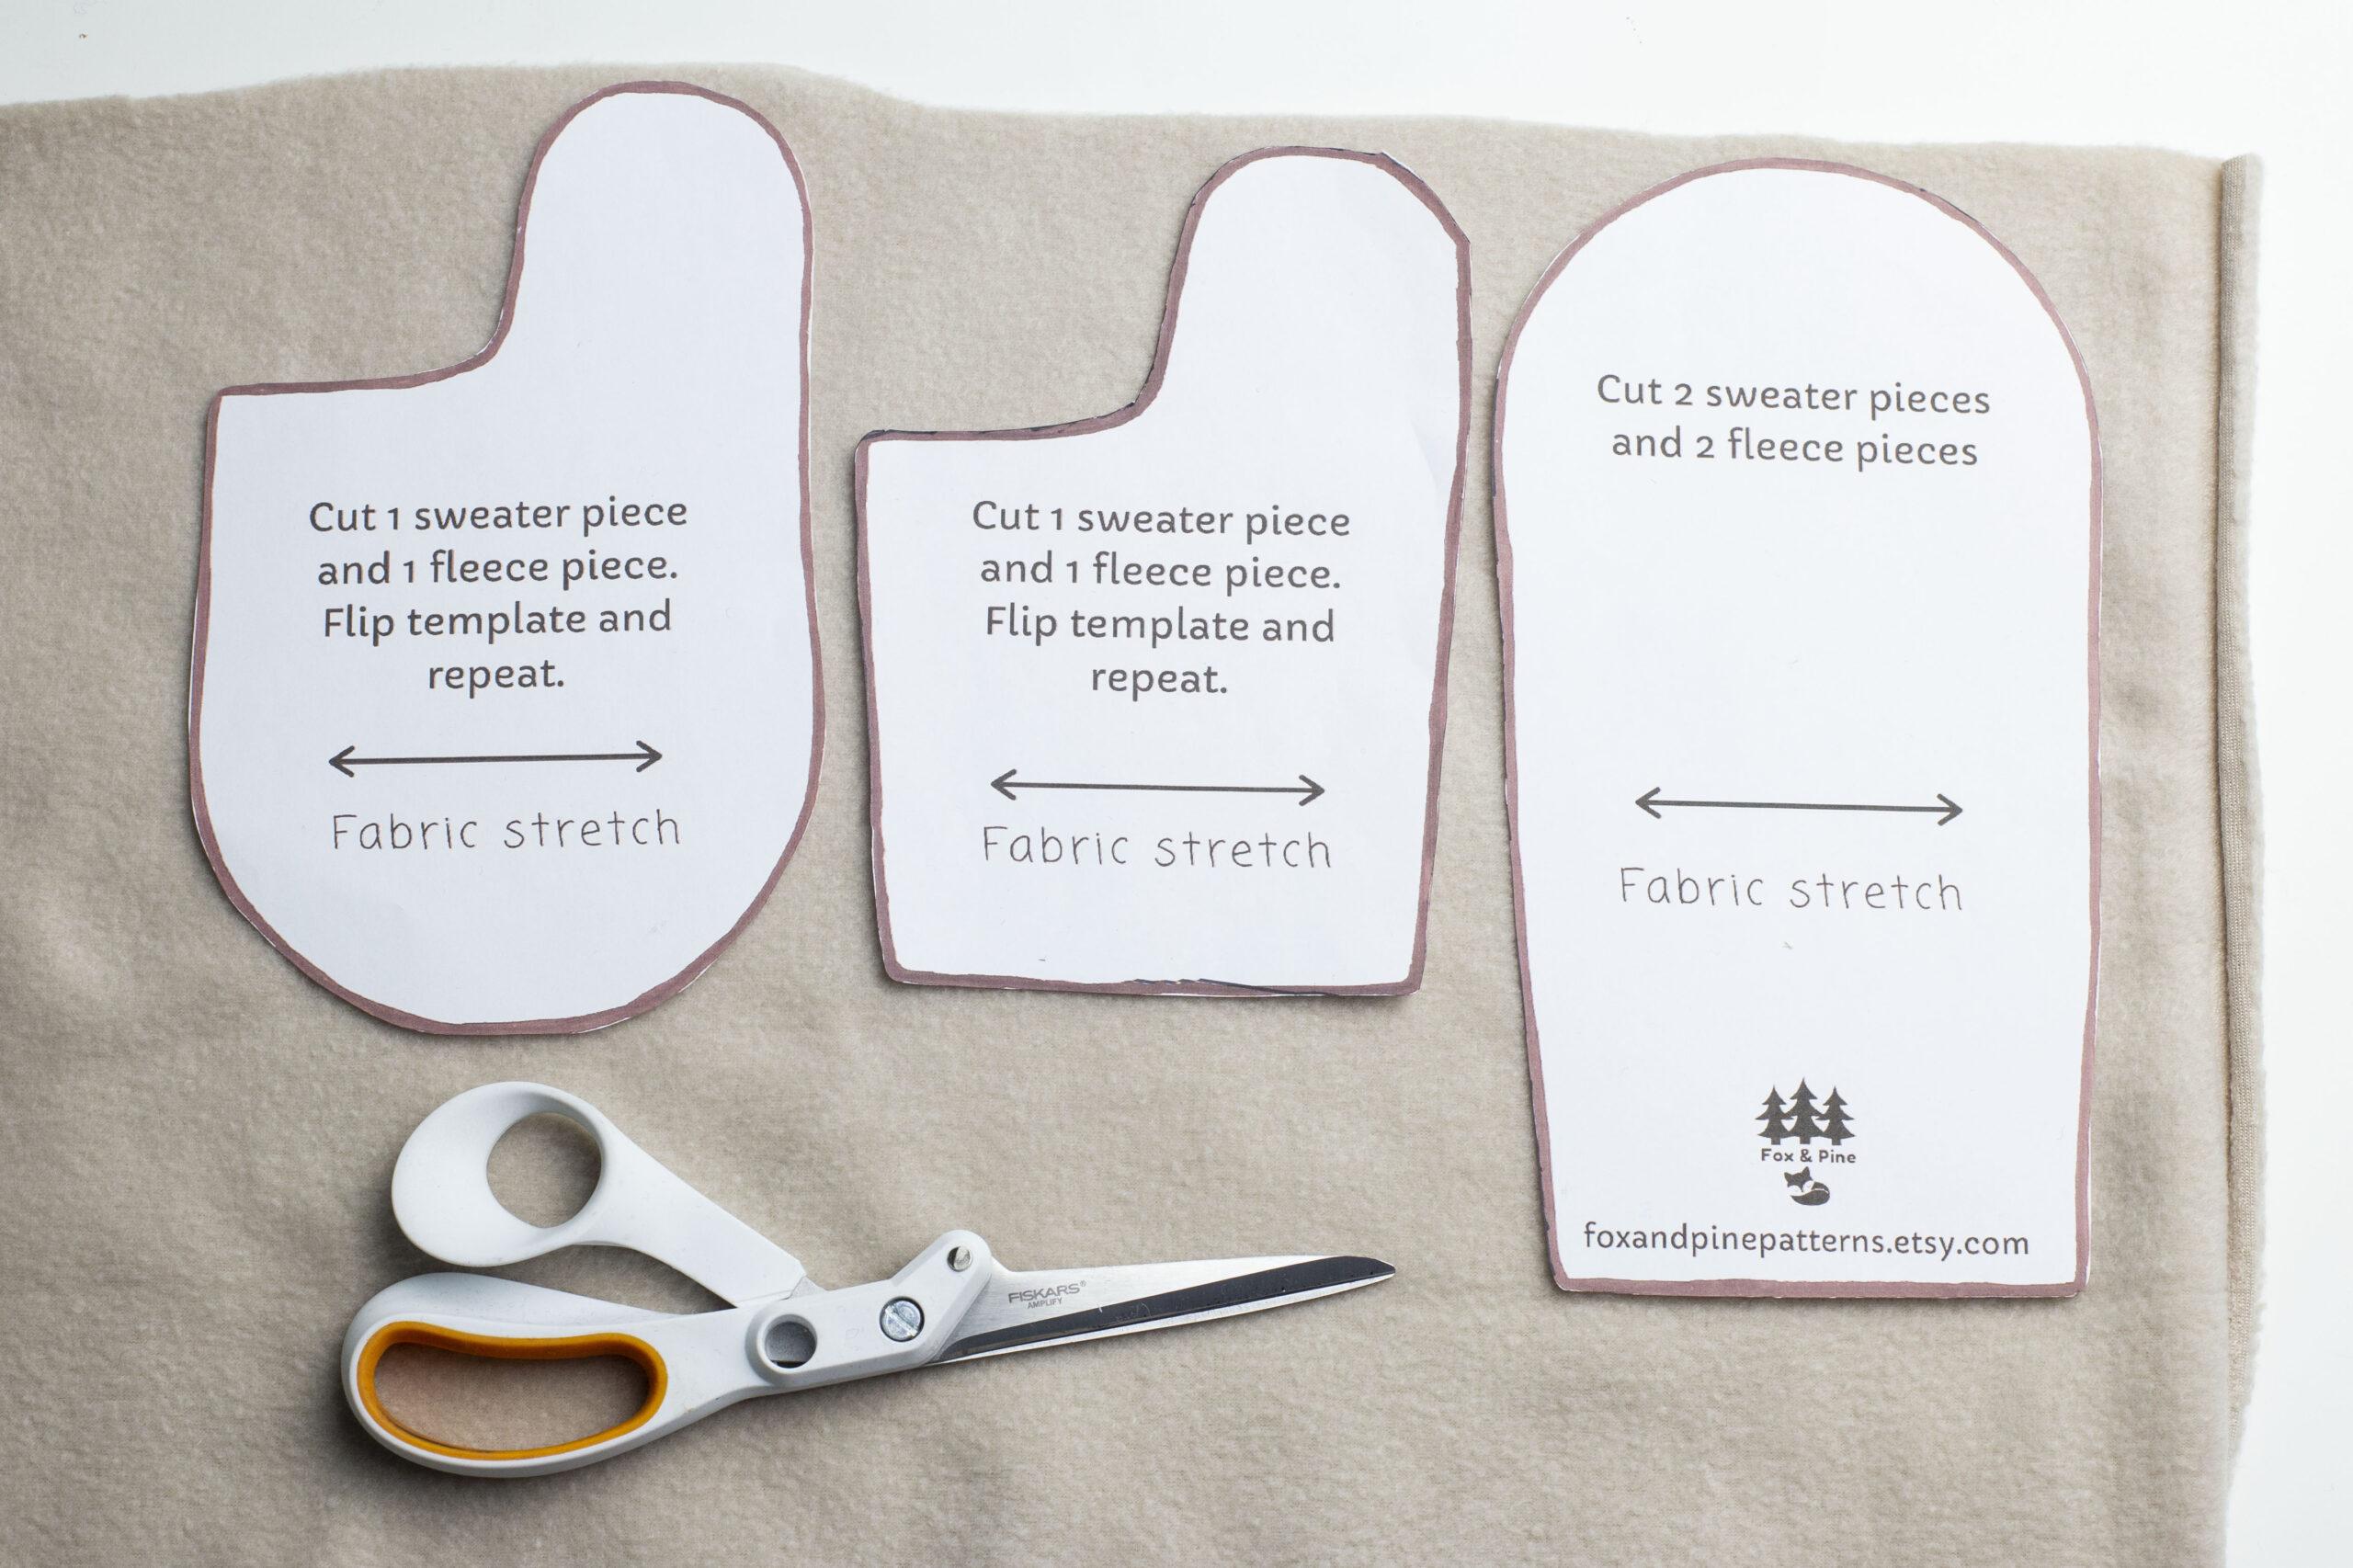
~ Take note of the arrows on the templates showing you which way to place them in relation to the direction the fabric stretches.
~ When trimming your templates, cut on the outside of the black outline.
~ I like to use a Sharpie marker to trace the template on the fabric. Alternatively, you can pin the template to the fabric and cut around.
~ If your fabric is quite thick and is slow to go through your sewing machine, never pull the fabric at the back where it has already been sewn. This will stretch out the shape of the mitten. You can gently guide/push the fabric at the front as it goes through the machine.
Read more : How To Fix A Floppy Baseball Glove
~ If you are planning to make multiple pairs of mittens, printing the templates on cardstock and/or laminating them makes them last longer. Laminated templates are available in my shop if you would like me to print and laminate them for you.
~ If you have an extremely special sweater you plan to use, I suggest first practicing on sweaters from a thrift store first to ensure you don’t make any mistakes using the sentimental piece that cannot be replaced.
Supplies
~ mitten templates
~ 1-3 sweaters
~ fleece for liner
~ sewing machine
~ scissors
~ measuring tape
~ permanent marker (optional)
~ pins
~ buttons, embroidery floss or thread + needle for cuffs
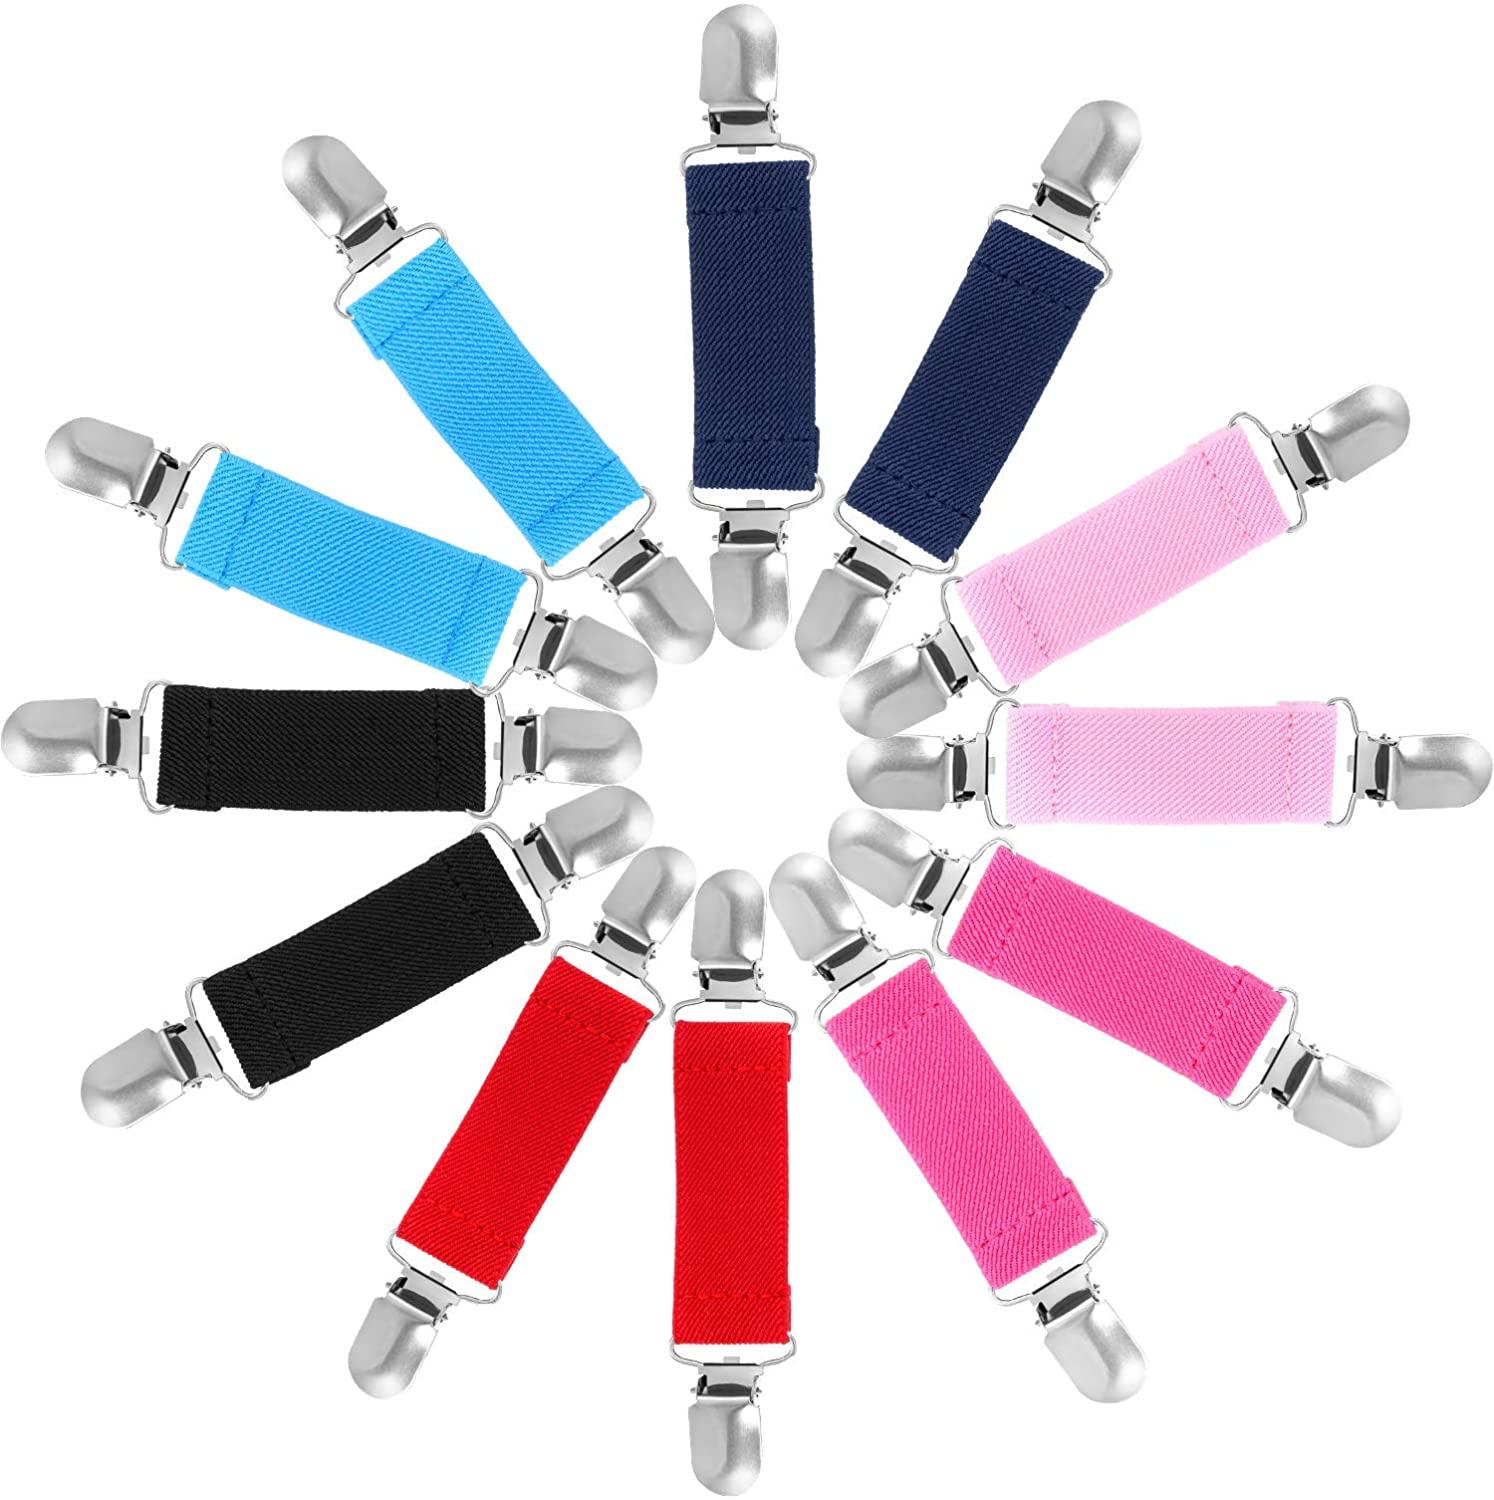
~ optional for children’s sizes – mitten clips to attach to the child’s jacket. These can be found here (USA) and here (Canada)
Making the mittens
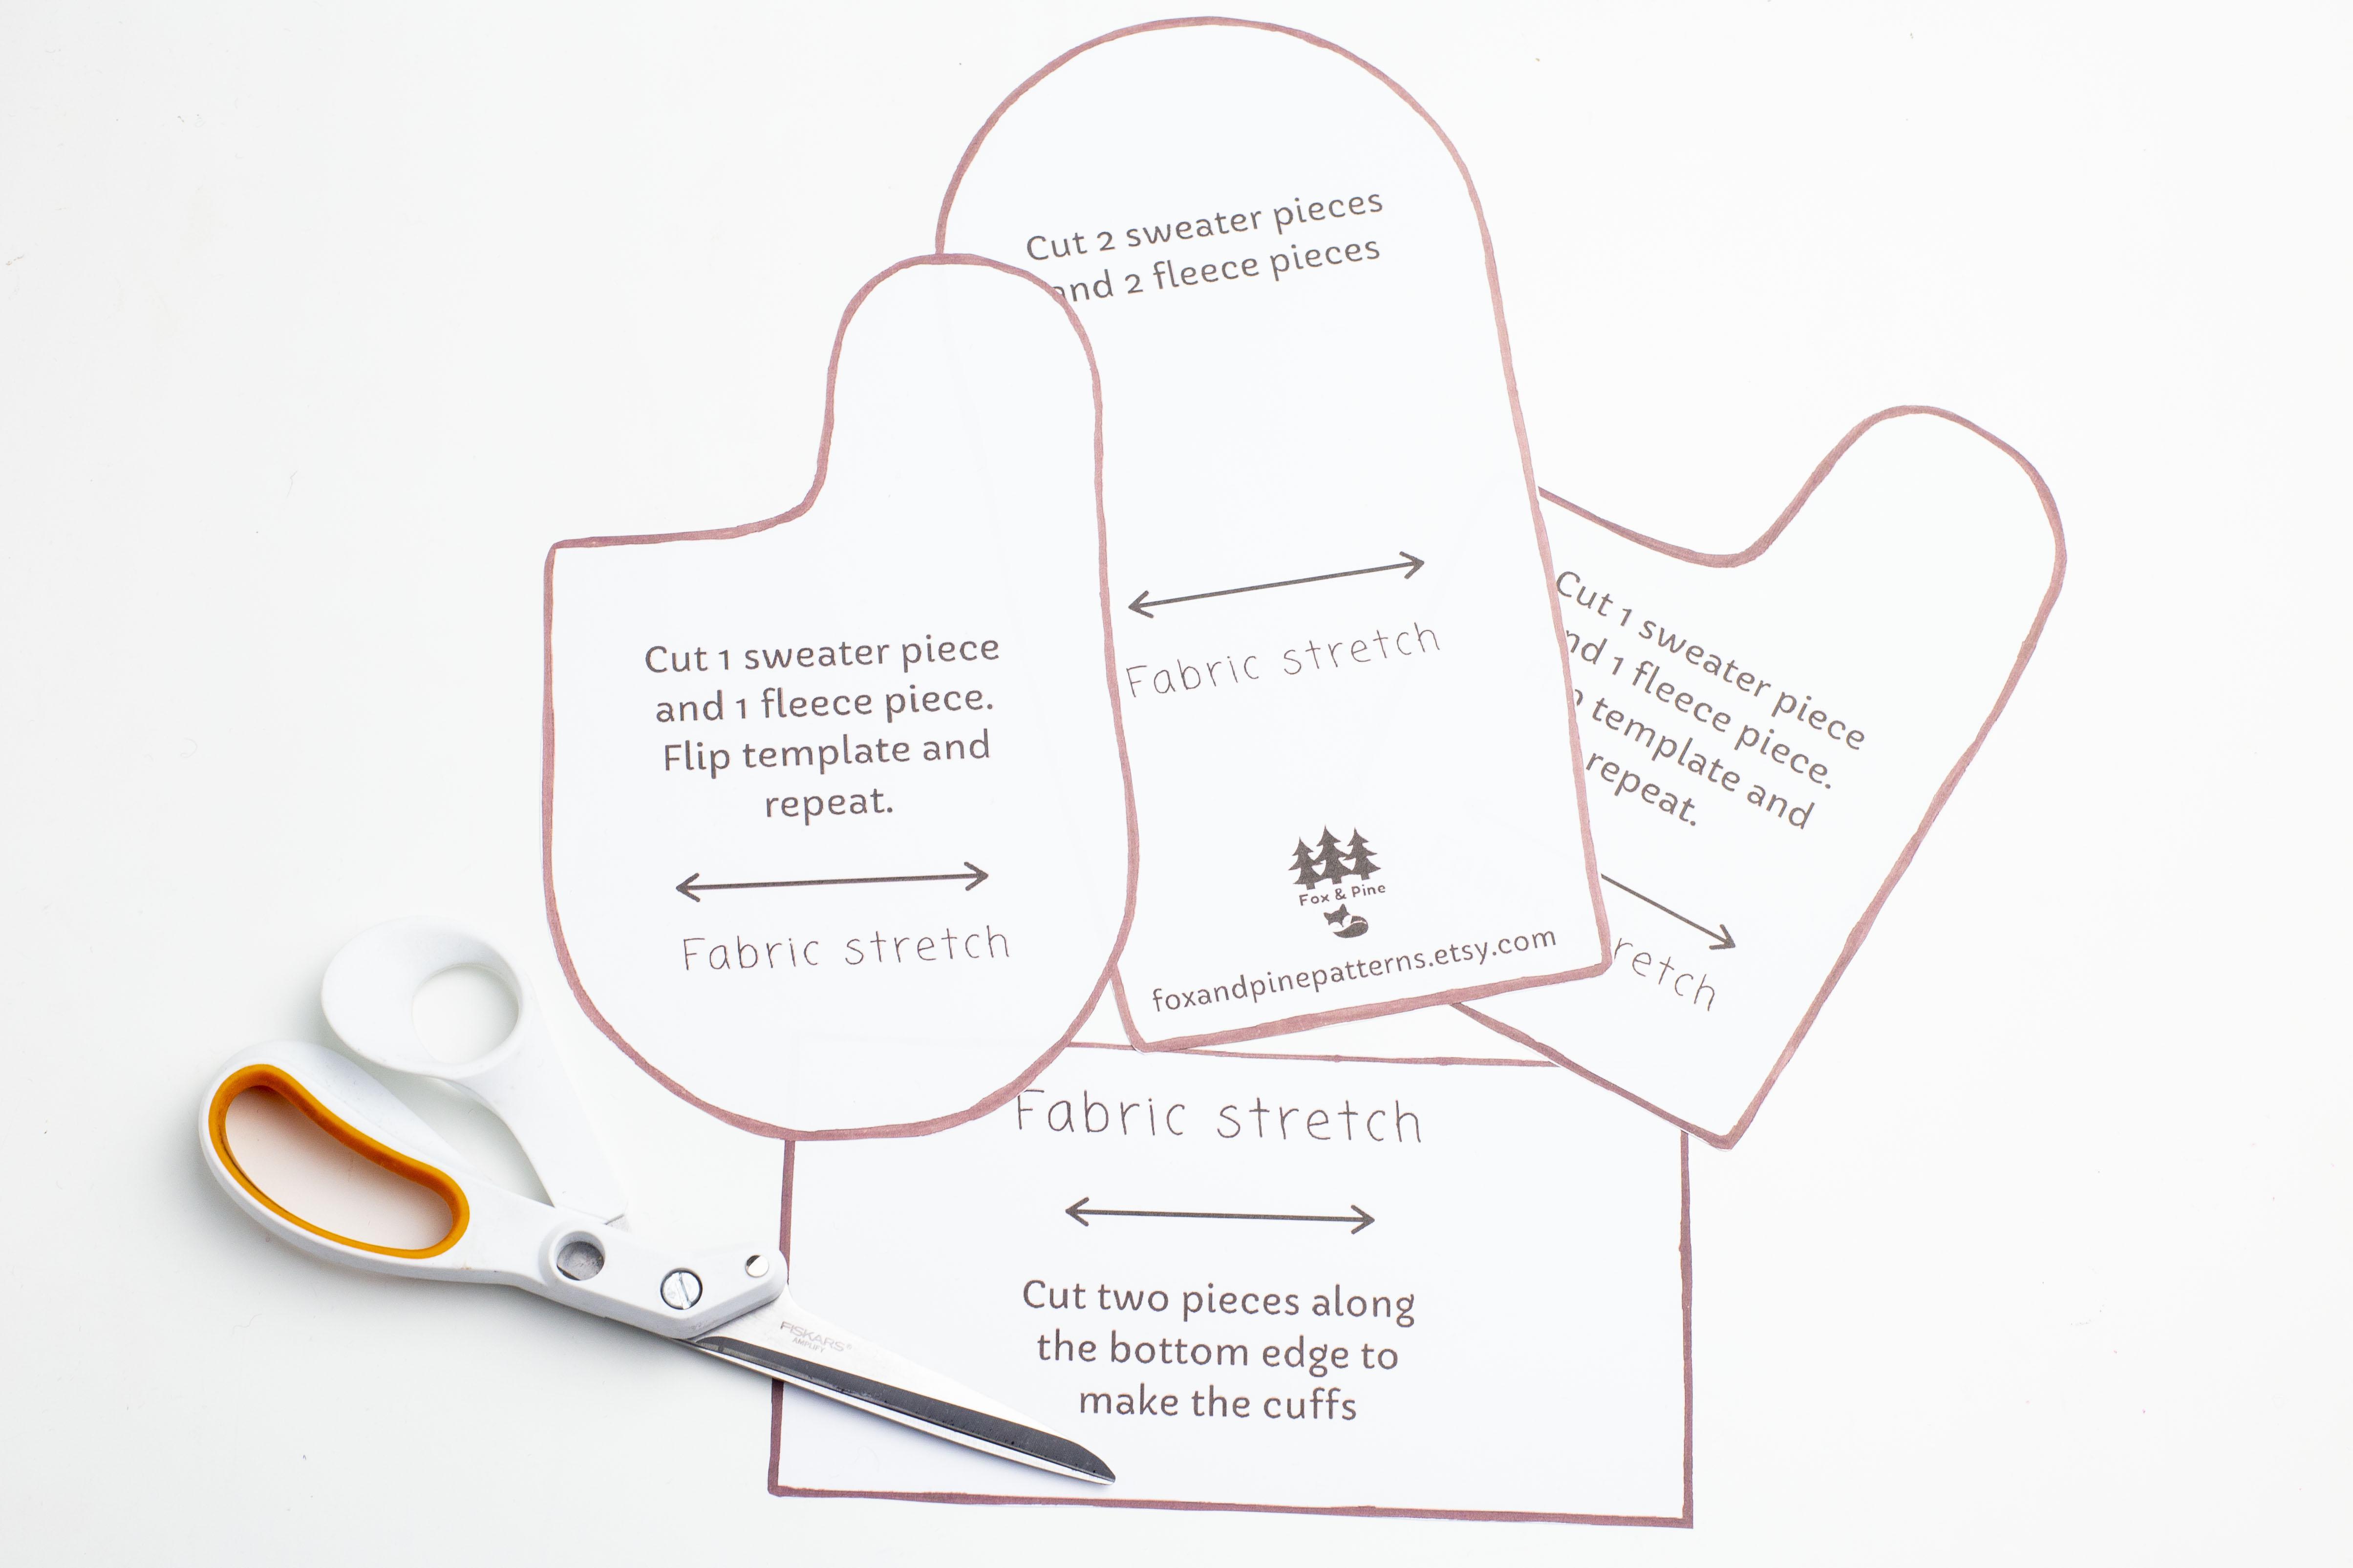
When printing the templates, make sure you select “print as image”, “print 100%” or “print actual size”. Printer settings vary but select which fits these terms best. Do not click “fit to page” or “fit to borders”. This will ensure your templates come out the right size. Once the template is printed, check the square in the corner to ensure it measures 1” by 1”.
Cut your templates, leaving the black outline on.
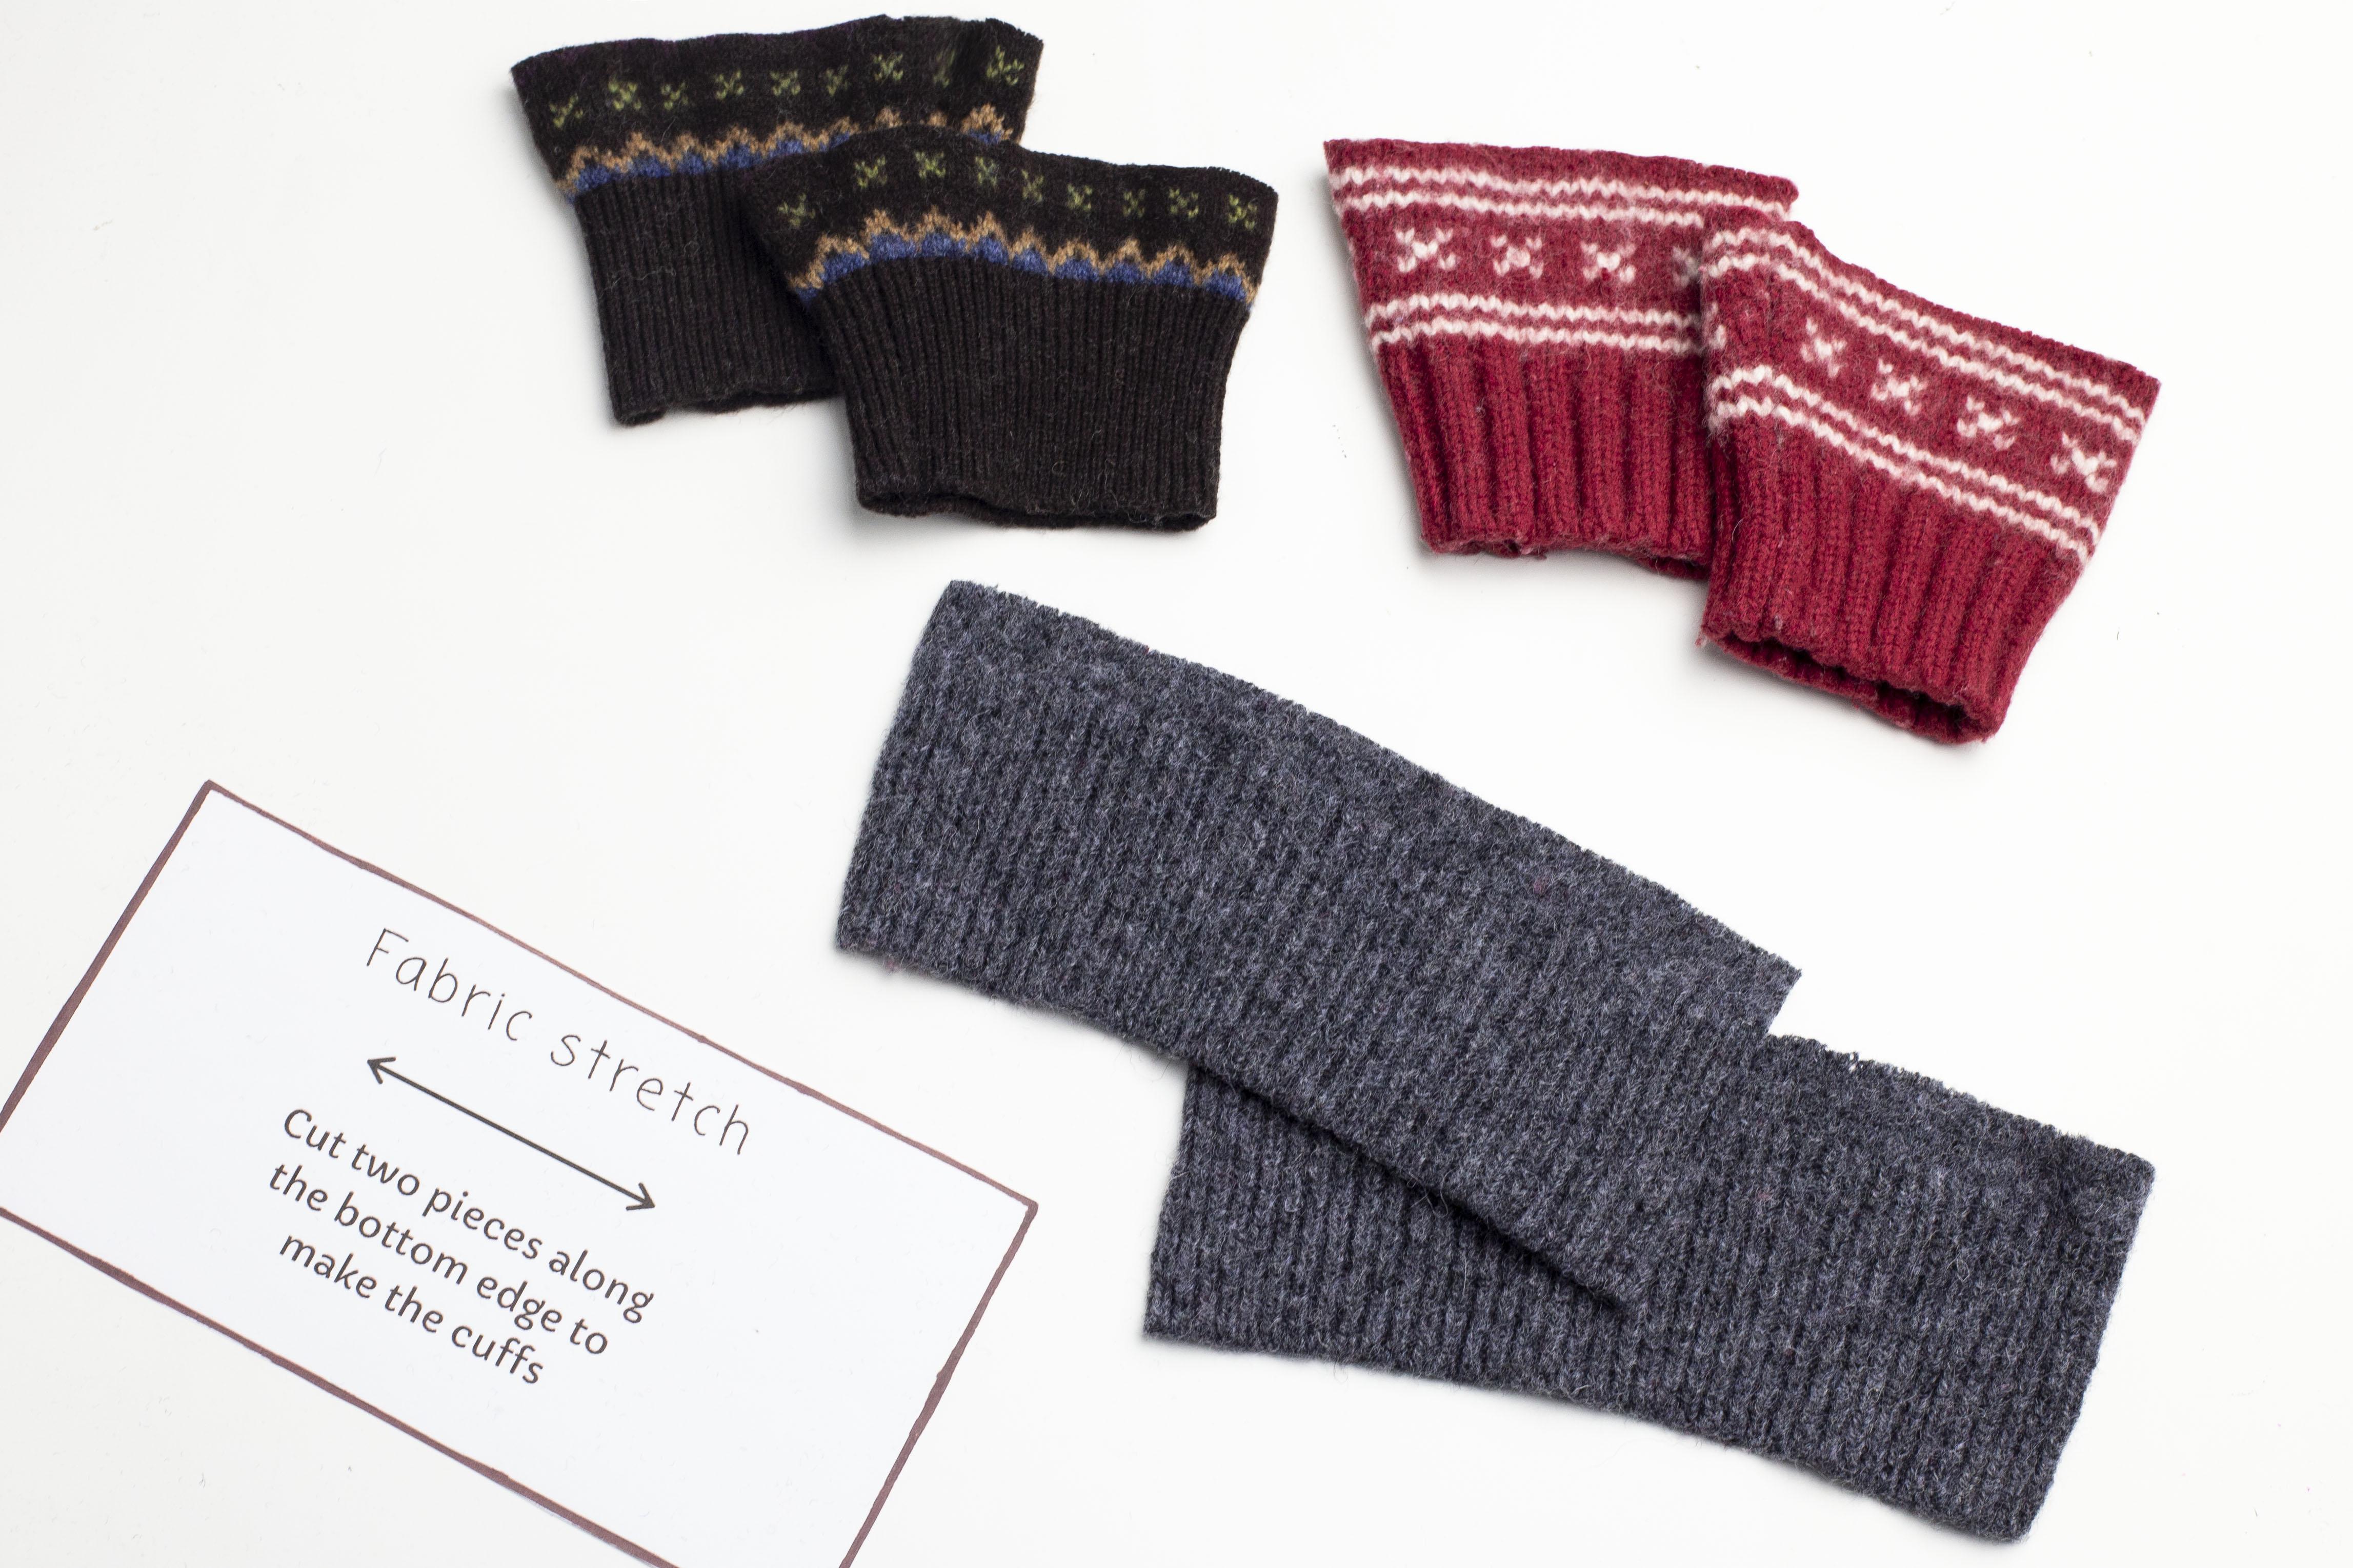
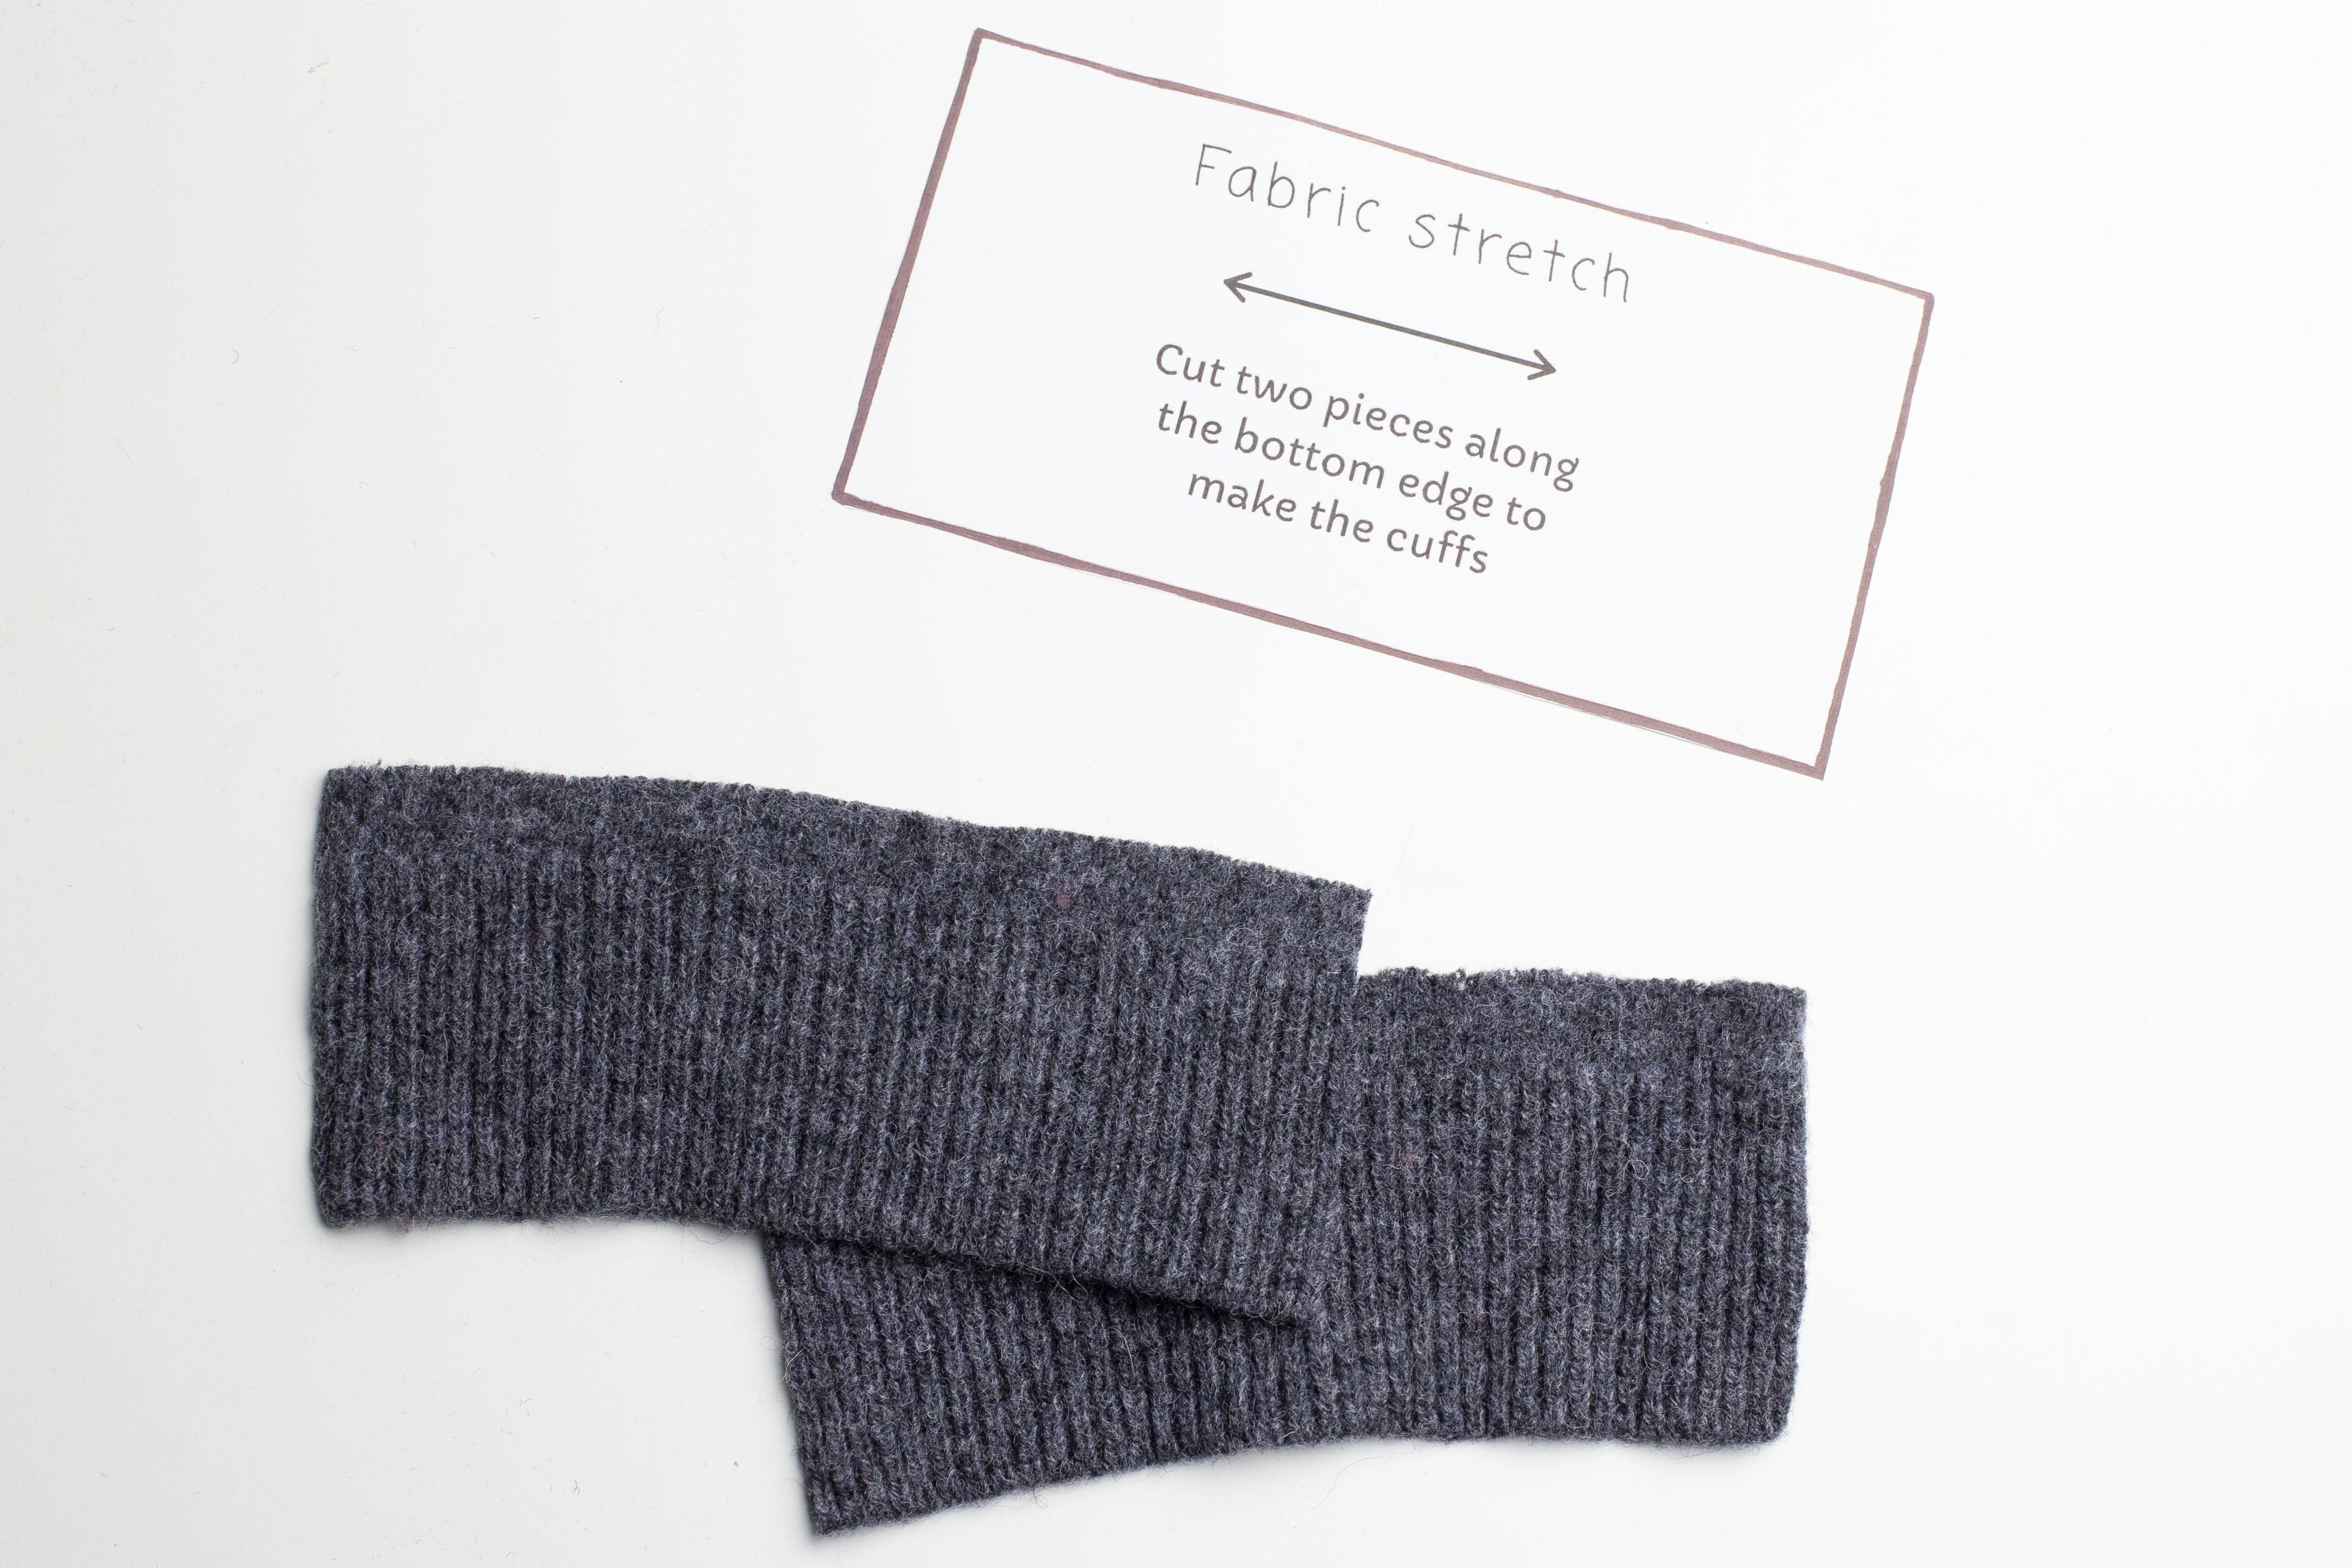
Prepare your mitten cuffs. You can either cut the end of the sweater sleeves (red and brown cuffs in the photo below), or make the cuffs from the bottom of the torso section of the sweater. Cut the cuffs 3.5” to 4” high. Because ribbed fabric has a nice stretch to it, the size of the cuffs can vary. Most cuffs from sweater
sleeves will work. That being said, if you are using a large sweater/cuff, such as Men’s XXL, it may be too wide but you can always turn it inside out and sew a new seam to shorten the width of the cuff.
If using the torso ribbing, use the template to cut two pieces of fabric for the cuffs. The height should be 3.5” to 4”. You will sew them together later.

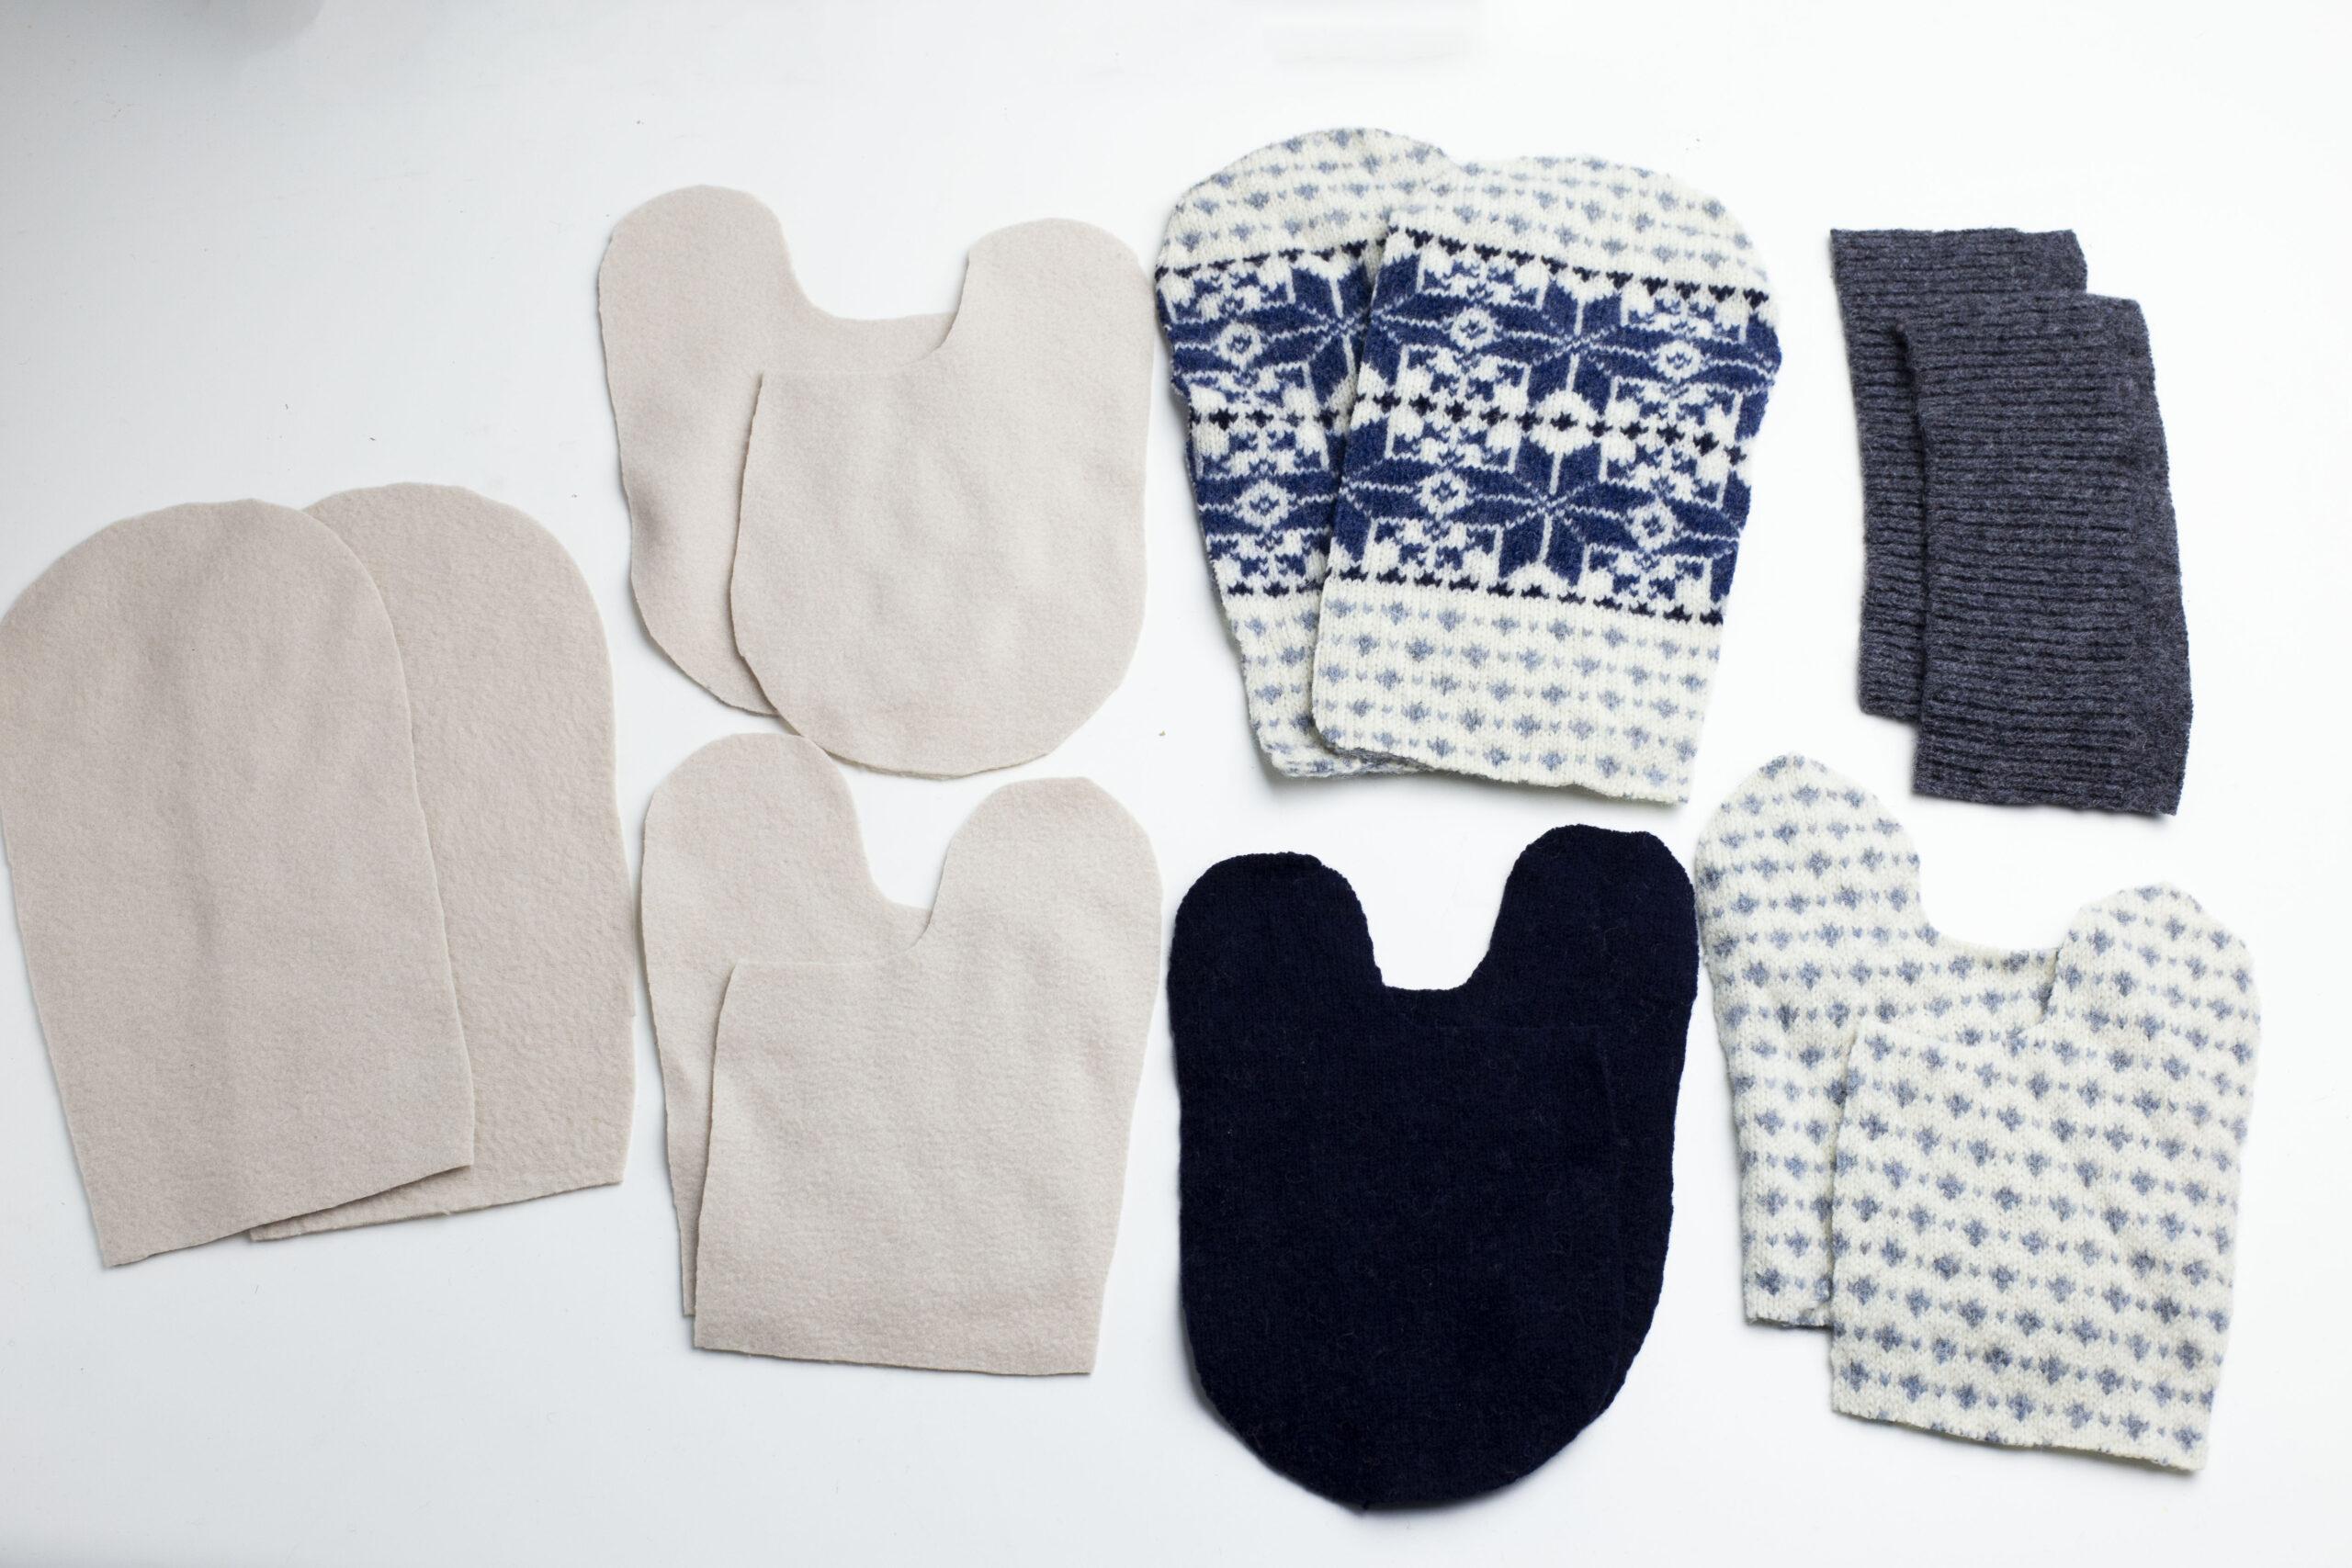
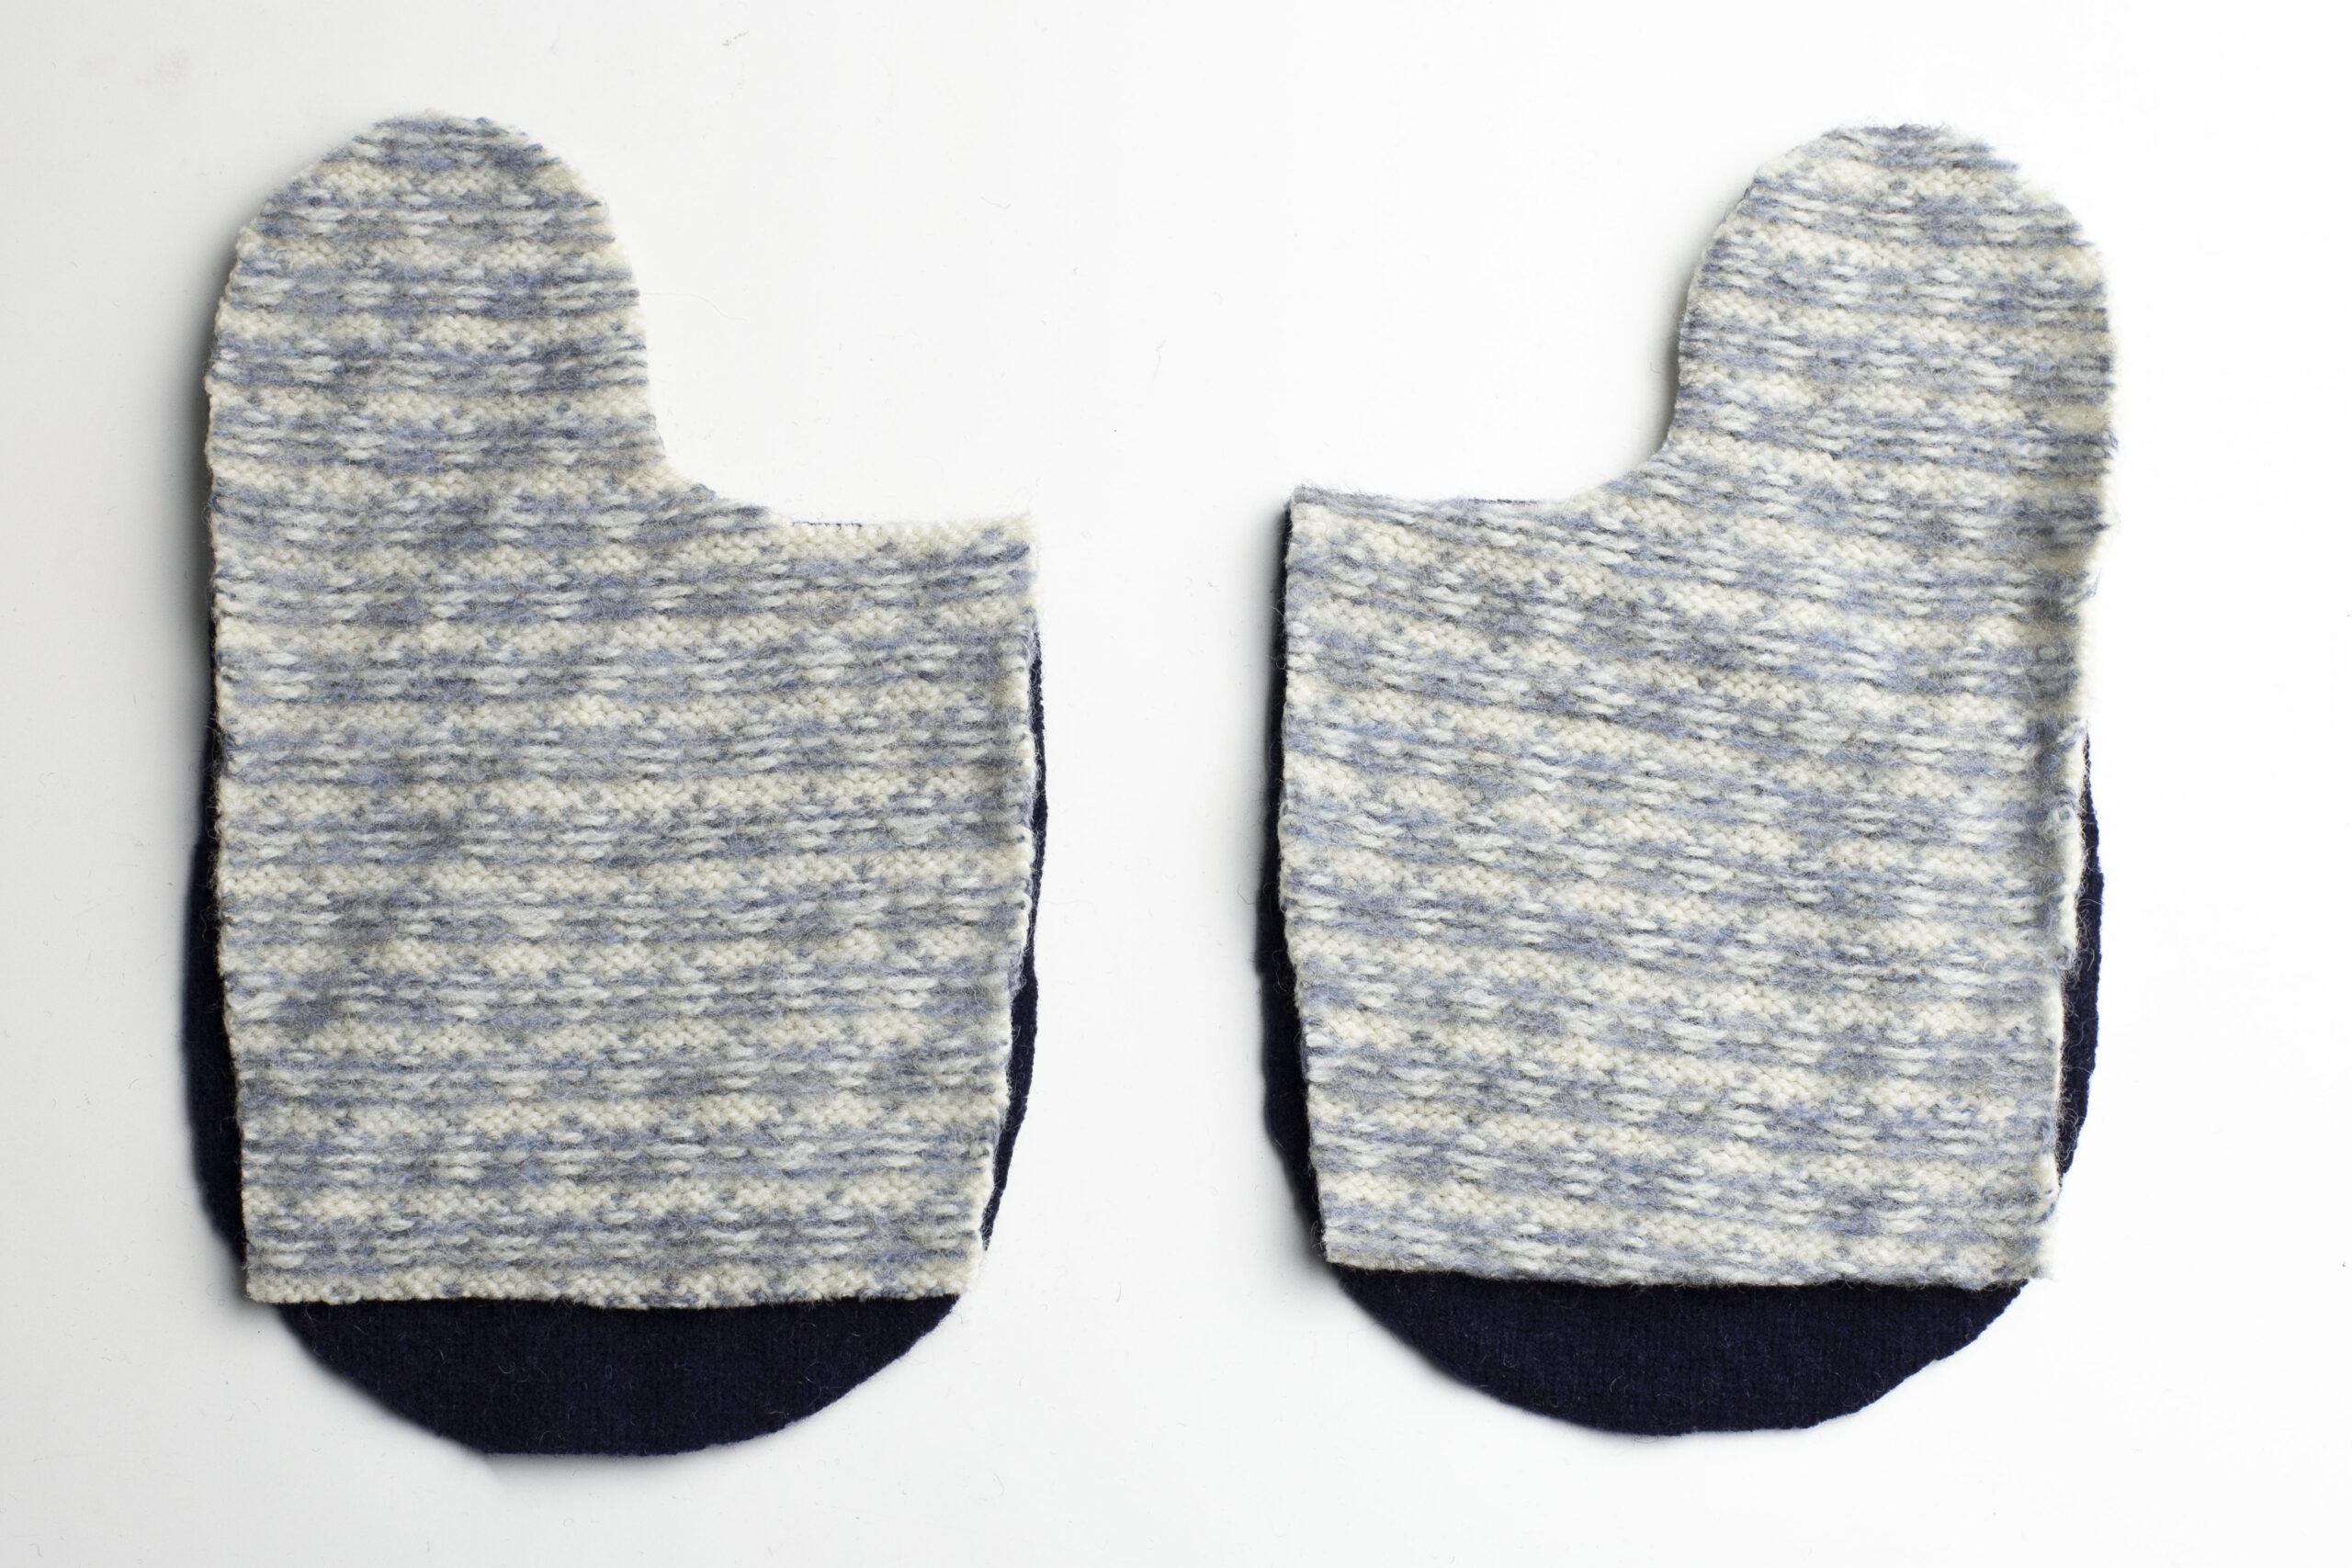
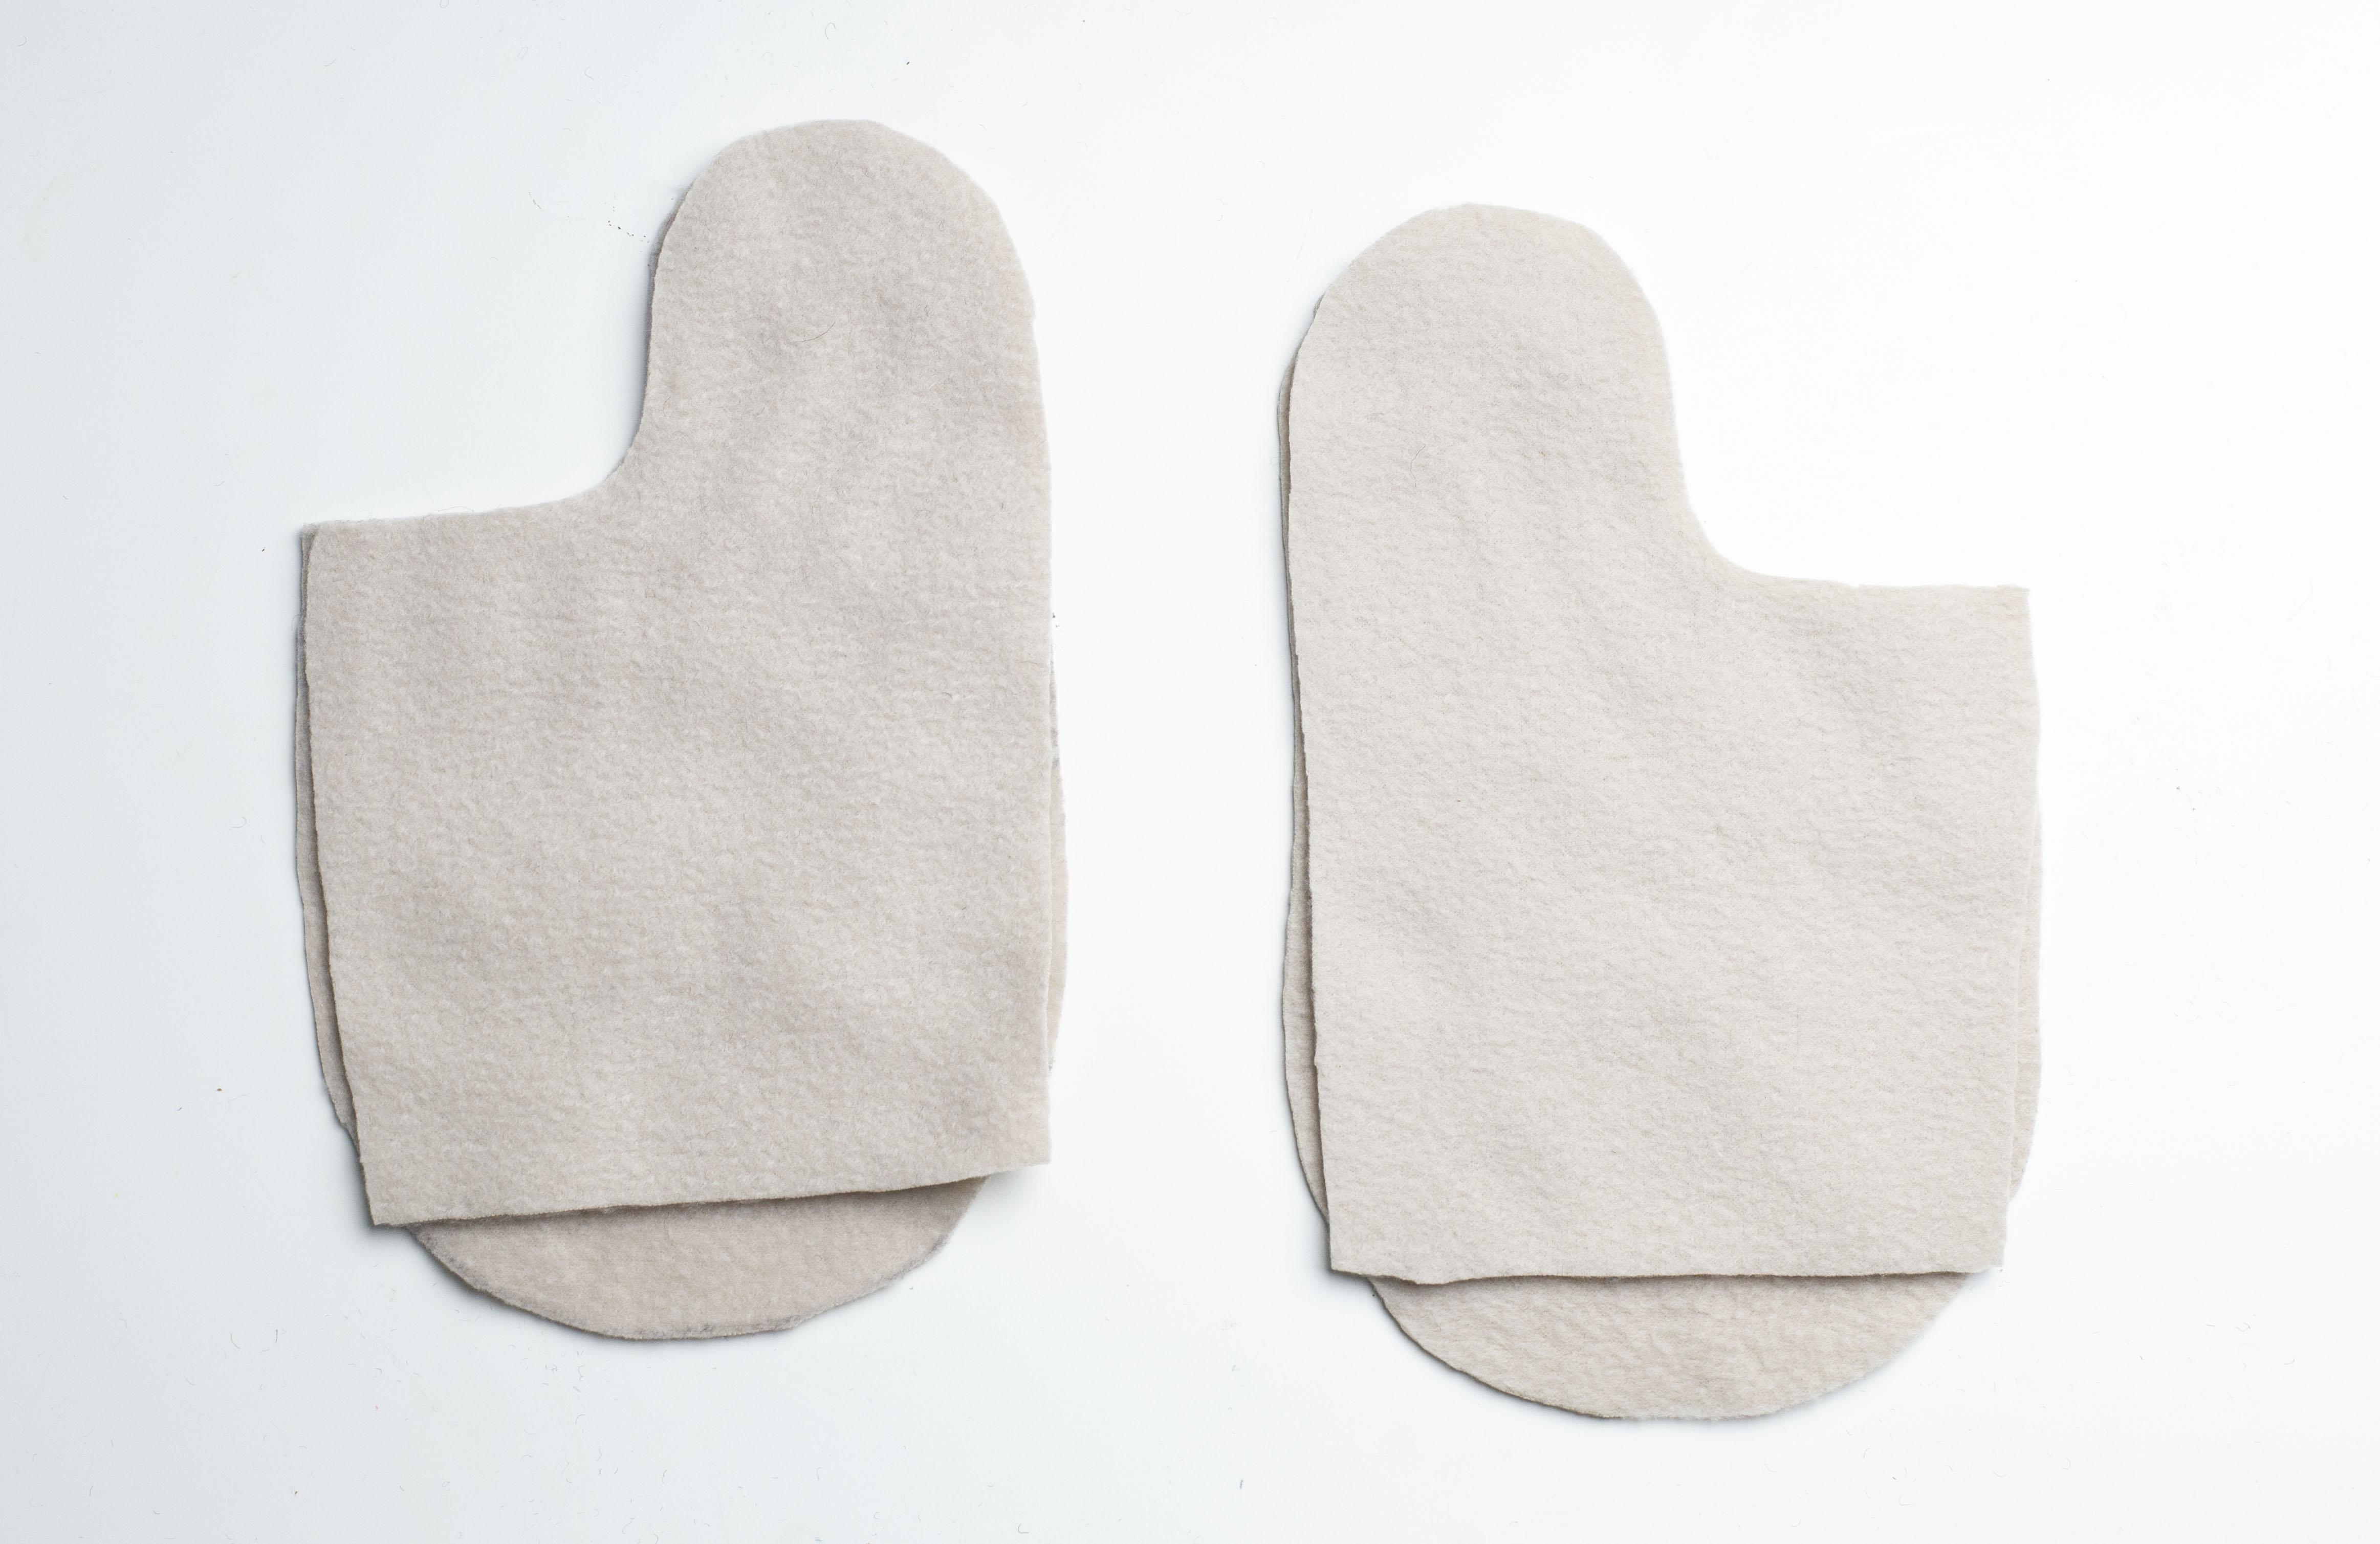
Place the templates on the fabric. I use a Sharpie marker to trace the patterns. You can also pin the template to the fabric and cut around. For dark colored sweaters I use a white gel pen. Cut two pieces of the top of the palm. Cut one each of the inside palm pieces, flip the templates and cut a second piece of each.

Repeat for the flannel liner fabric.
Once you have all of these pieces cut you are ready to sew!
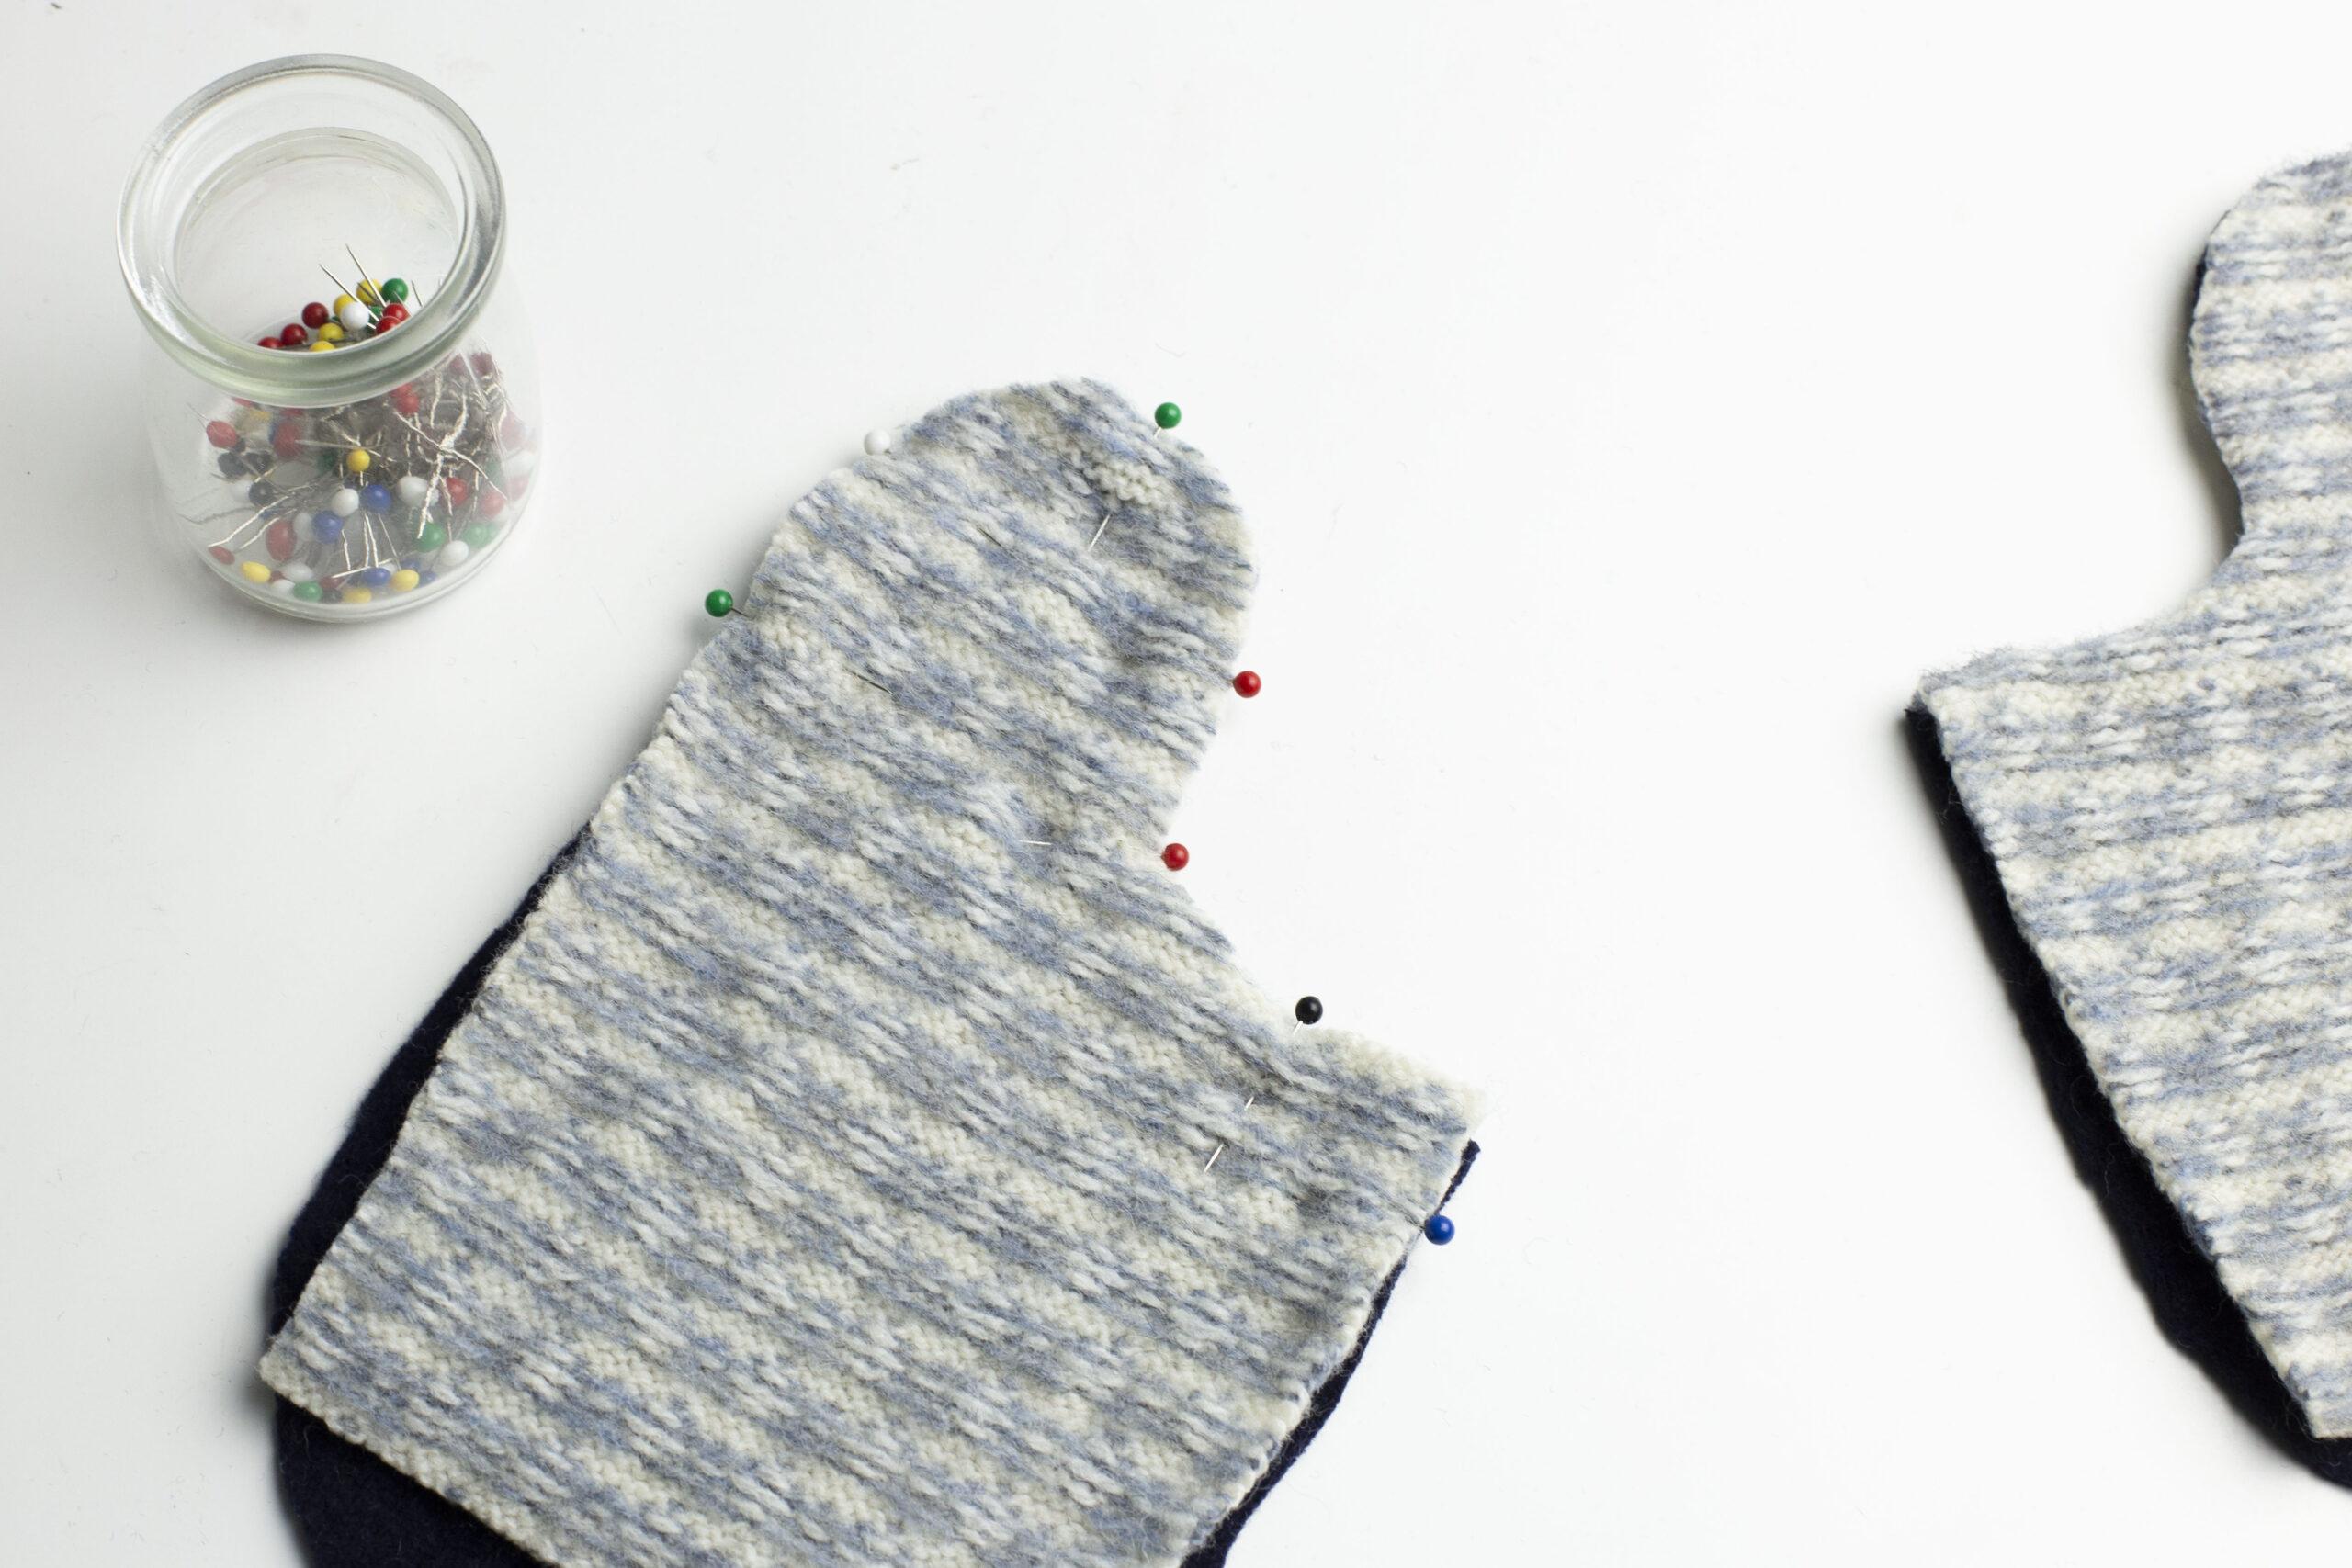
Start with the inside palm pieces. Line them up with the right sides facing one another; wrong sides on the outside. Pin fabric pieces together.
Sew around the top edge and thumb using a ¼” seam allowance. Always back stitch when starting and finishing all seams. The points where you start and finish this seam should be parallel to one another.

Read more : How To Lock Tesla Glove Box
Trim any excess fabric outside of the seam to prevent extra bulk, being very careful not to cut too close to the stitching. Stop trimming before you get to the bottom of your seam along the side of the thumb. You will need this excess fabric to sew around the thumb in the next step.
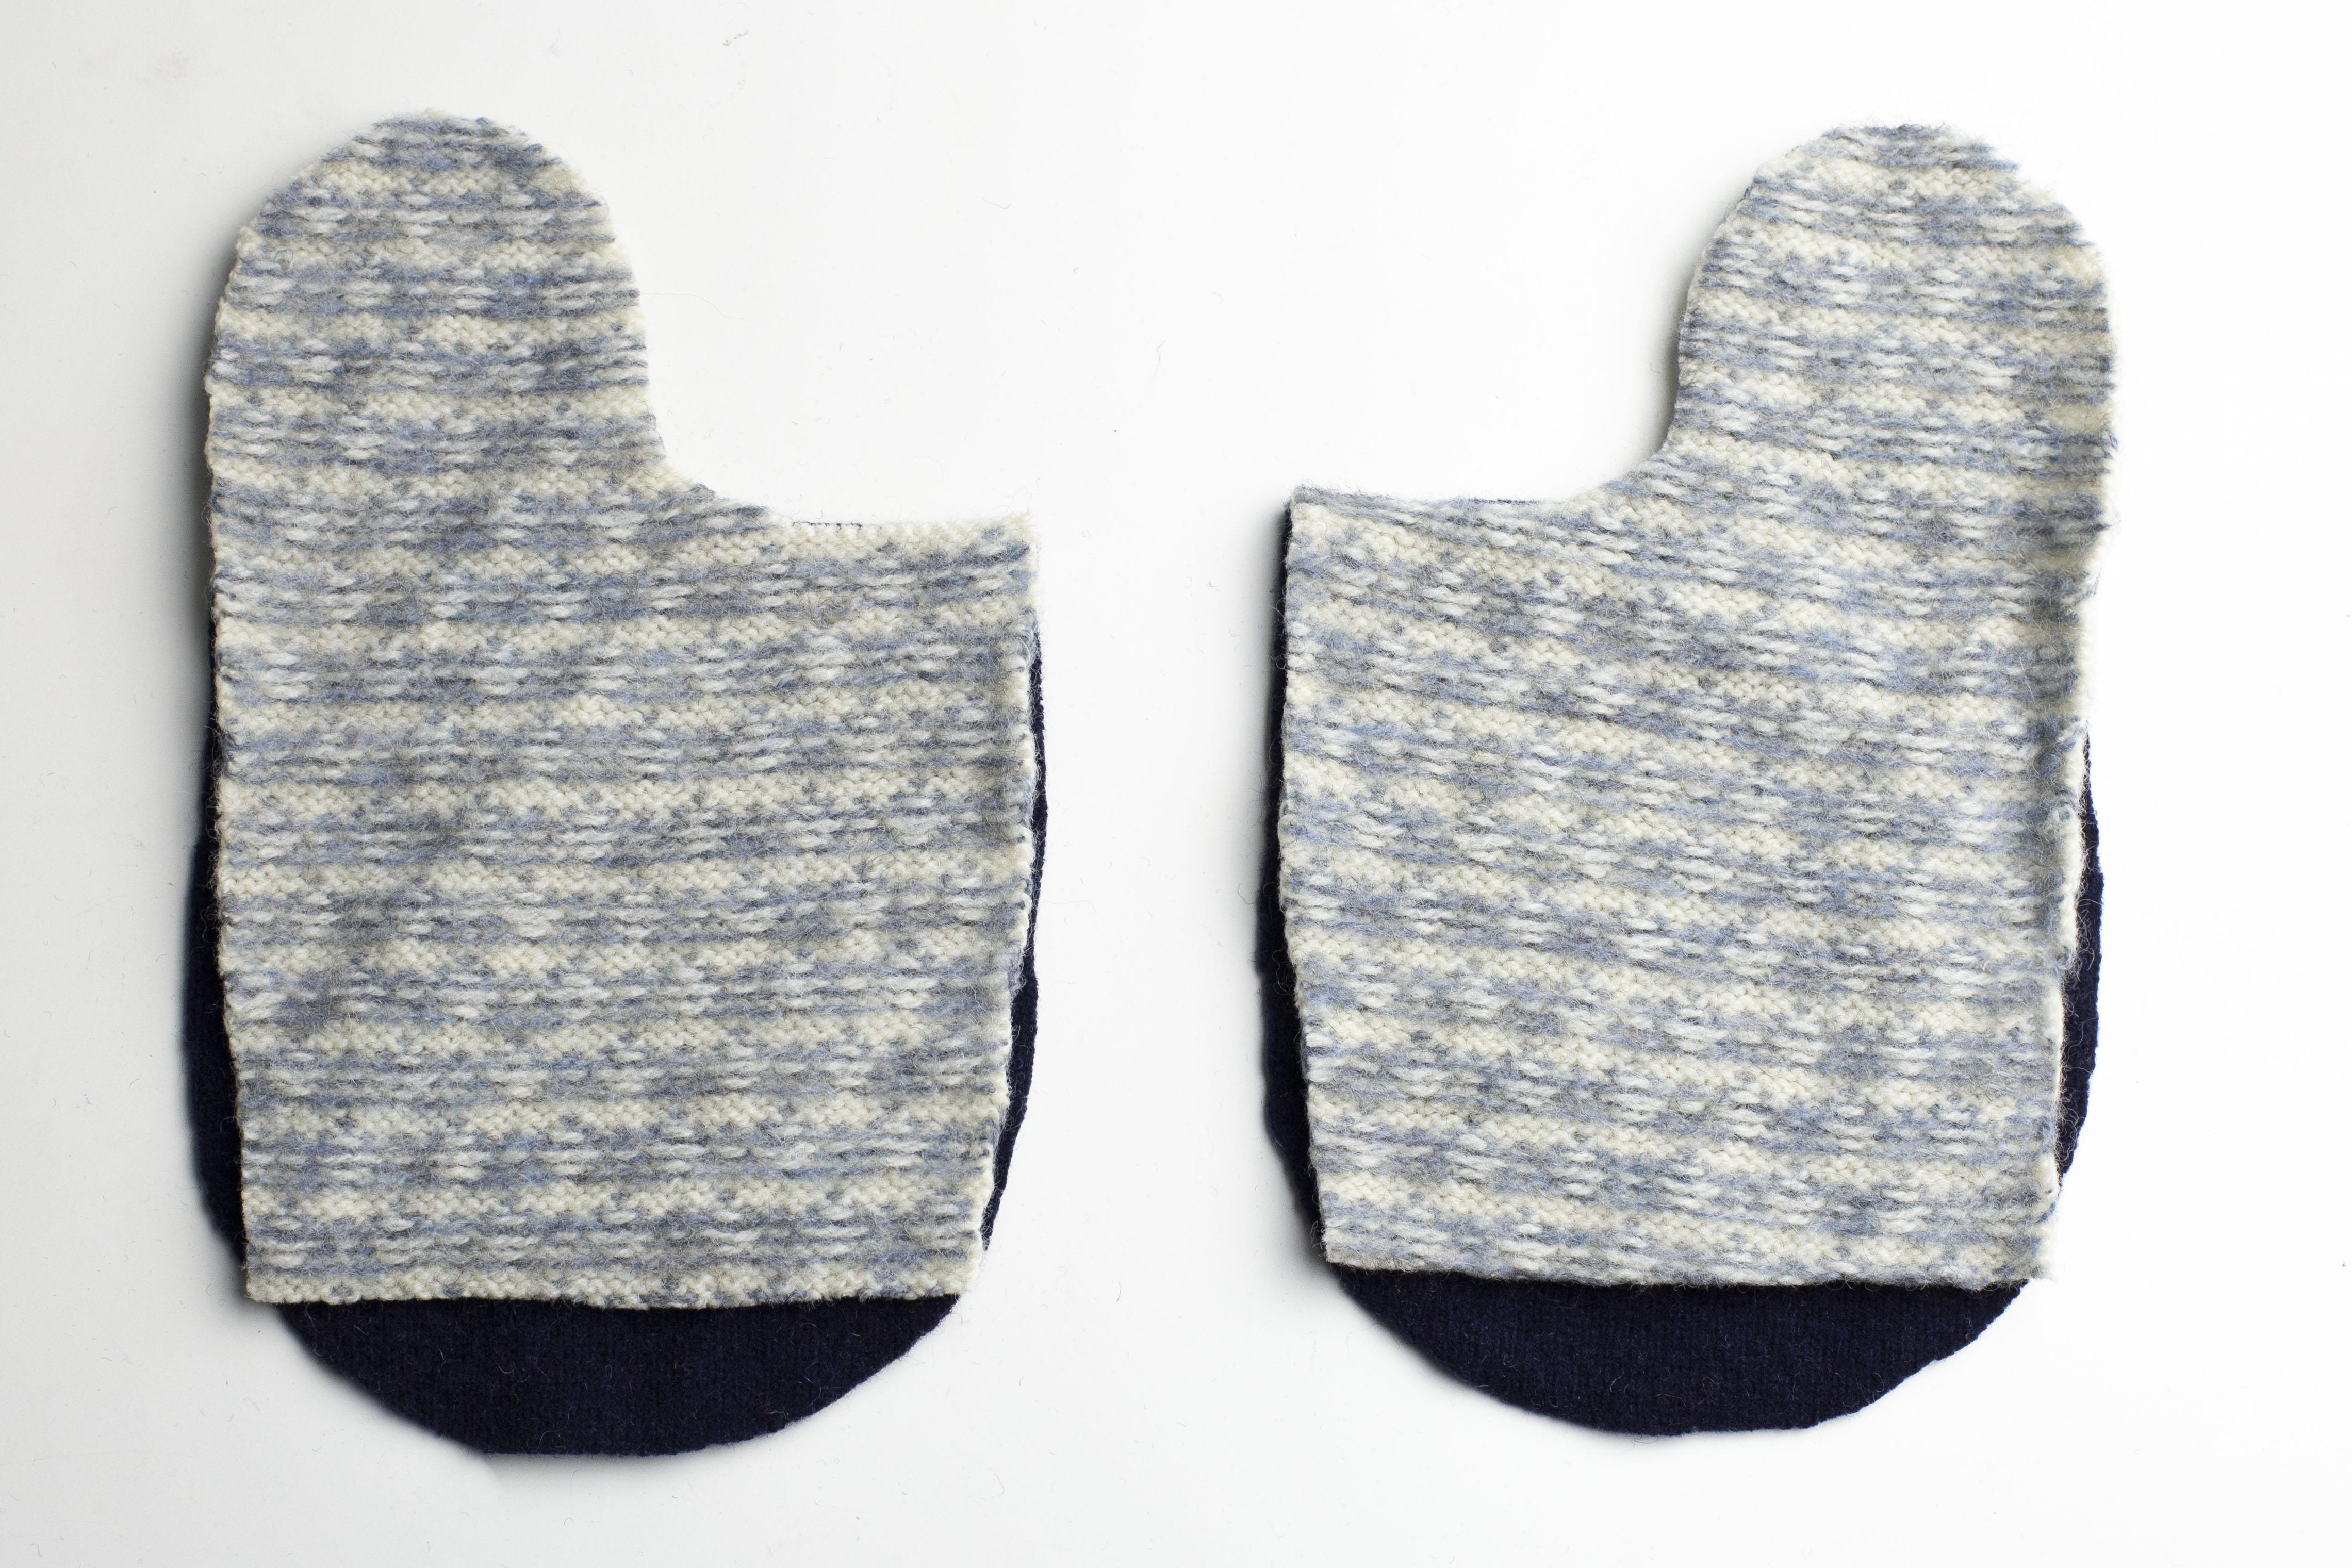
Lay the inside palm pieces on the top of the hand pieces, with the right sides facing each other, the wrong sides on the outside.
Line up the edges and pin them together. Sew around the outer edge of the mittens. When sewing around the thumb area, hold the thumb over and sew along the fabric you did not trim off in the previous step.
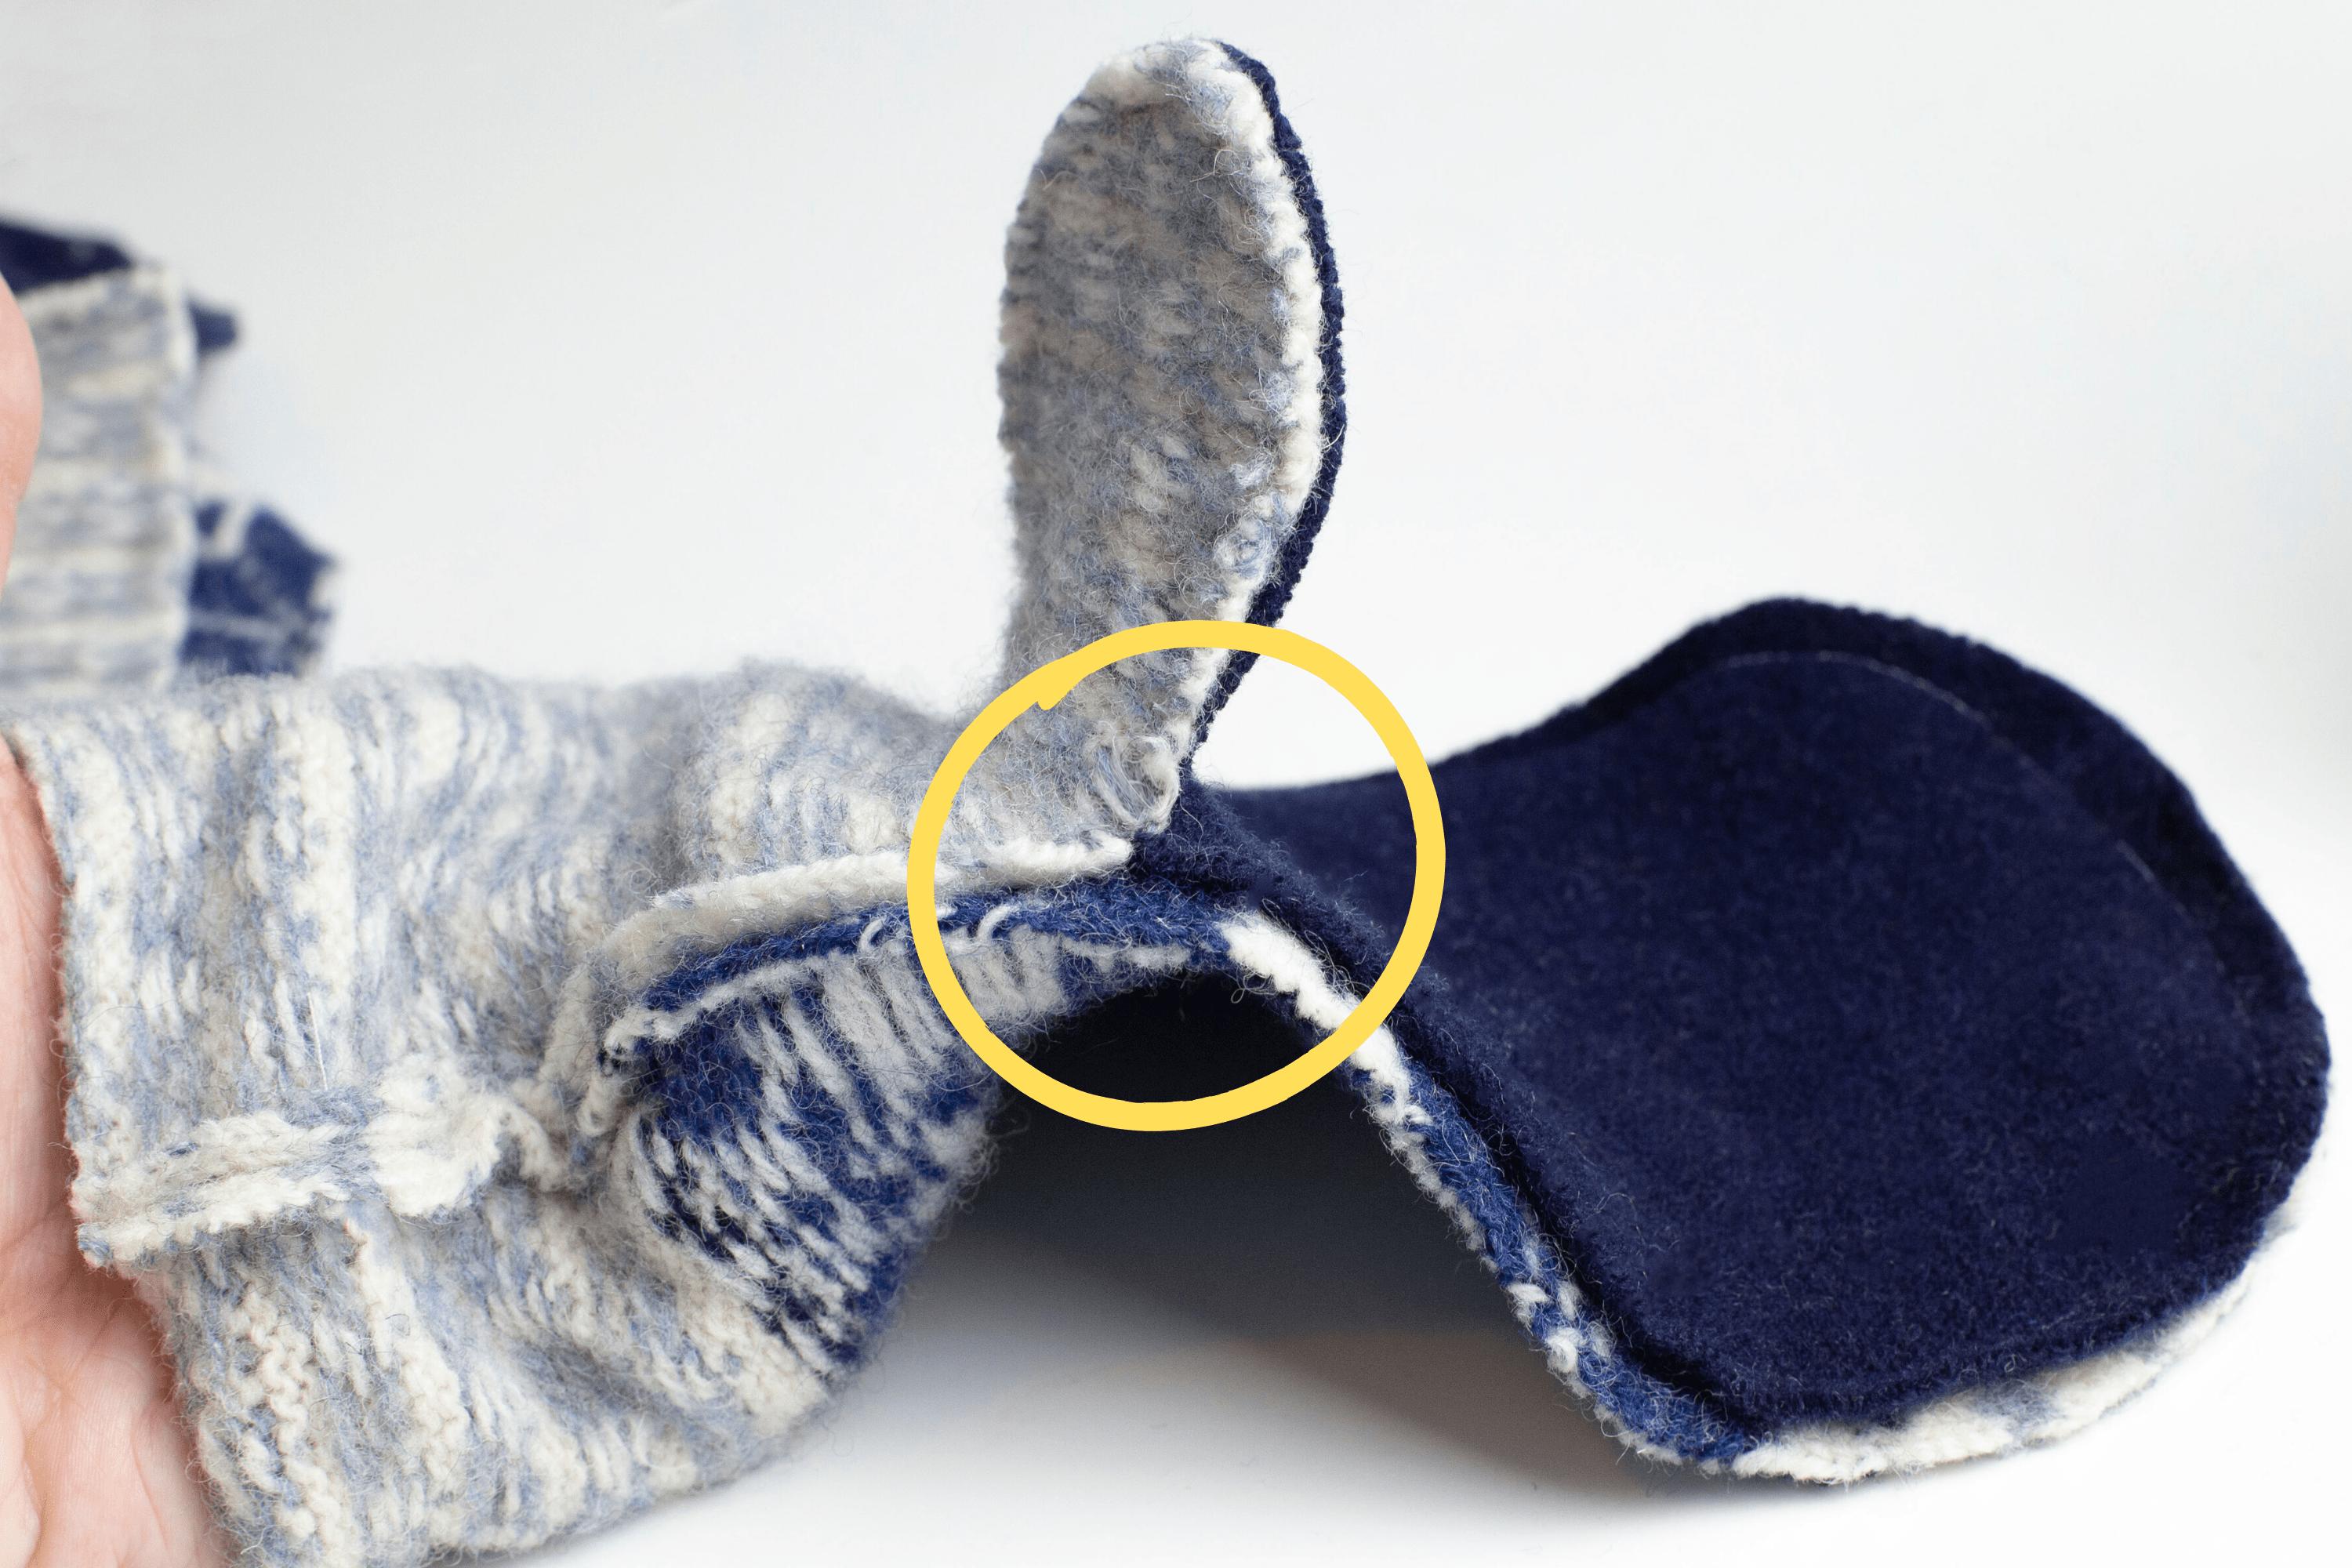
Check the area where the three pieces of fabric all connect. Ensure the seam is strong and not too close to the edge. Re-sew this section if necessary. Trim any excess fabric to prevent extra bulk, being very careful not to cut too close to the stitching. Flip the mitten right side out.
Repeat the same steps for the liners. The only change is you will not flip the liner right side out when you are finished. It will remain the way it was sewn.
If you are not using the pre-sewn cuffs from the sleeve of the sweater, you will sew up the edge of the cuffs. Fold the fabric in half with the right sides facing one another. Pin the edge. Sew along the side. I do this seam twice on each cuff to ensure it does not come undone when wearing the mittens. Turn right side out when finished.
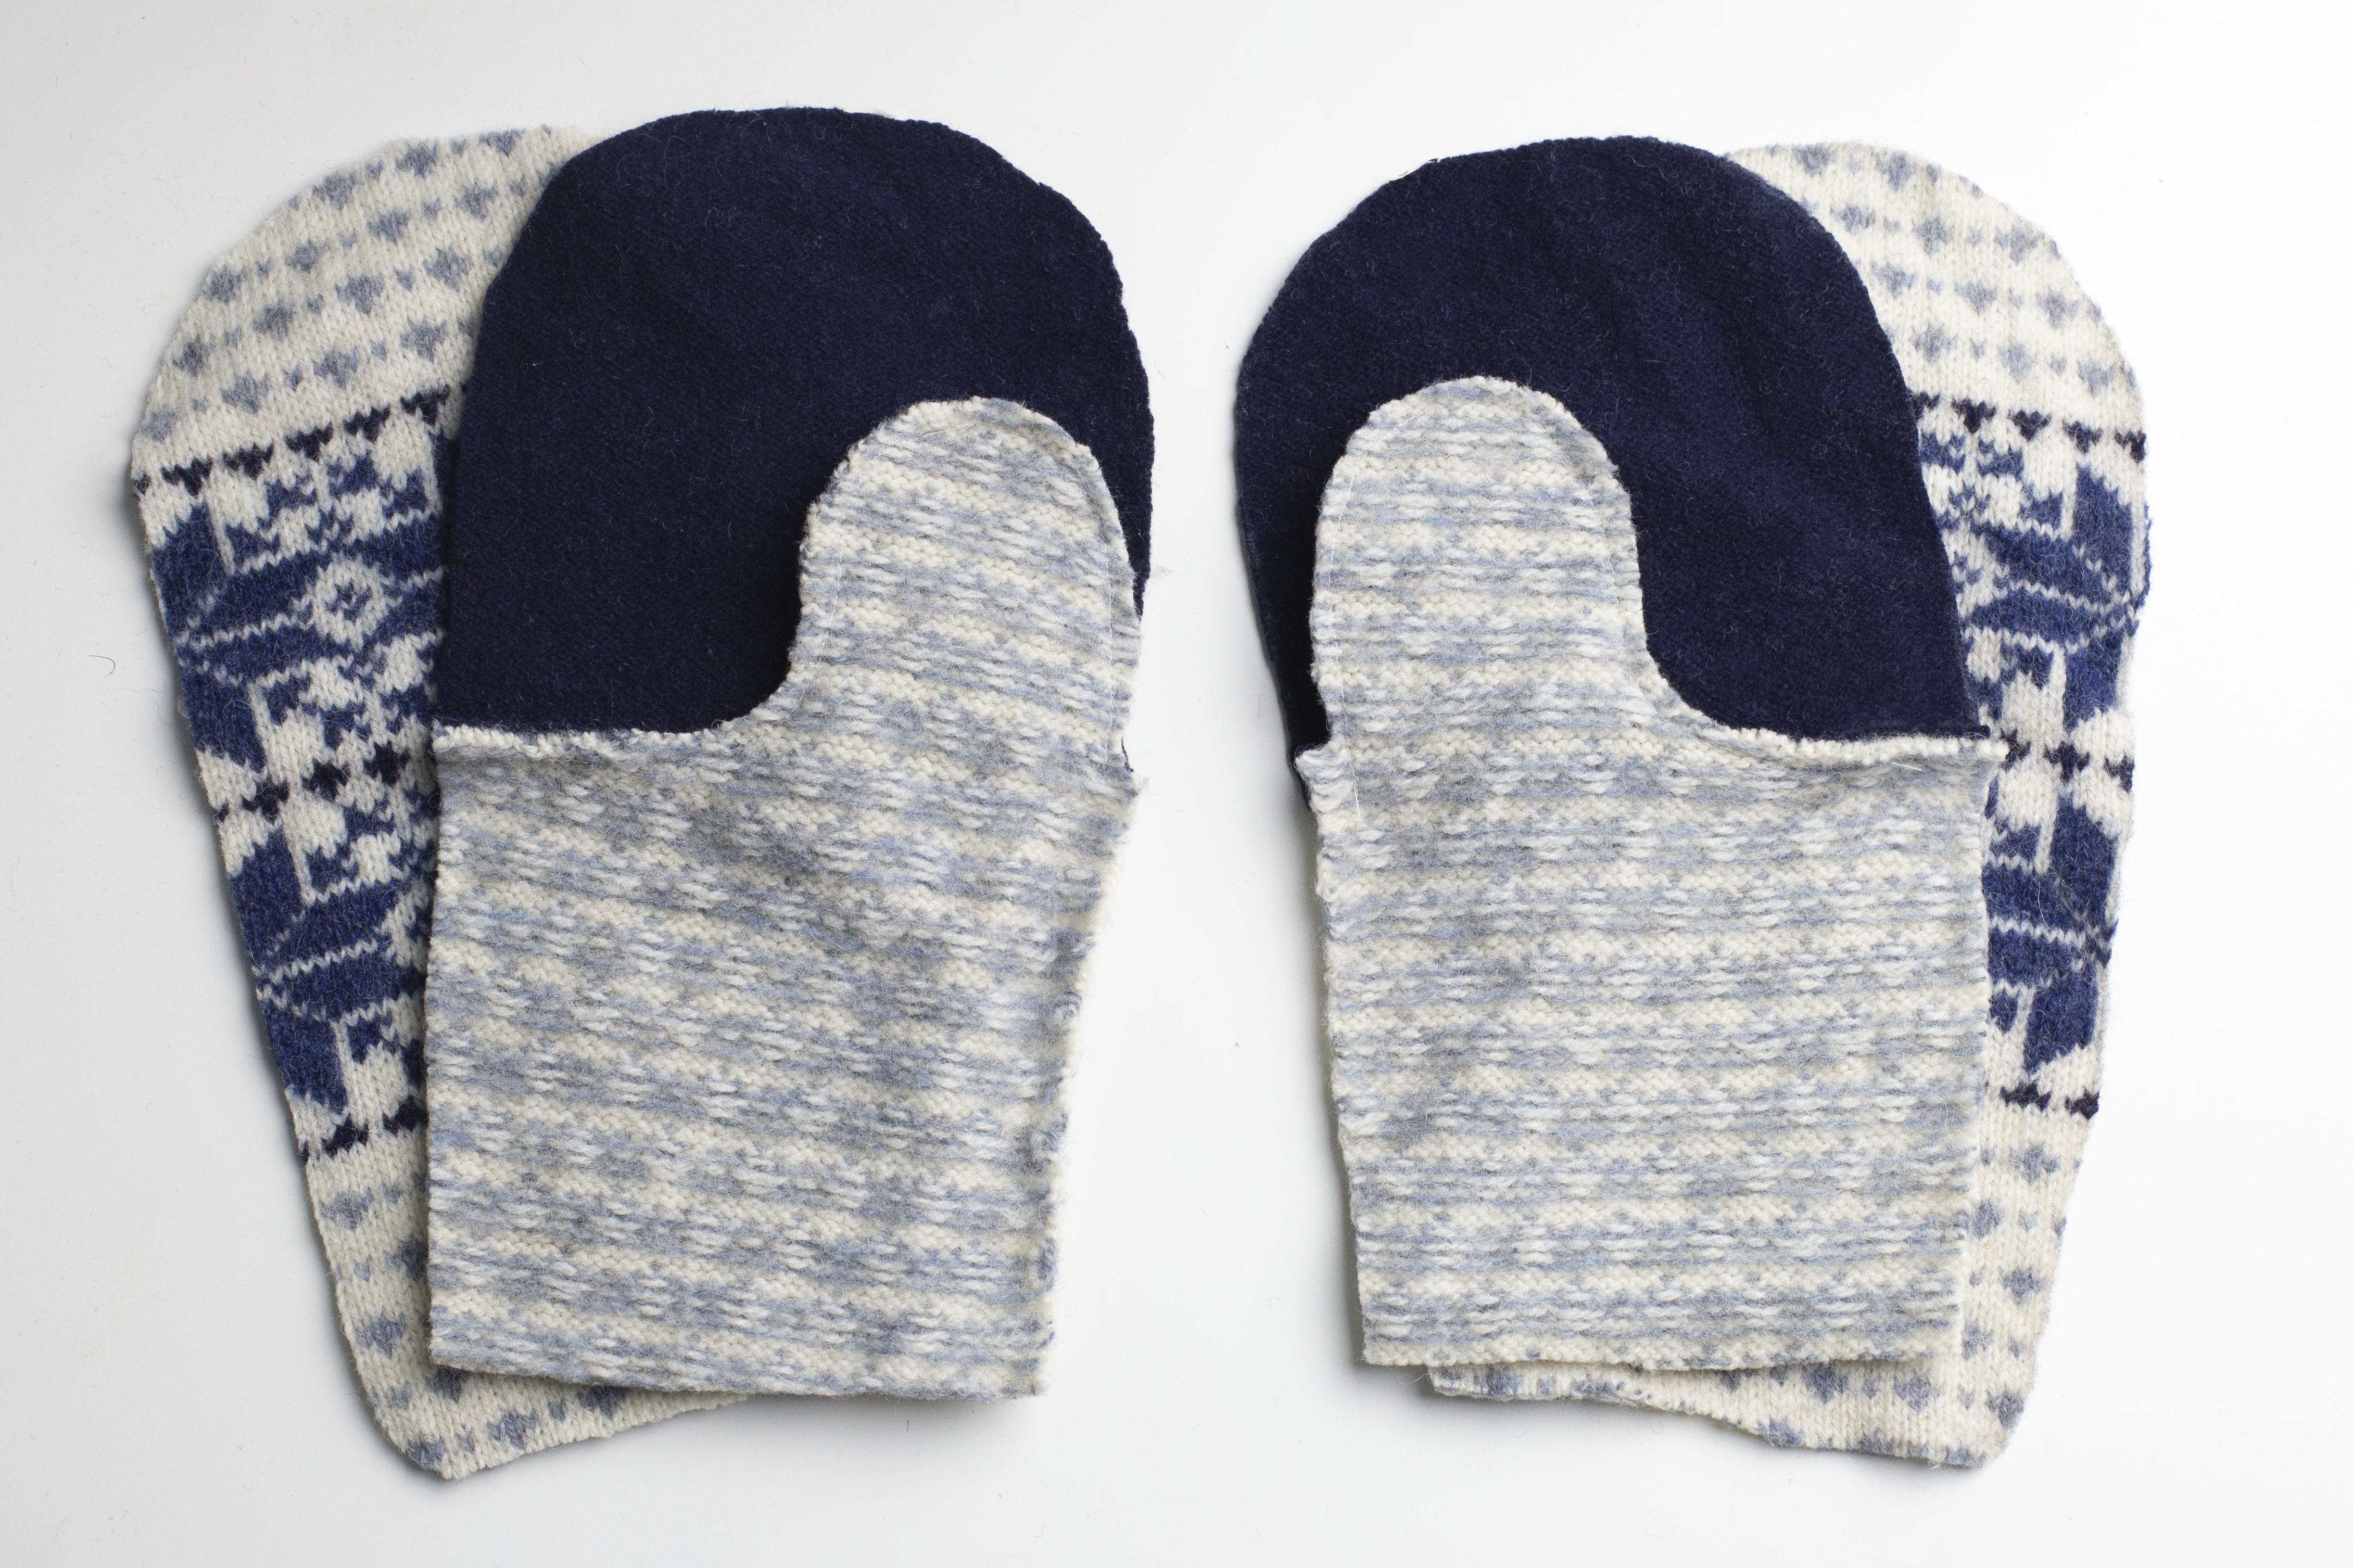
Your mittens are almost finished. This is how your project should be looking at this stage.

The last step is to sew the cuffs onto the liners. Your cuffs should be turned right side out (not inside out). Insert the cuff into the liner with the finished edge of the cuff furthest into the liner and the raw edges of the cuff and liner lined up. Line up the seam of the cuff with one either seam of the liner. Distribute the cuff evenly in the liner and pin.
Sew the two edges together, working along the inside of the cuff.

Repeat on the other liner. You are now finished with the sewing machine. Now for the best part – insert the liner into the mitten and turn the cuff over top the mitten.
There are several ways to secure the cuff onto the mitten so that it does not come unfolded.
- Attach a button to the front; stitching through all 3 layers. Be sure to save buttons from your sweaters to use for the cuffs.
- Tack both sides using embroidery floss or yarn; stitching through all three layers.

3. Stitch along the cuff + mitten using the invisible stitch technique.
The templates for the sweater mittens can be found here.
If you plan to make several pairs of mittens and would like a more sturdy set of templates, be sure to check out the laminated templates available in my shop. Our mitten patterns are available in sizes for the whole family.
Follow Fox & Pine Stitches on Instagram, Facebook and Pinterest.
Pattern and photos are the property of Fox & Pine Stitches. Copying, altering or sharing the pattern and claiming it as your own is strictly prohibited.
You have permission to sell items made with this pattern but credit must be given to the designer in any online listings/websites:
Pattern Credit: www.foxandpinestitches.com
You may not use our photos for your own listings.
Tagging us on social media is greatly appreciated.

Source: https://t-tees.com
Category: HOW