
Last Updated on October 9, 2023
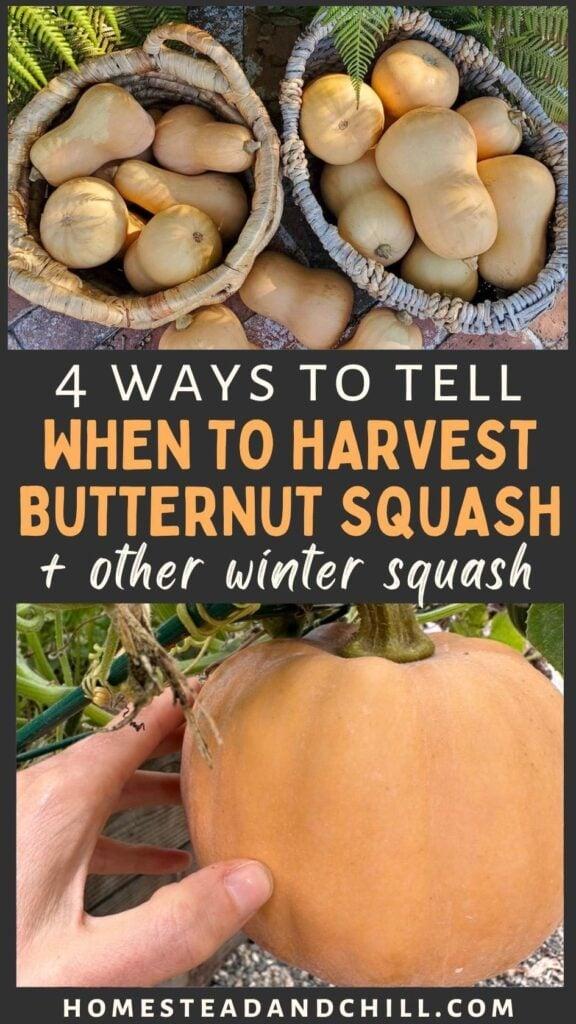
Are you growing winter squash, but aren’t sure exactly when and how to harvest them? Read along to learn! This post will cover everything you need to know about harvesting butternut squash, pumpkins, and other winter squash varieties – including four ways to tell when winter squash is ready for harvest.
You are viewing: When Butternut Squash Ripe
We’ll also cover the benefits of field storage, how to wash, cure, and store winter squash for the best long term storage, our favorite ways to eat and preserve butternut and winter squash, plus other frequently asked questions.
With these tips, you’ll be rewarded with delicious, nutritious squash to keep and enjoy for many months to come. We absolutely love having homegrown butternut and winter squash to use in soup, pie, chili, breads and more – all winter long!
Related: Tips on Growing Winter Squash and Pumpkins and The Best 28 Varieties of Winter Squash and Pumpkins to Grow
When to Harvest Butternut, Winter Squash and Pumpkins
There are several ways to tell when butternut squash, pumpkins, and other winter squash are ripe and ready for harvest – including time, skin and stem color, and “the fingernail test”. However, be sure to read the perks of prolonging your winter squash harvest as long as possible (weather permitting) with our field storage tips below too. When in doubt, wait it out!
1) Time
Most butternut and winter squash are ready to harvest in the late summer to early fall. The exact time it takes for winter squash to mature depends on the variety, ranging from 60 to 120 days to maturity after planting. So, check the description for the varietyyou’re growing to get a rough estimate of when they should be ready! However, pay attention to other signs of ripeness too; don’t rely on expected maturation time alone.
Weather and frost will also dictate harvest time. Despite the name “winter squash”, butternuts, pumpkins, and other hard squash are NOT frost tolerant. The vines are susceptible to frost injury, as is the fruit itself.
If winter squash are exposed to frost the protective rind becomes damaged, which compromises its long-term storage ability. Therefore, be sure to pick your winter squash before a hard frost! If just a light frost is in the forecast, you may be able to insulate the plants and fruit with frost cloth or other protective covers. If your winter squash or butternuts do get frosted, harvest and use (or preserve) them as soon as possible.
2) Color Changes
As harvest time draws near, winter squash vines will start to turn yellow or brown and die back. As that happens, the plant is drawing in final energy and nutrients from the leaves, putting it into ripening fruit instead. Removing late green fruit from the vine (ones that won’t have enough time to ripen) will also help the more advanced squash mature faster.
The skin of most winter squash will change color as they mature. For instance, pumpkins generally turn from dark green to bright orange (or the expected color for the pumpkin variety). Other winter squash may have a more subtle color change, but usually turn from some shade of green to a deeper rich fall color.
Most young butternut squash are pale yellowish green with streaks, and turn a nice solid deep tan once fully ripe. Our Autumn Frost butternut squash are unique: they start out dark green like pumpkins, changing to a beautiful frosted tan-orange color at harvest time.
Immature delicata squash has light green stripes and pale yellow-green skin, which changes to dark green strips against a warmer beige background as they mature (or even an orangish color, depending on variety). Spaghetti squash changes from a pale cream color to bright yellow when ripe.
Acorn squash is more tricky to assess since they stay dark green at all stages. One way to tell acorn squash is ready to pick is when their “field spot” (the spot that was resting on the soil) turns from white-yellow to bright orange. However, that method cannot be used for acorn squash grown on a trellis, so you’ll have to rely on other signals like the stem or fingernail test instead.
3) Ripe Winter Squash Stems
As winter squash and pumpkins ripen, most varieties’ stems will also turn from green to a brownish tan color. The stem will also become increasingly dry and hard, which is one way the plant seals the fruit for long term storage – and why you should always try to leave a long stem attached to pumpkins or winter squash post-harvest! Even more, mature winter squash stems usually develop “corking”, where dry cracks and brown lines appear along the stem. A corked squash stem is a good sign that it’s almost harvest time.
4) Winter Squash Thumbnail Test
The thumbnail test is another good way to tell if pumpkins, winter squash or butternuts are ready for harvest. To check, gently poke the skin of the squash with your fingernail. If the skin is easily pierced or significantly dents, it’s not ready. (Don’t worry, it will heal itself quickly.) Once the skin is tough and dense enough to resist puncture (barely dent) by the thumbnail test, it’s ready! This method is widely used and recommended by Master Gardeners and universities alike.
However, many gardeners leave their squash on the vines long after this – also known as field storage – until just before frost arrives.
Field Storage for Butternut and Winter Squash
Read more : When Is 1.4 Honkai Star Rail
Unlike summer squash, it’s best to leave winter squash on the vine to mature as long as physically possible. There, they continue to ripen and develop deeper, sweeter flavors. Furthermore, the longer they’re left on the vine, the more hard and storage-ready the rind becomes – which greatly increases shelf life! Once picked, their storage life countdown begins, so leaving them on the vine prolongs the time you can use them.
So, even if all signs say our butternut squash are ready to harvest, we’ll often leave them on the vine until just before frost (or until we have to otherwise clear the plants) essentially “storing” them in the field. That usually gives us an extra month or two of overall storage life!
How to Harvest Winter Squash and Pumpkins
This is the easy part. Once you’ve determined they’re ready for harvest, simply cut winter squash stems off the vine. The stems are likely quite hard by now, so you’ll need a nice strong, sharp pair of pruning shears. Try to leave the stem as long as possible, taking care not to break it off during transport or storage either. Also be careful to not cut the vine itself, especially if you’re not ready to remove the rest of the plant just yet.
Keep reading to learn what’s next: how to wash, cure, and store winter squash.
Related Questions
What happens if I harvest butternut or winter squash too early?
Did you accidentally pick your winter squash too early? Or perhaps you had to because of frost or other circumstances? Don’t fret, it happens to the best of us! The good news is, near-mature winter squash (including butternut) will continue to ripen off the vine after harvesting. Very green young fruit won’t be worth keeping however.
If you have to harvest butternut early, proceed with curing under ripe fruit as explained below. The flavor may never reach the quite same depth and sweetness as a vine-ripened squash, but they should still be worthy of a meal!
Can you leave butternut squash on the vine too long?
Not really! The only risk or downside of leaving butternut or other winter squash on the vine too long is if they end up getting frost damage or heavy water damage, so just keep an eye on your weather forecast.
Occasionally, if there is a heavy rain (or, if you suddenly overwater) mature butternut squash left on the vine may split. The tender skin of younger fruit can flex and stretch with moisture fluctuations, but the hard skin of mature squash is prone to splitting under pressure. Split squash is still perfectly edible though! Plus the split will often scab over and heal if it isn’t too deep.
Otherwise , the longer you can wait to pick winter squash, the better! As we’ve already explored, the fruit will only become increasingly ripe, sweet, and storage-ready the more time they’re left on the vine.
Should I wash butternut or winter squash after harvest?
After harvest, it’s best to thoroughly wash butternut and winter squash to remove any dirt, debris, bacteria, and mildew before storage, since leaving grime behind can encourage faster deterioration.
To wash winter squash, you can keep it as basic or elaborate as you wish. Some folks simply rinse them well with water, while others use mild soapy water and a towel or sponge. To kill bacteria and fungal spores, some gardeners spray or quickly soak their harvested pumpkins and butternut in a dilute bleach solution (2 Tbsp of bleach per gallon of water, 30 to 60 seconds is plenty) and then rinse after. No matter what method you use, be sure to thoroughly dry the squash after!
Oil buffing is another optional step to prevent mold growth and premature spoilage. After washing and drying winter squash, use an old clean towel or paper towel to apply a small amount of olive oil or vegetable oil all over the squash skin. Continue to buff and rub away the excess oil, leaving just a thin coat of oil on the squash. It should be shiny but not feel greasy to the touch after.
Curing Butternut and Winter Squash After Harvest
Why cure winter squash?
Curing is an important step after harvesting butternut squash, pumpkins, and some other types of winter squash (but not all). The curing process helps to further harden the skin, ripen immature fruit, and even heal minor wounds. Curing increases the shelf life and storage potential of butternut and winter squash – often extending it by several months.
Even better, curing winter squash improves the flavor and sweetness! Rather than eating them right after harvest, many winter squash varieties taste best after a couple months in storage. For instance, the flesh of butternut, winter sweet kabocha, and baking pumpkins all get sweeter with time.
What type of winter squash needs to be cured?
Pumpkins, butternut, buttercup, hubbard, and most kabocha squash should be cured. On the other hand, acorn squash, delicata squash, spaghetti squash, and mini varieties of butternut or kabocha squash don’t benefit from curing. They also have naturally shorter storage lives than those that need curing. Simply wash and store acorn squash, spaghetti squash, and delicata squash in a cool location immediately after harvest.
How to cure butternut and winter squash
Curing is the process of exposing winter squash to warm temperatures and sunlight for 7 to 14 days after harvest, before transitioning them to a cooler final storage location. Warm humid air helps to harden the skin and concentrate sugars, making the squash more sweet.
You can cure winter squash, pumpkins, or butternut indoors near a window in a warm room, garage, or attic space, in a greenhouse, or simply by leaving the squash to sun-cure outside in the garden after harvesting if the weather allows.
The ideal curing conditions for butternut and other winter squash is 75 to 85 degrees, with air humidity levels around 80% if possible. We usually cure any under ripe butternut for the full 14 days. Once they’re done curing, move the squash to a cool dark location for long term storage.
Storing Winter Squash, Butternut, and Pumpkins Long Term
Where to store winter squash?
Read more : When Is Next Powerball Drawing 2023
It’s best to store cured butternut and pumpkins in a cool, dark, well-ventilated area, such as a basement, root cellar, or garage. A cool pantry, spare closet, or shed could work too. The ideal storage temperature for winter squash is around 50 to 60 degrees Fahrenheit, with about 60 percent humidity. A location with fairly steady temperatures is best, since temperature fluctuations can encourage rot. It’s also best to store winter squash away from apples, pears, or other ripening fruit.
How to store butternut and winter squash
Store butternut and winter squash spread out in a single layer with room for air circulation around each fruit. Don’t pile them up on top of one another. This way, they won’t bruise or puncture one another with their stems. It also makes it easy to routinely inspect the fruit. Avoid storing winter squash directly on a cold concrete floor – lay down cardboard first. Cardboard can also be handy to line wire shelves or crates that may dent or bruise the skin.
Sorting and Inspection
After harvest, it’s a good idea to inspect and sort your butternuts and winter squash by fruit quality and damage.
Blemish-free “Grade-A” squash will hold up the longest in storage, and therefore can be kept in the back of your storage area and used last. “Grade-B” squash with nicks, cuts or bruises will rot faster, so they should be monitored more closely and consumed sooner.
Routinely check your winter squash storage every week or two, ideally turning over or rotating the fruit on occasion. Keep an eye out for wrinkly or softening squash that need to be used or composted. A neglected moldy squash can easily spread to neighboring squash too!
Which winter squash stores the longest?
Butternut squash, along with select long-storing specialty pumpkins and kabocha varieties (e.g. winter sweet), have the longest storage potential – lasting up to 6 months or longer if harvested, washed, cured, and stored properly. Delicata, spaghetti, and most acorn squash usually have a shorter shelf life, and should be consumed within 2 to 3 months after harvest.
Generally speaking, larger winter squash varieties last longer in storage than smaller varieties of squash. Even among the same type of winter squash, variety can influence storage potential. For example, ‘Butterscotch’ and mini ‘Butterbaby’ butternuts are expected to last around 3 months in storage. On the other hand, ‘Autumn Frost’ or classic ‘Waltham’ butternuts are known to have exceptionally long storage potential – up to 6 months or longer. Storage conditions will also influence shelf life.
Recipes: Ways to Prepare and Use Winter Squash
Now it’s time for the best part: eating your winter squash!
Winter squash are most often roasted or used in baking, such as pumpkin sweet bread or butternut squash pie. Yes, you read that right – butternut squash pie! Similar in texture and flavor, many winter squashes can be used interchangeably with pumpkin in recipes – especially butternut, kabocha, and hubbard types.
The easiest way to roast winter squash is to cut it in half (from stem to bottom), scoop out the guts and seeds, and roast the halves whole. You can roast them face-up with a sprinkle of seasonings, oil, or butter in the hollow cavity, or roast them flesh-side down. I also like to carefully peel and cut butternut into bite-size cubes or “french fries”, toss them in olive oil and seasonings, and bake them like potatoes.
We also love to use butternut squash in soup, like this creamy roasted butternut squash soup with sage and apple, or add cubed chunks to our favorite kale lentil soup recipe. We also make a killer vegan roasted sugar pie pumpkin 3-bean chili (and often substitute butternut in that recipe too). Or, try our seasoned rice stuffed acorn squash recipe!
Delicata squash has exceptionally thin, edible skin, so peeling isn’t necessary. This makes it especially popular for quick and easy preparation, and even used on salads. Once cooked, spaghetti squash flesh pulls apart into long “noodles” – a fun one for adults and kids alike!
Last but not least, don’t forget the winter squash seeds are edible too! Learn how to make the most crunchy, delicious and nutritious soaked and roasted pumpkin seeds here.
How to Preserve Butternut, Pumpkin, and Winter Squash
One of the best ways to preserve winter squash is to roast, puree and then freeze it – including freezing butternut puree, pumpkin puree, or other squash. Then use your homemade squash puree in any recipe that calls for canned pumpkin, including in baking, soups, stew and more. See the easy instructions here.
Winter squash and pumpkin can also be cut into cubes and frozen in freezer bags, or pressure canned. We also preserve our winter squash by making soup or chili with it (recipes above) and freezing the soup in durable, reusable BPA-free quart freezer containers for easy future meals!
And that concludes today’s lesson.
I hope this guide taught you everything you need to know to successfully harvest, cure and store winter squash of your own! Please feel free to ask any questions in the comments below. If you found this information to be useful, please spread the squash love by pinning or sharing this post. We greatly appreciate you tuning in today.
You may also enjoy:
- 28 Best Winter Squash and Pumpkin Varieties to Grow
- Growing Winter Squash and Pumpkins: The Ultimate Guide
- How to Make Homemade Pumpkin Puree (and Freeze It)
- Delicious Butternut Squash Pie Recipe (Vegan Options)
- Creamy Roasted Butternut Squash & Sage Soup Recipe
- Healthy Sourdough Pumpkin Spice Bread Recipe (or Muffins)
- Vegan Roasted Sugar Pie Pumpkin 3-Bean Chili Recipe
Source: https://t-tees.com
Category: WHEN