
A more recent addition to my garden, broccolini, has become one of my firm favorites.
What Is Broccolini?
Broccolini is an annual vegetable from the Brassicaceae family.
You are viewing: When To Harvest Broccolini
It is actually a hybrid cross between European broccoli, B. oleracea var. italica, and Chinese gai lan, B. oleracea var. alboglabra, otherwise known as Chinese broccoli or Chinese kale.
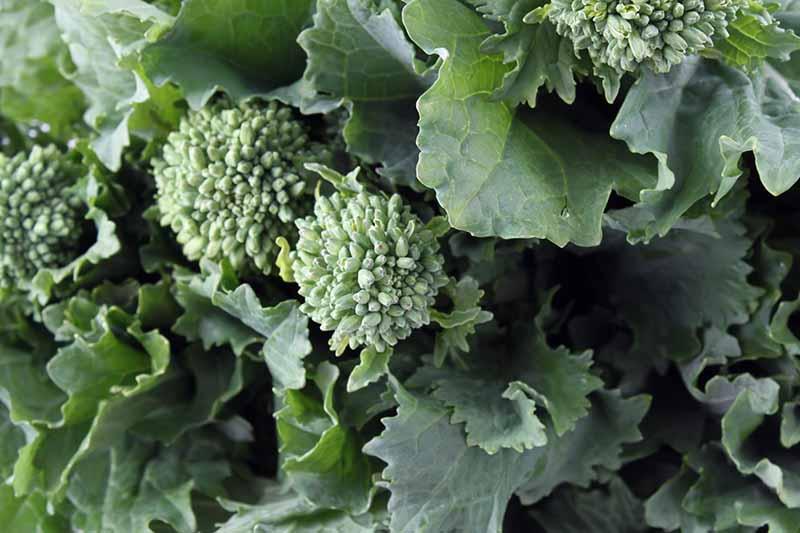
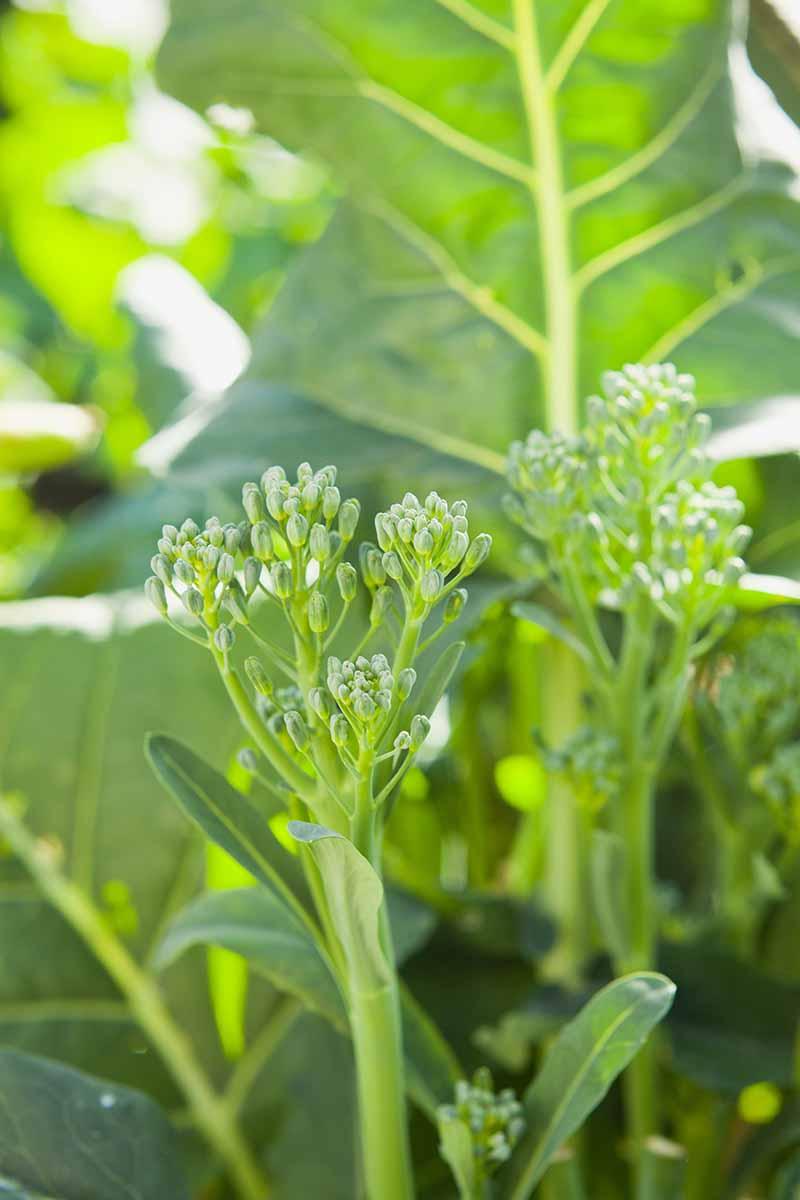
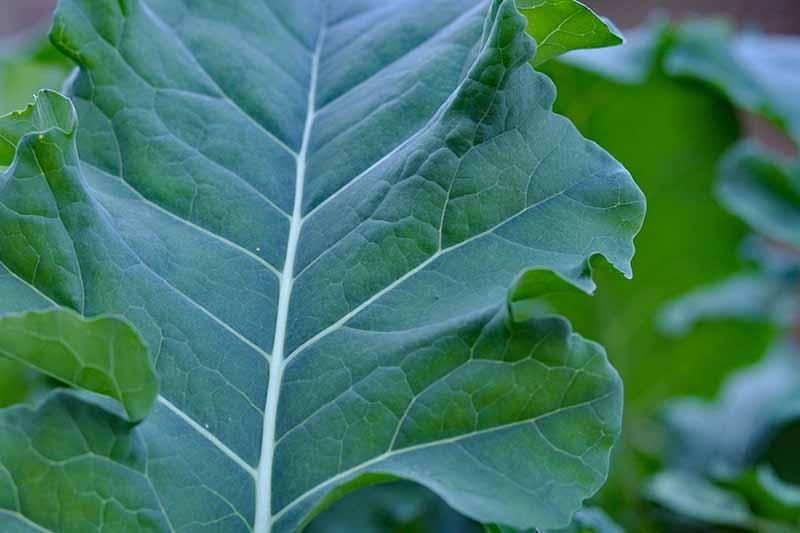
Though it resembles broccoli in many ways, unlike its large-headed relative, broccolini produces many small flowering shoots on thin tender stems.
The entire plant is edible, including the curly green leaves, small florets, and long stems.
Milder and sweeter than broccoli with a subtly peppery flavor, it is wonderful steamed, stir-fried, or even eaten raw in salads.
It is also not to be confused with B. rapa var. ruvo, known as broccoli rabe or rapini, which is actually a member of the turnip family, and has a more bitter taste.
Cultivation and History
Cultivated as a hybrid by Sakata Seed Company and first grown commercially in Mexico in 1994, broccolini is a relative newcomer to the garden scene.
The new hybrid was referred to as aspabroc, due to the thin edible stems’ likeness to asparagus.
It first became available in US markets in 1996, and was rebranded “broccolini” in 1998 after a partnership between Sakata Seed Company and Mann Packing Company.
It has gone by many names in its short existence, including broccoletti, broccolette, asparation, tenderstem, sprouting broccoli, and baby broccoli.
Propagation
Broccolini is hardy to USDA Zones 2 through 10.
It can be planted as soon as the ground has thawed in the spring. However, keep in mind that it only tolerates light frost and it may be safer to wait until all risk of frost has passed, particularly in colder regions.
Broccolini grows best when planted from transplants rather than by direct sowing.
Either purchase seedlings from your local nursery or garden center, or start seeds indoors in spring 4-6 weeks before your last average last frost date.
Sow 3-4 seeds in each pot at 1/4 inch deep in a balanced potting soil, and place in a bright, sunny location, or use a grow light. Seeds should germinate in 7 to 10 days.
After a few weeks, remove all but the strongest, healthiest plant in each pot.
Before transplanting, harden off the remaining seedlings by setting them outdoors for increasing periods of time over the course of a week.
Transplant into the garden when they are 4-6 weeks old, or when they have developed 6-8 true leaves.

You can also start seeds indoors or on a covered porch in pots in late summer and transplant out in early fall for an autumn harvest.
In the same way as you would with spring starts, you should transplant seedlings into the garden when they have developed 6-8 true leaves.
Plant seedlings outside in garden soil amended with compost, planting about 1/2 inch deeper into the soil than they were in the pots. Space plants about a foot apart in rows 2 feet apart.
If you do want to try direct-sowing, sow seeds in garden soil amended with compost in rows 12 to 14 inches apart. Place a broccolini seed in each 1/4-inch deep hole and cover lightly with soil.
Once seedlings emerge, thin to 5 to 6 inches apart.
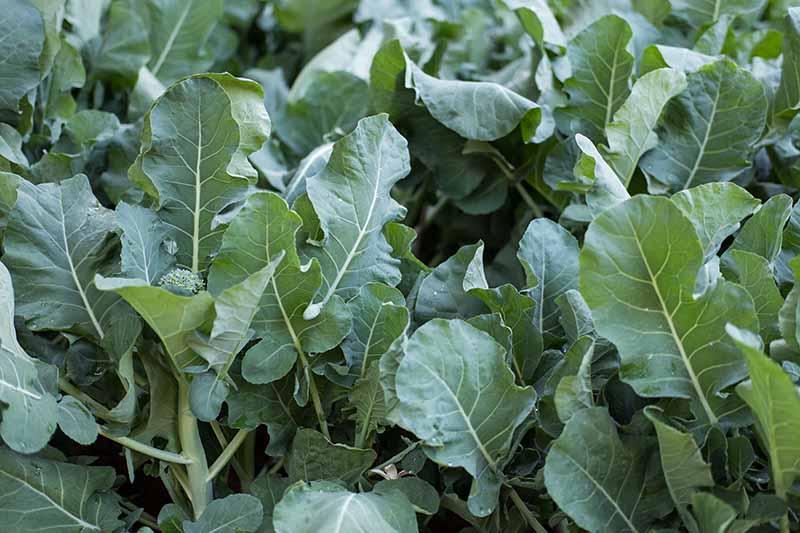
How to Grow
Broccolini can be somewhat challenging to grow due to the limited knowledge of its ideal growing conditions.
In general, it is considered a cool weather crop that has similar growing requirements to broccoli, though it is not quite as cold hardy as its parent.
It grows best in full sun in nutrient rich, well-draining soil with a pH between 6.0 and 7.0. Prior to planting, it is useful to add a couple of inches of compost or aged manure to the soil.
Top with a thick mulch of straw or shredded leaves to help retain moisture, keep down weeds, reduce erosion, and help regulate soil temperature.
Read more : When Will Heehra Rebates Be Available
Broccolini needs lots of water, guzzling up at least 1 to 2 inches per week. Keep an eye on plants and water every few days, or when the top of the soil begins to look dried out. Water until the soil is moist but not waterlogged.
You can also spray plants with compost tea, comfrey tea, or a balanced organic liquid fertilizer such as Dr. Earth Pure Gold All Purpose Liquid Fertilizer, available from Nature Hills Nursery.

Dr. Earth Pure Gold All Purpose Liquid Fertilizer
Spray whenever you notice yellowing leaves, which are a sign of nitrogen deficiency. You can also choose to apply liquid feed regularly every few weeks, which will give plants an extra boost of nitrogen, helping your crop to grow larger and more resilient.
When plants are about 8 to 10 inches tall, you can push soil around the stems up to the first large leaves.
This will help encourage side shoots to form. This is important because the side shoots are the part that is harvested.
Growing Tips
- Plant in soil amended with compost or aged manure.
- When transplanting, add a scoop of compost to each planting hole.
- Mulch to help retain moisture, reduce weeds, and regulate soil temperature.
- Supply 1 to 2 inches of water per week.
- Spray foliage with compost tea or organic fertilizer every few weeks, or when leaves begin to yellow.
- Push soil up around the stems of plants as they grow to encourage side shoots to develop.
You will often find aphids lurking on the undersides of leaves. Look for curled, stunted, or yellowing foliage. You can also recognize aphids by the sticky “honeydew” they leave behind, which can attract other pests and encourage mold.
You can try washing off the leaves with a strong spray from the hose to remove them.
You can also try spraying with a homemade insecticidal soap made from a combination of biodegradable dish soap, water, and garlic. Just crush or blend two bulbs of garlic into a quart of water and let it steep overnight. Strain and add a teaspoon of biodegradable dish soap.
Read more about aphid control here.
Cabbage Loopers
These small green caterpillars often seen lurking about brassica plants and they can eat through leaves, causing incredible damage. It is good to catch these early since the more they munch, the bigger they grow, and the more damage they cause!
You can handpick the caterpillars when they appear, or try sprinkling food-grade diatomaceous earth on and around plants that show signs of infestation.
Head off issues before the larvae hatch by treating the small green eggs and silky cocoons that appear on stems or the undersides of leaves with with diatomaceous earth.
You can also install install floating row covers to deter the moths from landing on plants and laying eggs.
Learn more about combating cabbage loopers here.
Flea Beetles
These tiny jumping insects will chew small holes through leaves. You may also see tiny white eggs around the base of plants or in the soil.
Severe infestations can completely destroy crops, and they can quickly spread throughout the garden.
If you tend to have issues with issues with flea beetles, floating row covers can be very effective when placed around young seedlings.
You can also sprinkle diatomaceous earth or spray neem oil on affected crops.
Read more about controlling flea beetles here.
Root Maggots
These small legless critters lay eggs at the base of young plants and feed on underground roots, causing rotting, and sometimes death of your plants.
Look for stunted growth, wilting leaves with occasional yellow or blue foliage, and damaged roots.
If you discover an infestation, remove and destroy infected plants.
Read more about identifying and control cabbage root maggots here.
Slugs
These slimy, soft-bodied insects tend to make an appearance in moist conditions. They can eat large holes through leaves and can quickly cause substantial damage to foliage. Learn more about protecting your crops from slugs and snails here.
You can hand pick slugs if you are not too squeamish, or you can try burying cups filled with cheap beer around your garden beds. The beer will attract the slugs which will fall into the cups and drown.
You can also spray garlic oil to the soil around the crop or lay uncoated copper around plants to act as a repellent. More information on controlling slugs on cole crops can be found here.
You can reduce the risk of problems by installing floating row covers or by sprinkling food-grade diatomaceous earth around the base of your crops.
Practice regular crop rotation to reduce the risk of continued infestation.
Disease
Be on the lookout for signs of disease and take preventative measures such as weeding regularly to reduce overcrowding of plants and prevent excessive moisture from building up.
Black Leg
This common fungus, which causes dark spots on leaves, commonly affects cole family crops. It is common in warm and wet conditions, and can overwinter in the soil and on plant debris.
Read more : When Does Going To The Sun Road Open 2023
Because this fungus spreads easily and does not have an effective treatment, it is important to remove infected plants and destroy the plant debris at the end of the season.
Mulching, thinning seedlings, weeding, and allowing leaves to dry thoroughly between watering will reduce the chance of infection.
Black Rot
This is a bacterial disease that produces a foul odor and darkens leaf veins, ultimately causing foliage to wilt and die. It is common in warm, wet conditions, and is especially prevalent in overcrowded garden beds.
Prevention is the best way to manage black rot, as it can be difficult to treat effectively. To reduce risk, plant crops in well draining soil, rotate regularly, avoid over watering, and remove and destroy any infected plants.
Read more about black rot control in cruciferous vegetables.
Downy Mildew
This disease causes yellow or brown spots on leaves that grow white mold in wet conditions. It can stunt growth or cause leaf loss. Remove and destroy any plants that have been infected by downy mildew.
You can reduce the risk of infection by weeding regularly and thinning to reduce overcrowding and increase airflow.
You can also water in the early morning to give foliage a chance to dry out during the heat of the day, making it less susceptible to mold.
Harvesting
There are a couple of steps to harvesting broccolini.
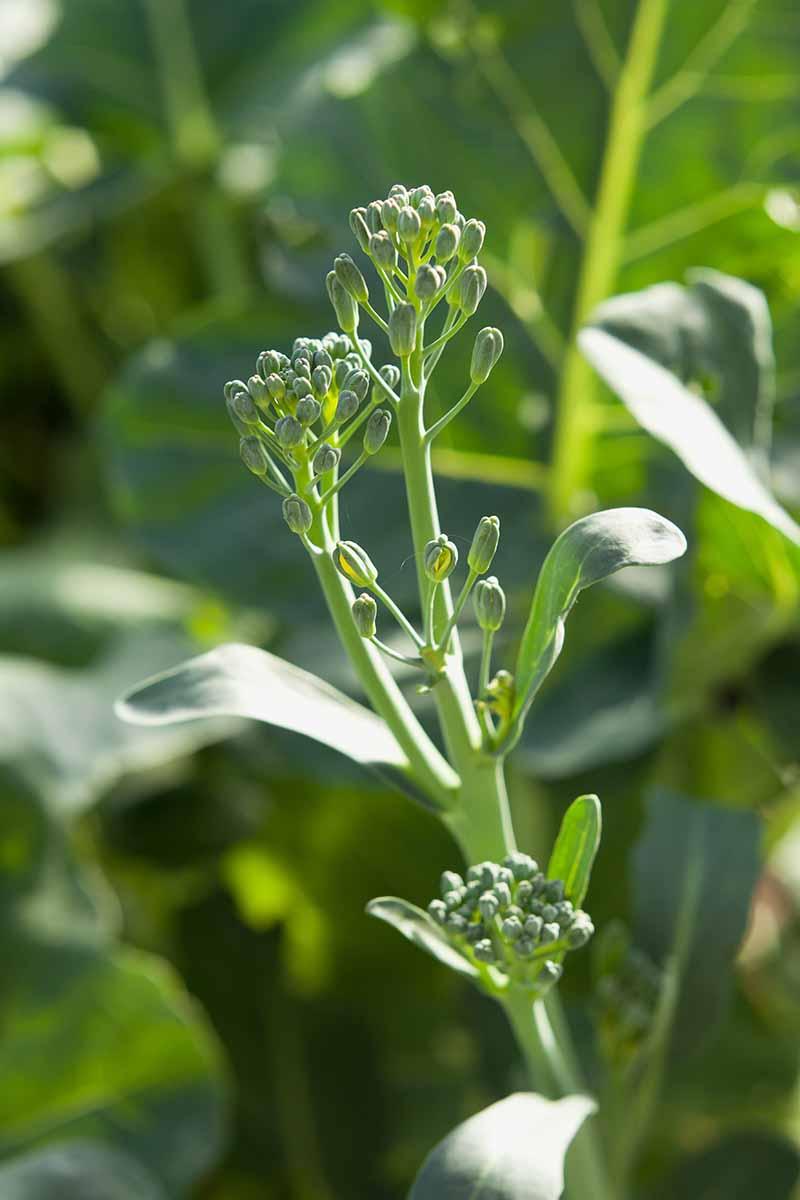
You want to begin the harvest process after the main heads have formed, but before they have begun to separate into individual flowers – typically about 2 to 3 months after planting out.
Leaves should be a vibrant green. Be sure to harvest before the leaves start to turn yellow, which will cause the heads to wilt and lose flavor.
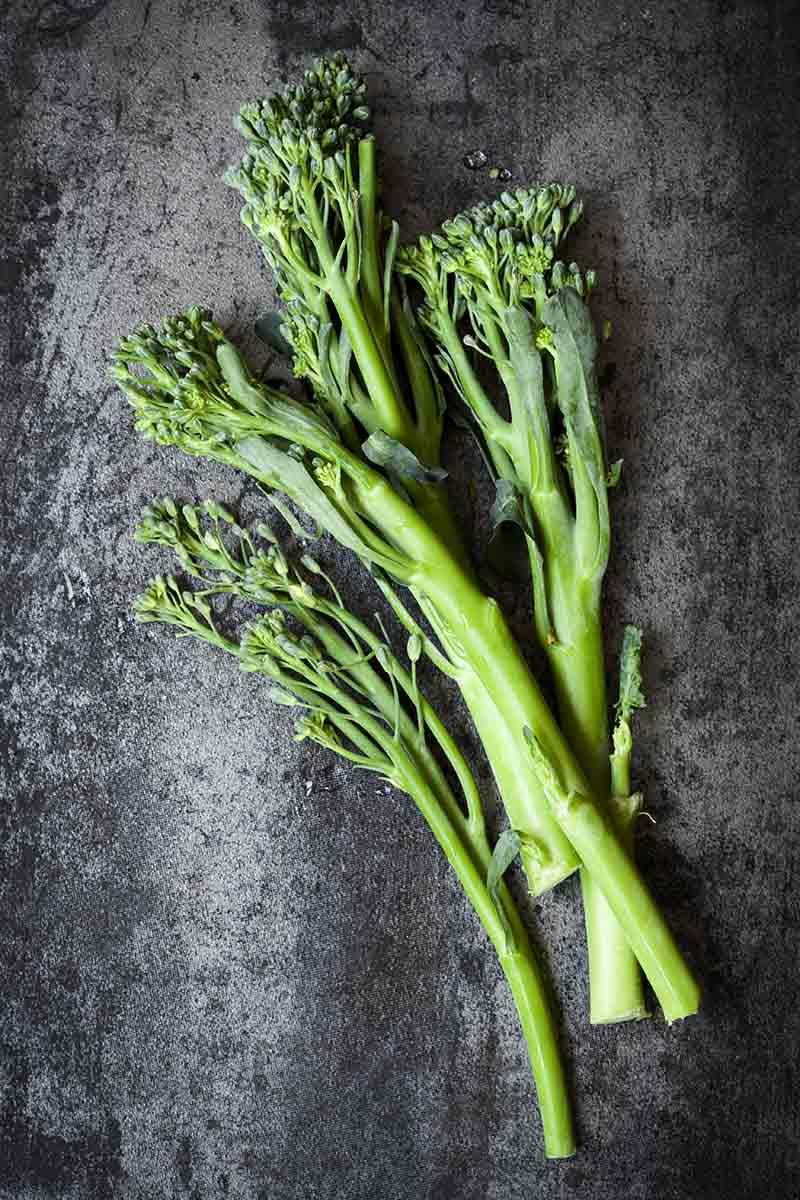
Start by cutting the main crown and about 6 inches of stem.
Removing the central stem will stimulate side shoots to grow, which is the goal. While the main stem is edible, the side shoots are the parts that will ultimately be the main harvest.
Once side shoots appear, you can cut each of the stems just above a set of green leaves. Cut towards the base of the stem, leaving one set of leaves intact to encourage new shoots.
If the foliage is still green and vibrant after cutting the shoots, you should get multiple crops of florets. If you are lucky, you may get up to 3 to 5 rounds of harvests from each plant.
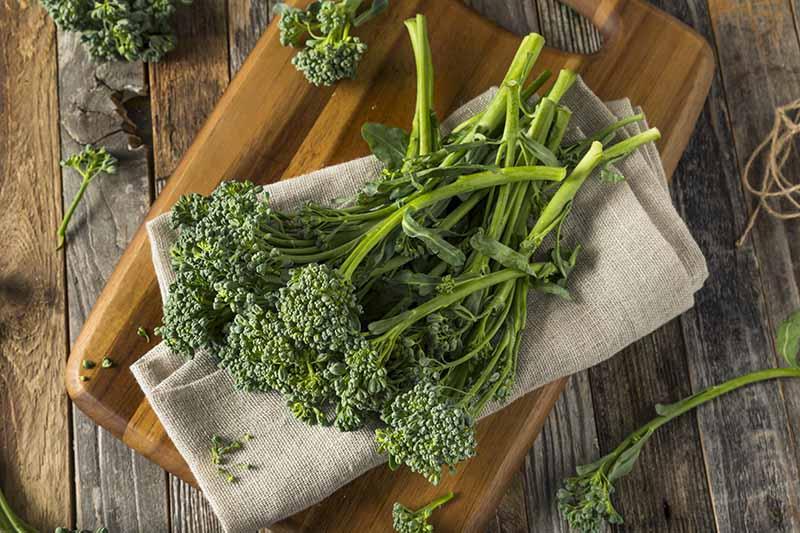
Preserving
Freezing is an easy and convenient way to preserve broccolini. After harvest, wash any dirt off of the shoots and cut each one into bite-sized chunks.
Next, blanch by dropping pieces into boiling water for 1 to 2 minutes. Remove the pieces from the water and immediately dunk them in ice water to stop the cooking process. Let them sit for a few minutes in the ice water before draining.
Be sure to drain them thoroughly prior to freezing.
Freeze pieces in a single layer on a baking sheet for a couple of hours to prevent them from sticking together. Once they are frozen, pack them into freezer-safe bags or airtight containers for long term storage.
When you are ready to cook, just remove a handful from the freezer and throw it into your stir fry or steamer!
For shorter term storage, it should last a few days to a week in a sealed plastic bag in the refrigerator. To increase shelf life, do not wash it until you are ready to use.
Recipes and Cooking Ideas
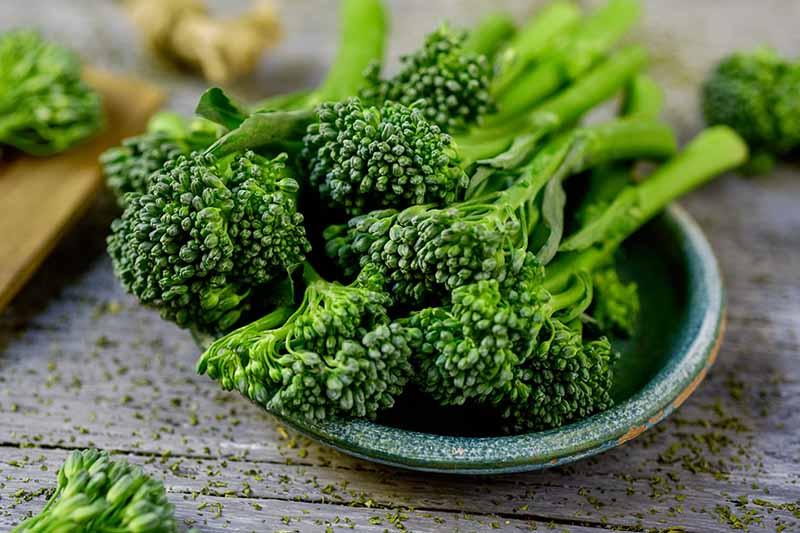
Tender and crunchy when raw, sweet and mild when cooked, broccolini is a versatile ingredient in the kitchen.
The green leaves, tender stalks, and crunchy florets all have a sweet and earthy taste. The stalks, which require no peeling, resemble asparagus, though they taste more like a milder version of broccoli.
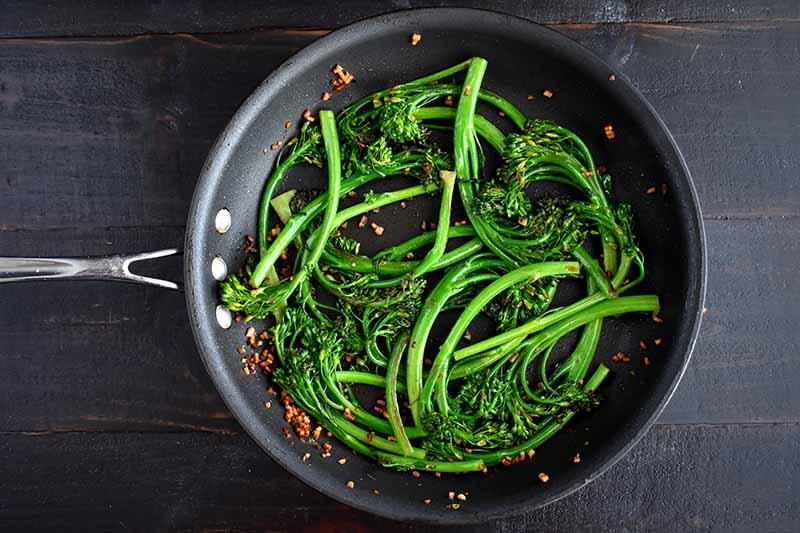
Sauteed, steamed, roasted, grilled, or sliced raw and served with some dip, you simply can’t go wrong with this vegetable.
I love to whip up a quick and simple stir fry of broccolini with butter, garlic, and a dash of lemon juice.
Try this fun spin on a classic pasta salad on our sister site Foodal, featuring grilled tomato, broccolini, and a tangy ginger-balsamic vinaigrette. The juicy tomatoes will melt in your mouth, and the broccolini adds a subtly sweet, chewy texture. Enjoy this delicious salad warm or cold!
Quick Reference Growing Guide
Plant Type:Annual vegetableWater Needs:Moderate Native to:Hybrid of European and Chinese cultivarsMaintenance:Moderate Hardiness (USDA Zone):2-10Soil Type:Nutrient rich Season:Spring, fallSoil pH:6.0-7.0 Exposure:Full sunSoil Drainage:Well-draining Time to Maturity:60-90 daysCompanion Planting:Chamomile, dill, mint, rosemary, sage, and alliums such leeks, onions, chives, and shallots Spacing:2 feetAvoid Planting With:Nightshades Planting Depth:1/4 inch (seeds)Family:Brassicaceae Height:2-3 feetGenus:Brassica Spread:1 footSpecies:oleracea Tolerance:Light frostCultivar:var. italica × alboglabra Common Pests:Aphids, cabbage loopers, flea beetles, slugs, root maggots, white fliesCommon Disease:Downy mildew, powdery mildew, black leg, black rot
Source: https://t-tees.com
Category: WHEN