
Pedag “T-form” metatarsal pads are among the most helpful (and least obtrusive) foot pads you can use to rehabilitate your feet. These pads are helpful in restoring optimal foot health because they spread the heads of your metatarsal bones (which creates more room for sensitive and easily-compressed ball of foot structures, such as nerves and blood vessels, to pass), they promote a balance between your toe flexor and extensor tendons (and in so doing help prevent or address a variety of crooked toes), and they encourage the return of your forefoot fat pad to a position that supports and cushions the heads of your metatarsal bones. Metatarsal pads are also frequently used to address ball of foot pain caused by capsulitis, neuromas, and sesamoiditis.
You are viewing: Where To Place Metatarsal Pads
- You can learn more about the many merits of metatarsal pads in our article entitled Metatarsal Pad Benefits.
But how do you properly place Pedag metatarsal pads to ensure the best possible results? This is an important question and consideration because improper placement may cause foot discomfort and result in a poor user experience, not to mention less than optimal foot and toe rehabilitation outcomes. One of the big keys in correctly placing your metatarsal pads is to make sure they’re pressing into the space or pocket behind the ball of your foot, not under the ball of your foot. Placing the pad under the ball of your foot will be uncomfortable and could possibly worsen your condition. We’ll explore this crucial point in more detail below, but we’ll also walk you through the full 10-step sequence required to achieve optimal metatarsal pad positioning.
Perform these 10 steps when placing your metatarsal pads to get the very most out of them:
- Step 1: Remove the insole from your shoe
- Step 2: Assess the insole to determine ideal pad position
- Step 3: Find the ball of your foot
- Step 4: Expose a portion of the pad’s adhesive backing
- Step 5: Try placing your metatarsal pad
- Step 6: Try on your shoe
- Step 7: Make any necessary position adjustments
- Step 8: Mark the optimal location of your metatarsal pad
- Step 9: Permanently place your metatarsal pad
- Step 10: Place your other metatarsal pad
Let’s dive into each of these important steps in greater detail now.
Step 1: Remove the Insole from Your Shoe

The easiest way to place your metatarsal pads is to use your shoe’s insole or liner as a gauge and to place the pads directly on the insole. So, the first step in properly placing your metatarsal pads is to pull the insole out of your shoe. If the insole will not come out (it may be glued down or sewn into place, in some cases), or if there is no insole, or if you prefer wearing your shoes without the included (usually optional) insole, then the act of placing your metatarsal pads will be a little more tricky, though certainly not impossible (more on this in the section below entitled What if the Shoe Doesn’t Have a Removable Insole?).
Note: One set of Pedag metatarsal pads contains a left pad and a right pad, and these must be placed on your left and right insoles, respectively.
SHOP PEDAG METATARSAL PADS
Step 2: Assess the Insole to Determine Ideal Pad Position

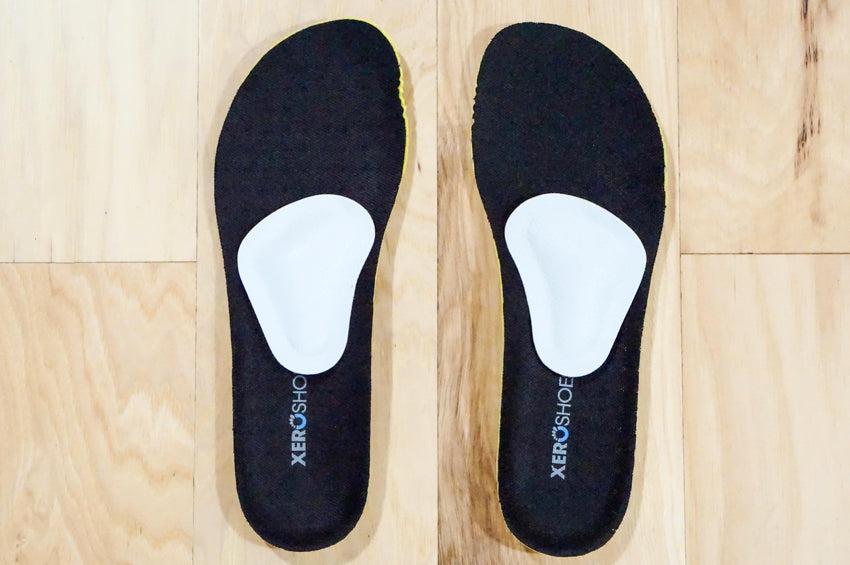
With your insole now exposed, take a good look at it. Mentally (or even physically, with a ruler and markings) divide the insole into thirds, such that there are clearly defined segments for the forefoot, arch area, and heel. It’s the middle third of the insole that is the target for placing your metatarsal pad. It’s a common error among new users of metatarsal pads to place the pad too far forward on the insole, such that it encroaches well into the front third of the insole and is thereby positioned directly underneath the ball of the foot. You’ll want to avoid this common—though not inconsequential—positioning mistake.
Step 3: Find the Ball of Your Foot
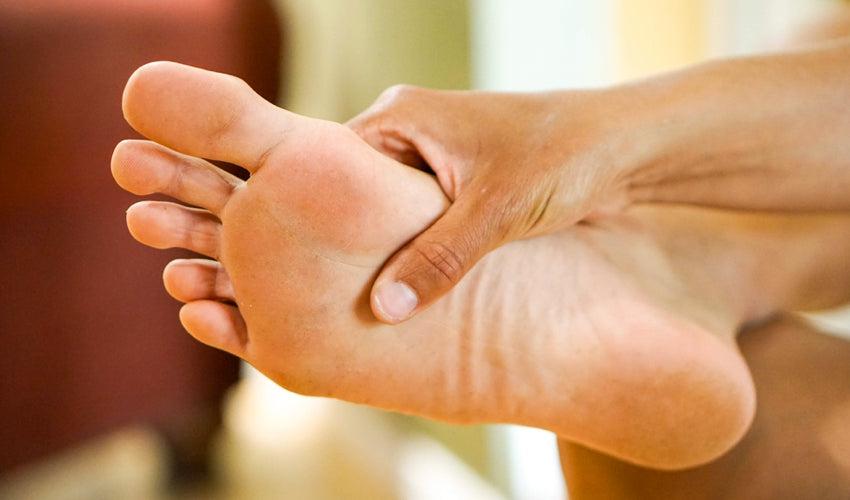
Knowing a few key anatomical landmarks on the foot is very helpful in properly placing your metatarsal pads. One of the main landmarks to know is the ball of the foot. The ball of your foot is the padded part of your foot’s sole between your toes and your arch; it’s the part of your foot upon which the weight of your body rests when your heel is elevated. Some people mistakenly think that the heel is the ball of the foot (it is more “ball-like” in appearance, but it is not actually the ball of the foot).
The other key part of your foot that you’ll need to identify and palpate is actually the area just behind the ball of your foot. You’re looking for the pocket of space that exists just behind the heads of your metatarsal bones, which are the bony structures that form the prominence of the ball of your foot. It’s in this pocket that the raised part of your metatarsal pads will ultimately be situated. You can tell that you’ve found the pocket mentioned here when you press your thumb into the underside of your foot and your toes flex downward (which is the same action and effect that the metatarsal pad will have on your toes once it’s in place on your insole or in your shoe).
Read more : Where Did Kelce Go To College
To properly place your metatarsal pad, you’ll need to determine where the ball of your foot sits on your insole when you’re wearing your shoe. This is easy to see in a pair of shoes that you’ve been wearing for a while, as there will often be a worn area or depression where the ball of your foot has contacted your insole. If your shoe is new, place your foot on the insole and note the position of the ball of your foot (you can even dab some lipstick on the ball of your foot and then press your foot into your insole to leave a positional mark on it). Again, you’re shooting for a metatarsal pad placement in which the raised portion of the pad is positioned just behind the ball of your foot, which should approximately correspond to the middle third of your insole.
Step 4: Expose a Portion of the Pad’s Adhesive Backing
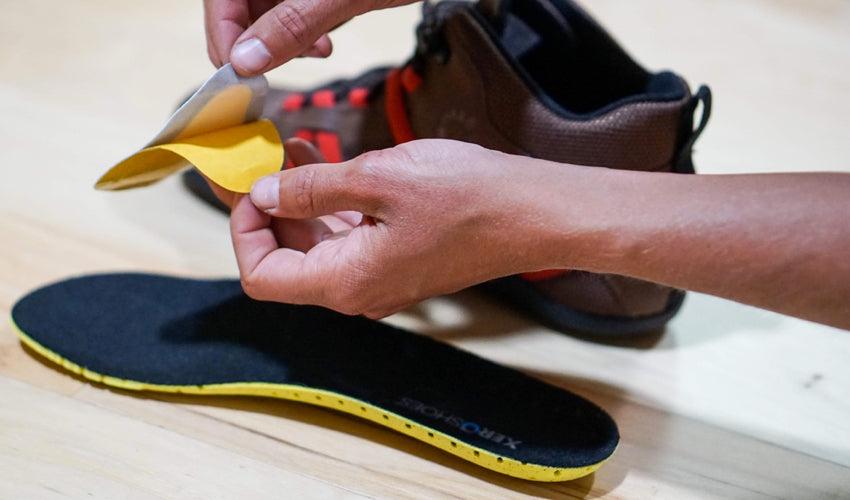
Pedag metatarsal pads come with an adhesive backing that allows you to permanently stick them in your shoes without fear that they will shift position beneath your foot. This is true even in athletic shoes during vigorous physical activity; the pads should remain in place, assuming you press them firmly enough onto your insoles or the bottoms of your shoes during the installation process. When placing your metatarsal pads, we recommend that you first expose only a portion of the adhesive backing.
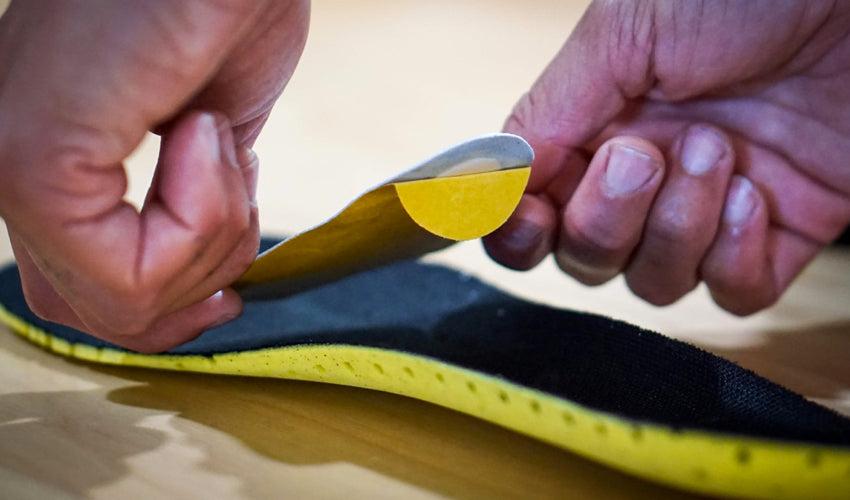
Indeed, to preserve the adhesiveness of your pad, and to make it easier to adjust your pad’s position before committing to a more permanent placement of it, fold back just one small portion of the adhesive covering (we recommend exposing about 1 inch or so of the pad’s rear-most adhesive backing). With this done, there will be enough of the adhesive exposed so that you can affix the pad to the insole for position testing purposes, but not so much that the adhesive loses any of its long-term stickability when the pad is taken up or moved.
Step 5: Try Placing Your Metatarsal Pad
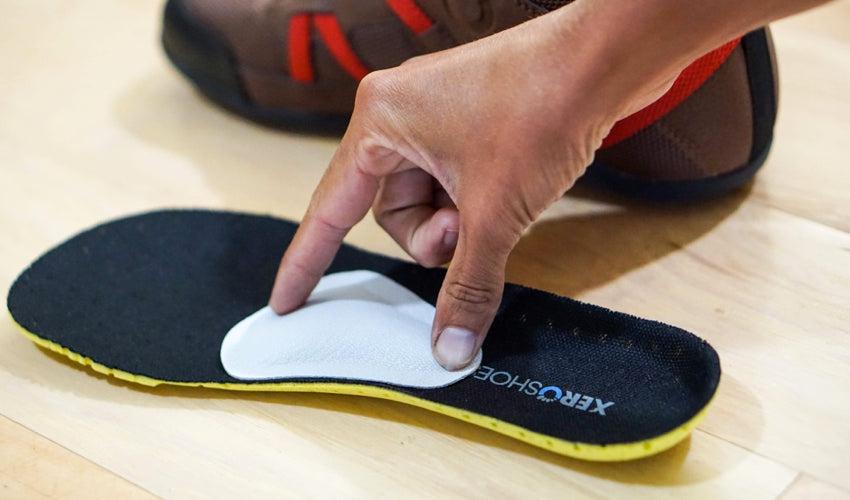
As mentioned above, place the raised portion of your metatarsal pad just behind the area where the ball of your foot contacts your insole (the flat front or leading edge of the pad may be slightly under the ball of your foot). The pad should occupy approximately the middle third of your insole, perhaps biased very slightly (i.e., just a hair) toward the front of this middle third segment. Most people find this to be the ideal position for the metatarsal pad. Another important consideration in placing your metatarsal pad is that it is horizontally centered (i.e., centered from left to right) on the insole, such that it’s not too far toward the inside or outside aspect of your foot.
SHOP PEDAG METATARSAL PADS
Step 6: Try on Your Shoe
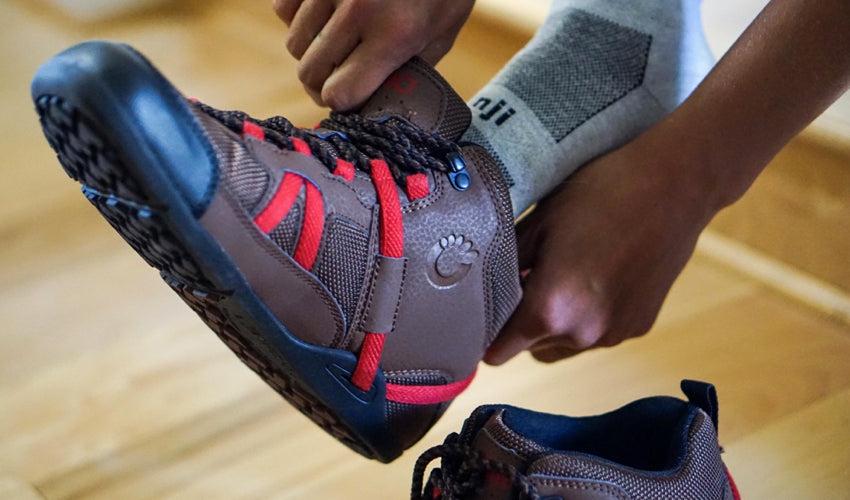
With your metatarsal pad partially affixed to your insole, put your insole back into your shoe. Make sure that both pad and insole are “seated” properly. After putting on your shoe, you should feel the pad pressing into the sole of your foot just behind the ball of your foot, in the pocket of space we mentioned earlier in this article. This sensation typically feels “good.” Sometimes, however, the pad may feel “weird.” If you feel as though your pad needs to be moved, please do so (see the section below on pad position adjustments). Metatarsal pads, especially those in which only a portion of the adhesive backing is exposed during the testing phase, can be pulled up and moved several times without losing their adhesive quality.
Step 7: Make Any Necessary Position Adjustments
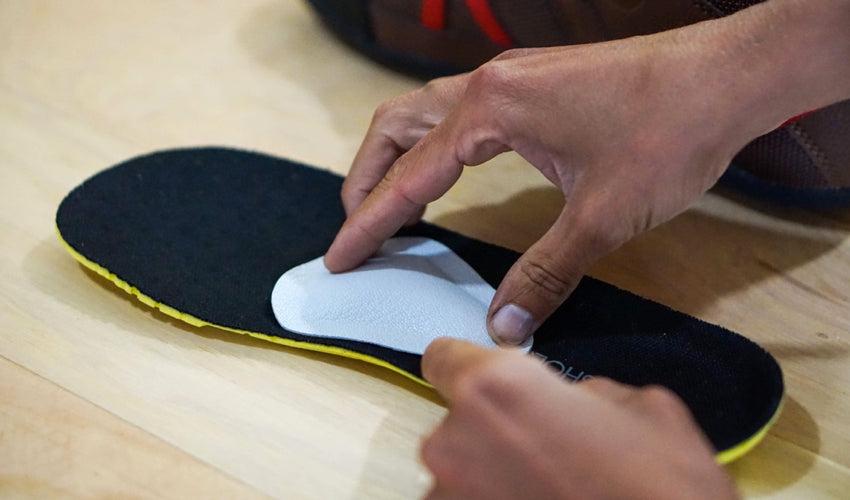
If your foot feels uncomfortable when your pad is in place, we recommend removing your insole from your shoe and making any necessary pad position adjustments. Usually, only a small repositioning (forward or backward, left or right) is required to get the pad location perfectly dialed in for optimal foot comfort and pad effectiveness. Sometimes, the metatarsal pad may also need to be rotated slightly in one direction or another (clockwise or counterclockwise), so that it better conforms to the contours of your foot. Generally speaking, though, the pad works best when it’s positioned almost perfectly vertical, with the midline of the pad aligned with the midline of the insole.
A sore foot from a metatarsal pad is usually indicative of a pad that has been placed too far forward, such that the pad is sitting directly underneath the ball of your foot. A pad that’s placed too far backward, toward the heel, on the other hand, will not be nearly as effective as it could be and will not produce the beneficial effects that it’s capable of. An optimal pad position is something in-between these two extremes. It’s important to note that, even with perfect positioning, most people do experience a short adaptation period after starting in with metatarsal pads, during which time the foot habituates to the new stimulus. Some mild foot fatigue (i.e., the feeling or sensation that your foot has undergone a vigorous workout) is possible during this time, and this is normal.
Step 8: Mark the Optimal Location of Your Metatarsal Pad
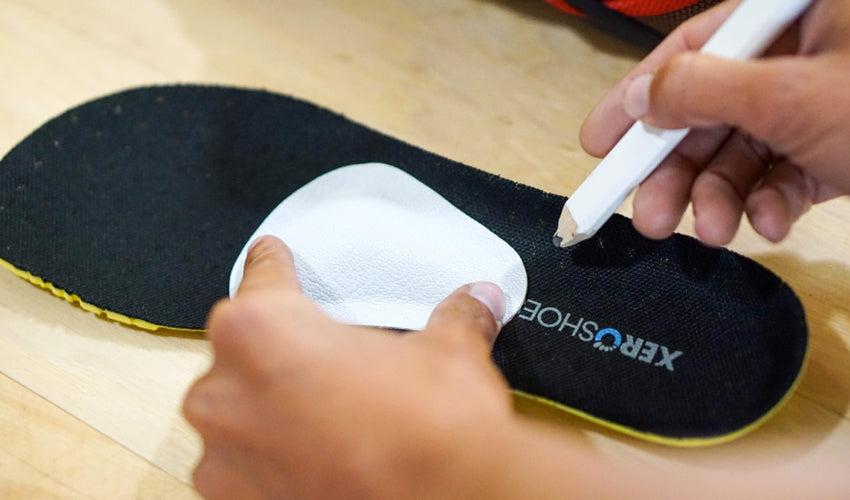
Now that you’ve determined the optimal location for your metatarsal pad on your insole, we recommend that you “document” this position before permanently placing your pad (it’s easy to lose track of this location when taking up the pad to remove the entire covering or backing). Use a pen, a tube of lipstick, a piece of chalk, or some other such tool to scribe a semicircular arc on the insole around the back portion (i.e., the rounded portion nearest to your heel) of your metatarsal pad. This will give you a clear indication of and guide for where to re-stick your pad once the adhesive backing is fully exposed.
Step 9: Permanently Place Your Metatarsal Pad

The moment of truth! The time to permanently place your metatarsal pad has finally come. Remove the entire adhesive covering from the back of the pad and plant your metatarsal pad on your insole, using the semicircular arc you drew on the insole in the last step as your guide. Make sure that your pad is properly aligned in all respects, and then use both of your hands to firmly press all aspects of your pad onto your insole.
Step 10: Place Your Other Metatarsal Pad
Now that you have successfully placed one of your metatarsal pads, it’s time to repeat steps 1 through 9 for the other pad and insole. Once you complete that, you will have a functional set of metatarsal pads performing rehabilitative work on your feet with each and every step you take. Just set ’em and forget ’em! Pedag metatarsal pads are durable little performers, so it may be quite a long time before you will need to replace them with a fresh set. In the meantime, enjoy enhanced foot comfort and health, and take heart knowing that these unobtrusive foot helpers are doing good work on your behalf.
SHOP PEDAG METATARSAL PADS
What If the Shoe Doesn’t Have a Removable Insole?
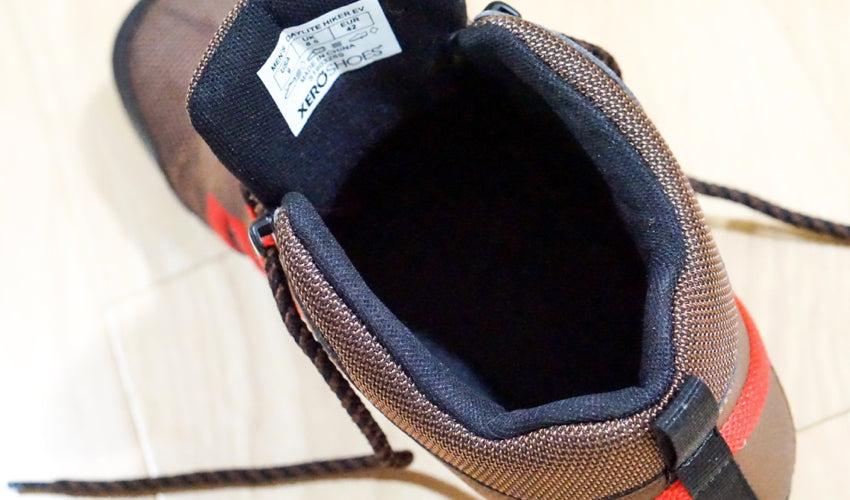
As mentioned earlier in this article, some shoes do not include insoles or liners, and the insoles of other shoes may be glued down or sewn into place, making them impossible to remove. In some cases, it may make sense to remove your shoe’s insole to open up more space for your foot and toes inside your shoe, so this would be another scenario in which placing a metatarsal pad on an insole is not possible or helpful. In cases such as these, you can simply stick your metatarsal pad directly into the bottom of your shoe.
To do this, you’ll most likely need to fully untie your shoe’s laces and pull down your shoe’s tongue as far as possible to expose the surface upon which your foot rests inside the shoe. Using a flashlight, first check for any indentations on this surface. If there are ball of foot indentations, place your metatarsal pad accordingly. If there are no wear signs, then simply eyeball the placement, first sticking a small portion of the pad onto the surface and then making any adjustments to the pad’s position based on feel before committing to a more permanent pad placement (you can use the same techniques described in Steps 4 and 8 above to temporarily affix the pad and mark the back edge of the metatarsal pad, respectively).
If you don’t feel confident that you can place your pads correctly, we recommend you have your metatarsal pads placed by a podiatrist or other foot care professional who has experience doing so. For further instructions on how to properly place your metatarsal pads, please see this video tutorial by Dr. Ray McClanahan, who is our natural foot health mentor and the inventor of Correct Toes.
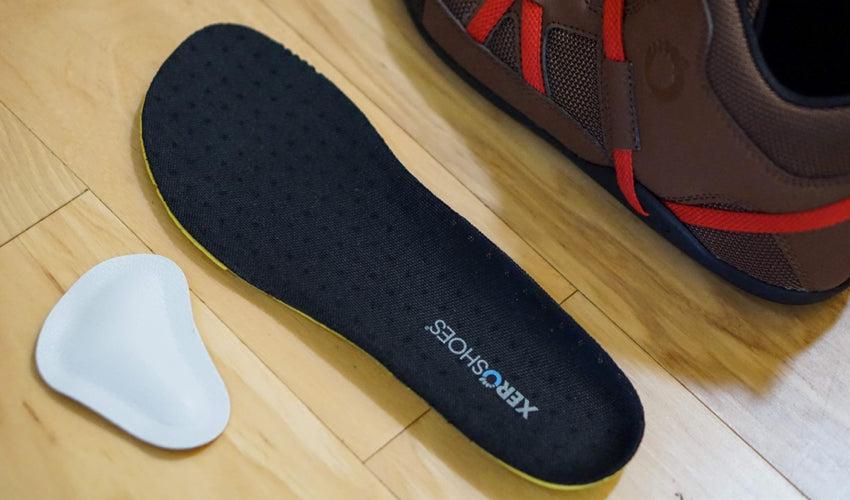
Wearable Metatarsal Pads: Another Viable Option
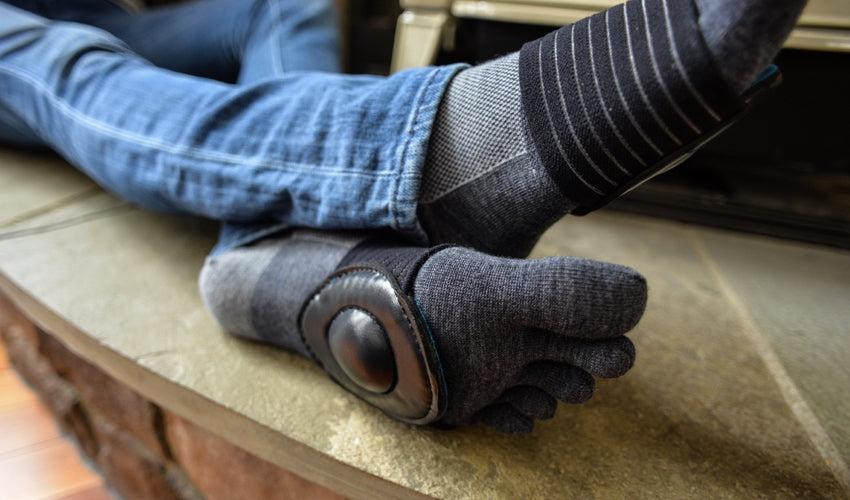
There are two main types of metatarsal pads available to consumers:
- Stationary: The pads are permanently affixed inside your shoes
- Mobile: The pads can be worn on your feet inside any pair of shoes
Pedag metatarsal pads are an example of “stationary” metatarsal pads, whereas wearable metatarsal pads (pictured above) are an example of “mobile” metatarsal pads. Wearable metatarsal pads incorporate a wide elastic band that wraps around your foot and a raised pad that tucks up into the sole of your foot. You can wear these pads on your bare feet, over Injinji toe socks, or within men’s or women’s foot-healthy footwear. Adjusting the location of these pads is simple too: Just slide the band up or down your foot until you achieve the perfect positioning. Wearable metatarsal pads come in just one size, which works well for most people, though if you want/need more nuanced sizing, Pedag metatarsal pads may be a better option for you, as they come in several distinct sizes. Learn more about wearable metatarsal pads in this instructional guide.
Metatarsal Pads + Other Helpful Footgear
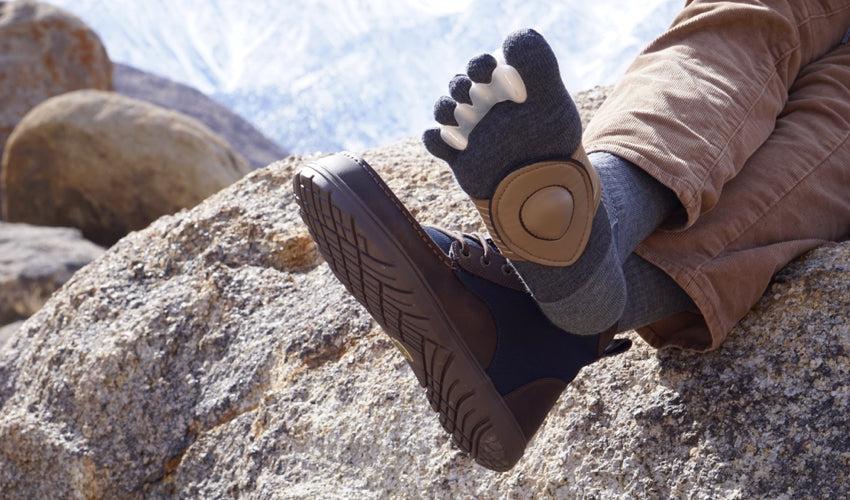
Metatarsal pads are, by themselves, a helpful and effective piece of footgear for restoring optimal foot health, but they work even better when you use them in combination with other natural footgear to promote foot and toe rehabilitation and address or prevent common foot problems. Indeed, combining Pedag metatarsal pads with Correct Toes toe spacers, Injinji toe socks, and men’s or women’s foot-shaped footwear is a potent way to build a strong, healthy, and resilient foot that looks and functions how nature intended. If you’re looking to achieve optimal foot health through natural means, consider adopting this unique combination of footgear for its powerful synergistic effects.
SHOP CORRECT TOES SHOP INJINJI TOE SOCKS SHOP MEN’S FOOTWEAR SHOP WOMEN’S FOOTWEAR
Source: https://t-tees.com
Category: WHERE