
Getting only half the audio experience? Here’s your one-stop guide to fix your headphones that only work in one ear.
Headphones are excellent for immersing yourself in music, podcasts, or video games.
You are viewing: Why Can I Only Hear Out Of One Headphone
Unfortunately, you can instantly lose that immersive listening experience if one speaker fails, usually due to loose wiring, software glitches, or physical damage.
Here’s a comprehensive guide on how to fix your wired and wireless headphones if they stop working on one ear.
When asked about the first steps in troubleshooting headphones that only work in one ear, Carine advised:
Headphones Only Work in One Ear: How to Fix Audio Source Issues
When your headphones work only on one side, the issue often lies with your device’s audio settings, not necessarily the headphones themselves.
Here are some simple settings-related fixes you can try:
- Disable Sound Enhancements
- Adjust the sound balance
- Update the software and drivers
- Restart the device
Disable Sound Enhancements
Enabling Windows’ audio enhancements can improve sound quality through features like bass boost and surround sound. But sometimes, these enhancements can mess with your headphones, causing one side to stop playing sound.
To fix this, simply disable the audio enhancements with these steps:
- Go to Settings > Sound.

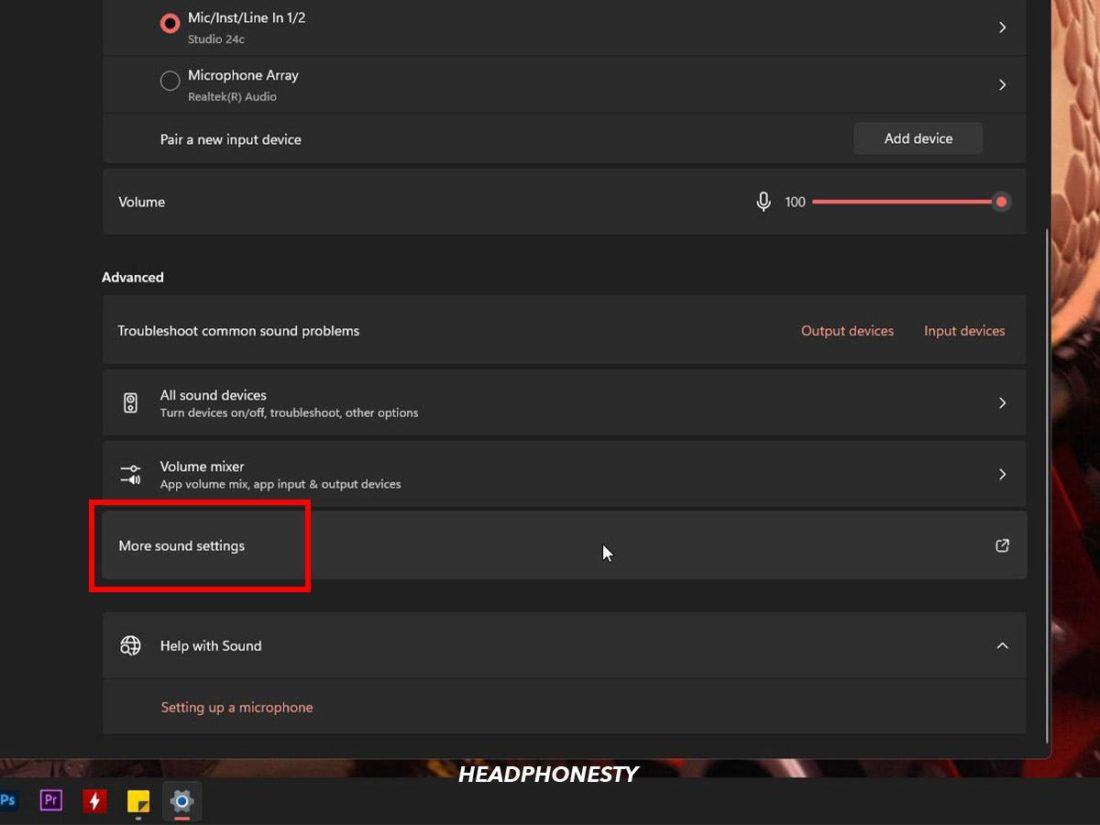
‘Sound’ highlighted in Windows Settings. - Under Advanced, click on More sound settings.

‘More sound settings’ highlighted in Windows Sound settings. - Double-click your audio output device in the Playback tab.

Audio output device highlighted. - In the Advanced tab, uncheck Enable audio enhancements, then click Apply and OK.
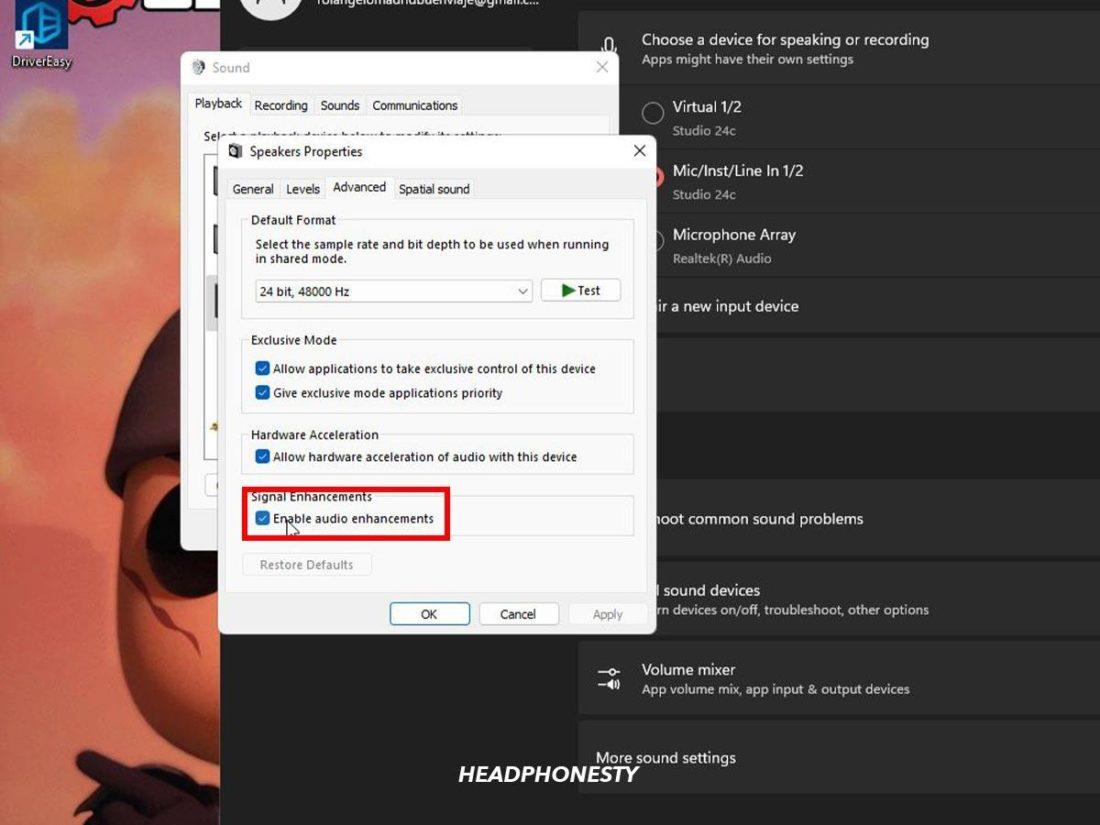
‘Enable audio enhancements’ highlighted.
Adjust the sound balance
Windows’ sound balance function lets you adjust the left and right audio output so that both signals are equally loud and clear. Sound becomes unbalanced when the audio signals are directed more towards one speaker than the other. When this happens, you’ll have noticeably softer or no sound at all in one speaker.
To remedy this, ensure both channels are equal by adjusting the sound balance. Here’s how to do that on Windows:
- Go to Settings and select Sound.

‘Sound’ highlighted in Windows Settings. - Click on More sound settings under Advanced.
‘More sound settings’ highlighted in Windows Sound settings. - Double-click your audio output device in the Playback tab.
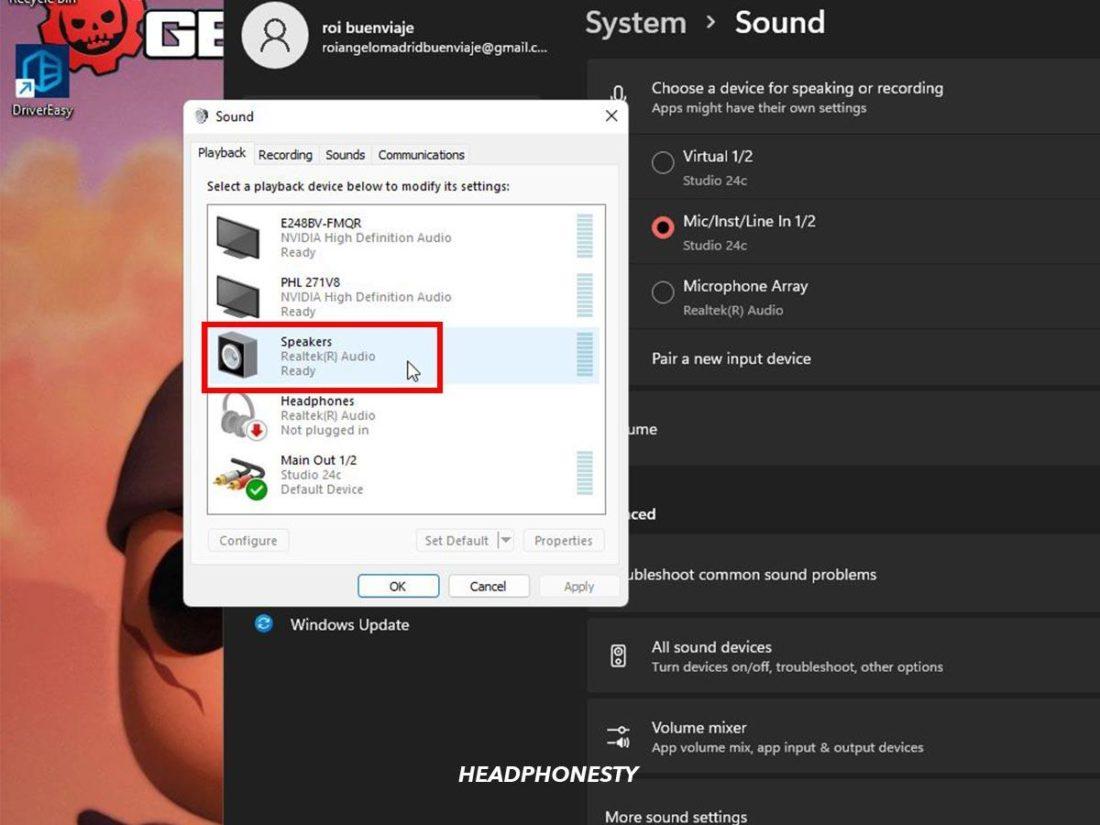
Audio output device highlighted. - Select Balance in the Levels tab.
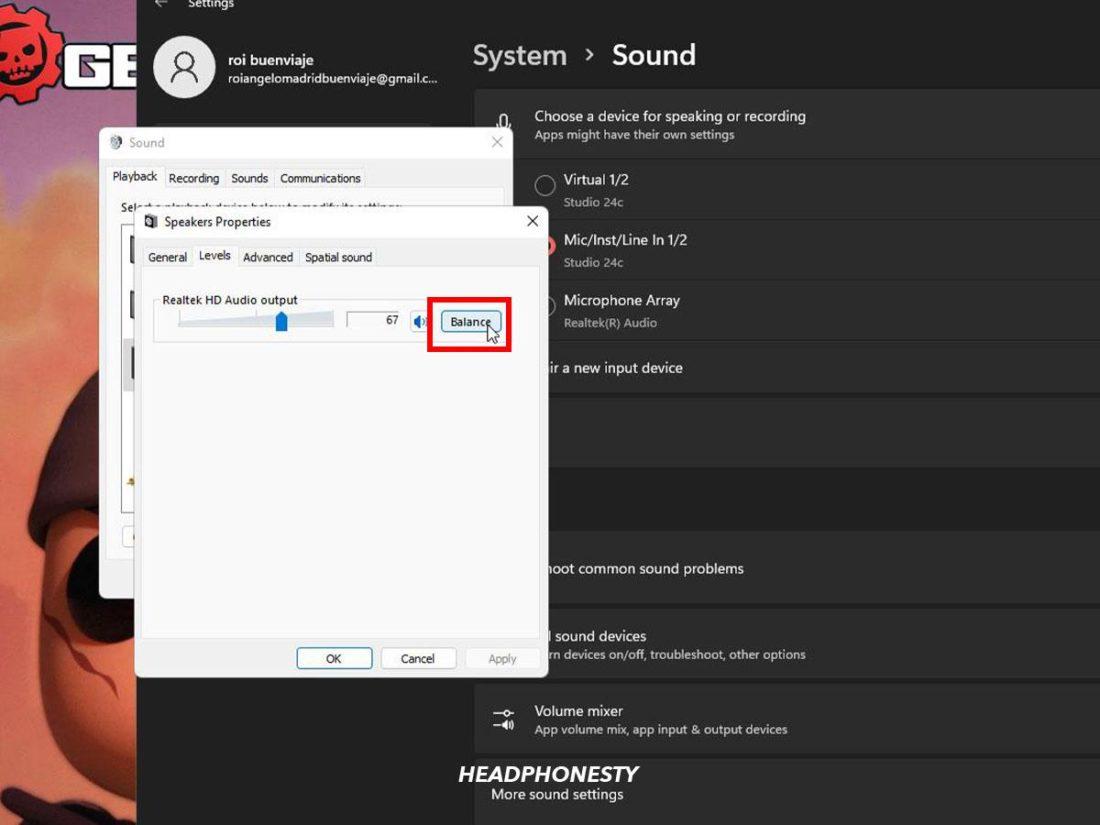
‘Balance’ highlighted in Speaker Properties. - Adjust the sliders for left and right audio until they’re identical, then click OK.
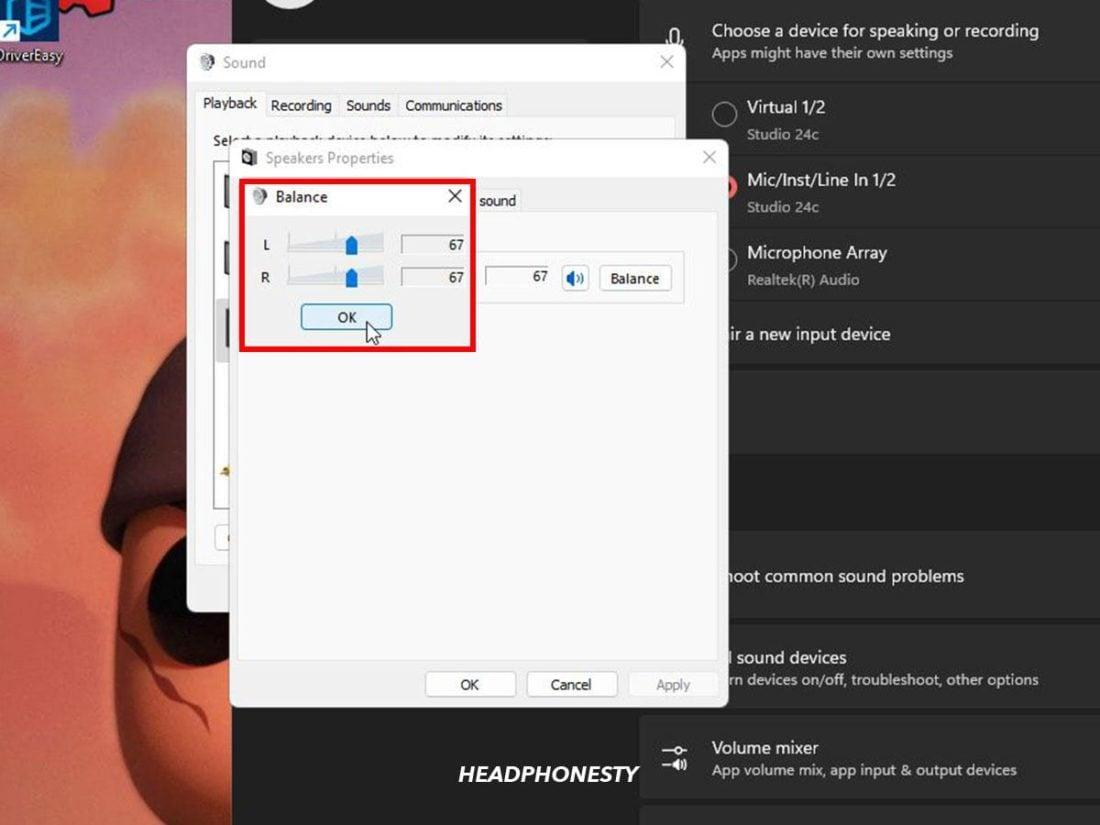
Make sure both balance sliders are equal.
Update the software and drivers
Outdated software and drivers can cause errors in how your system’s sound card functions. This can lead to various sound problems, from your headphones not being detected by your computer to hearing audio in only one ear. To avoid this, ensure your Windows OS and audio drivers are updated.
Here’s how to update your Windows OS:
- Go to Settings > Windows Update.

‘Windows Update’ highlighted in Settings. - Select Check for Updates.
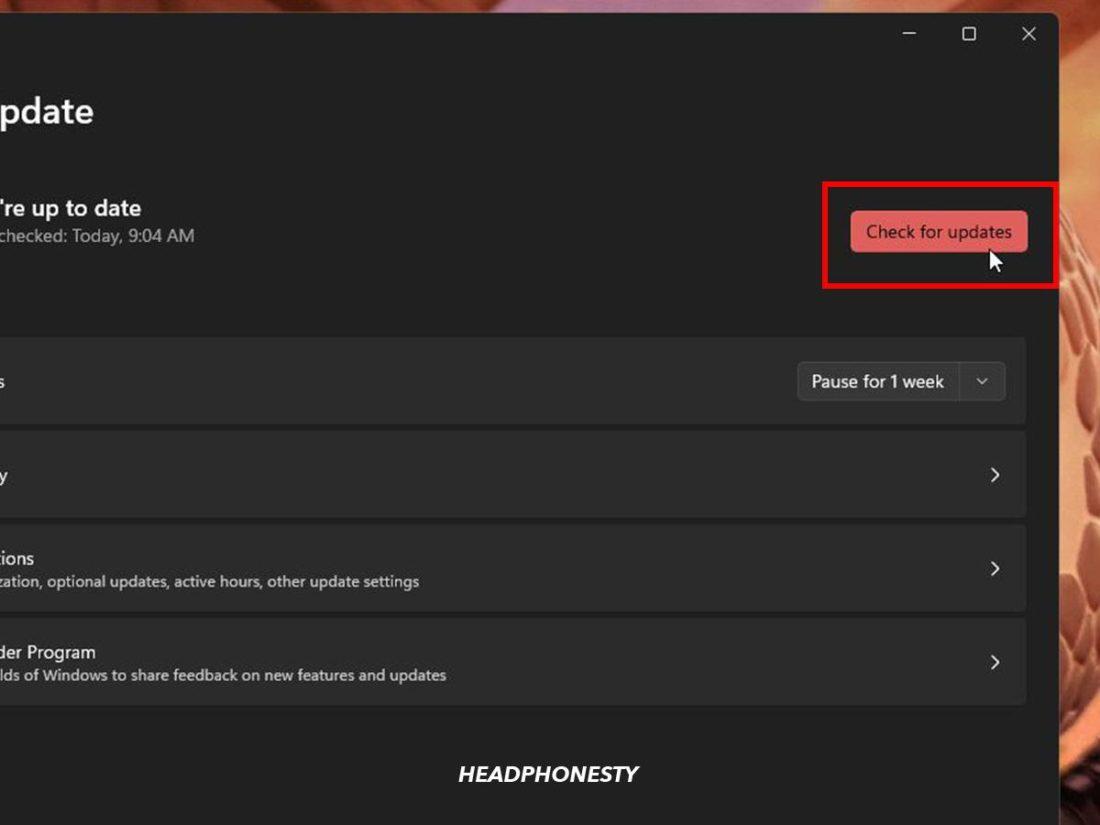
‘Check for updates’ highlighted under Windows Update. - Once the updates are downloaded, you can proceed to install them.
To check and update your audio drivers, follow these steps:
- Right-click on the Start menu icon in the taskbar and select Device Manager.
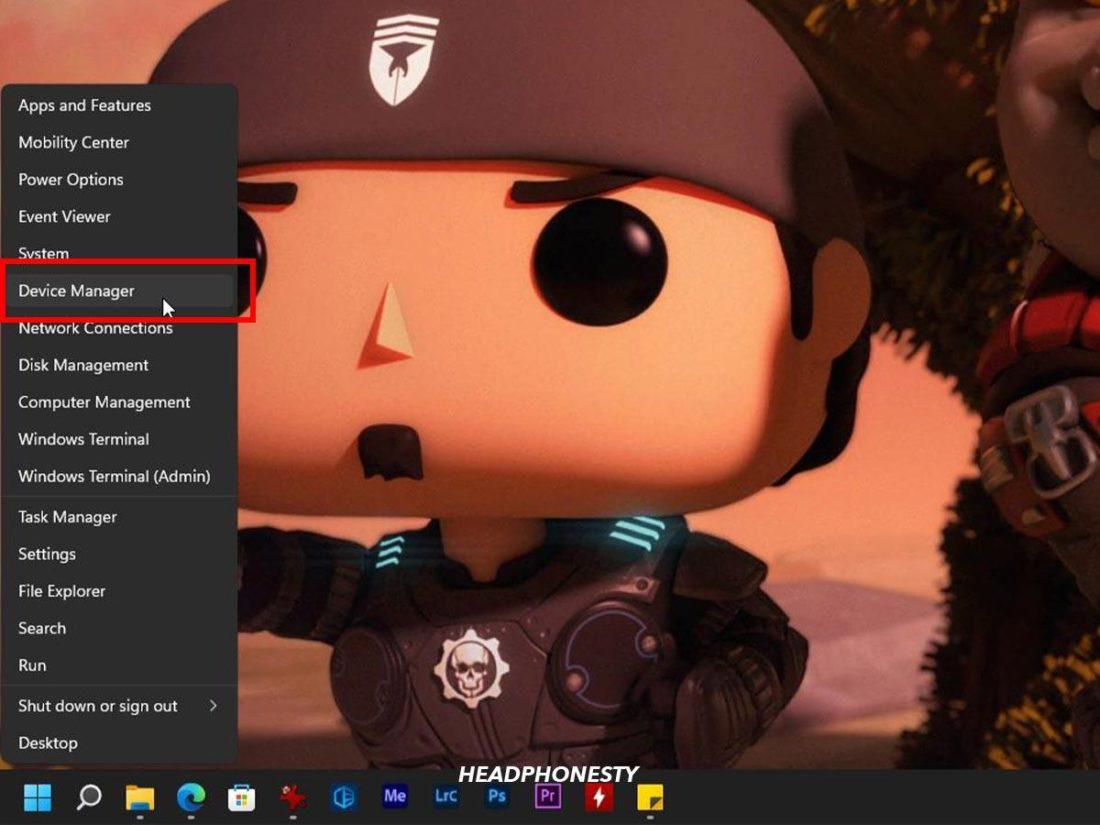
Start menu icon and ‘Device Manager’ highlighted. - Double-click Sound, video, and game controllers from the list.
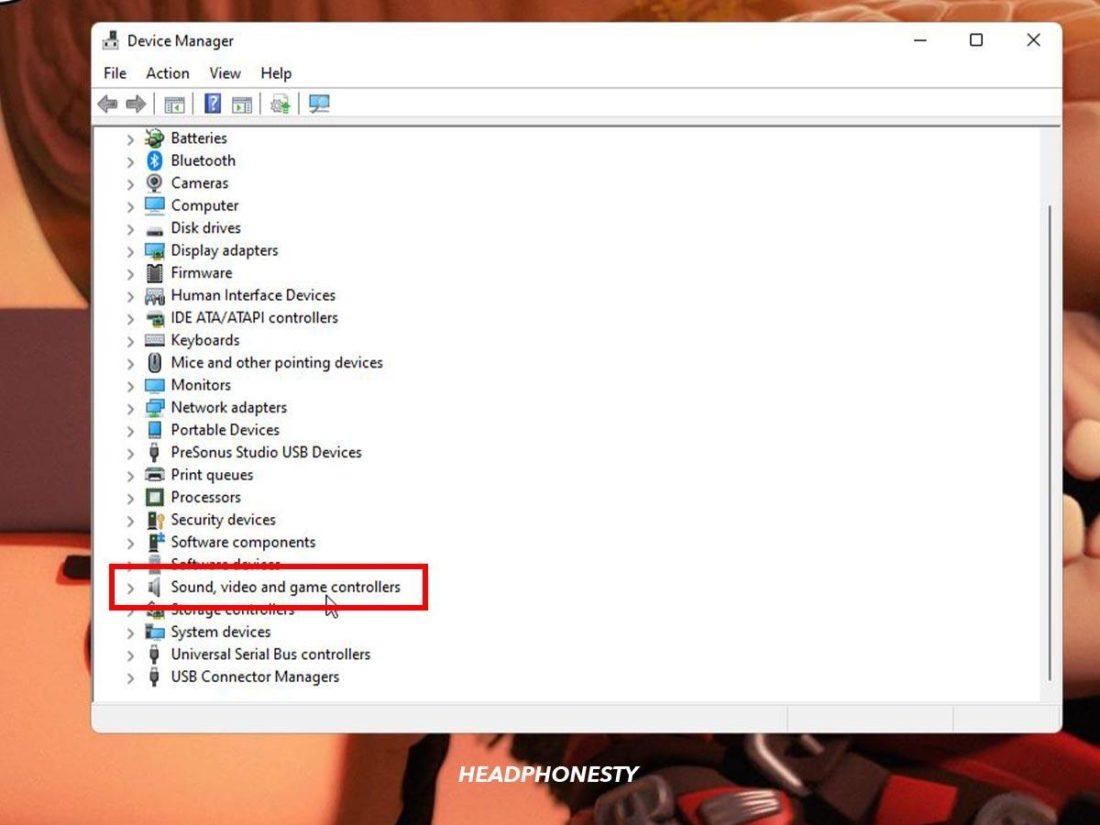
‘Sound, video and game controllers’ highlighted under Device Manager. - Right-click your audio output device and select Update driver.
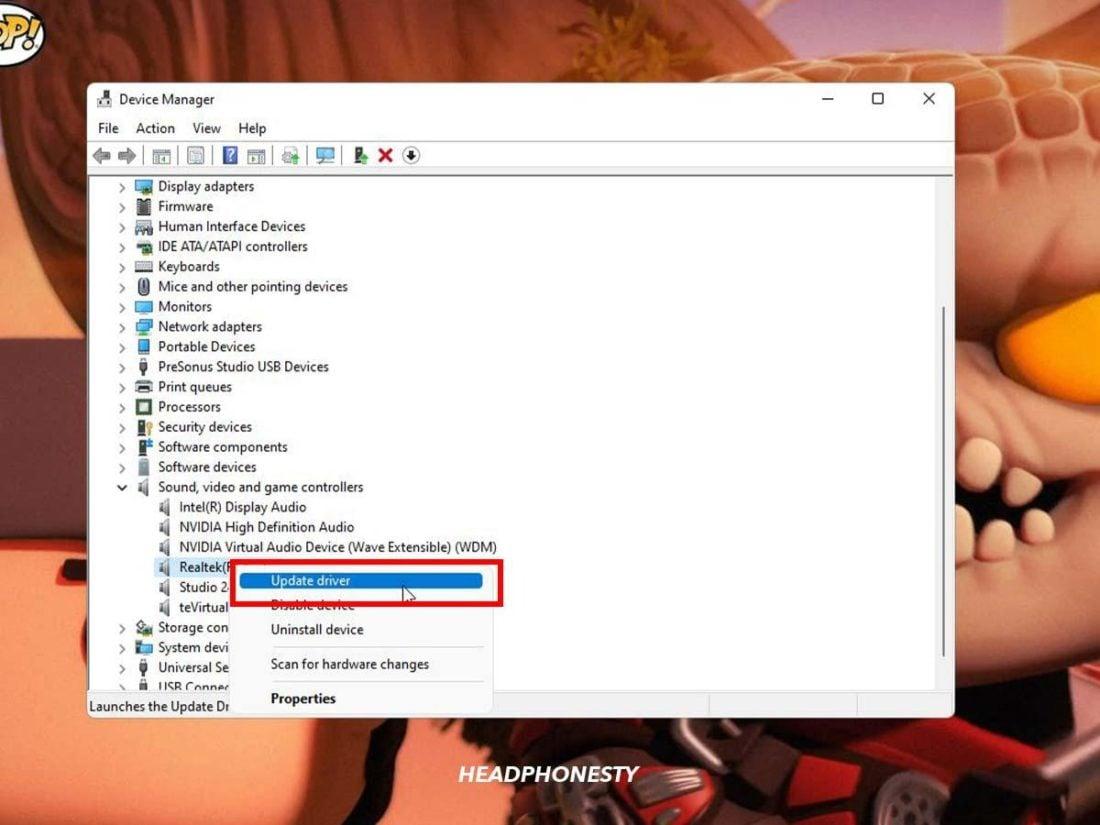
‘Update driver’ highlighted in Device Manager.
Restart the device
Read more : Why Hungary Is The Best Country
Another simple fix is restarting your device. Over time, your device gets overloaded with unused data and background tasks, which can slow it down and cause problems. Restarting clears this out and helps it run better.
Restarting your device shuts down all running programs and deletes all caches, effectively refreshing your device. This could be especially helpful if your audio issue occurred after a software update since specific components are removed or replaced during this process.
Wired Headphones or Earbuds Only Working in One Ear: What to Do
Headphone wires are notoriously fragile due to their thinness. As such, it’s one of the most common reasons we find ourselves with one headphone that’s stopped working.
Luckily, this can be solved in 4 ways:
- Check the connection
- Fix exposed or damaged wires near the plug
- Fix shorted wires
- Solder faulty wires inside the defective headphone or earbud
Check the connection
A partial connection is often a cause of headphones not working in one ear. To check this, try to remove and reinsert the headphone plug from the jack. Make sure to push until you feel a light ‘click’.
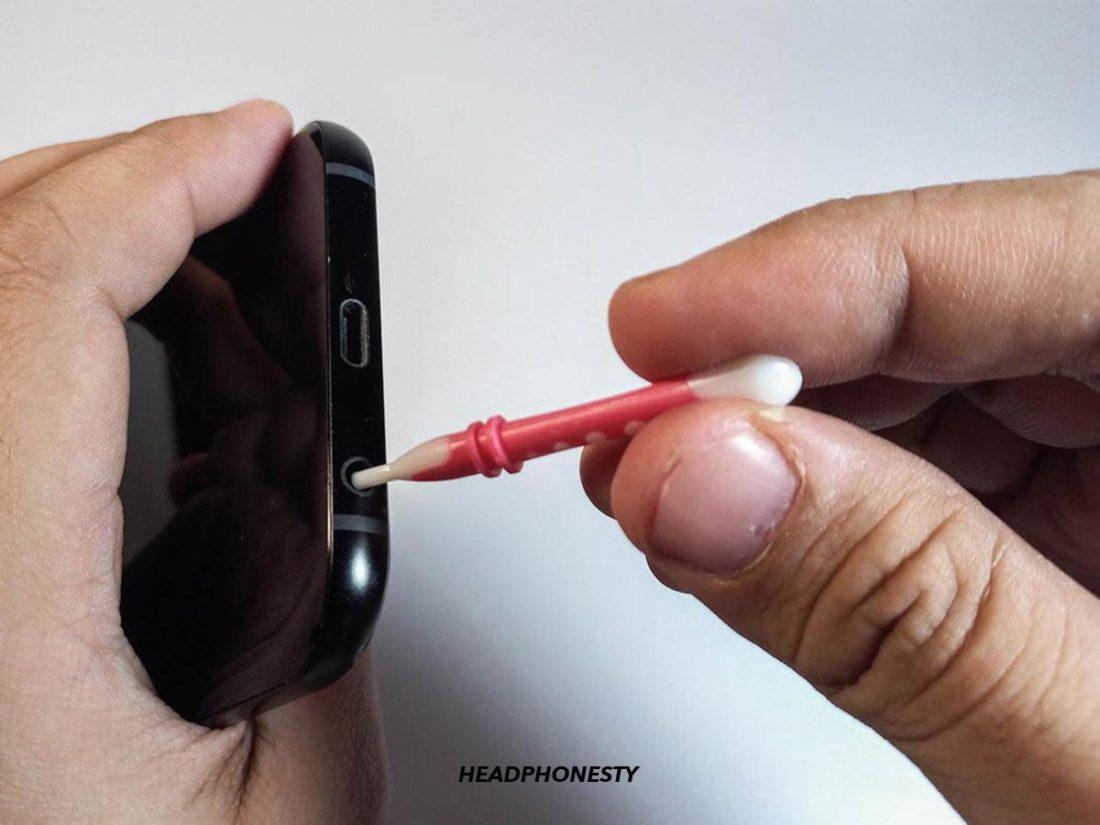
If it doesn’t click, there might be dirt or lint in the jack.
“Dirt or lint in the audio jack can lead to poor contact and loss of sound in one ear.” – Carine, Support Technician at Linsoul
To clean the jack, carefully use the pointed end of a toothpick or an interdental brush to loosen any dirt, then gently remove it with the brush.
Fix exposed or damaged wires near the plug
Pulling headphones out by the cord instead of the plug can strain the connection, wearing down the protective casing and exposing wires to damage, leading to shorting or a bent headphone plug.
So, if you’re only getting audio in one ear and seeing signs of wear and tear near the headphone plug, you’ll need to fix the damaged portion of the wire. To do that, follow the steps below:
- Using a knife or cutter, slice through the protective plastic base around the earphone plug and the cord near it.
- Locate the section with the damaged wires and cut it off.
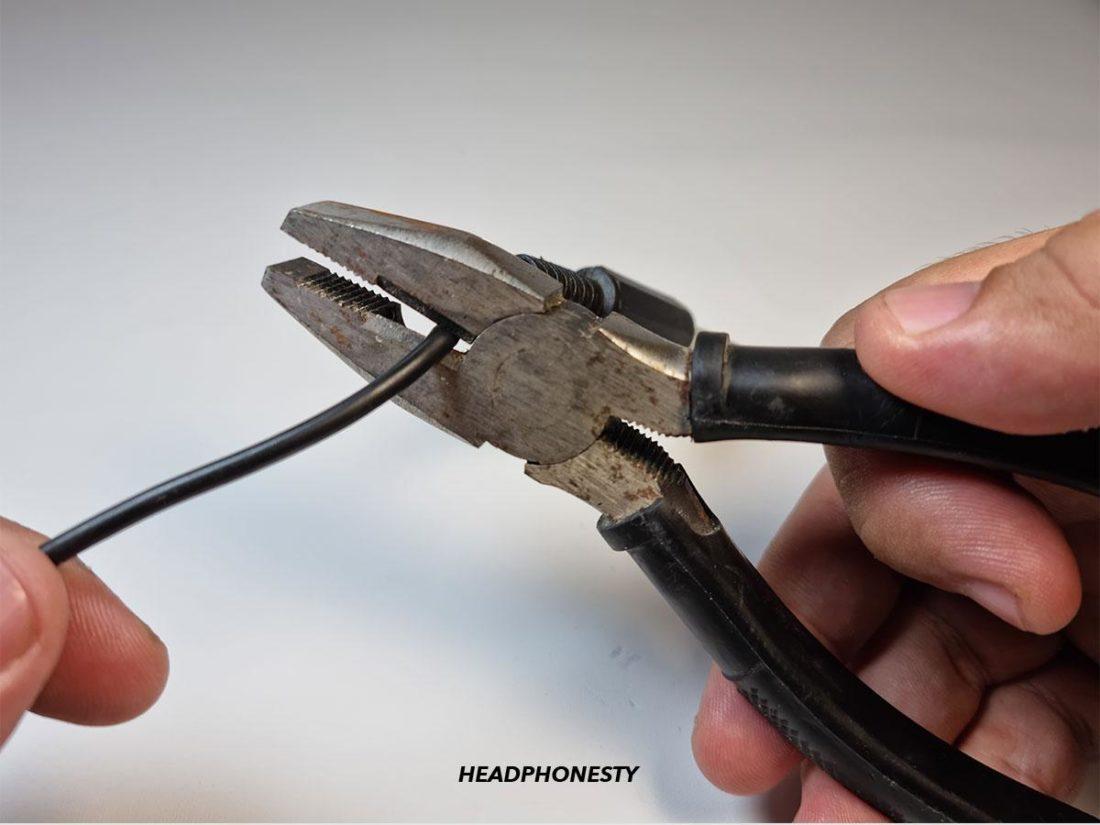
Slicing the protective cover using wire cutter - Remove the plastic cable around one end of your headset cord.
Exposed ends of internal wires - Use a match or lighter to burn off the wire’s insulation briefly.
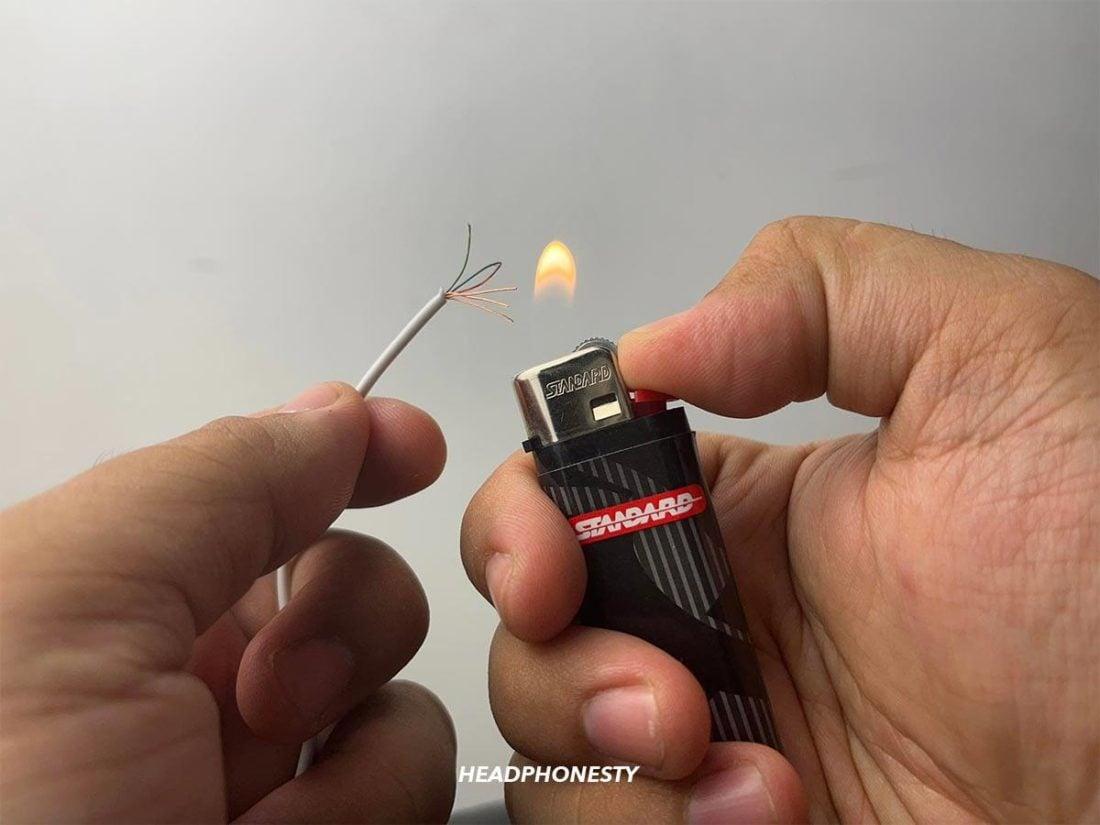
Use lighter to burn insulation on wires - Solder the wires to the earphone jack following the illustration below.
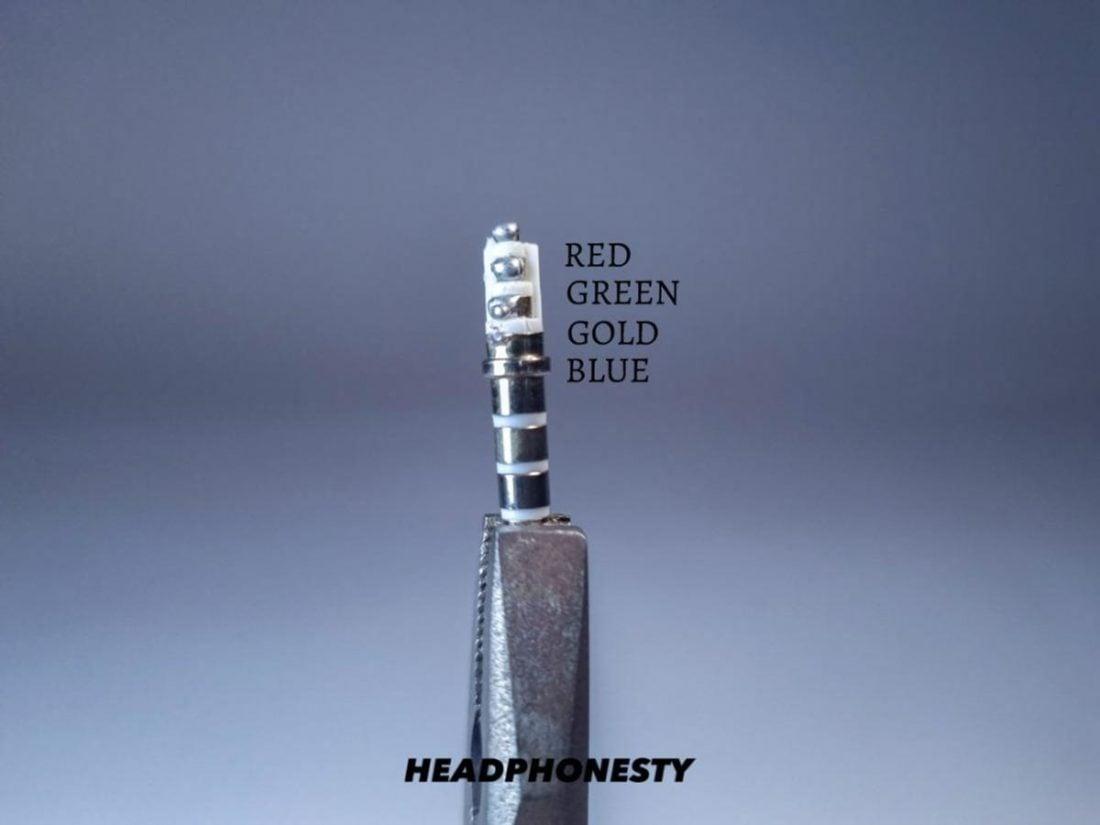
Make sure to connect the right wires to their corresponding section on the earphone jack. - Cover the newly joined section with a heat-shrink tube or electrical tape.

Securing wire with heat-shrink tube
Fix shorted wires
Sometimes, a simple wiggle of the audio jack can be a quick solution but actually hide a bigger problem.
Carine explains, “If gently wiggling the audio jack can temporarily fix the issue of your headphones only playing in one ear, you’re likely facing a shorted wire issue.”
Shorted wires occur when a powered wire touches a neutral wire, exposing it to excessive electricity and causing it to short-circuit.
Here’s how to fix a shorted headphone wire:
- Plug your headphones into your device and play an audio or video file.
- Locate the short by bending the headphone cord every half inch. Continue doing this until you start hearing sound coming off both headphones.
- Remove the damaged portion of the wire.
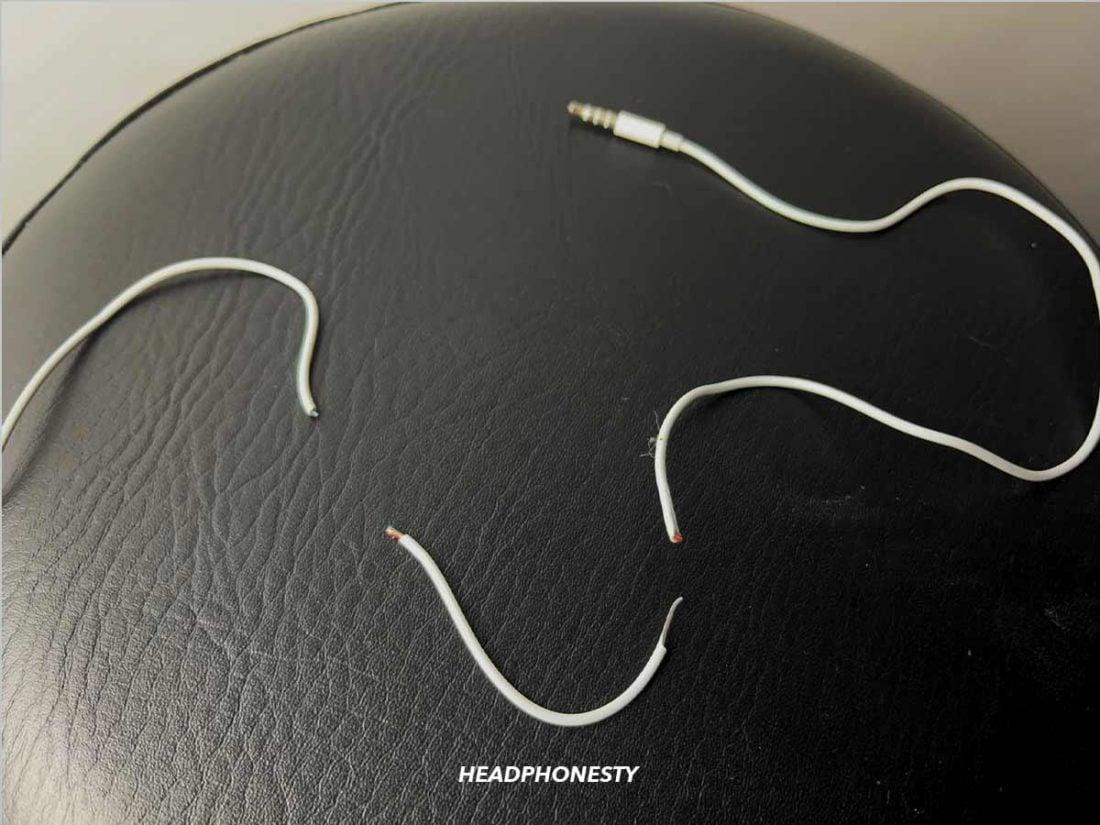
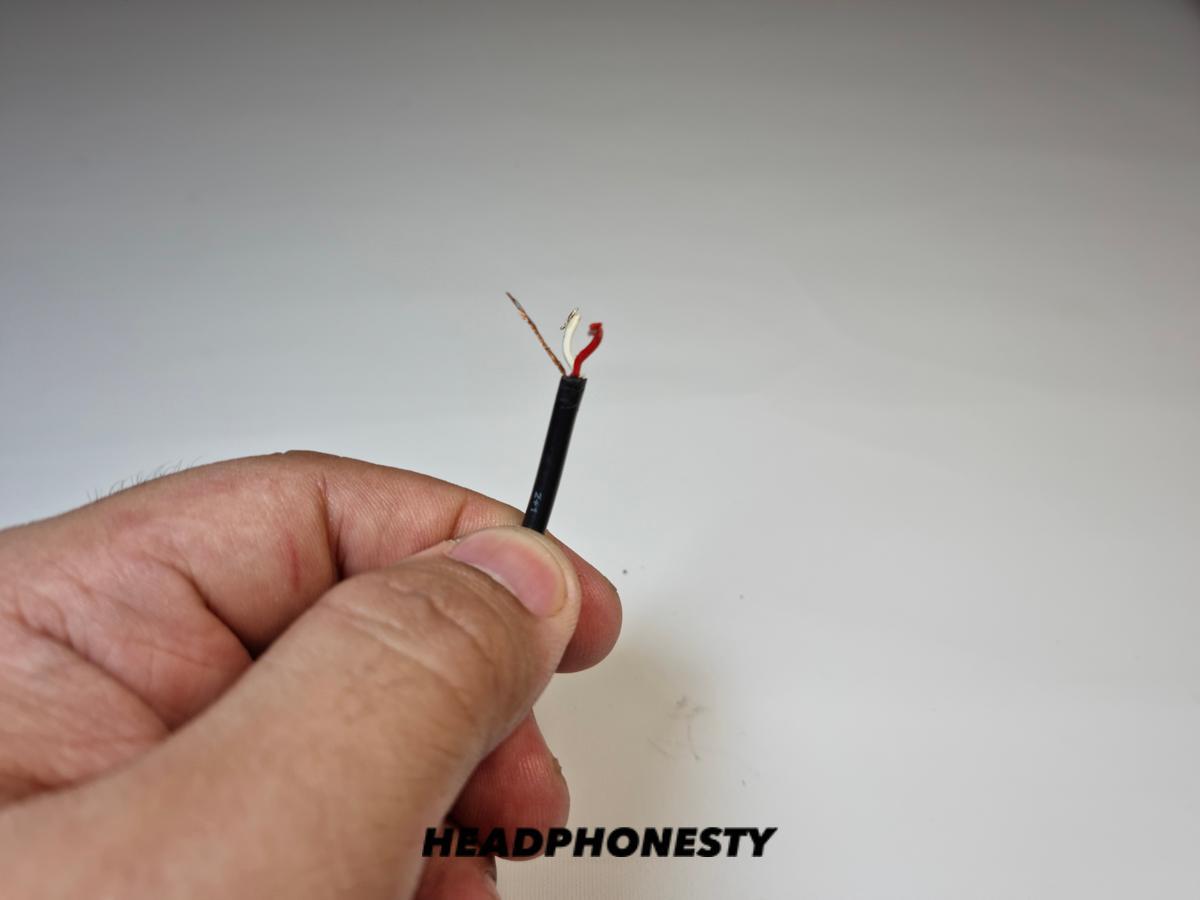
Remove the damaged wire - Get the remaining sections of the headphone cord. Slice through both tips of the plastic cord to expose the wires.
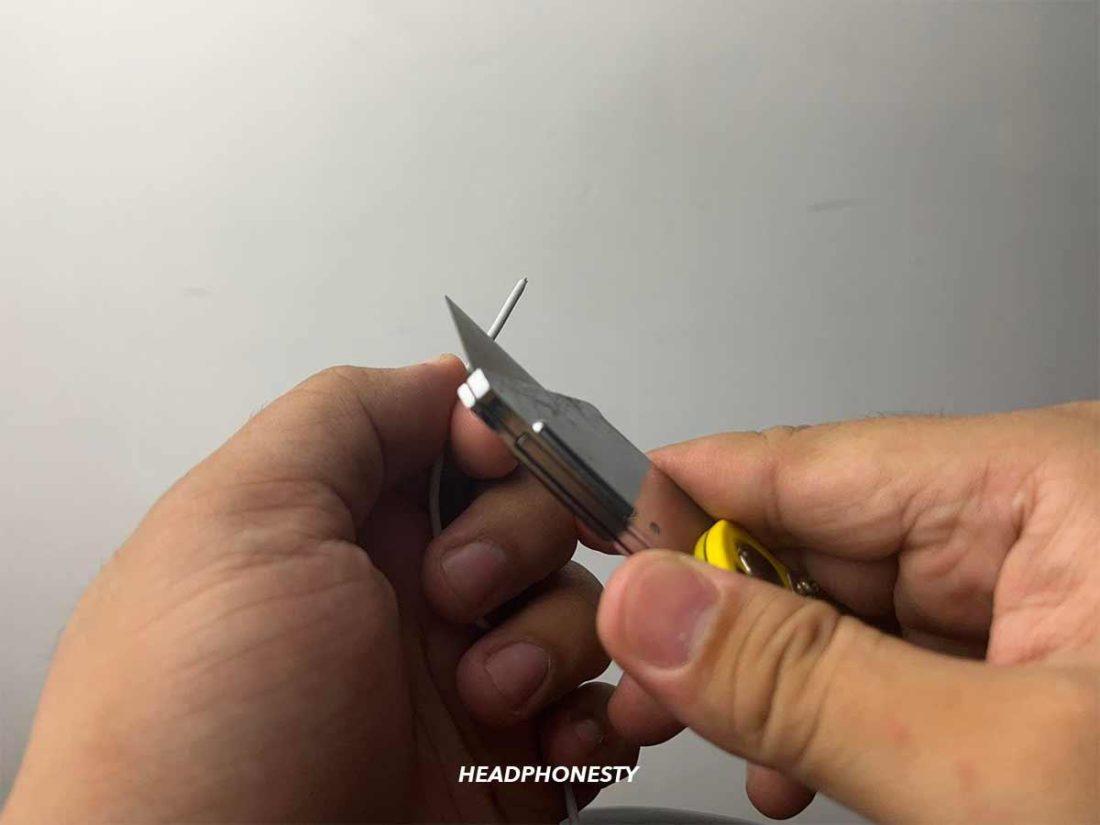
Use cutter to expose the internal wires - Separate the copper wires (ground wires), insulation (white wires), and colored wire.
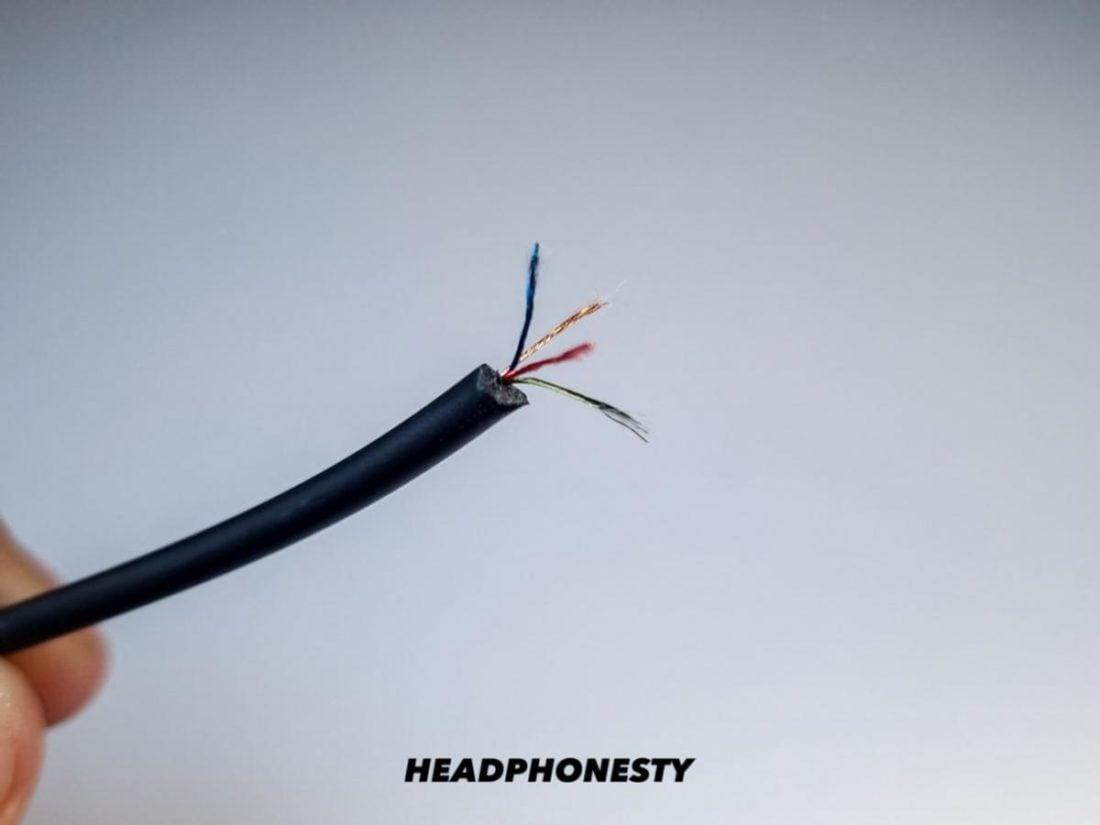
Isolate internal wires based on color - Cut the insulation wires. Meanwhile, twist the copper wires to keep them together.
- Use a match or lighter to briefly burn off the enamel at the tip of the colored wires.

Burn off the enamel using lighter - Join the colored wires by twisting them together. Secure these with electrical tape.
- Link the ground wires in the same way and wrap electrical tape around these as well. Ensure the ground wires do not touch the colored wires.
- Wrap electrical tape around this newly linked section.
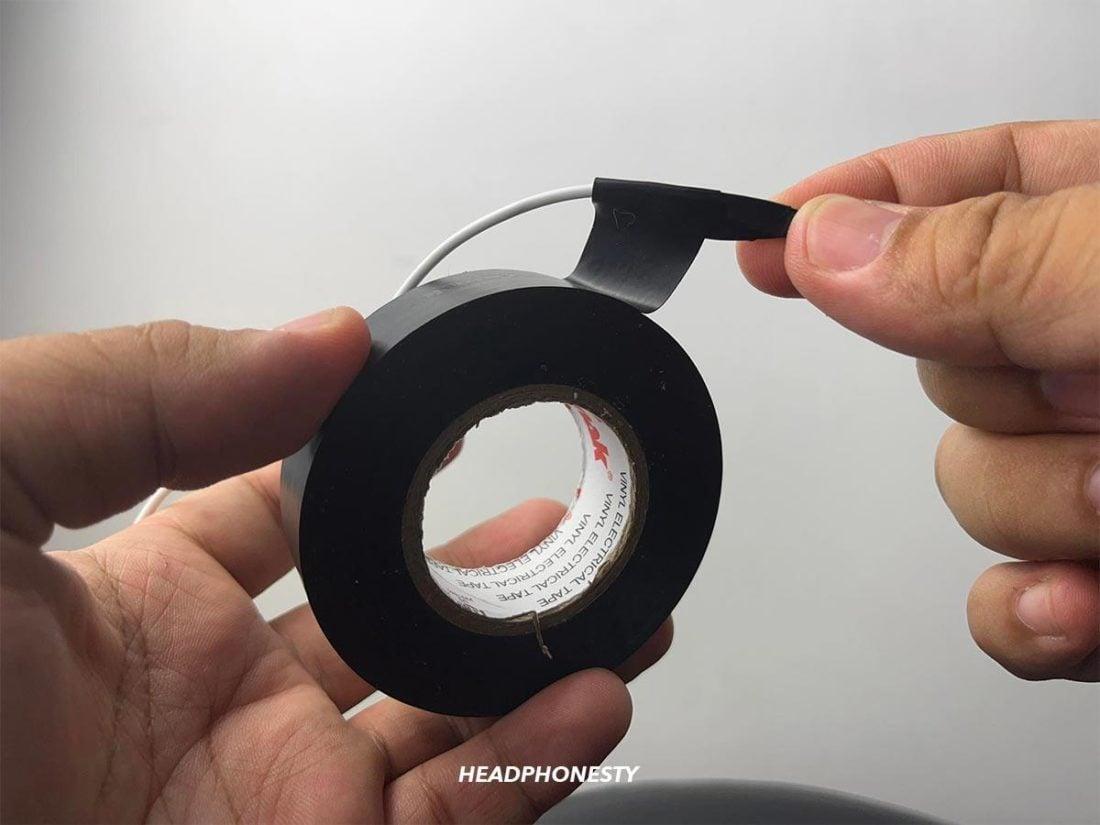
Wrap repaired wire with electrical tape
Solder faulty wires inside the defective headphone or earbud
Read more : Why Should Homework Not Be Banned
Sometimes, loose or broken wires can occur inside the earbud speaker and not along the cord. Similar to the previous issues, faulty wiring arises from poor handling or, in some cases, a manufacturer defect.
If you’re sure this is the cause of your audio problem, follow the steps below to learn how to fix faulty wires inside earbuds:
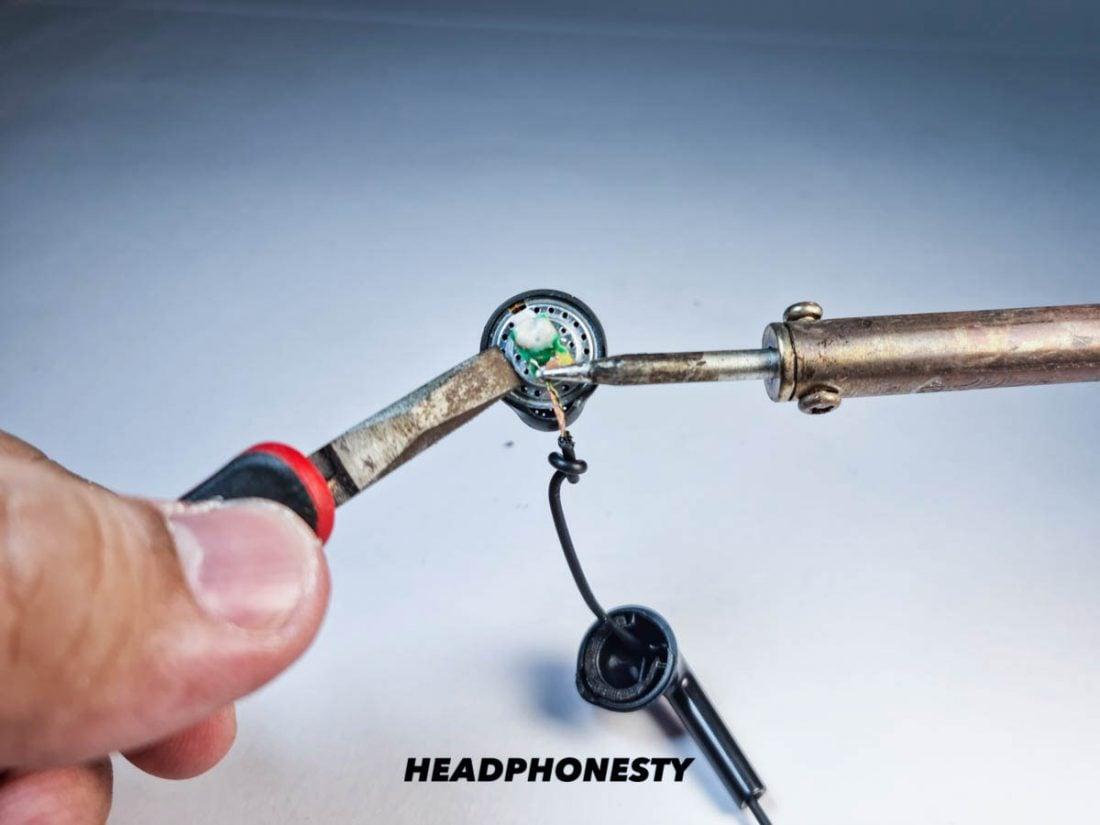
- Open the earbud casing using a small flat-blade screwdriver. You can also use your nail clipper’s lever to open the earbud’s front casing or ear tip.
- Do not pull at the case to fully open the earbud – doing so can further rip the wires if they’re attached to the front case. Instead, push the cord up through the earbud’s upper housing. This will shove the front case and expose the internal components.
- Resolder the loose wire and let it cool before testing the earbuds.

Soldering loose wire
Wireless Headphones or Earbuds Only Working in One Ear: What to Do
Here are four things you can do when experiencing audio malfunctions in one wireless earbud or headphone speaker:
- Reset your headphones or earbuds
- Check for a halfway point issue
- Check for low battery in one earbud
- Check for disconnected wires inside earbud
Reset your headphones or earbuds
If one side of your wireless headphones isn’t producing sound, a factory reset can often resolve the issue.
Here’s how:
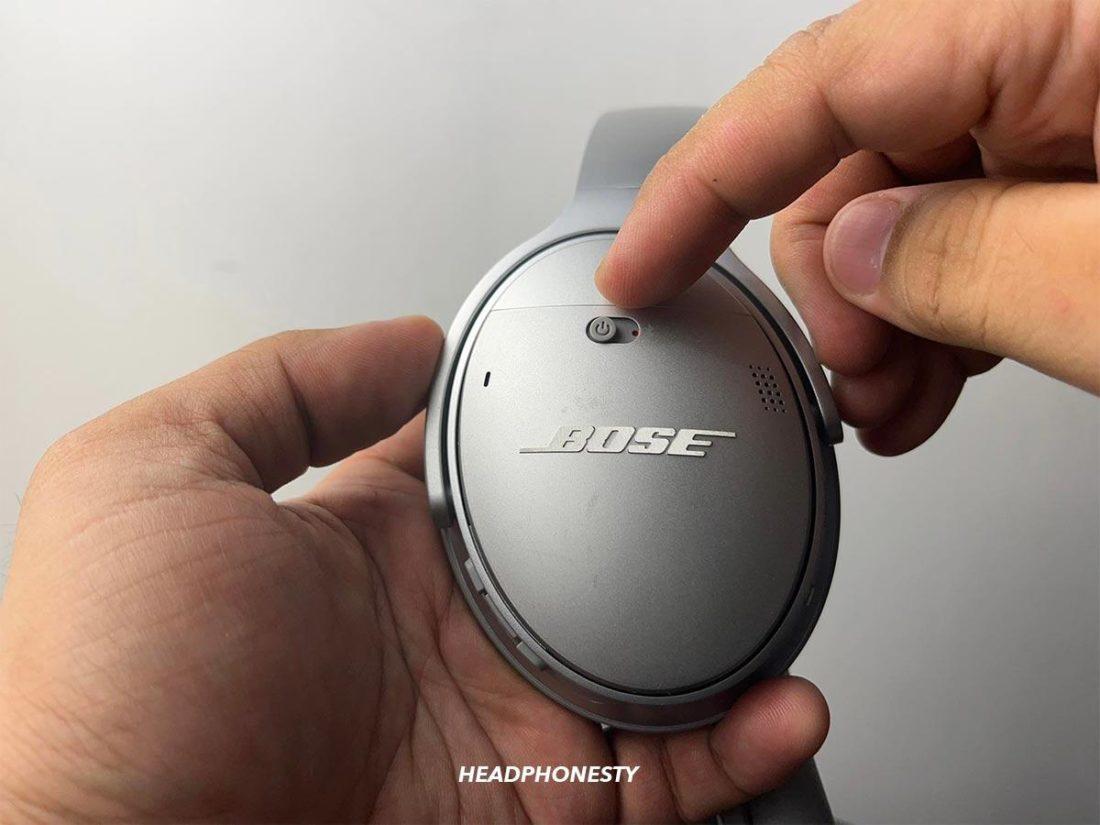
- Press your device’s power button.
Bluetooth headphones power button - Hold it down until the headset’s light flashes blue or red.
- Pair the headphones again with your device.
Check for a halfway point issue
Most wireless headphones have detachable cords that let you switch easily from wired to wireless mode. However, if you notice that your audio goes from normal to only working on one side whenever you detach the cord, you may be dealing with a halfway point issue.
If you’re still not getting sound in one ear after removing the headphone plug, these switches may be stuck in a halfway position, thus causing one of your headphone speakers to malfunction.
Fortunately, the solution is quite simple and is a matter of trial and error:
- Insert, then remove the AUX plug from the jack.
- Repeat the first step using various angles. The goal is to try and push the mechanical trigger back into its original position.
- Test your Bluetooth headphones to see if this resolves the issue.
Check for low battery in one earbud
True wireless earbuds have individual batteries and need separate charging, leading to different battery lives. Often, one earbud (typically the right) handles more tasks, like managing the connection to your mobile device, while the other connects to the first earbud. This can cause one to drain faster, possibly resulting in audio loss in one earbud.
To fix this, charge both earbuds for at least 15 minutes and then check if the issue is resolved.
Check for disconnected wires inside the earbud
If one side of your wireless earbuds is silent, despite being fully charged, the problem could be internal.
As mentioned in the previous section on faulty wiring, if there are no visible signs of damage on the earbuds, your audio issue is probably due to displaced wires in the hardware itself, particularly in the control panel where the Bluetooth module is stored.
To confirm this, you must open the control panel and check for disconnected wires. Here’s how:
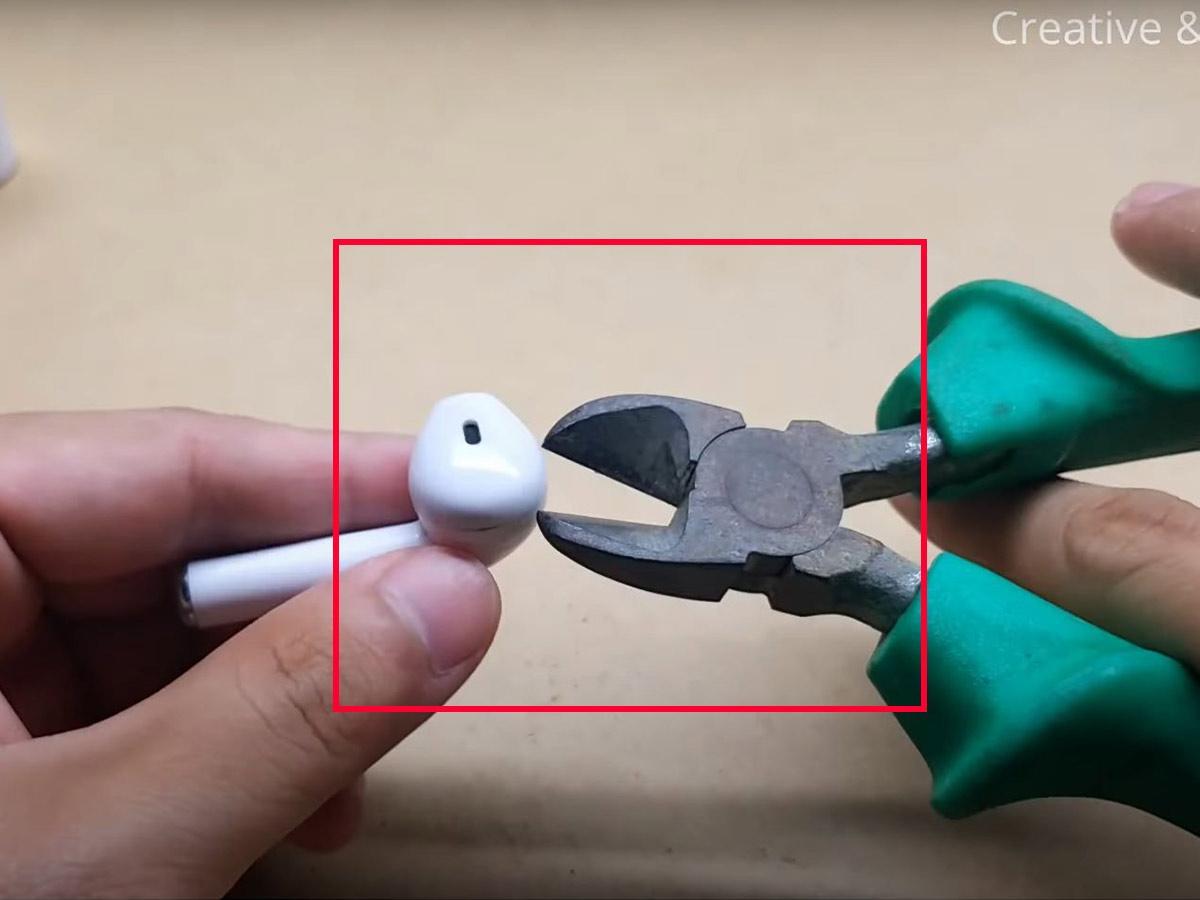
- Using a pair of cutting pliers or a flat-blade screwdriver, pry open the casing of your earbuds’ control panel.
Using a pair of cutting pliers to open the casing of the earbuds. (From: Youtube/Creative & Duck) - Carefully take out the internal components.
Take out the internal components. (From: Youtube/Creative & Duck) - Locate broken wires or wires separated from others and reconnect them using a soldering iron.
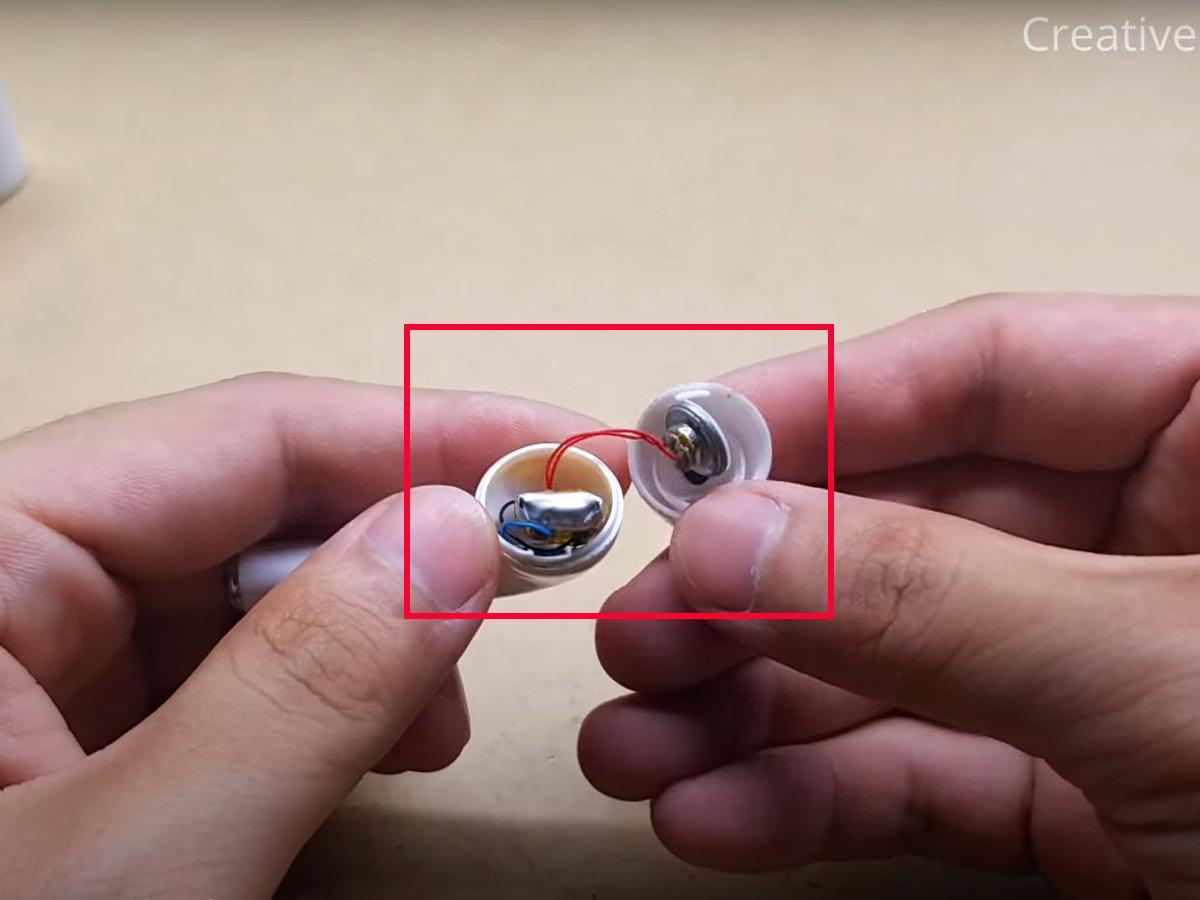
Use soldering iron to fix the broken wires. (From: Youtube/Creative & Duck) - Return the internal components inside the casing.

Return the internal components inside the casing. (From: Youtube/Creative & Duck) - Turn on your Bluetooth earbuds to test if your audio is working normally, then reseal the casing if it’s all good.
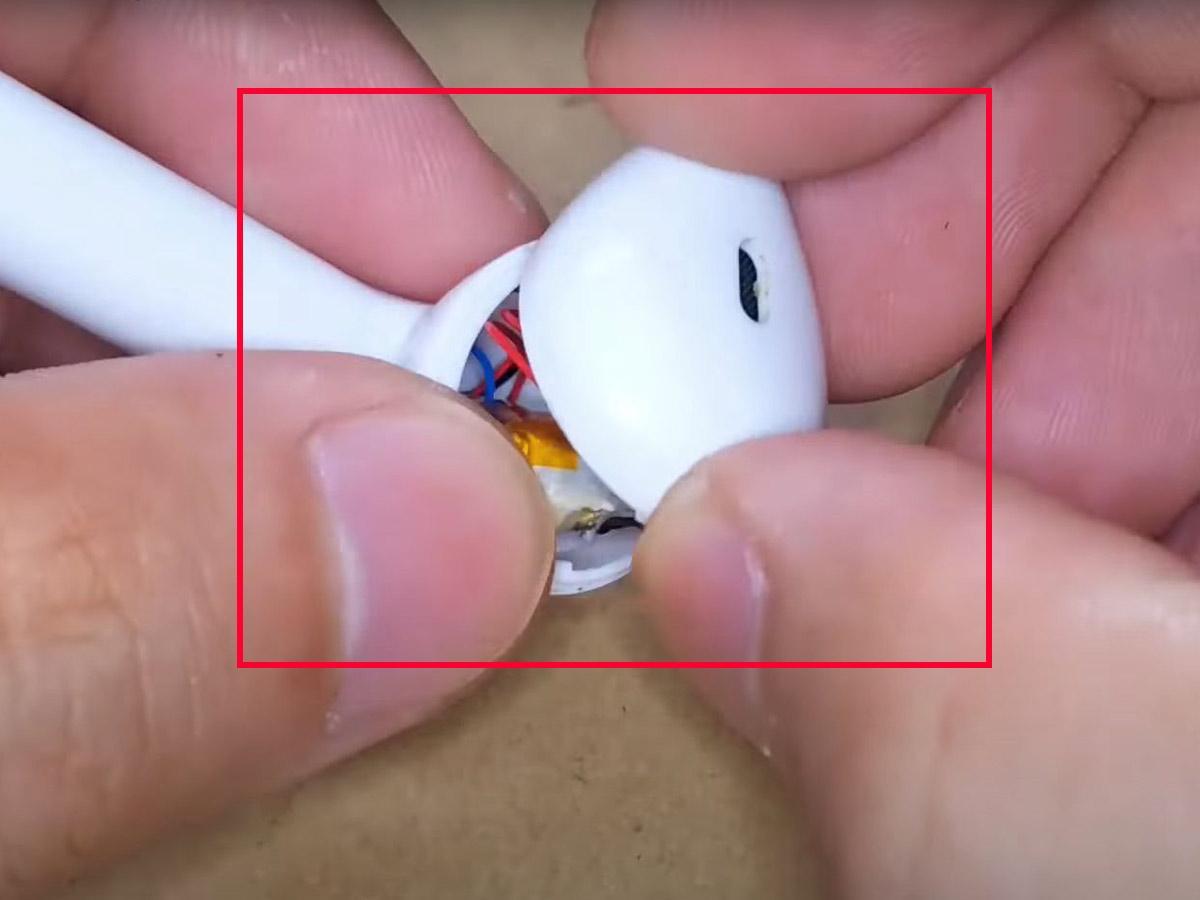
Turn on the Bluetooth earbuds by pressing the power button. (From: Youtube/Creative & Duck)
How to Reuse Multiple One-Side Working Earbuds
If you have several wired headphones with only one earbud working, you can reuse these so long as they have the same plug type. Just keep in mind that the audio quality may no longer be as good as it was before.
Here’s how to resurrect your old wired earbuds using an audio splitter:
- Get an audio splitter with two output jacks and plug it into your device’s AUX output.
- Plug both pairs of one-side working earbuds into the audio splitter’s output jacks.
- Play an audio or video file to test the sound quality.
- Keep your earbuds looking neat by trimming off the opposite non-working wires.
- Insulate the ends of the trimmed wires with electrical tape or heat-shrink tubing.
Source: https://t-tees.com
Category: WHY